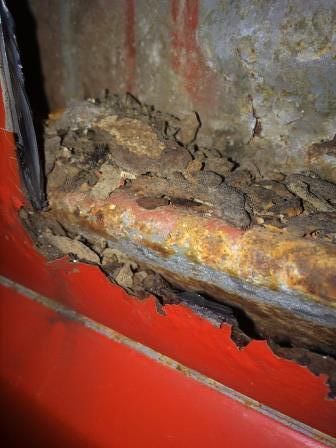
Anyway, to understand why this happens, you just have to look at the cross section of panels in the bed side. Attached is a not-to-scale hand drawing of how the sheet metal is configured. Due to the geometry of the metal, there is an area that naturally collects dirt, water, and general debris, and has no good way to dry out or clean out. I have heard the replacement bed side panels do not have the seam between the upper and lower bed side, this seems like it would help with getting rid of the trapped area, but I have not worked with them as of yet.

Fortunately, this one is an '86 so the steel is still pretty sound structurally. It looks like a few things happened, first is the gas filler neck guard inside the bed got bent up bad and allowed more debris than usual to get in between the panels. Second, it looks like the seam sealer between the bed floor and inner bed wall was compromised, allowing water to get under the seam and into the problem area.

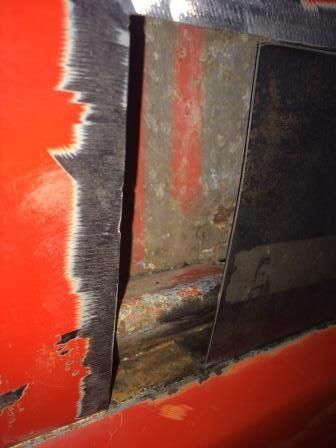
Next is to cut until we find some solid metal. Mind the inner structure because its easy to cut into something behind the outer panel that you shouldn't. I had to cut surprisingly more than I thought to get to good metal. As you can see from the pictures, I also cut a portion of the inner bed wall out to replace it. I used an old wood chisel for breaking the spot welds, and a cut off wheel for the rest.

Next step is to replace the steel. If there is interest I would be glad to share more pictures. The patches were simple to make, and I used panel bond on the overlap seams and welded the rest.
Ready for the patches with panel bond spread over every surface that I could to protect it...

Fitting the new patch...