Blacksmith forging project thread idea (pic heavy)
-
Wagn Man
- Posts: 4
- Joined: Mon Mar 25, 2013 6:13 pm
Re: Blacksmith forging project thread idea (pic heavy)
Wow! That's real talent you have there. I do enjoy seeing people and their craft.
-
bigun
- Posts: 1250
- Joined: Sat Jun 11, 2011 8:20 pm
- Location: Mountainair, NM
Re: Blacksmith forging project thread idea (pic heavy)
Nice work! There are several videos showing bumping, but only on the end of the piece not the middle. I guess you could hammer weld a piece on either side in the center and get your width that away.
-
 ScottsMojo
- Posts: 753
- Joined: Fri Mar 02, 2012 7:37 pm
- Location: Casa de Ducati North
- Contact:
Re: Blacksmith forging project thread idea (pic heavy)
Thanks for the advice. Coal or coke, either would be better than charcoal or wood, which are my only resources at the moment and difficult to work with. But, I will find a resource for other fuel.Florida83FSJCherokee wrote:ScottsMojo wrote:Awesome work by all! I have begun to dabble in this art, I have an antique rivet forge and have attempted to make a knife from a RR spike. So far my results have been poor, but I think thats a mixture of inexperience and lack of coal. I know coal is available in the area, just not sure how to source it. But... Good Lord it is a fun hobby!!!
If your gonna get a coal fire going you should use a "coke" fire pot. Coal is down right nasty, it burns cooler than coke, smokes horribly, and a coal forge can only burn coal. Unlike a coke pot forge that can burn anything you wanted to. Its a little more expensive to build because of the metal required for the coke pots extreme temp ranges, but in my opion its a no brainer. I have used both and would never use coal if I had a choice.
side note: please if you do buy an anvil dont leave it loose on your stand like the guys in the first video, Its dangerous for one thing and down right annoying to have the darn thing ringing like that. Listen to the anvils in the other videos and you will see what I mean... They are only loud in movies....
I do have an anvil, an old 75 pounder. It's not affixed to anything right now but I intend on setting a hardwood stump into the ground and securing the anvil to that. It will not be indoors, as I don't have a place to do that but I do have a tractor shed which it can live. Again, great work and keep it coming!
-
 Strode182
- Posts: 374
- Joined: Sat Jun 09, 2012 8:38 am
- Location: Littleton, Co
Re: Blacksmith forging project thread idea (pic heavy)
JP, I just discovered your thread. Amazing work, you are the man. Your pride in your work is obvious, and you are a true craftsman. Thanks for showing a little of your skills.
-
 Driftwood
- Posts: 159
- Joined: Fri Mar 02, 2012 3:31 pm
- Location: 'gon
-
 Florida83FSJCherokee
Topic author - Posts: 196
- Joined: Sat Mar 09, 2013 7:53 pm
- Location: Lakeland , Central Florida
Re: Blacksmith forging project thread idea (pic heavy)
Thanks Guys,
I very much appreciate the encouraging remarks.
Scottsmojo-
[/quote]Thanks for the advice. Coal or coke, either would be better than charcoal or wood, which are my only resources at the moment and difficult to work with. But, I will find a resource for other fuel.
I do have an anvil, an old 75 pounder. It's not affixed to anything right now but I intend on setting a hardwood stump into the ground and securing the anvil to that. It will not be indoors, as I don't have a place to do that but I do have a tractor shed which it can live. Again, great work and keep it coming![/quote]
In response to your anvil stump...an oak stump is a great base, no doubt. Only issue I have found with them is if your shop is indoors, they wont sit level. I personally have never been able to cut one even enough (on both sides) to get a true flat/level work surface. In dirt or gravel you can dig the stump into the ground untill you reach home but on concrete or wood floors I would say its near impossible unless you happen to own or live by a lumber mill. Since your gonna have the stump outdoors its totally the way to go!
For people who are indoors a great solution is to build an "overlaped weighted base".
Its stagered 2x3"s or 2x4's on a plywood base, screwed together and built to the height needs of your personal preference. For most blacksmiths the correct height is when your arm is straight at your side with the hammer out 90deg from the body. The head should be sitting flat on the anvil face. In my opinion lower isnt a bad thing as it gives you more power but it is harder on your back , but higher is no good as every inch you go up is an inch less stroke to your hammer and that equals more work. Unless you happen to have a Multi!!!thousand dollar power hammer like some of the guys in the videos. Thats just cheating! LOL
This one was built for a massive 275lb Peter Wright Anvil I use as my stationary shop anvil. The anvil itself is around 100years old and is a solid wrought anvil. This means is made from one piece of iron instead of the top and base being welded together, The smaller 100lb Emerson I use as my trucks swing arm anvil is an exmple of a two piece anvil. Anyway...tangent....sorry
Stagger the boards so you rotate the long and short side.
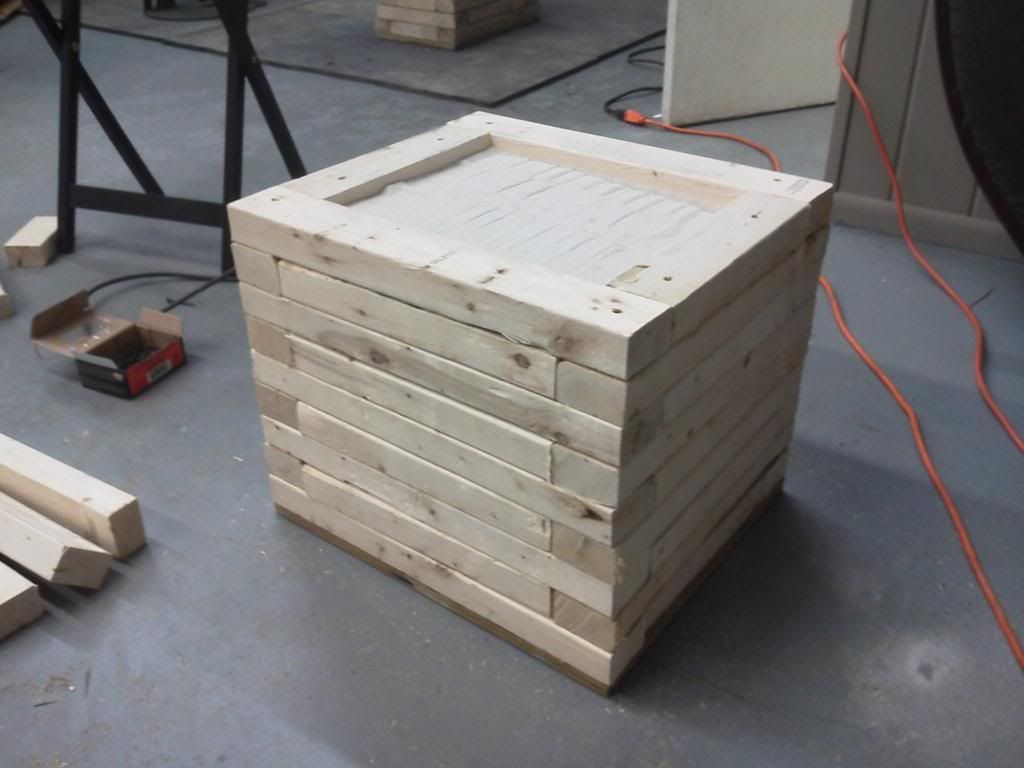
Fill with sand and pack it in tight(some guys water it so it compacts more, but 150lbs of sand is plenty for me wet or dry filled)
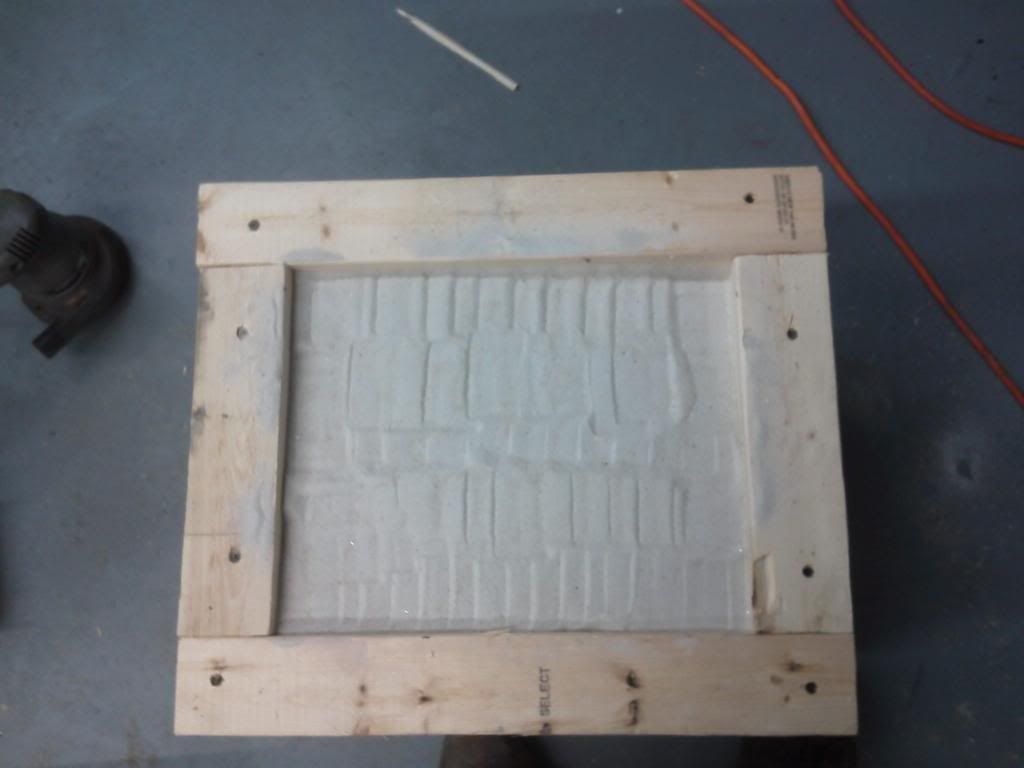
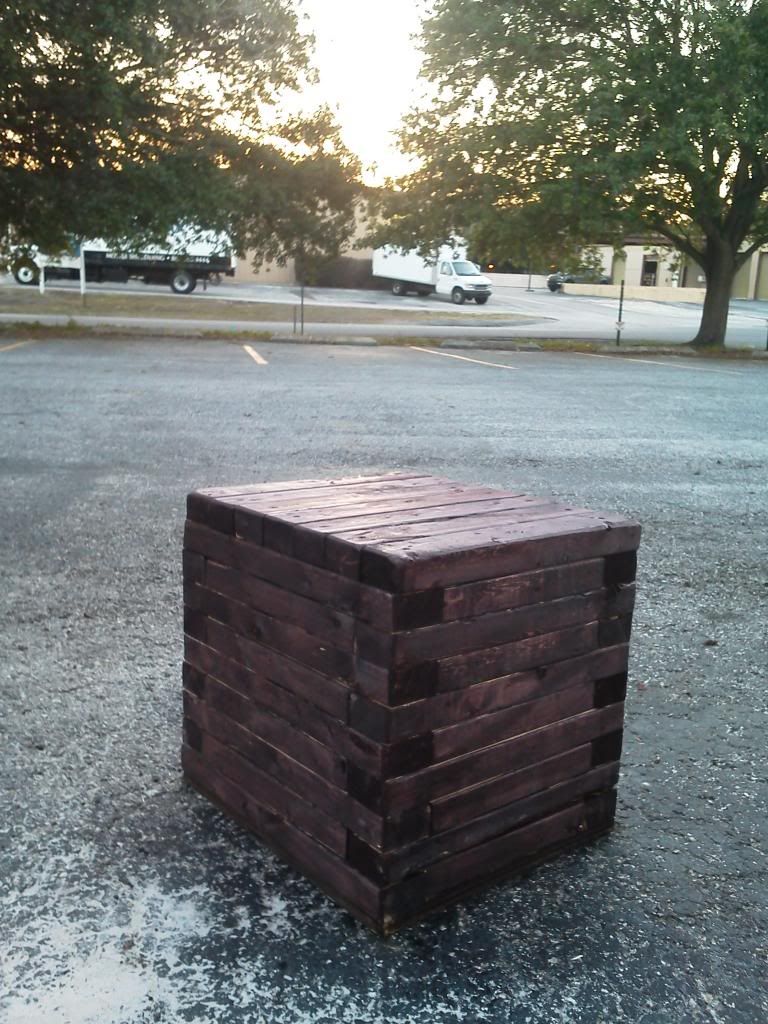
Put the cap boards on and make it look cool with some stain or paint or whatever. I did have a buddy build one out of some expensive hardwood and I felt bad because after a week of use it had burn marks all over it...
Cut some strapping and drill out holes for some lag bolts and cinch her down as tight as you can.
Your on your own for finding cool vintage signs to make it look awesome, sorry...

if you look in the background there is one that i built for the 100lb emerson under the forge stand. Its tapered to get narrower at the top for the smaller size of the other anvils base.
Anyway, just a cool, relaltivly cheap solution for hard surface shops. Its also will deaden the ring of the anvil almost all the way out. To take the last bit of edge off I use 3/4'' rubber nats under the forging area. Its handy for when you drop your steel or tools and its a little better on your body.
Driftwood - You dont want this one, it has alot of flaws , and truthfully I wouldnt kill more than one enemy with it because it would probably break.
Ill make a Zombie strength one for you one of these days.
Thanks again and let me know your ideas?
You may think its silly to suggest your idea, but its fun to figure out "how the heck am I gonna pull this one off"
JP
I very much appreciate the encouraging remarks.
Scottsmojo-
[/quote]Thanks for the advice. Coal or coke, either would be better than charcoal or wood, which are my only resources at the moment and difficult to work with. But, I will find a resource for other fuel.
I do have an anvil, an old 75 pounder. It's not affixed to anything right now but I intend on setting a hardwood stump into the ground and securing the anvil to that. It will not be indoors, as I don't have a place to do that but I do have a tractor shed which it can live. Again, great work and keep it coming![/quote]
In response to your anvil stump...an oak stump is a great base, no doubt. Only issue I have found with them is if your shop is indoors, they wont sit level. I personally have never been able to cut one even enough (on both sides) to get a true flat/level work surface. In dirt or gravel you can dig the stump into the ground untill you reach home but on concrete or wood floors I would say its near impossible unless you happen to own or live by a lumber mill. Since your gonna have the stump outdoors its totally the way to go!
For people who are indoors a great solution is to build an "overlaped weighted base".
Its stagered 2x3"s or 2x4's on a plywood base, screwed together and built to the height needs of your personal preference. For most blacksmiths the correct height is when your arm is straight at your side with the hammer out 90deg from the body. The head should be sitting flat on the anvil face. In my opinion lower isnt a bad thing as it gives you more power but it is harder on your back , but higher is no good as every inch you go up is an inch less stroke to your hammer and that equals more work. Unless you happen to have a Multi!!!thousand dollar power hammer like some of the guys in the videos. Thats just cheating! LOL
This one was built for a massive 275lb Peter Wright Anvil I use as my stationary shop anvil. The anvil itself is around 100years old and is a solid wrought anvil. This means is made from one piece of iron instead of the top and base being welded together, The smaller 100lb Emerson I use as my trucks swing arm anvil is an exmple of a two piece anvil. Anyway...tangent....sorry
Stagger the boards so you rotate the long and short side.
Fill with sand and pack it in tight(some guys water it so it compacts more, but 150lbs of sand is plenty for me wet or dry filled)
Put the cap boards on and make it look cool with some stain or paint or whatever. I did have a buddy build one out of some expensive hardwood and I felt bad because after a week of use it had burn marks all over it...
Cut some strapping and drill out holes for some lag bolts and cinch her down as tight as you can.
Your on your own for finding cool vintage signs to make it look awesome, sorry...
if you look in the background there is one that i built for the 100lb emerson under the forge stand. Its tapered to get narrower at the top for the smaller size of the other anvils base.
Anyway, just a cool, relaltivly cheap solution for hard surface shops. Its also will deaden the ring of the anvil almost all the way out. To take the last bit of edge off I use 3/4'' rubber nats under the forging area. Its handy for when you drop your steel or tools and its a little better on your body.
Driftwood - You dont want this one, it has alot of flaws , and truthfully I wouldnt kill more than one enemy with it because it would probably break.
Ill make a Zombie strength one for you one of these days.
Thanks again and let me know your ideas?
You may think its silly to suggest your idea, but its fun to figure out "how the heck am I gonna pull this one off"
JP
Last edited by Florida83FSJCherokee on Sat May 18, 2013 9:59 pm, edited 1 time in total.
Education through restoration thread link:
http://www.fsjnetwork.com/forum/viewtop ... =12&t=1366
Blacksmithing thread link:
http://www.fsjnetwork.com/forum/viewtop ... f=6&t=1381
http://www.fsjnetwork.com/forum/viewtop ... =12&t=1366
Blacksmithing thread link:
http://www.fsjnetwork.com/forum/viewtop ... f=6&t=1381
-
 Cecil14
- Posts: 727
- Joined: Mon Oct 01, 2012 6:40 am
Re: Blacksmith forging project thread idea (pic heavy)
Well I'll be happy to continue the weapon theme and suggest a sword. Swordsmithing has always fascinated me. Any kind of sword will do; something shorter and straight would probably be easiest to start with?
aa
aa
1983 J-10 - 4.6L(MPFI)/CS130D/Hydroboost/NV3550/D300/44/44/3.54/Disc-Disc/32s/42 gallon 'burb tank
-
Driftwood
- Posts: 159
- Joined: Fri Mar 02, 2012 3:31 pm
- Location: 'gon
Re: Blacksmith forging project thread idea (pic heavy)
JP has earned the coveted Tomahawk patch!

Last edited by Driftwood on Wed Apr 03, 2013 2:23 am, edited 1 time in total.
1979 Wagoneer
-
Driftwood
- Posts: 159
- Joined: Fri Mar 02, 2012 3:31 pm
- Location: 'gon
Re: Blacksmith forging project thread idea (pic heavy)
and the distinguished Horseshoe patch

1979 Wagoneer
-
bigun
- Posts: 1250
- Joined: Sat Jun 11, 2011 8:20 pm
- Location: Mountainair, NM
Re: Blacksmith forging project thread idea (pic heavy)
Yesterday I was roaming the net and found this web site. It is full of PDF's of books researched using our tax money to send to third world countries there are books on tools including 2 on blacksmithing one is more modern, the other is from the 1880s. There is a lot of other information they is worth looking at also.
http://journeytoforever.org/farm_librar ... books.html
http://journeytoforever.org/farm_librar ... books.html
-
bigun
- Posts: 1250
- Joined: Sat Jun 11, 2011 8:20 pm
- Location: Mountainair, NM
Re: Blacksmith forging project thread idea (pic heavy)
Best use I have seen of a chevy engine
Junk yard power hammer
https://www.youtube.com/watch?v=-tPTLwmxsWc
Junk yard power hammer
https://www.youtube.com/watch?v=-tPTLwmxsWc
-
Florida83FSJCherokee
Topic author - Posts: 196
- Joined: Sat Mar 09, 2013 7:53 pm
- Location: Lakeland , Central Florida
Re: Blacksmith forging project thread idea (pic heavy)
Thank you for my patches ! !!!!"
Sword making requires a striker. Gonna have to work on convincing my apprentice that 60 hrs. A week isn't enough and if she really wants to be Cool she's gonna need to spend Saturday night forging completely unrealated projects. Lol
Fortunately she's a hammer head and will be stoked!
This weekend I'm gonna work on the jeep. BIG plans. But sword production will commence soon after.
Thanks
Jp
Education through restoration thread link:
http://www.fsjnetwork.com/forum/viewtop ... =12&t=1366
Blacksmithing thread link:
http://www.fsjnetwork.com/forum/viewtop ... f=6&t=1381
http://www.fsjnetwork.com/forum/viewtop ... =12&t=1366
Blacksmithing thread link:
http://www.fsjnetwork.com/forum/viewtop ... f=6&t=1381
-
 lindel
- Posts: 923
- Joined: Tue Oct 04, 2011 2:47 pm
- Location: Tool, TX
Re: Blacksmith forging project thread idea (pic heavy)
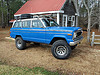
Keep it coming Jp, and a very nice looking Cherokee btw!
Lindel
-
Florida83FSJCherokee
Topic author - Posts: 196
- Joined: Sat Mar 09, 2013 7:53 pm
- Location: Lakeland , Central Florida
Lets make some KNIVES
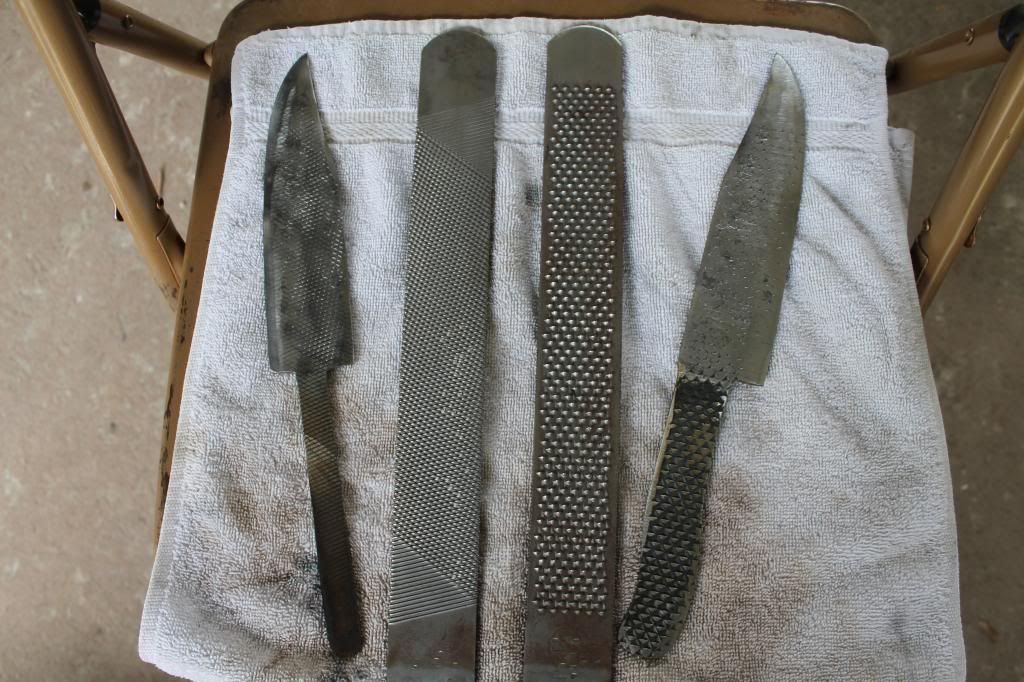
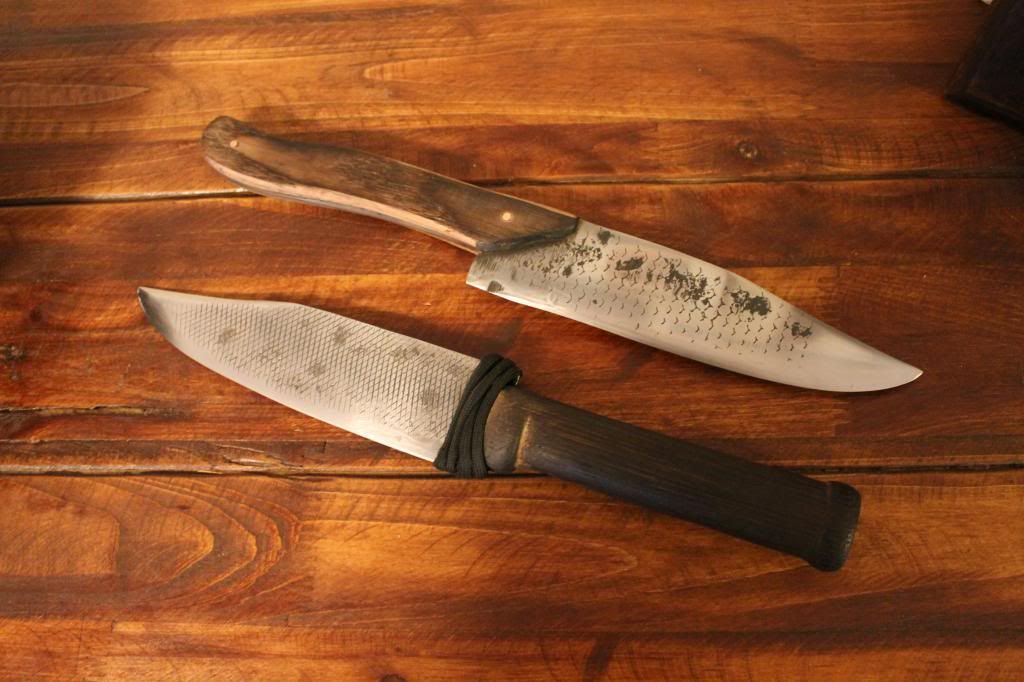
So I had another horse show to work this weekend and decided it was time to tackle a project I have wanted to do for quite some time. It was requested that I make a sword, but I unfortunately don’t have the resources to pull off that project yet. So, Instead I made a couple knives from some used rasp. The intention was to make two 8” Chefs Knives that would be good enough to put into daily service in our home kitchen.
Like every other first attempt, I made some mistakes, and had to alter my plan mid-way through. Instead of two kitchen knives I made one kitchen knife and one hunting knife. LOL
The reason will be explained further in the post.
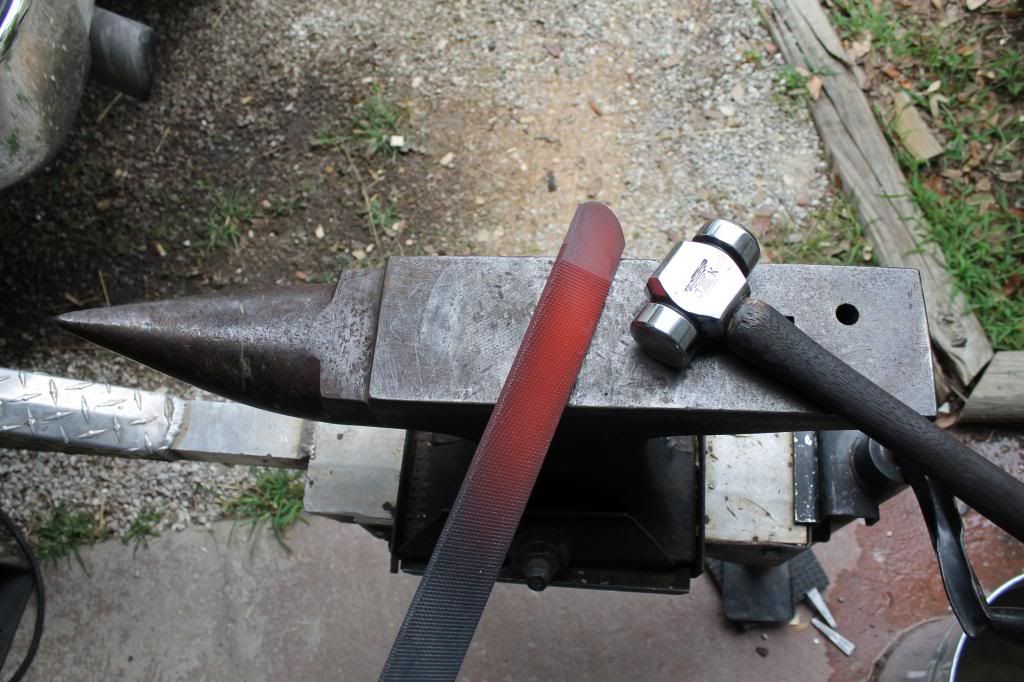
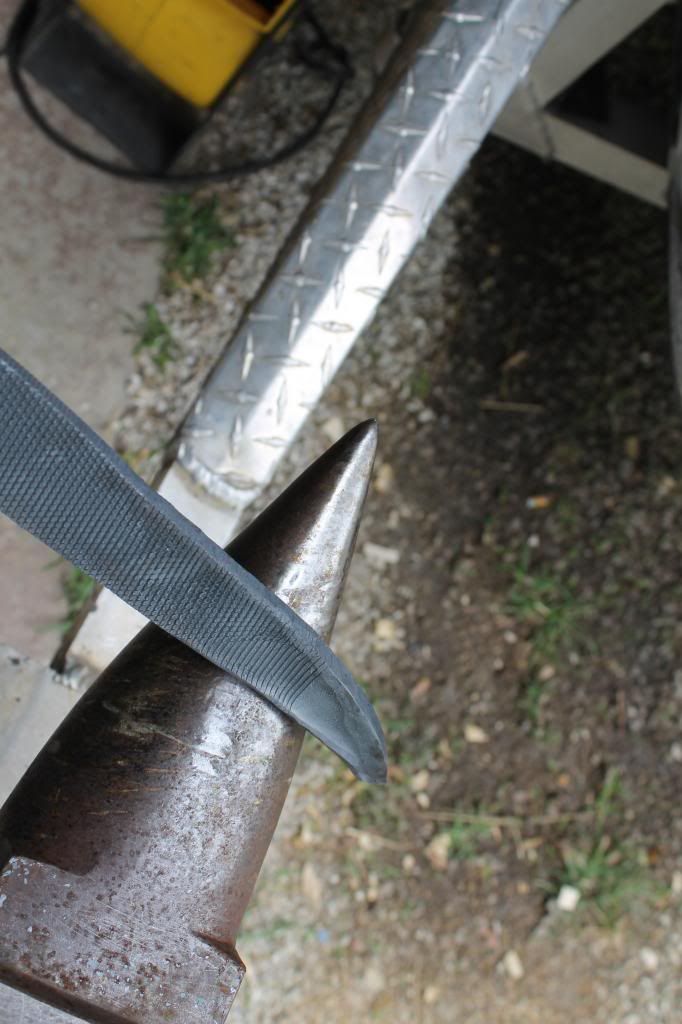
A farrier’s rasp is a great resource for knife making because they are made from a good grade, high carbon tool steel. The exact number/name of the steel I can’t say, but when you hammer this stuff you can feel how hard and dense it is compared to mild steel.

The tang was making holding them difficult so I cut them off and got a nice straight edge for the tongs to bit on.

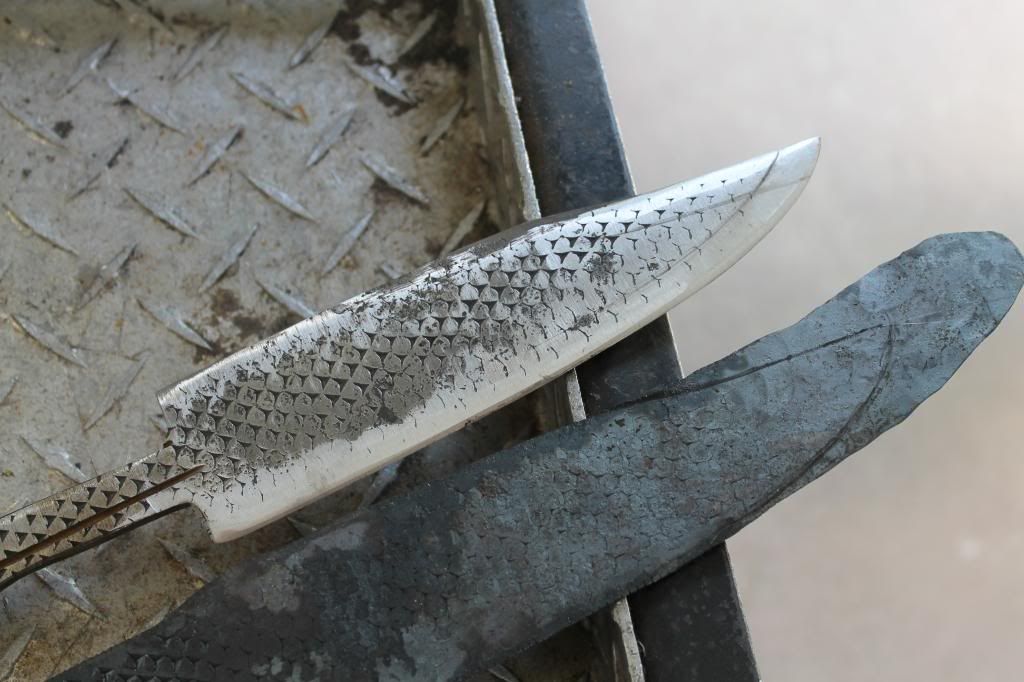
I heated the side I wanted to forge and began overlapping blows, walking down the rasp to form the shape of the blades tapered point.
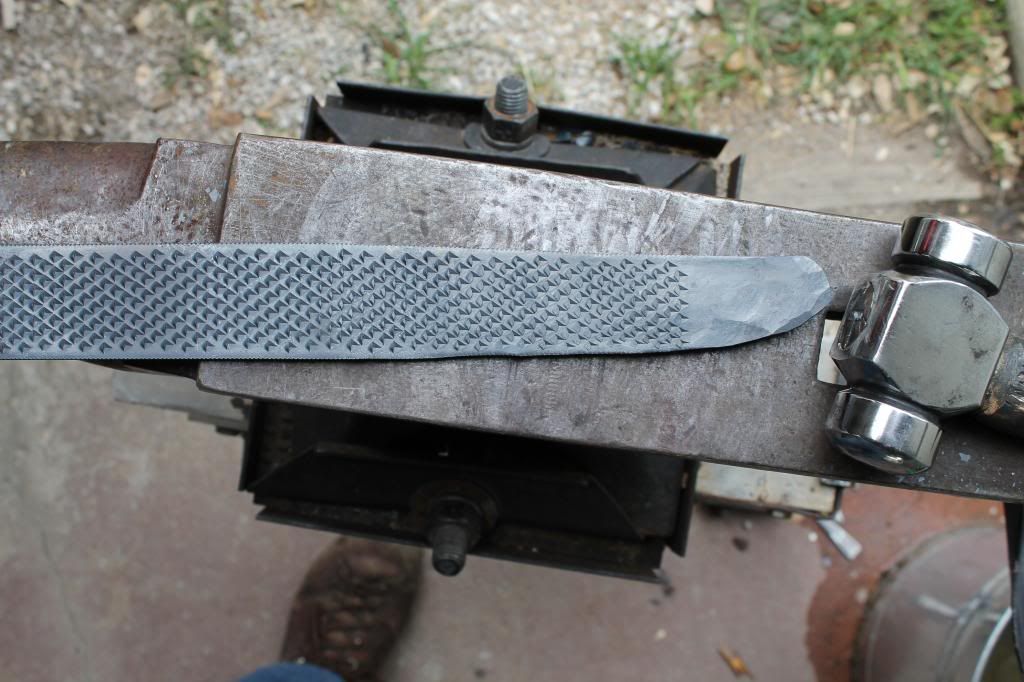
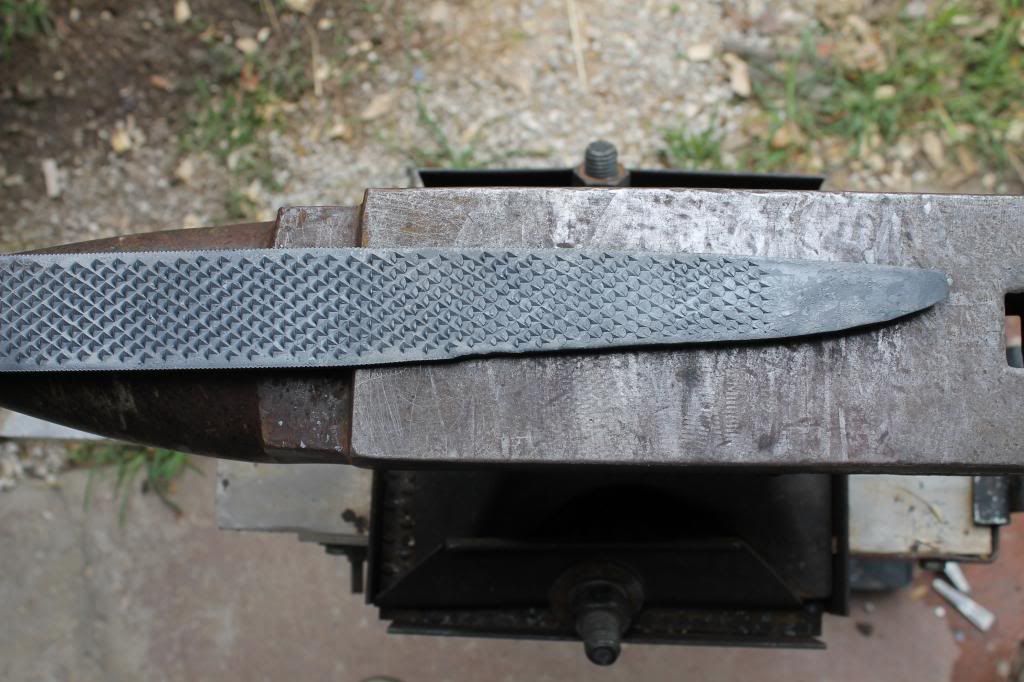
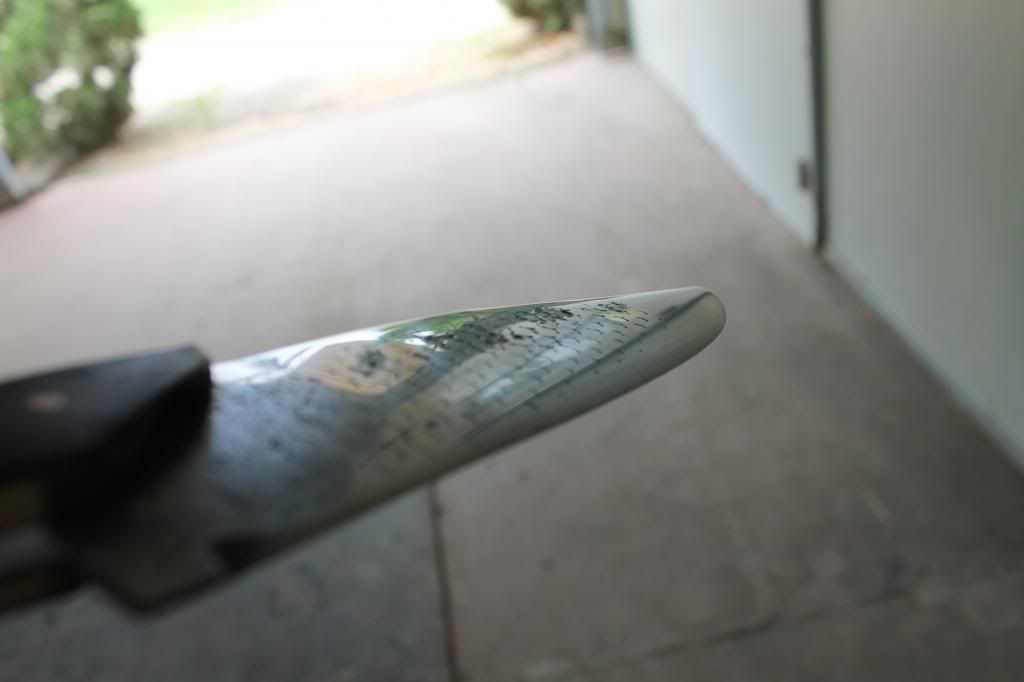
When I think of a cool knife shape it always has the “kick back”. There is probably an actual term for it, but its where the top of the blade sucks in before the tip.
So you’re probably asking yourself why didn’t he just cut the shape out of the rasp and grind it down?
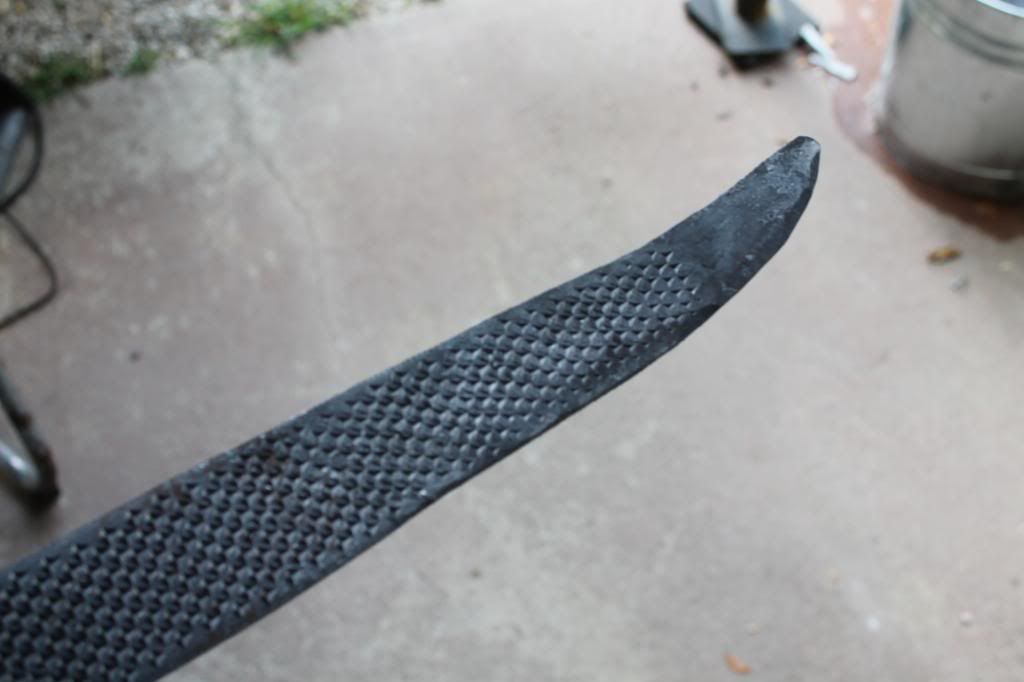
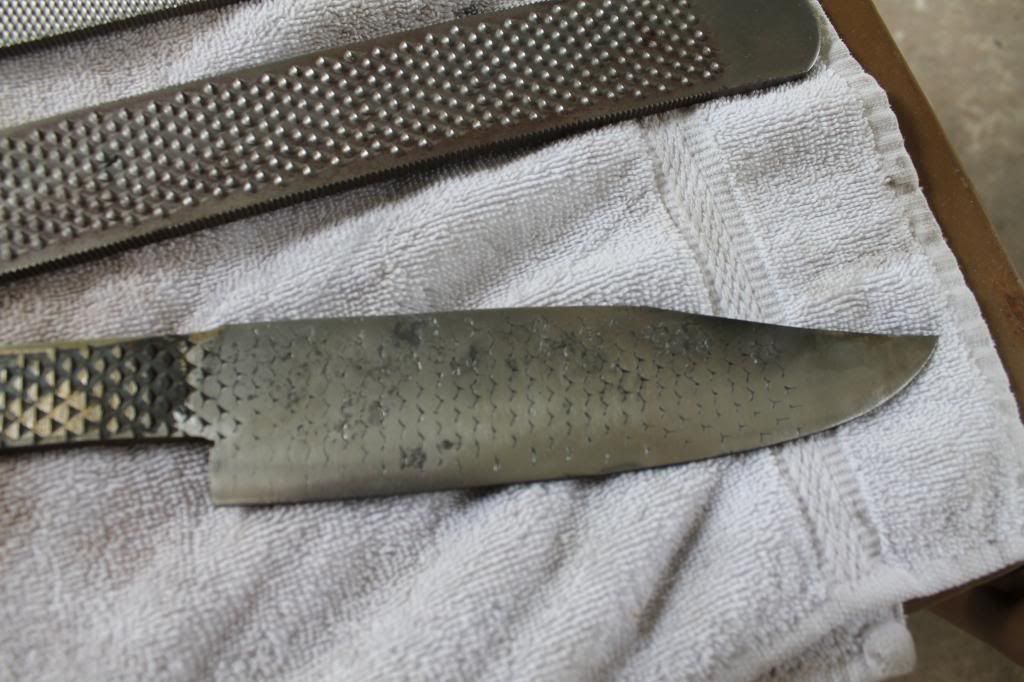
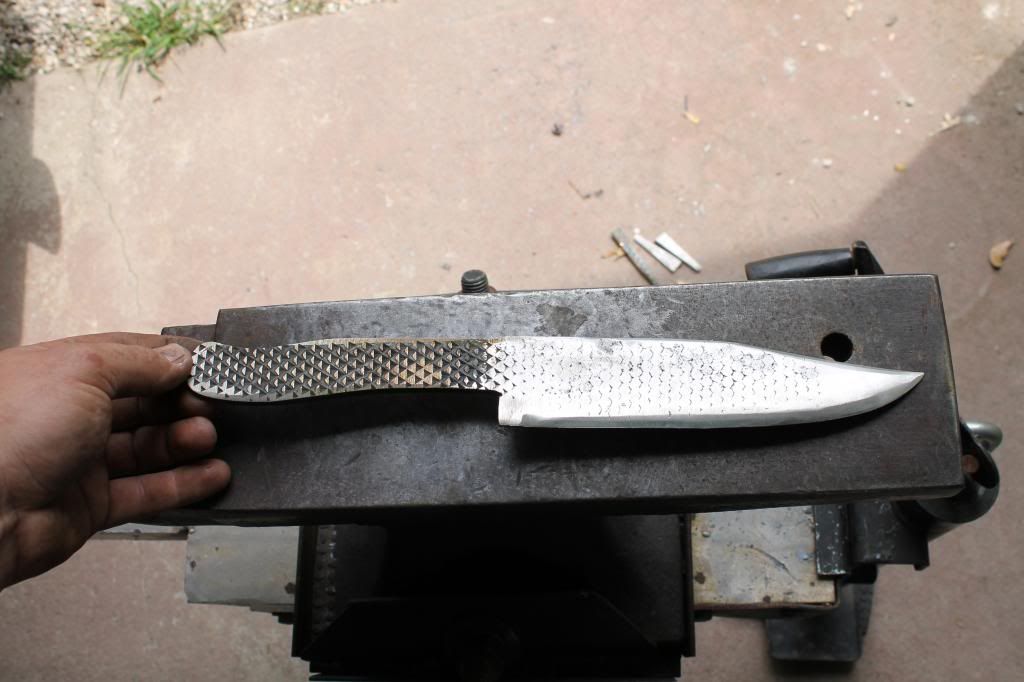
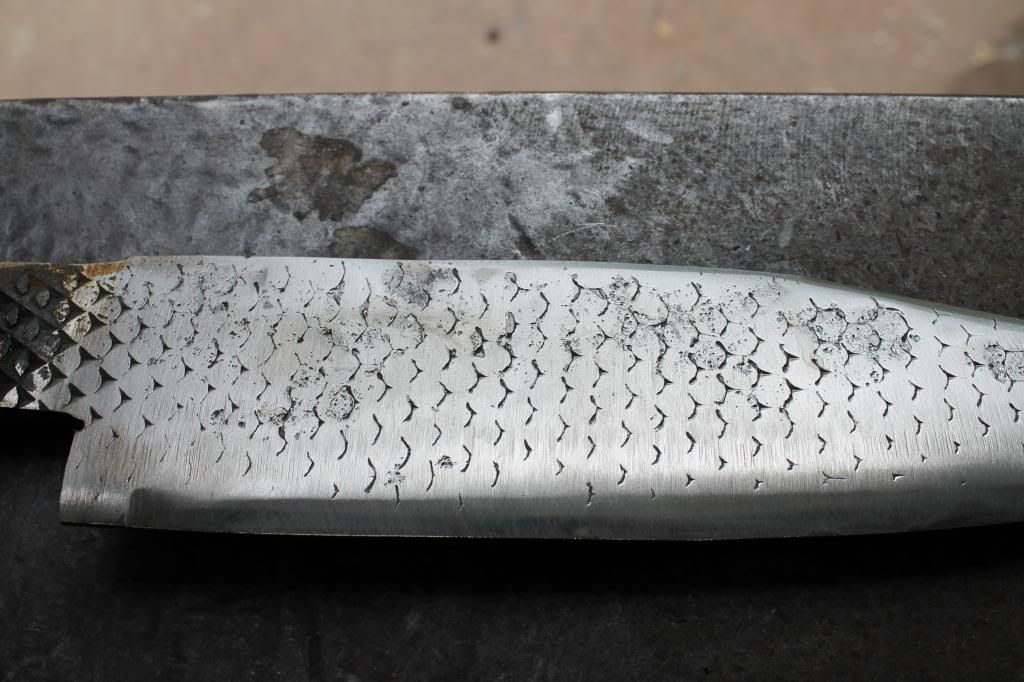
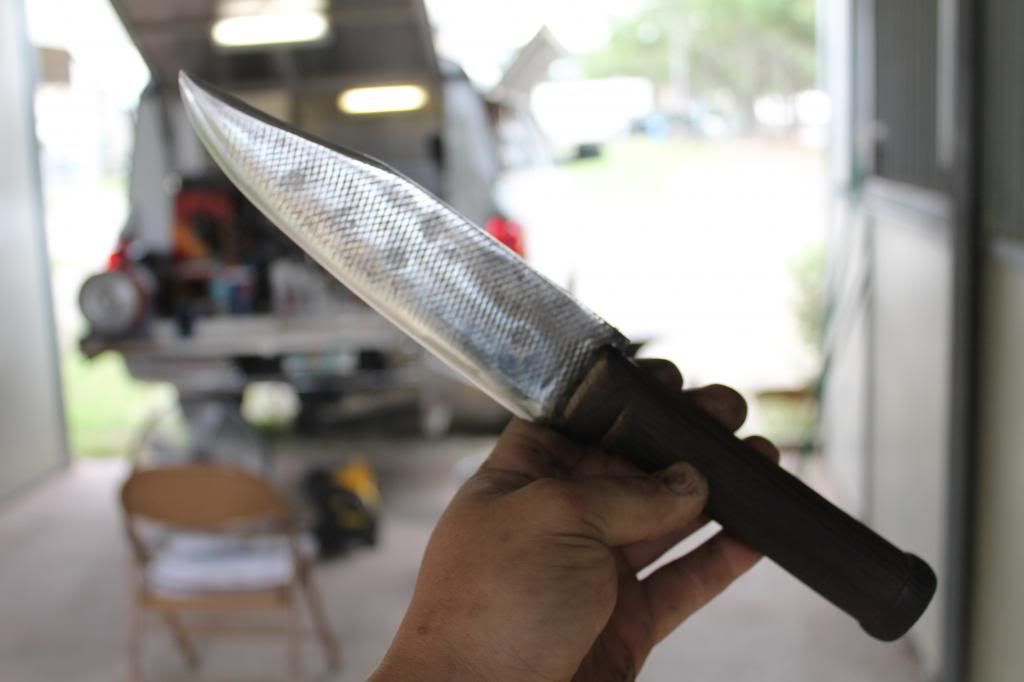
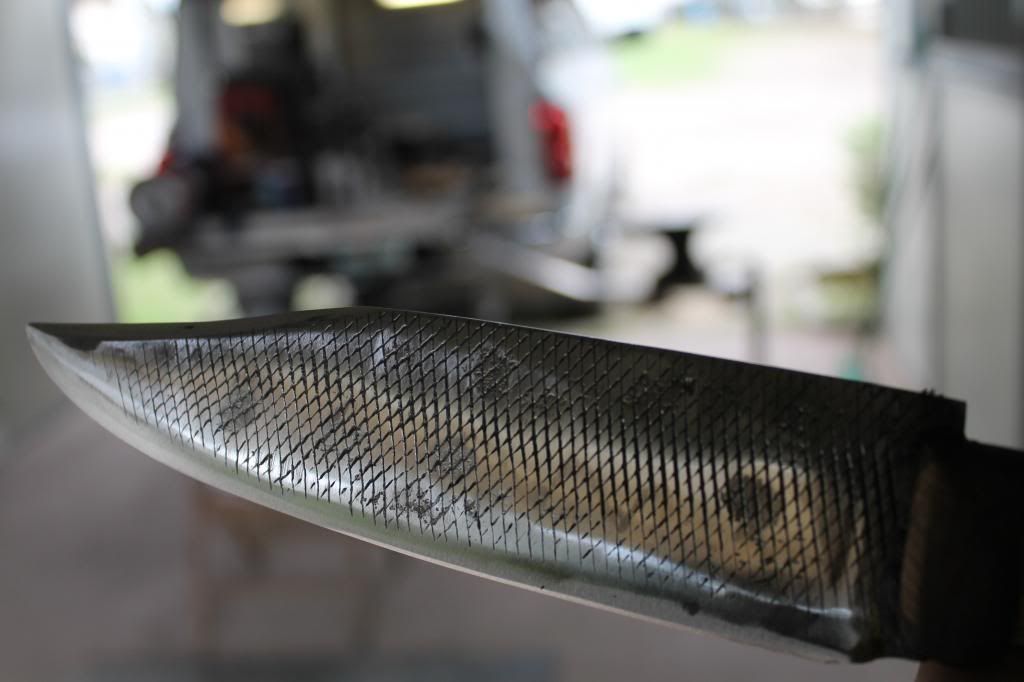
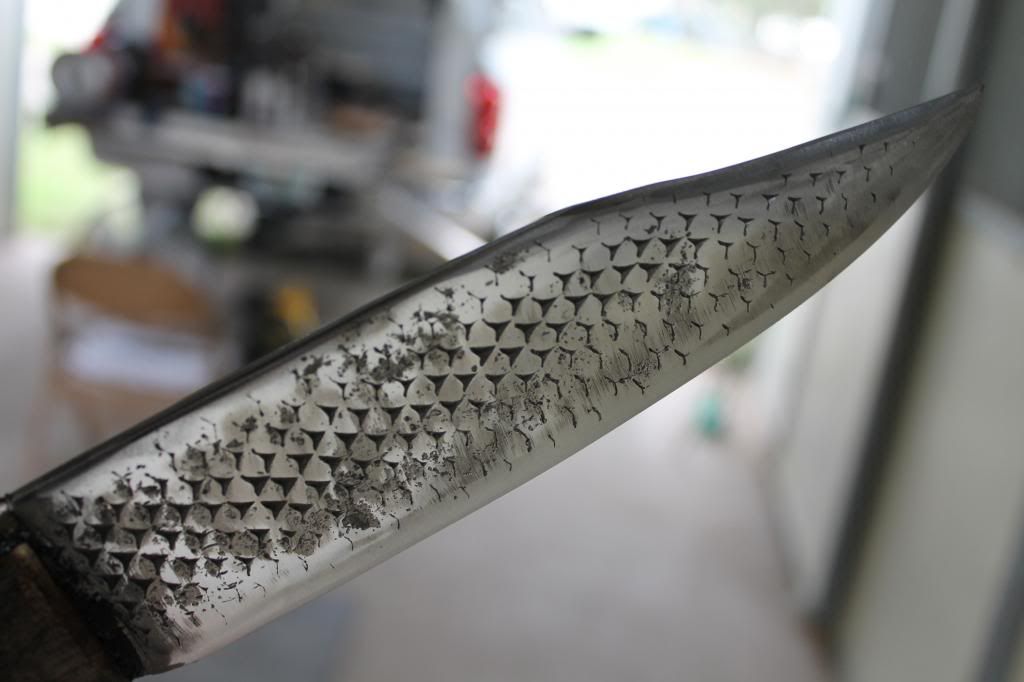
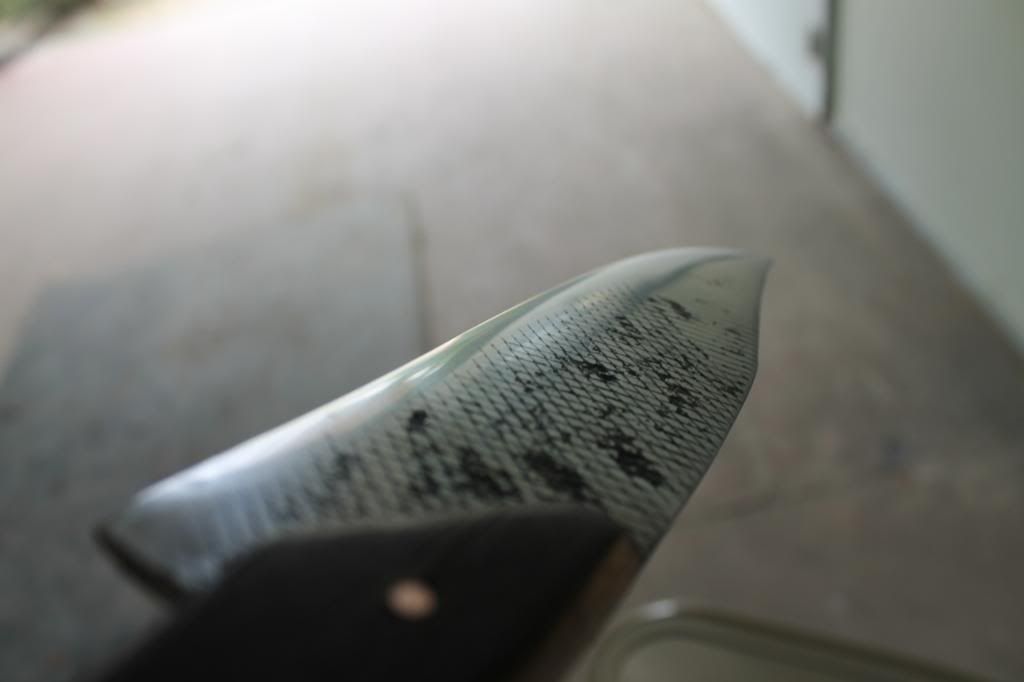
With a smooth piece of tool steel you could do that, but the rasp has teeth that have to be flattened otherwise the blade would have bumps and ridges in it. If you forge the teeth carefully and lay them all in the same direction the pattern it creates is really cool!
Another reason I forged it is that grinding tool steel takes a long time. It took hours! To grind down what I left, let alone if I had the whole thickness to contend with. So instead I forged out the blade into the thickness I wanted.
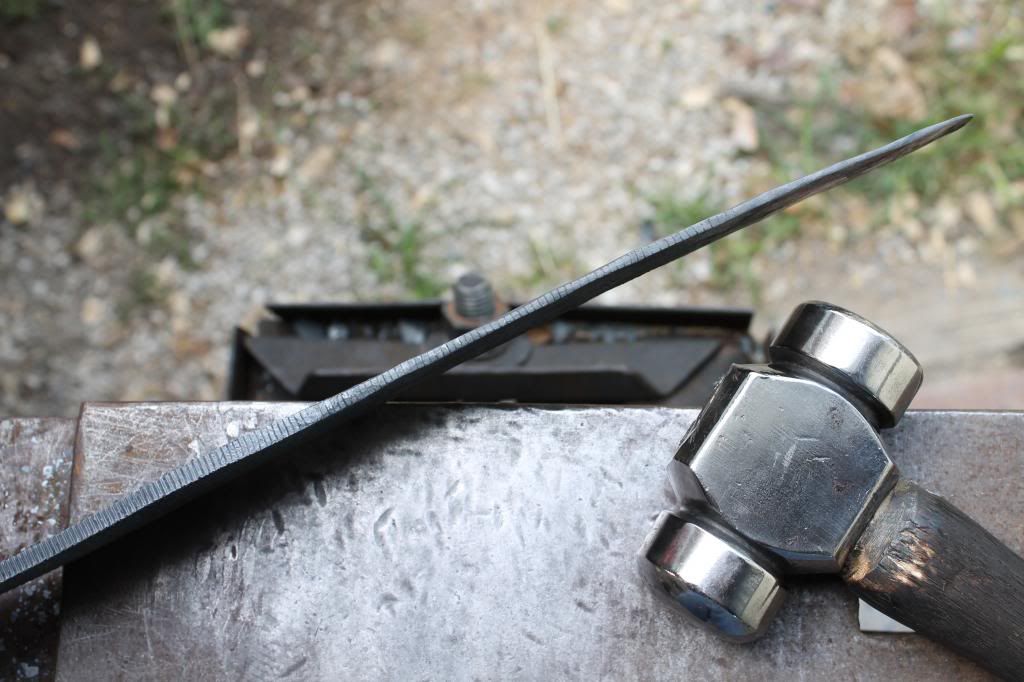
It’s important to try and keep it the general shape you started with because when you lay out the pattern to be cut out, the curves will be in the right direction and you won’t be short.
I marked out the pattern and used the cutting wheel to rough the shape out.
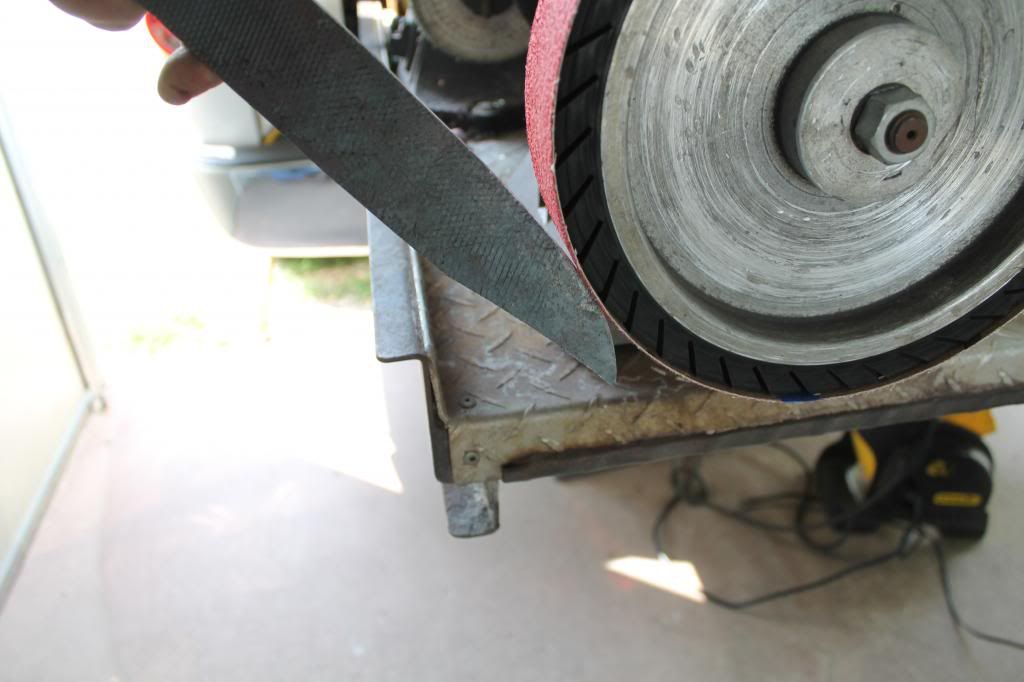
Then I used the big Baldor to get everything tightened back up.
The blade had a tendency to warp under the slightest heat so it’s important that before you commit to your final shape that you carefully level the blade.
This would have been aided greatly by a tool called a “flatter hammer” but I unfortunately don’t have one.
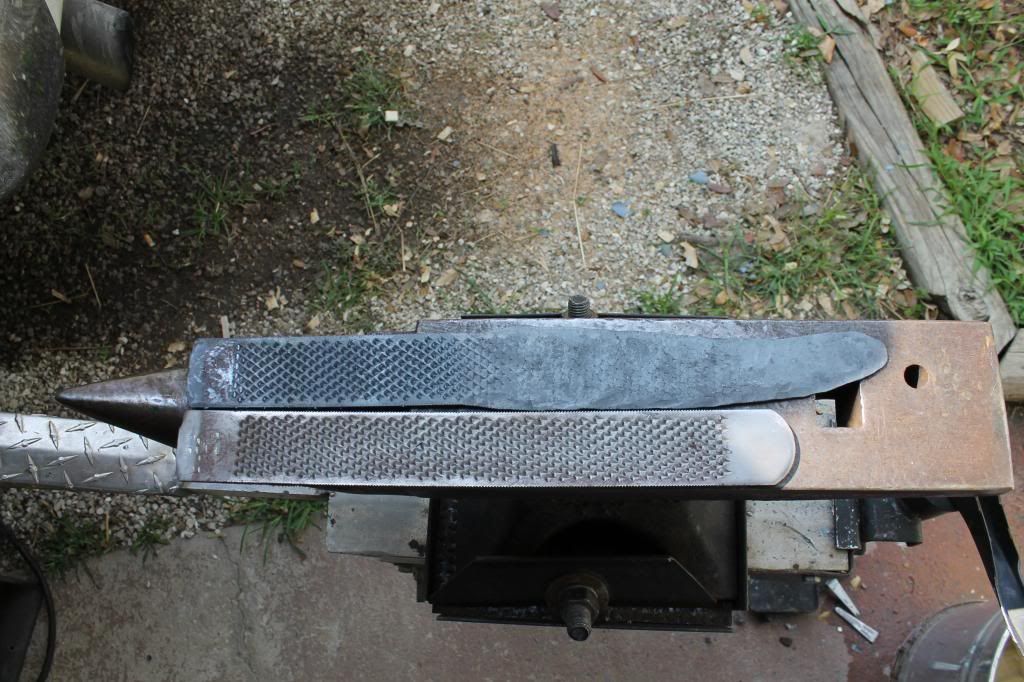
It’s at this point that you will discover why the first knife gets turned into a hunting knife. I wasn’t paying attention and I cut out the wrong side of the handle. ;(
Instead of pitching it I cut the correct side back as well and decided to make a inserted tang hunting knife.
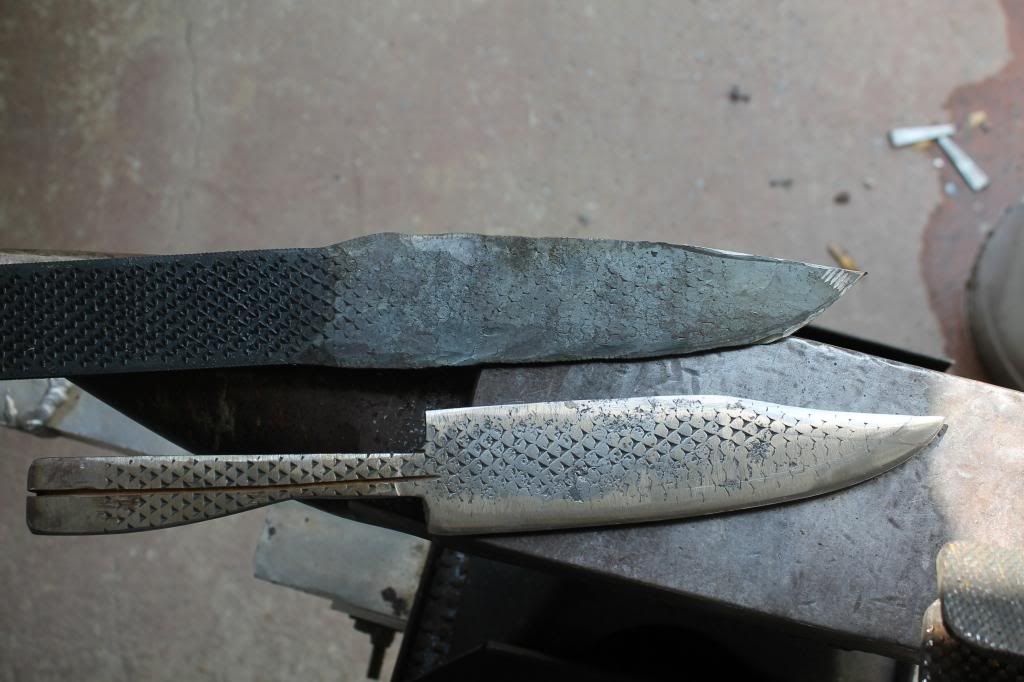
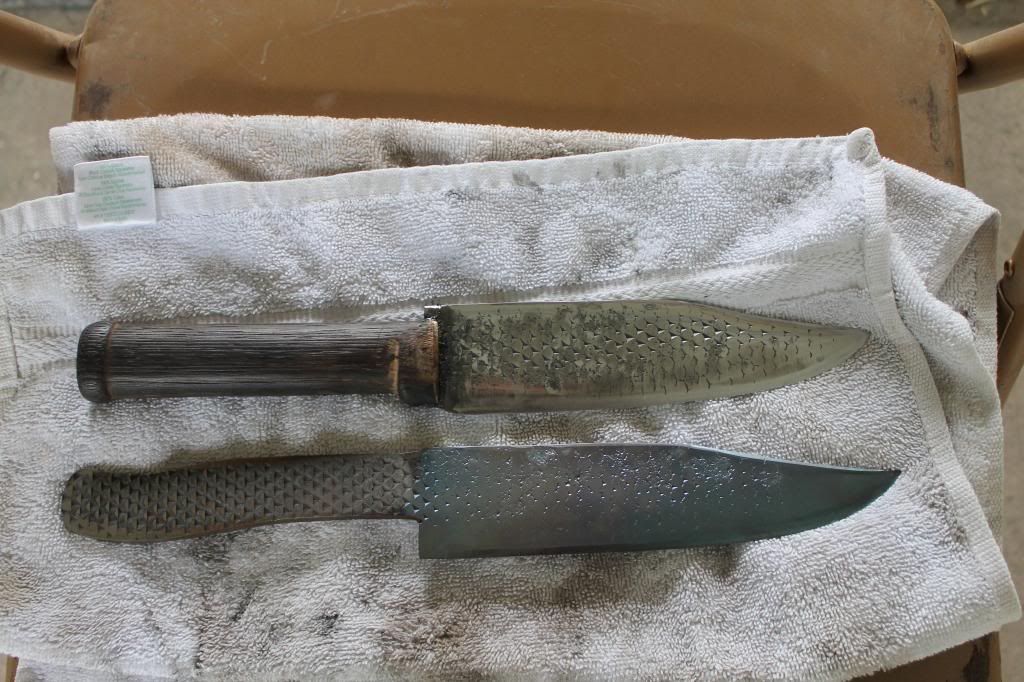
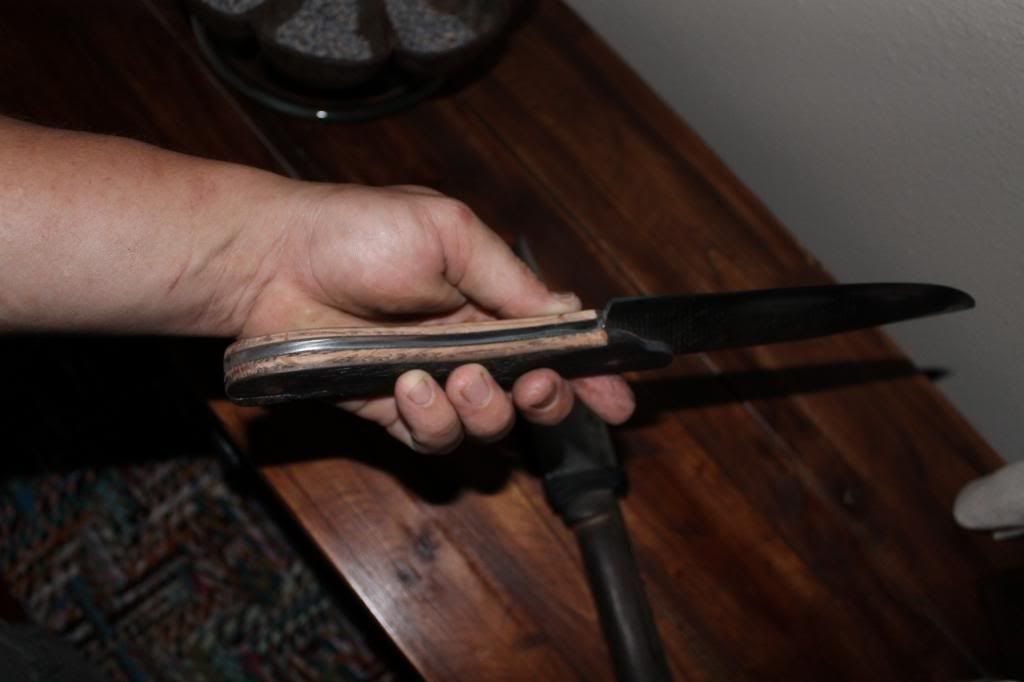
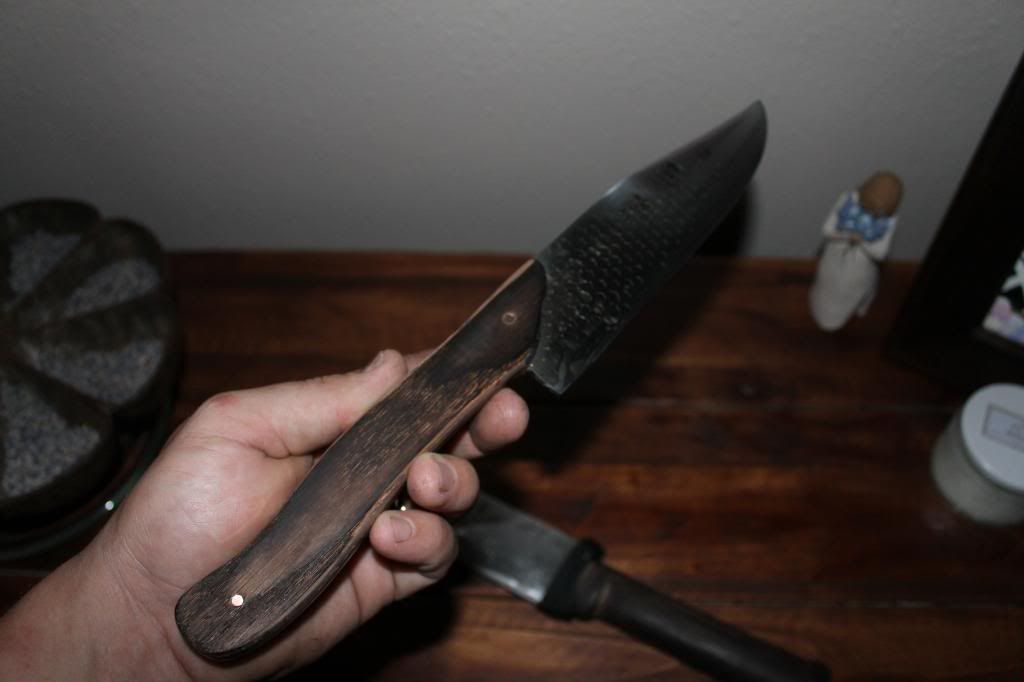
However, The second knife did not receive the same carelessness and I managed a pretty cool full tang handle. Complete with contours for the palm and thumb.
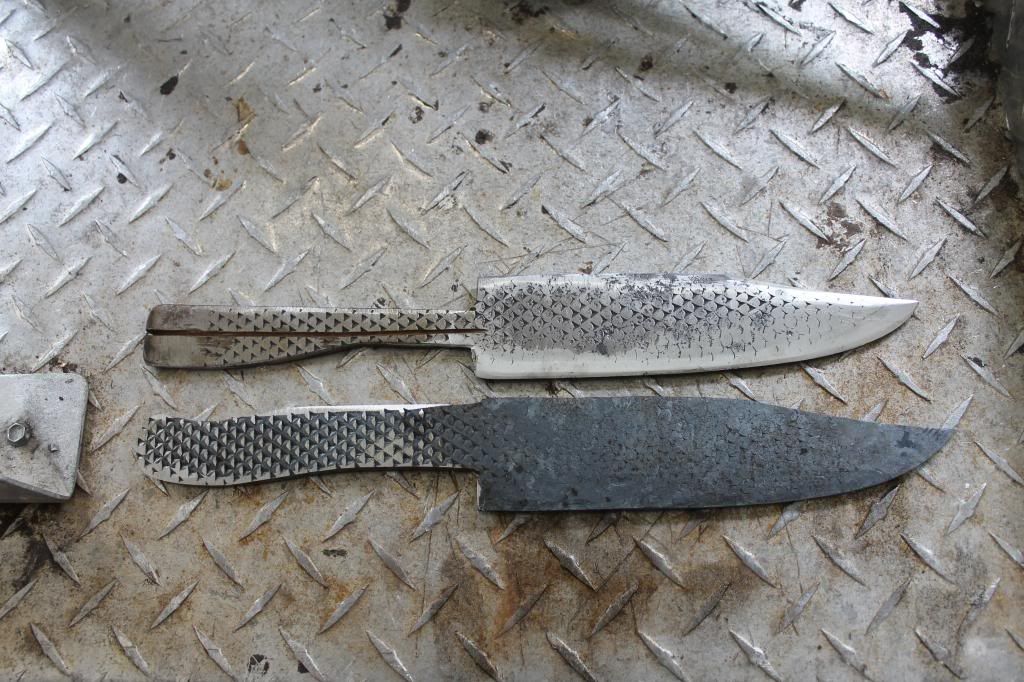
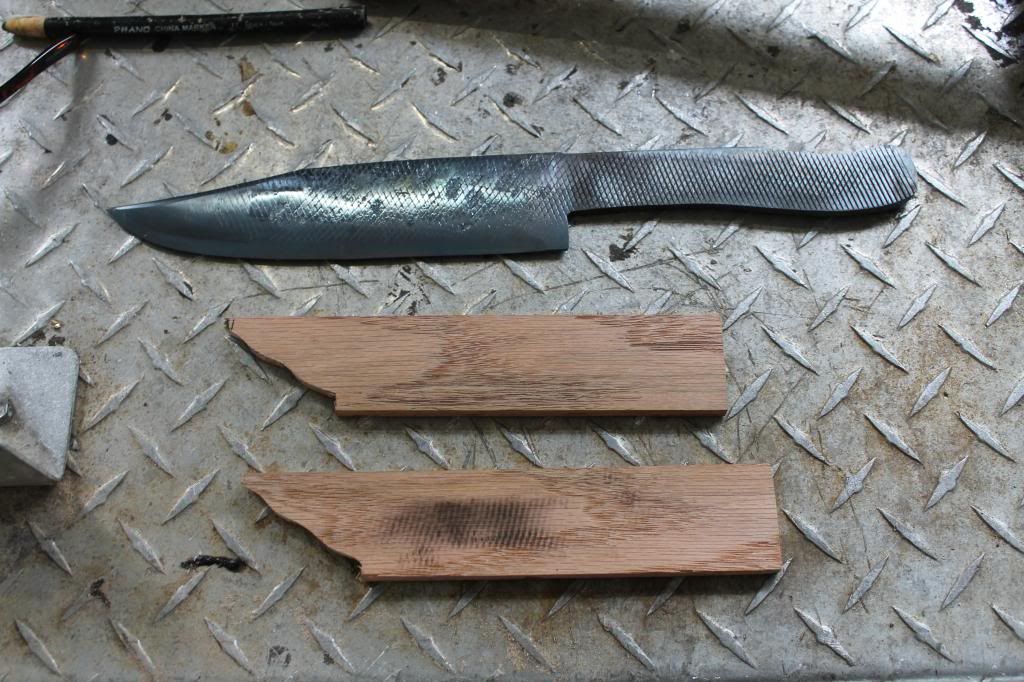
Here are some photos to show the before and after. The blades have been roughly ground at this point but still a long way from finishing.
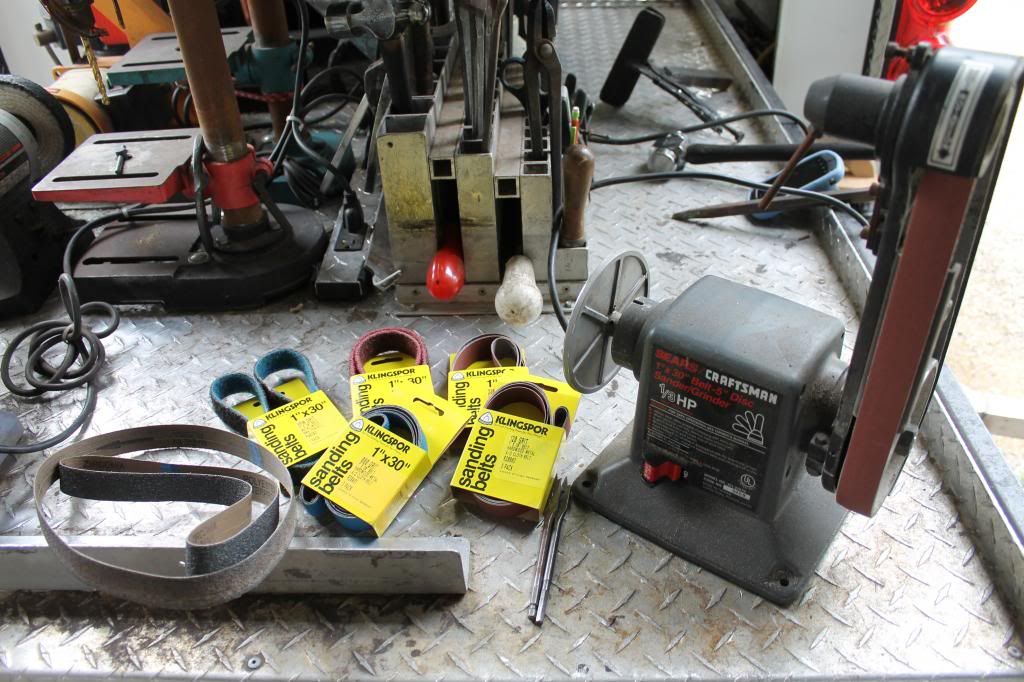
Meet Mr. Belt Sander: - I found this guy for $25 on Craig’s list and then promptly spent another $50 on various grit belts. LOL
Without this tool or something similar I personally wouldn’t try to take on this project.
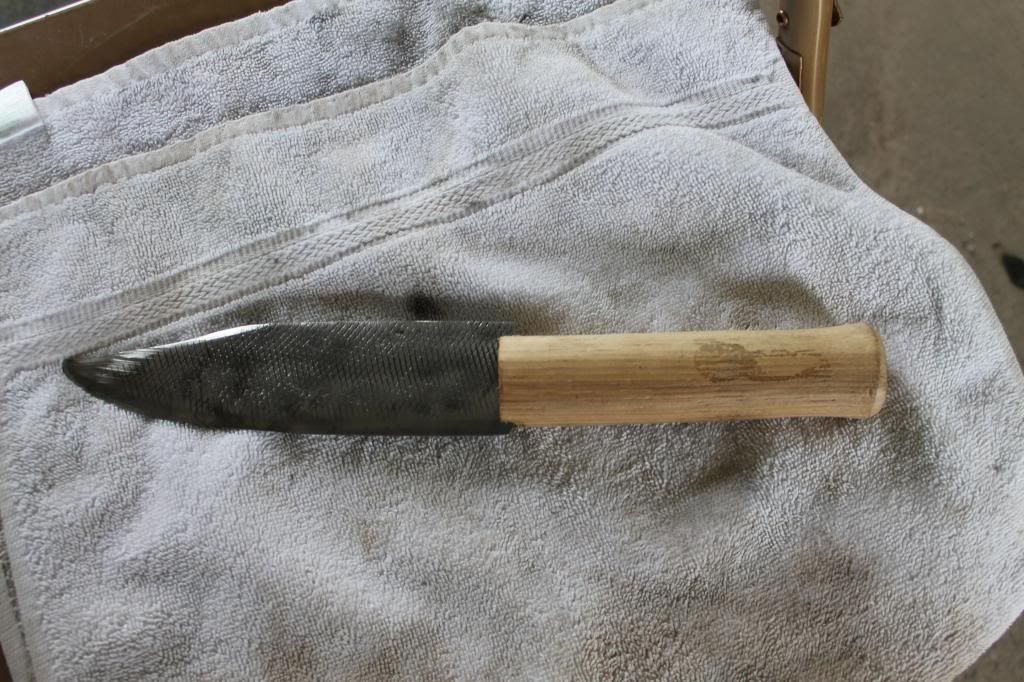
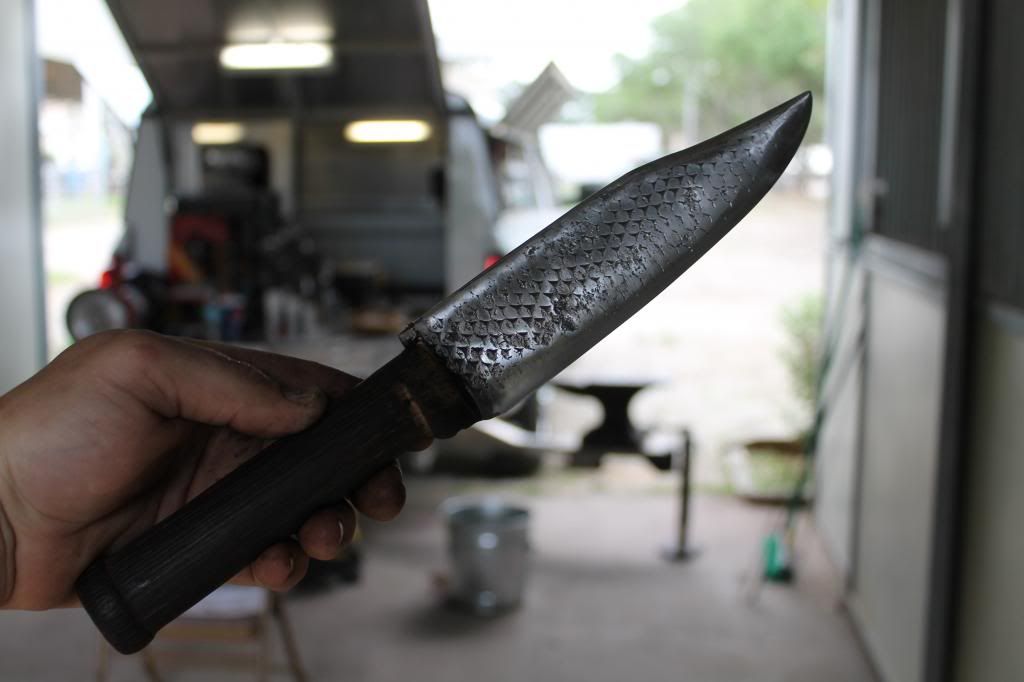
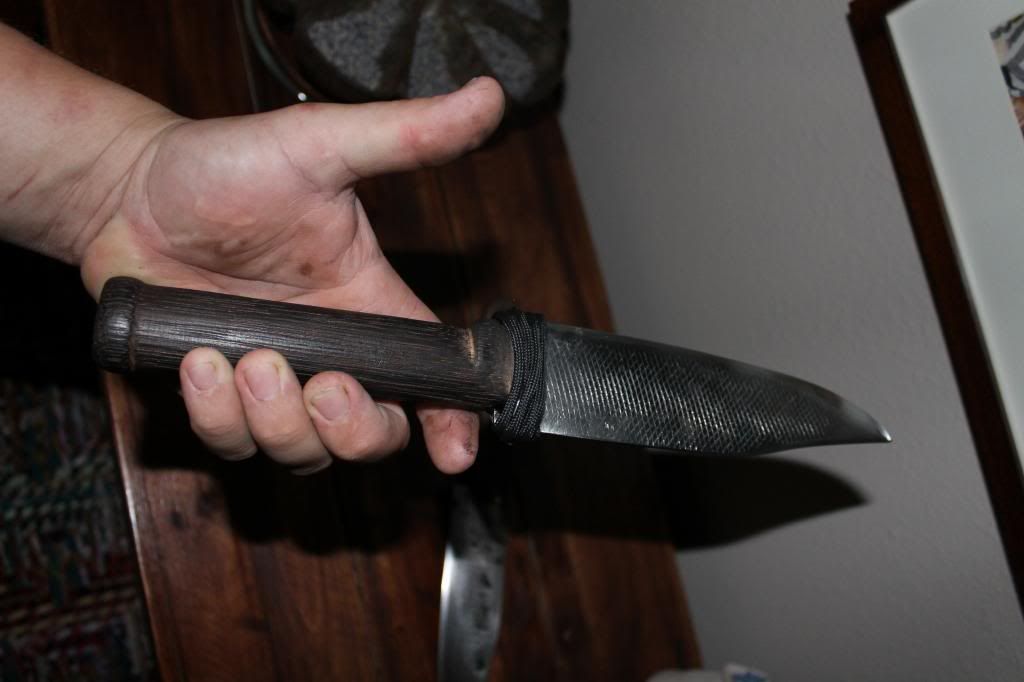
Handling the hunting Knife:
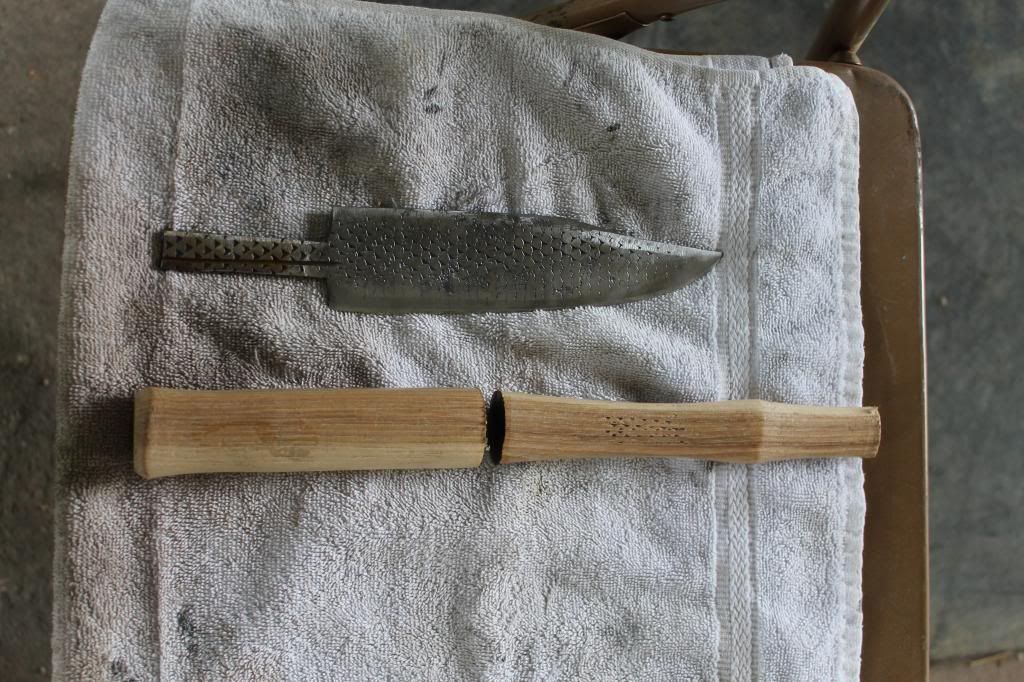
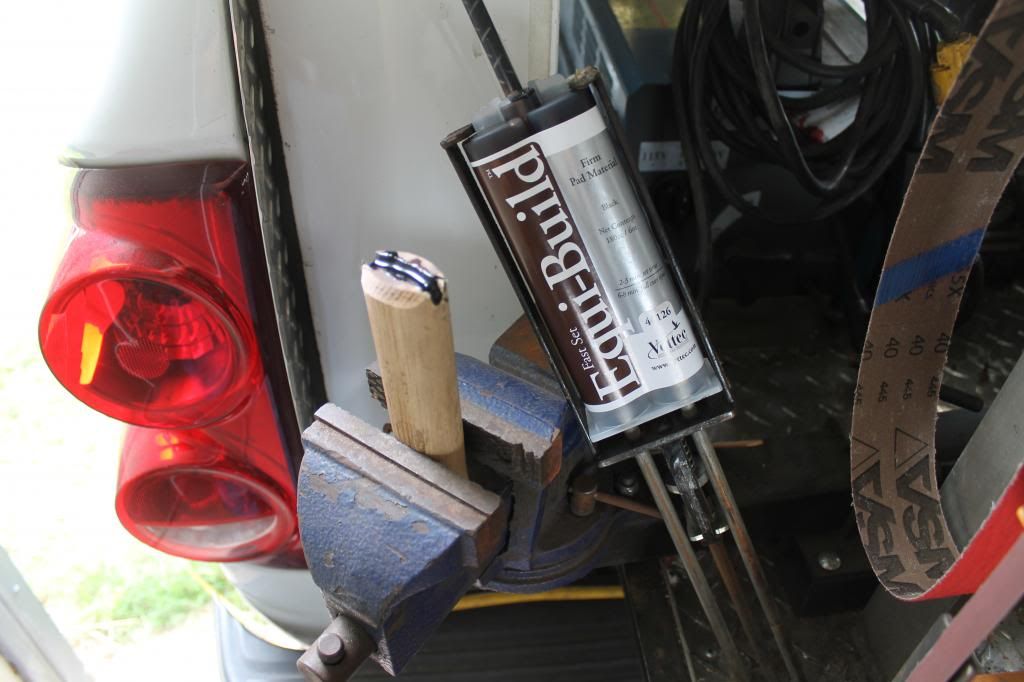
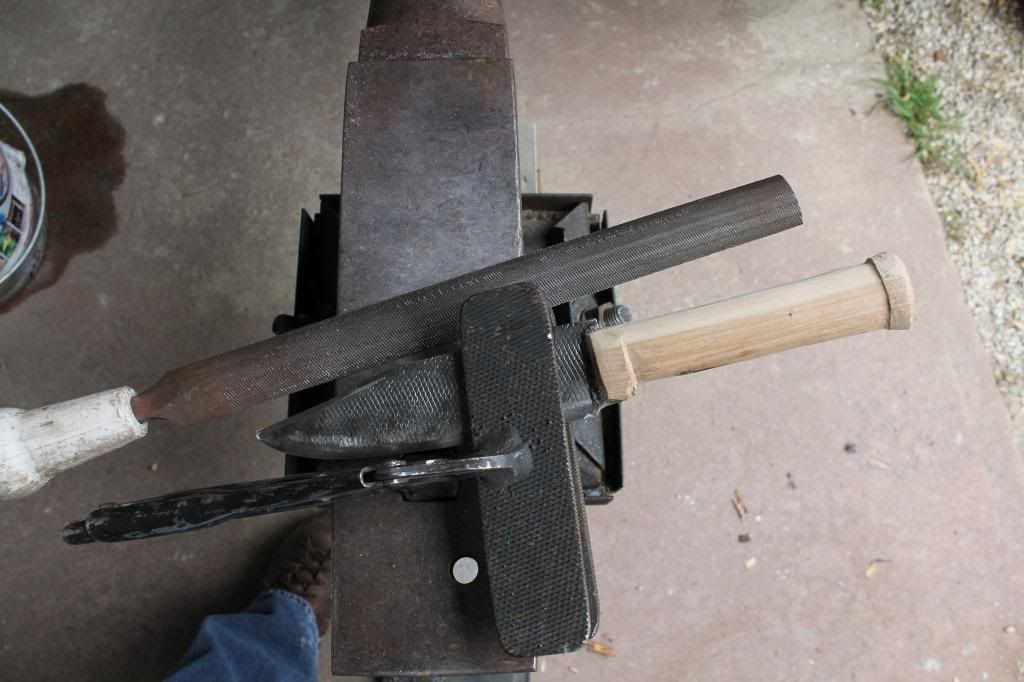
So I had a spare hammer handle in the rig and decided to use it as the starting point for the handle.
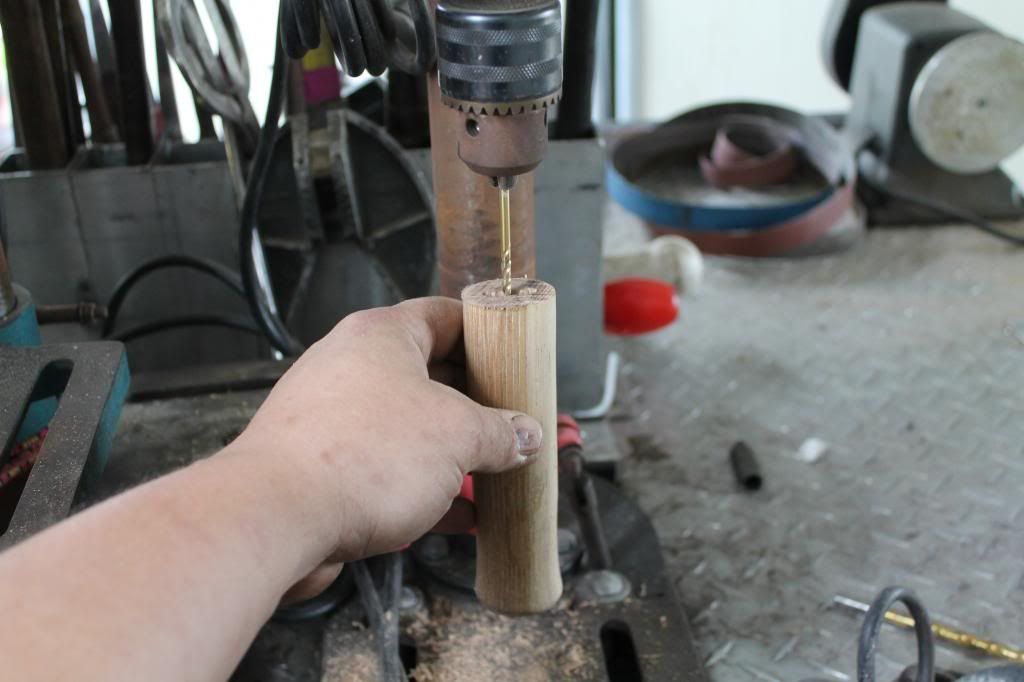
The tang on the blade was cut down to the same depth as the drill bit used to bore out the hole.
I made several pilot holes in the center of the handle and then turned on the “ H.M.M. or Human Milling Machine” ; working the bit across the groove until I had it evenly bored out.
Check the fit:
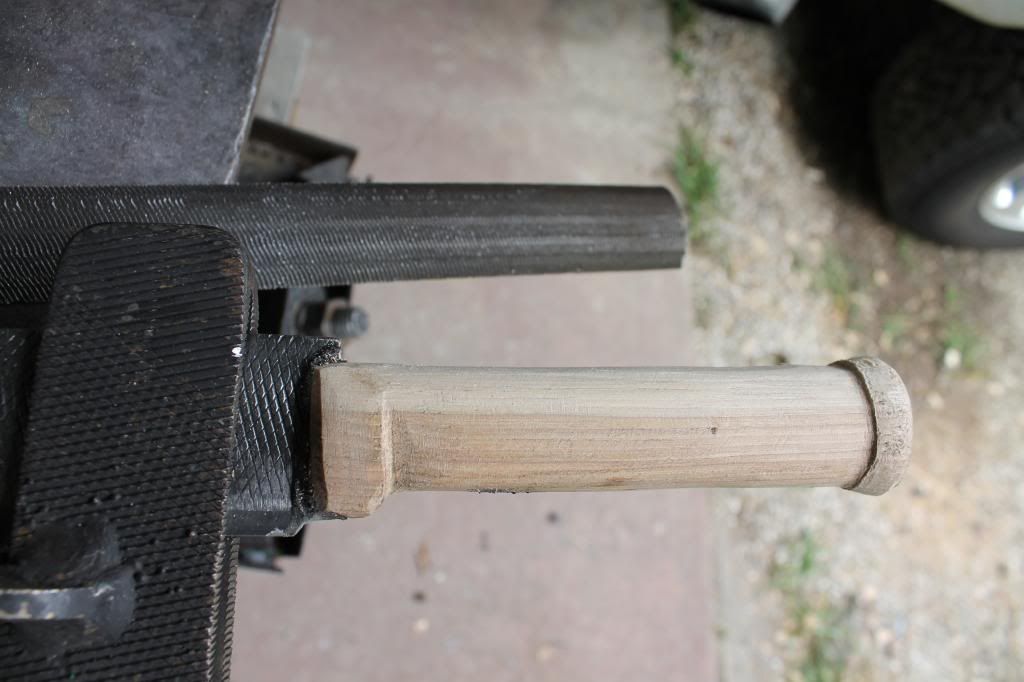
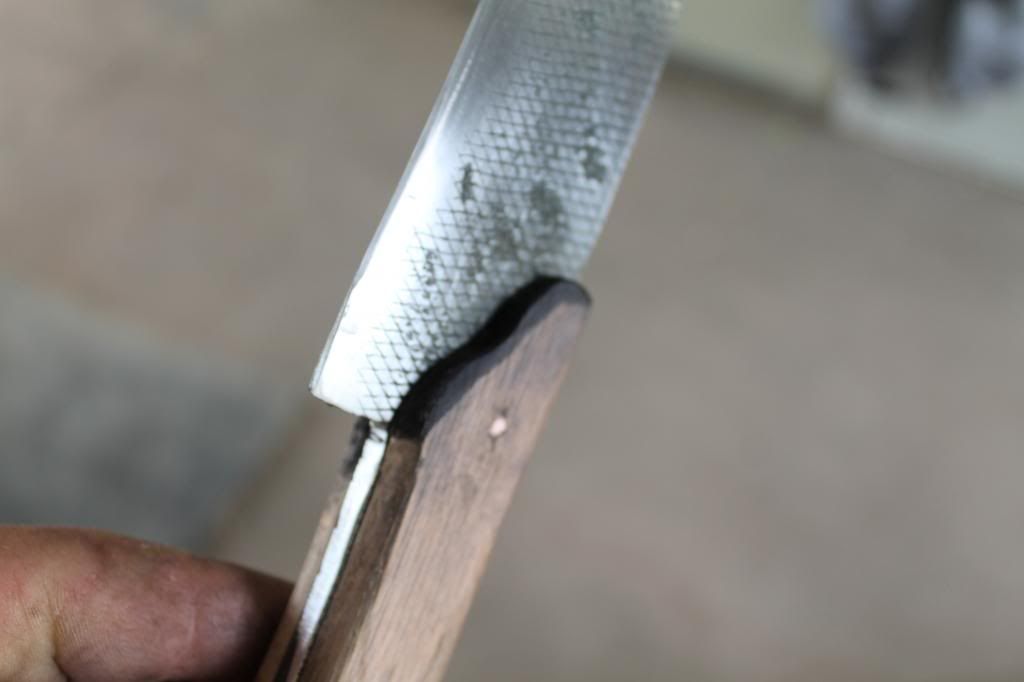
I didn’t like the way the blade sat on top of the handle so I used the finish file to notch out a catch for the lower portion of the blade.
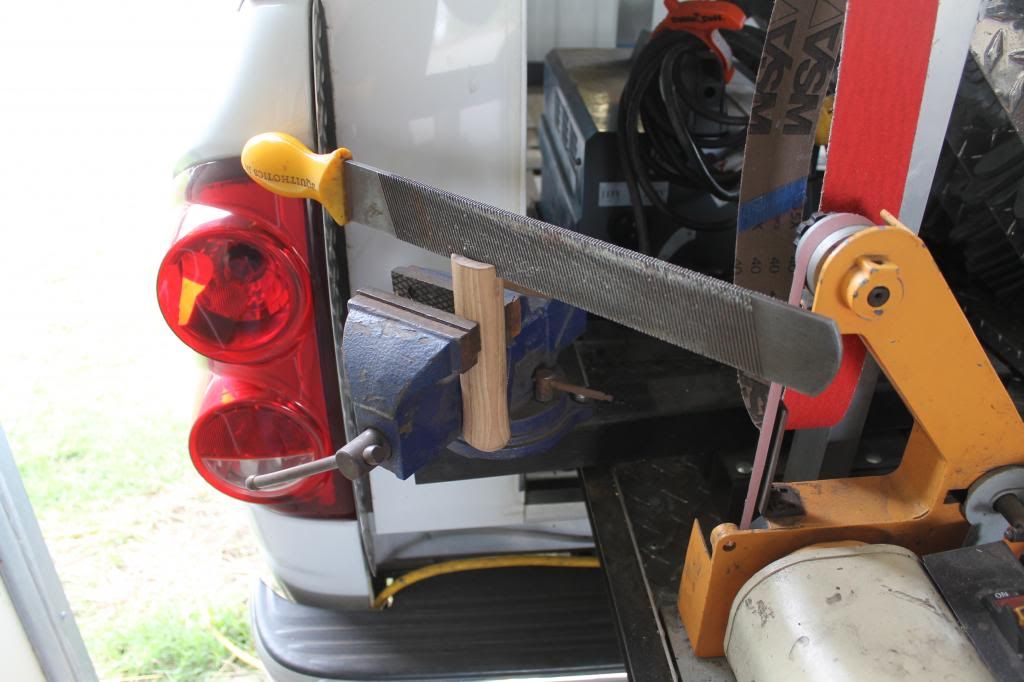
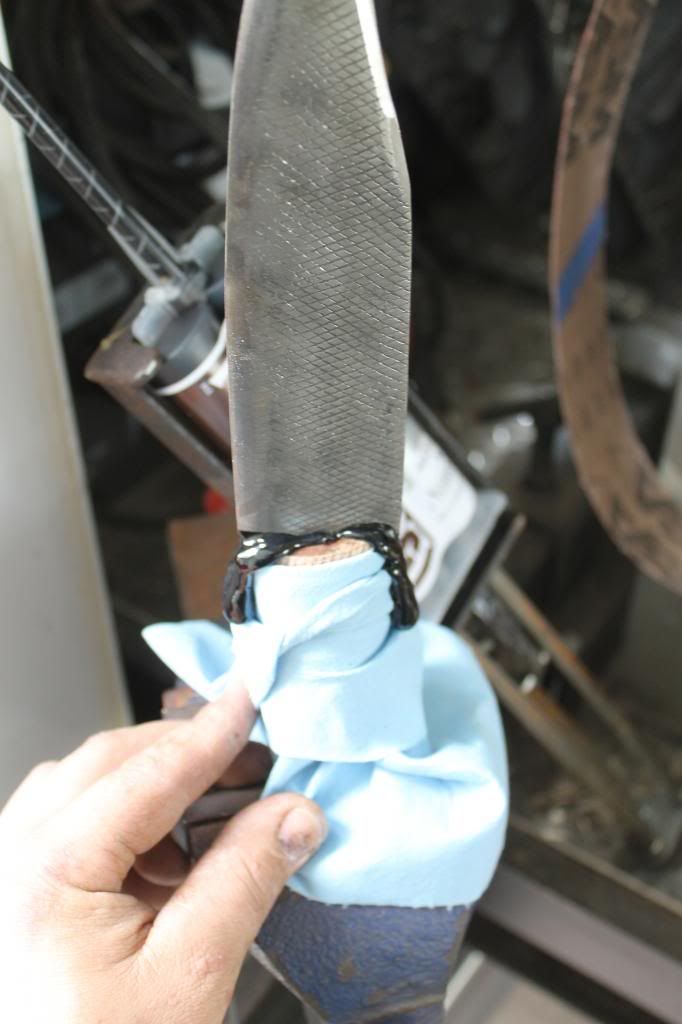
I used a firm setting adhesive to fix the tang into the handle. Epoxy would be best but I didn’t have any on Saturday so this worked fine. Pretty self-explanatory, filled it up with adhesive, dropped in the blade , and kept the excess from getting everywhere with a towel.
while we let that cure...
Tempering the Kitchen knife blade:
The hunting knife is a “shelf sitter”. It was my rough draft but it turned out decent enough that tossing it seemed like a waste. The kitchen knife on the other hand I need to be useable and in turn it needs to be able to be sharpened. In its current state the blade is way too hard and brittle due to the hot/cold influxes it received during the forging process.
Tempering is complicated. I truthfully know almost nothing about the specifics. The basic idea is you have heated and cooled the molecules in the steel rapidly. When you quench the hot steel it condenses and the molecules are left ridged and compacted. This process is referred to as the hardening stage.
Tempering is when you bring the steel up to a certain heat slowly and then cool it off slowly. Every steel has specific tolerances for tempering, but since I don’t actually know what steel this is none of that information is very useful. A generic tempering would have to do. LOL
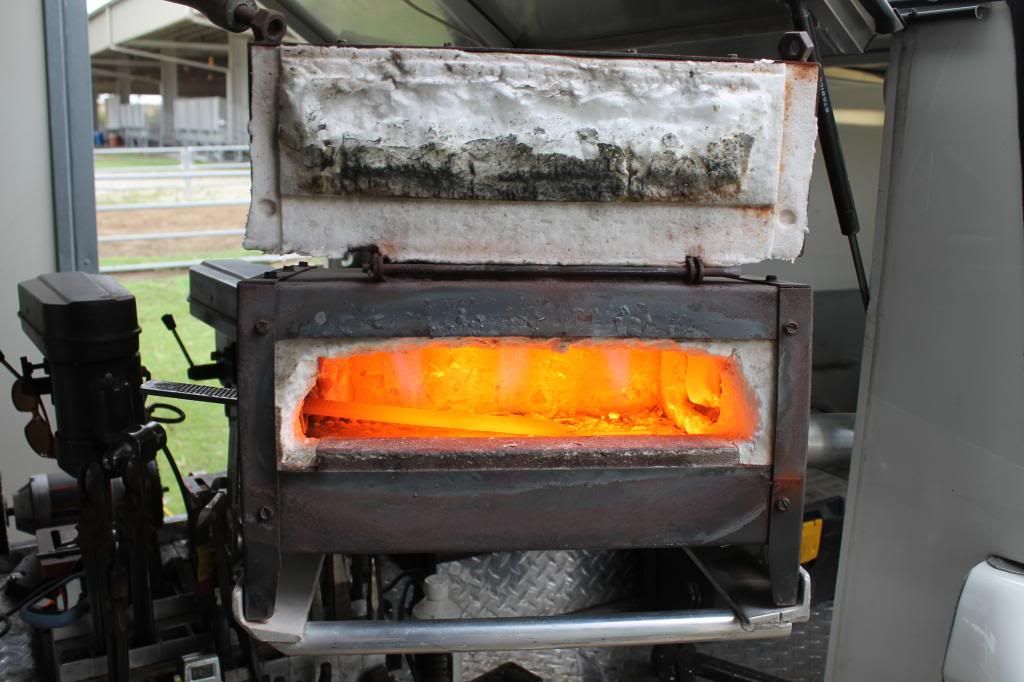
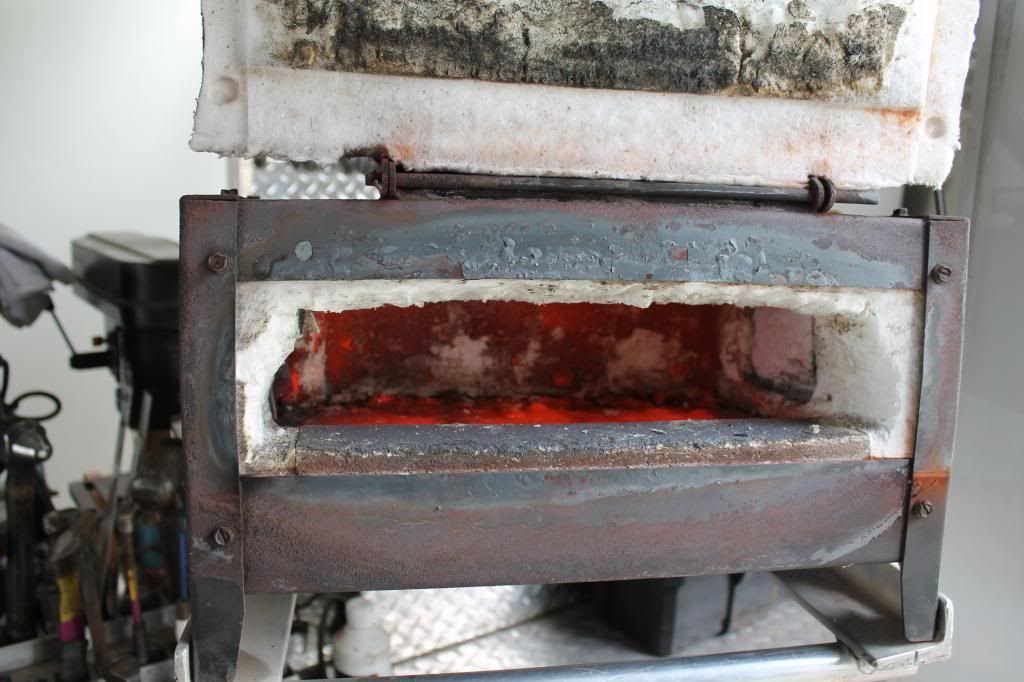
So I heated the forge without the knife inside it and then shut it off. It’s still plenty hot in there for a long time after so your essentially “baking” the blade and letting it cool completely naturally inside the forge.
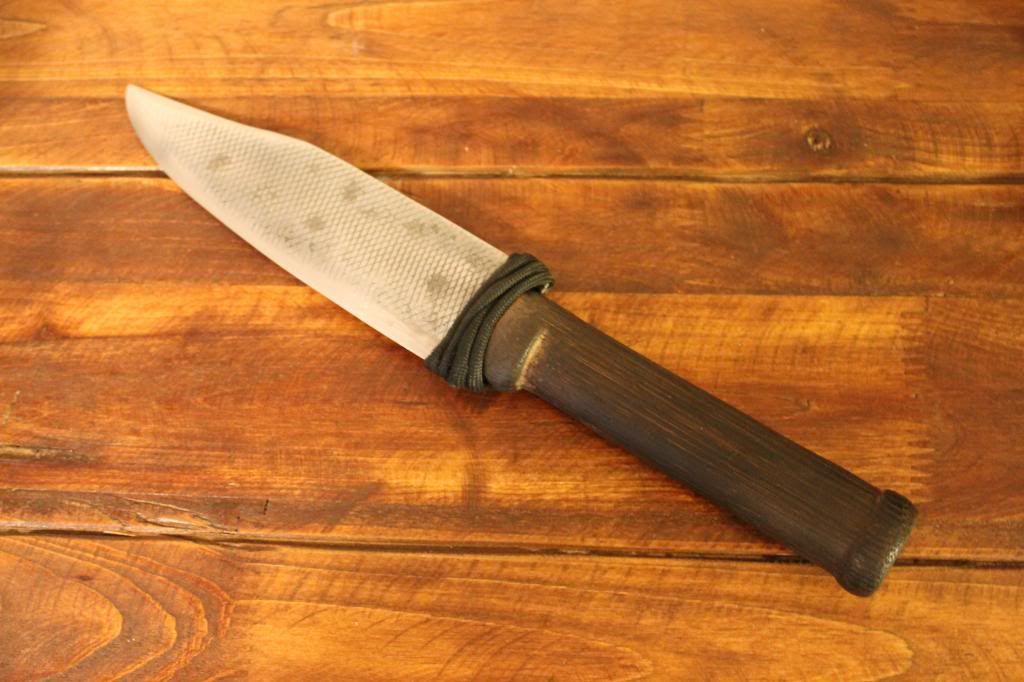
Since this took a while I went back to the hunting knifes handling job.
I thought it looked a bit too generic so I used the half round file and carved out what the handles vison looked like in my head. It took a little while but it made a ton of difference.
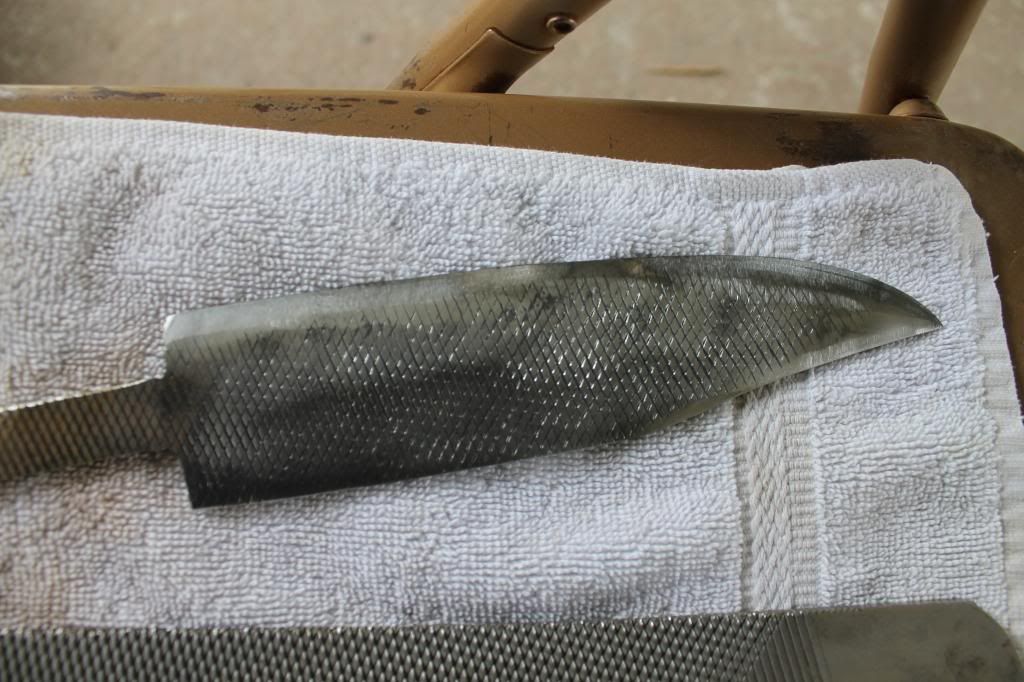
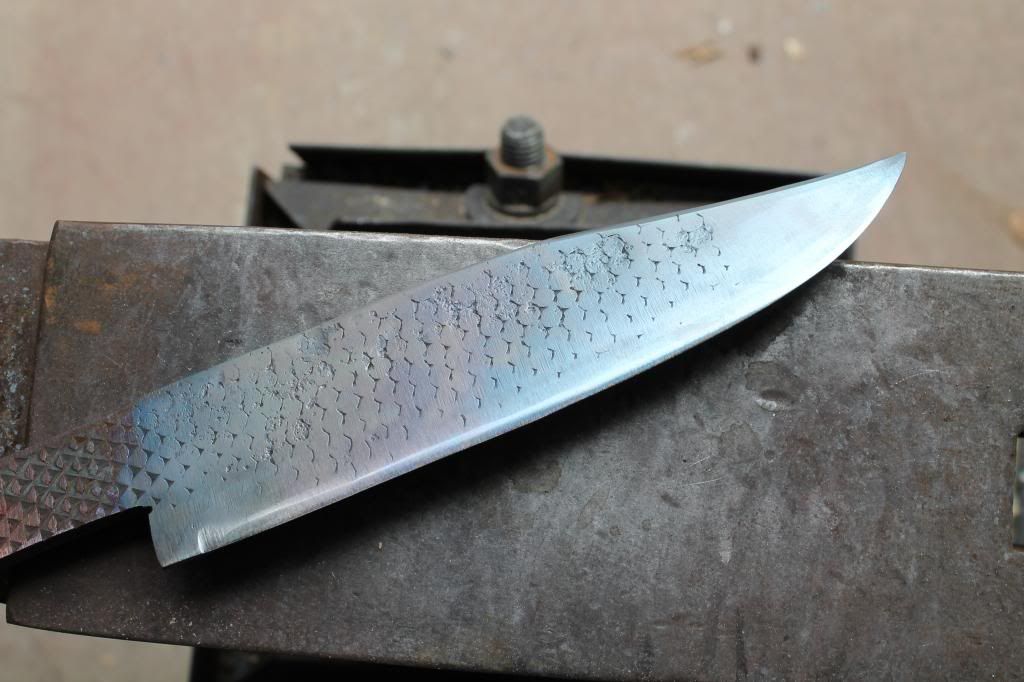
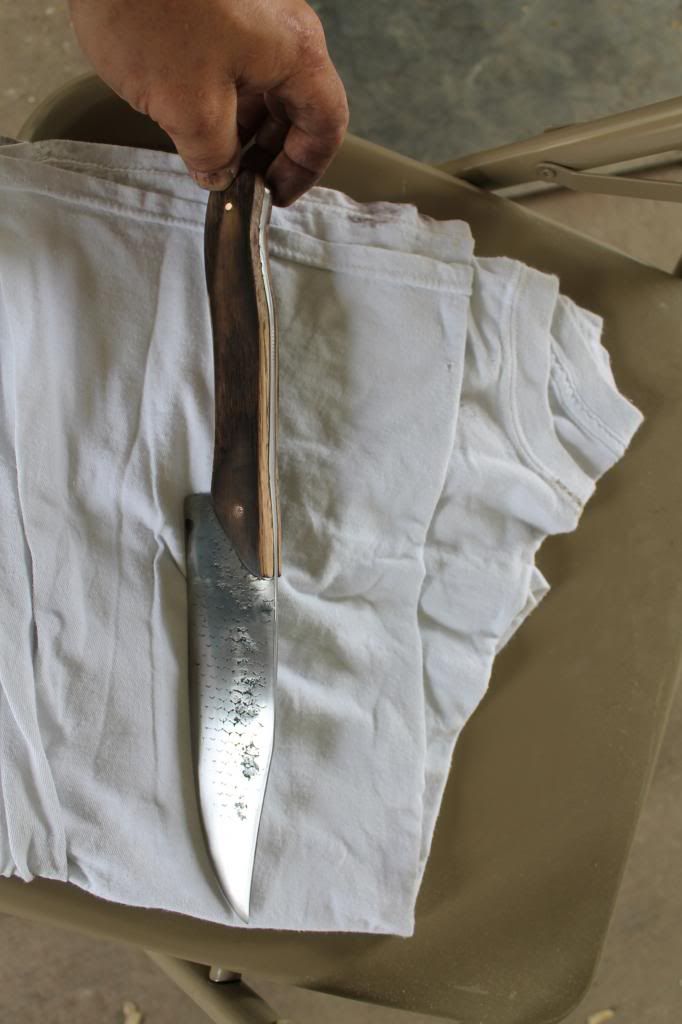
The tempering was done at this point and it actually turned out pretty nice. The colors indicate what temperature the steel was brought up to. The higher it was heated the more hardness is removed. Again I don’t know the specifics but the blue areas were heated to around 600deg.F and the lighter golden areas indicate around 400deg.F. Ideally you would be evenly heated….
So buy the end of Saturday I had the Kitchen Knifes blade forged, cut, roughly ground, and tempered. The Hunting knife was forged, cut, ground, and had a basic handle.
The plain hickory color wasn’t very appealing so I did a fire treatment and then sanded back through it to give it a weathered look.
So Sunday was kind of tough because of a lot of starting and stopping, but I managed to get finished with the kitchen knife and get both knives polished up to 600 grit. I wanted to go up to 1000 grit but decided that the quality of the job didn’t merit the time it takes to polish to that level. I’ll go that far when I am totally happy with the blades finish.
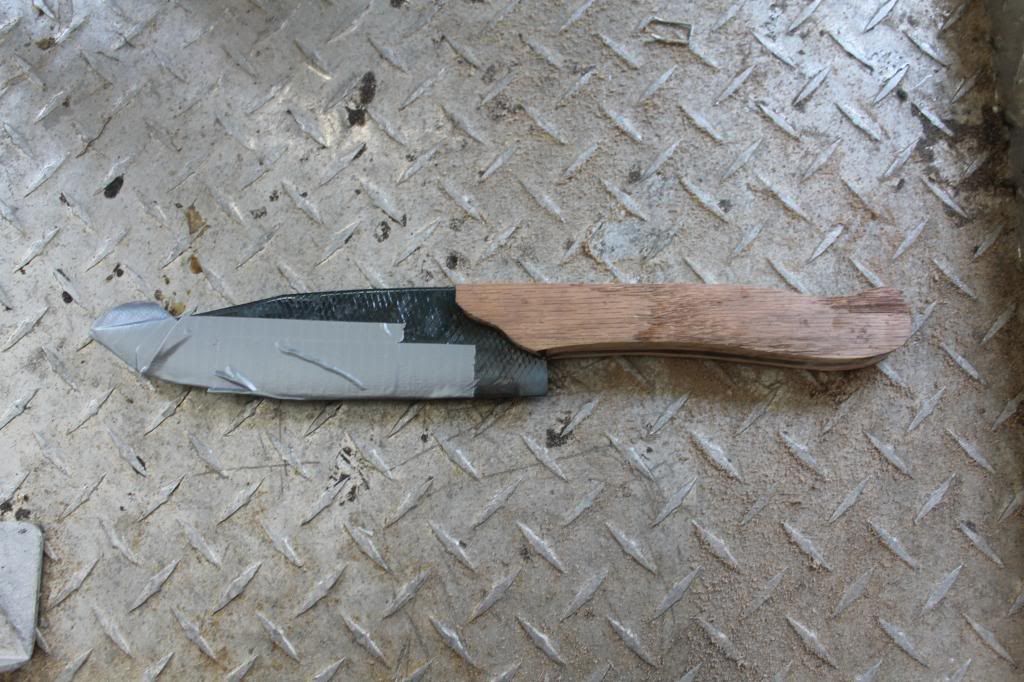
To begin the handling I cut two strips of oak and used the grinder to scroll in the front section.
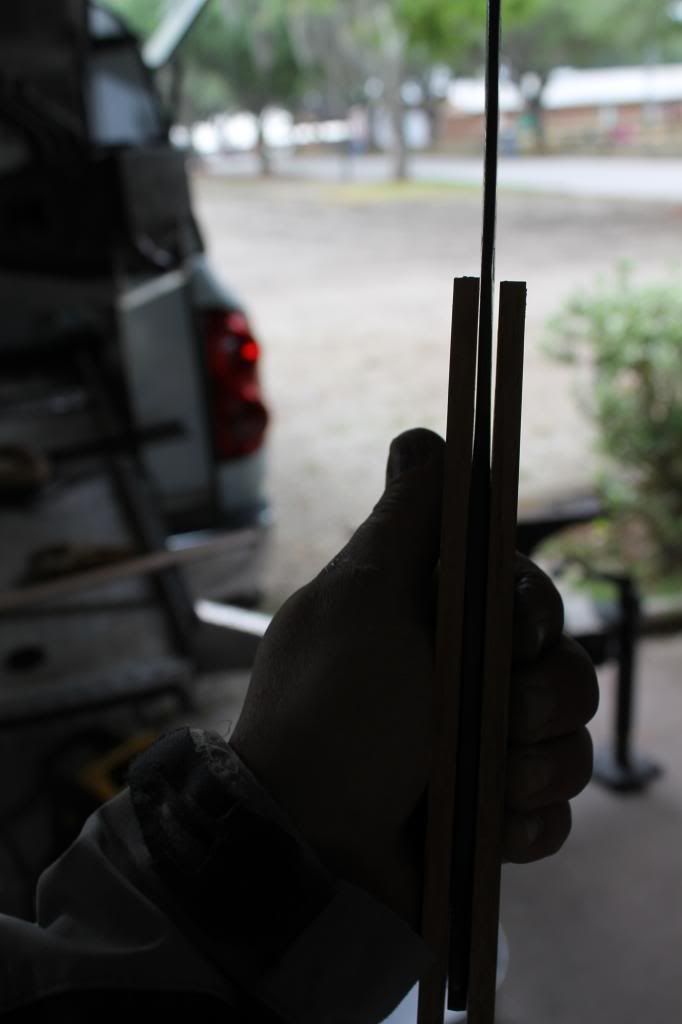
I ran into a problem immediately…the blade narrows so to follow the contour and run the scrolled section down and into the blade seamlessly I had to sand down the handle side in order to make a “reverse wedge”. This worked pretty well. If I had a planer it could have been more precise but it worked for today.
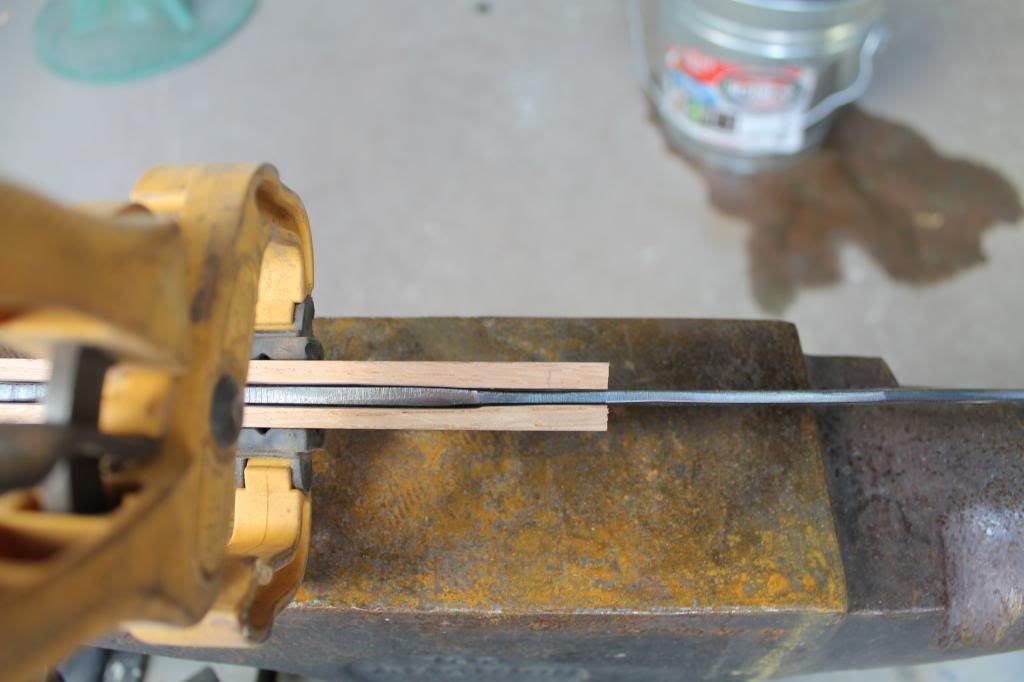
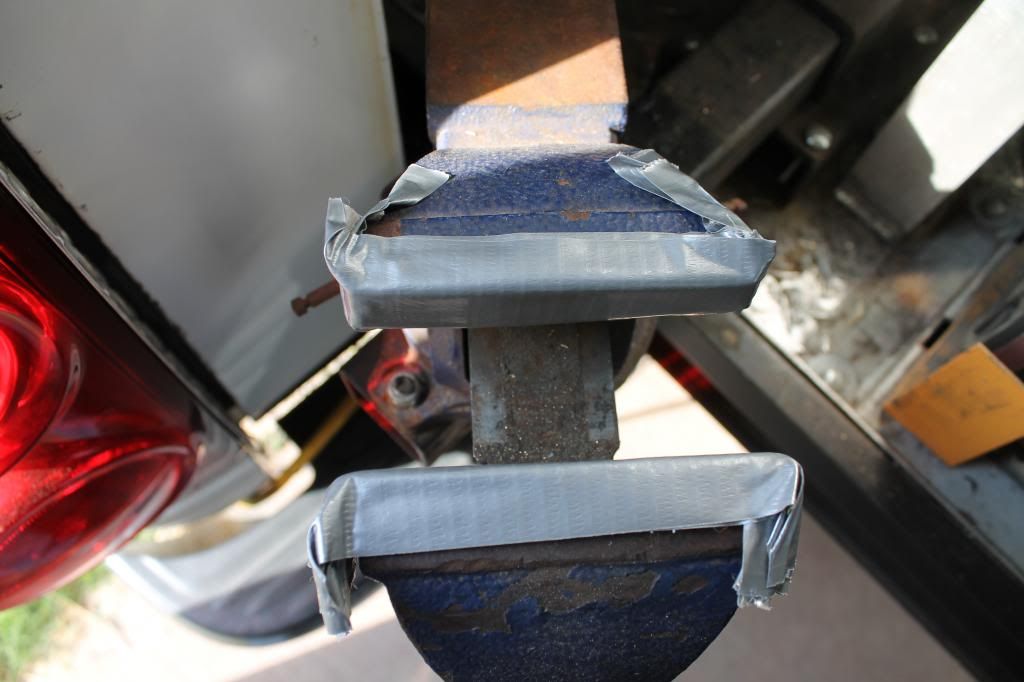
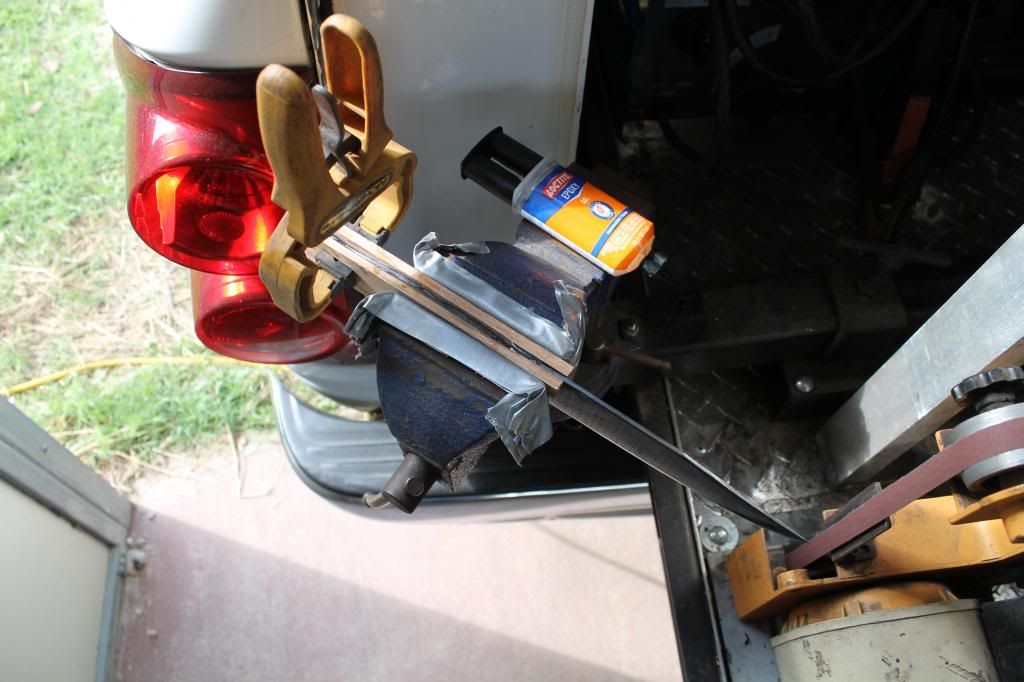
I stopped Saturday evening and grabbed some gel epoxy to set the handle with. I used the vice to get the best contact possible. The vices teeth would have damaged the handle so I put several layers of duct tape over it to smooth out the process.
The epoxy set up for almost two hours before I got back to the project.
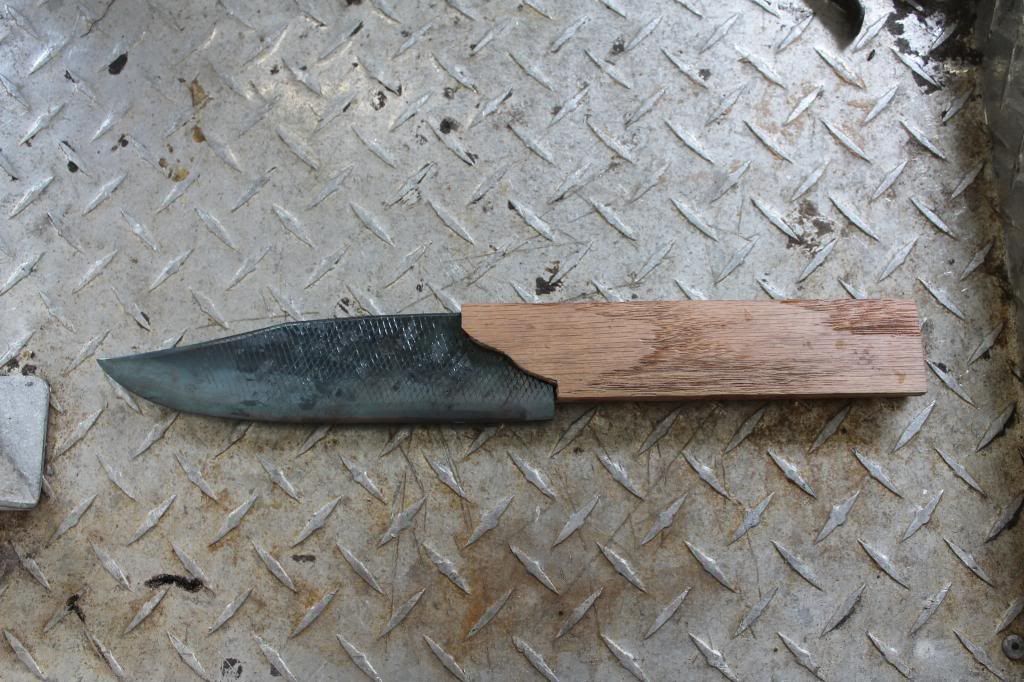
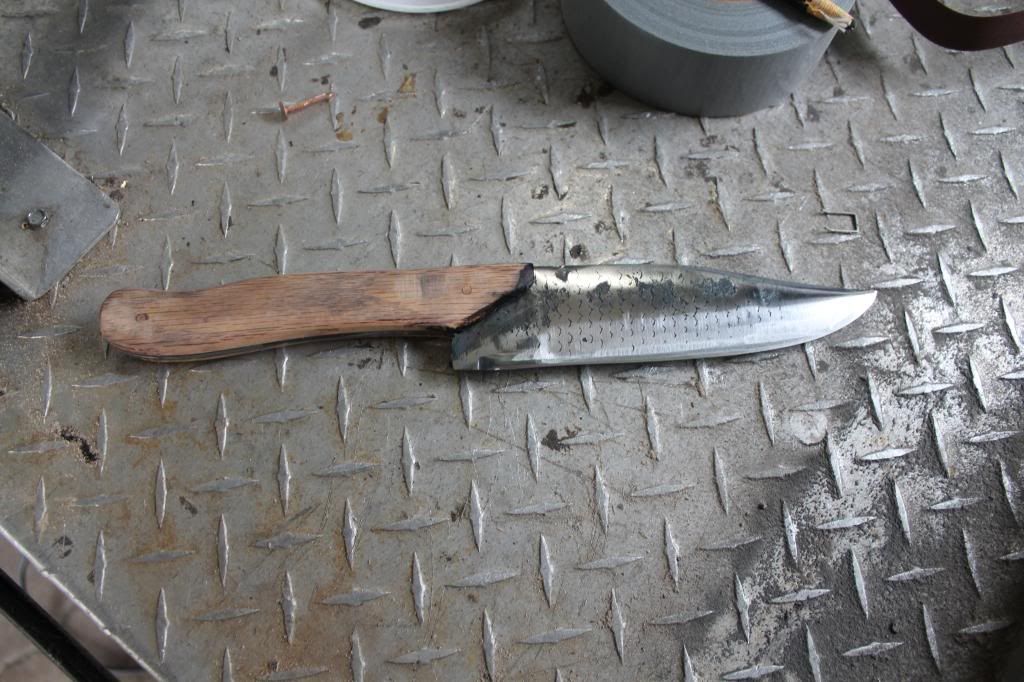
The next step was pretty easy. Just grind away the overlapping wood until it matches the shape of the tang.
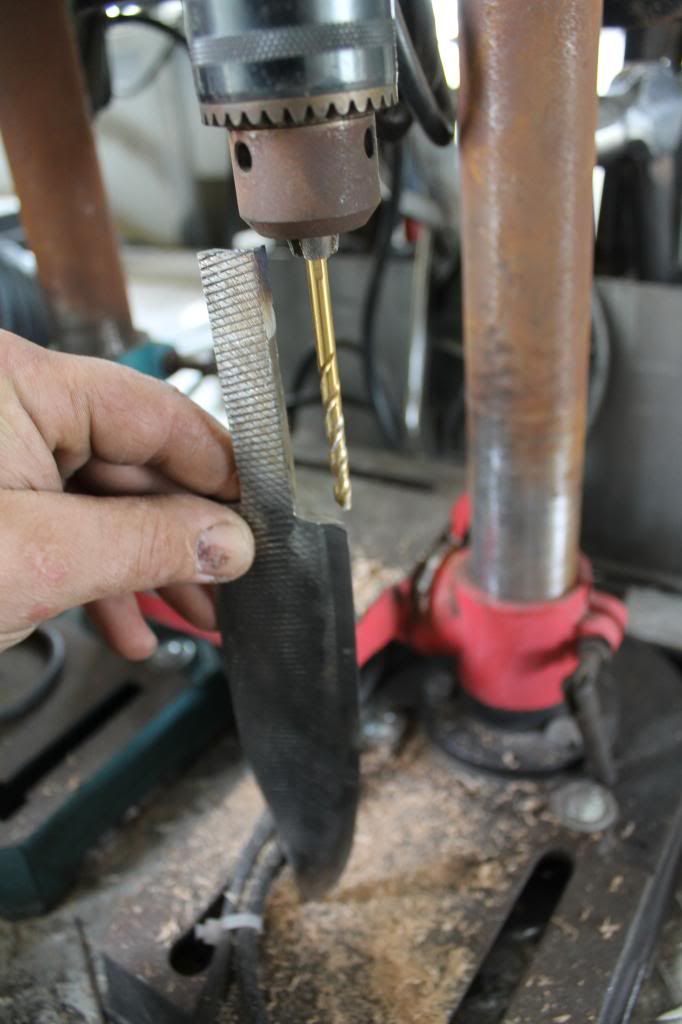
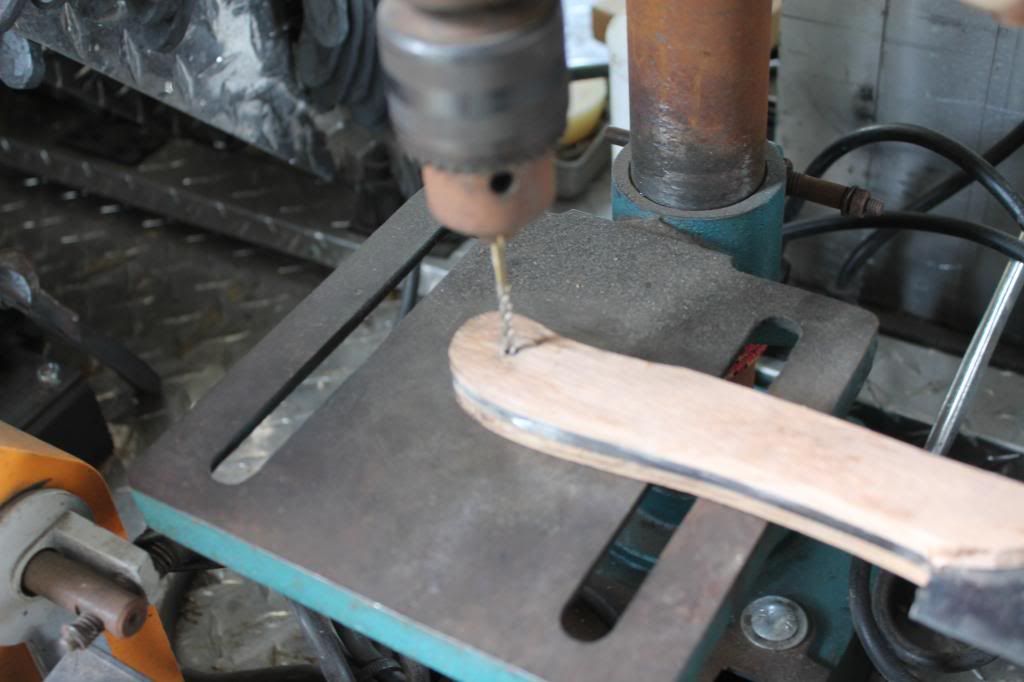
I wanted to add a couple of safety rivets to the handle. The epoxy is what holds the knife together but the rivets will catch and hold the blade if the epoxy were to fail. It would hold long enough for you to realize something was wrong and stop using the knife.
I used copper rivets, and the drill press to get the holes through the tool steel. It is a slow process because of how hard the steel is.

The rivits were set in epoxy as well and the excess was ground flush to the handle.
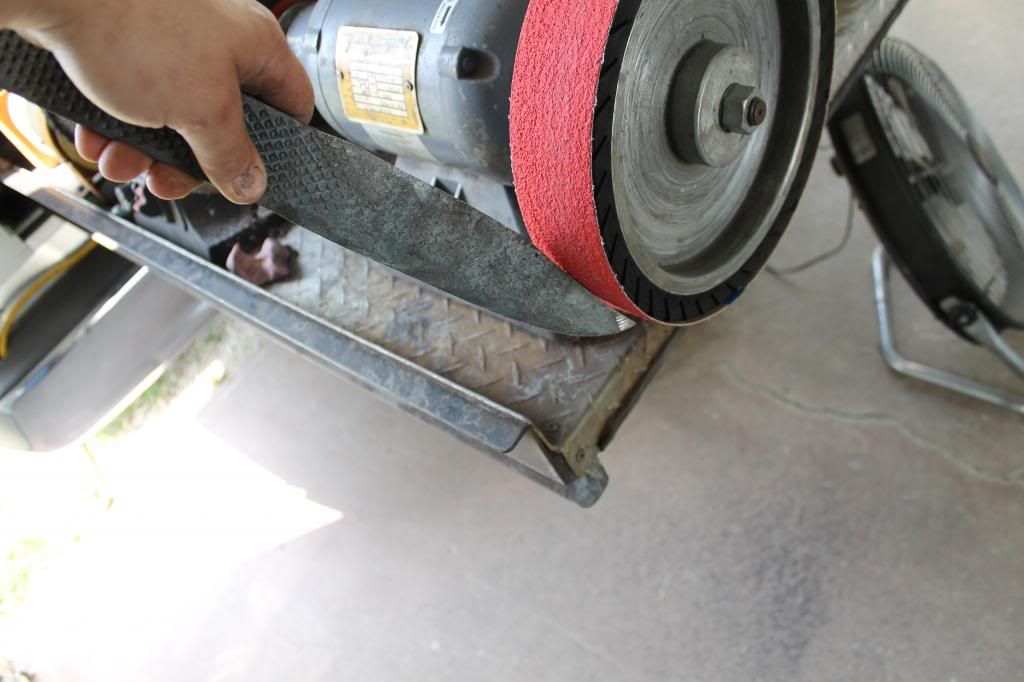
The last step was to polish out and sharpen the blades.
This took a very long time. Repetitious passes across the belt sander working my way up in belt grits. For the 400 and 600 grit wet sanding I used a sanding sponge with the paper around it and finished it by hand.

ANOTHER MISTAKE!
The darn carbon from the steel mixed with the water from the sanding and created a dye. My grand plan was to sand down the handle and finish it with Danish oil or teak oil. The stains looked really bad so I decided to do the same fire treatment that was used for the hunting knife. It was a disappointing moment but it turned out pretty good in the end.
So lesson learned. Next time I will finish the blade before I handle. Luckily this was just oak, and not an expensive exotic wood handle…
So the long and short of the rest of the day was polishing when I had a minute, and working the rest.
For my first knives I couldn’t be happier. They are sharp enough to shave the hair off my arm and functionally useful.
My biggest disappointment is in the blades, the forging marks drive me crazy. I know better…I was excited and forgot to brush the slag off the steel before I went to work on it. The slag pops loose and then gets driven back into the blade causing the divots that are left… oh well; I know the solution and will do it better next time.
Thanks for checking it out!
I hope this was enjoyable and mildly informative.
JP
Like every other first attempt, I made some mistakes, and had to alter my plan mid-way through. Instead of two kitchen knives I made one kitchen knife and one hunting knife. LOL
The reason will be explained further in the post.
A farrier’s rasp is a great resource for knife making because they are made from a good grade, high carbon tool steel. The exact number/name of the steel I can’t say, but when you hammer this stuff you can feel how hard and dense it is compared to mild steel.

The tang was making holding them difficult so I cut them off and got a nice straight edge for the tongs to bit on.

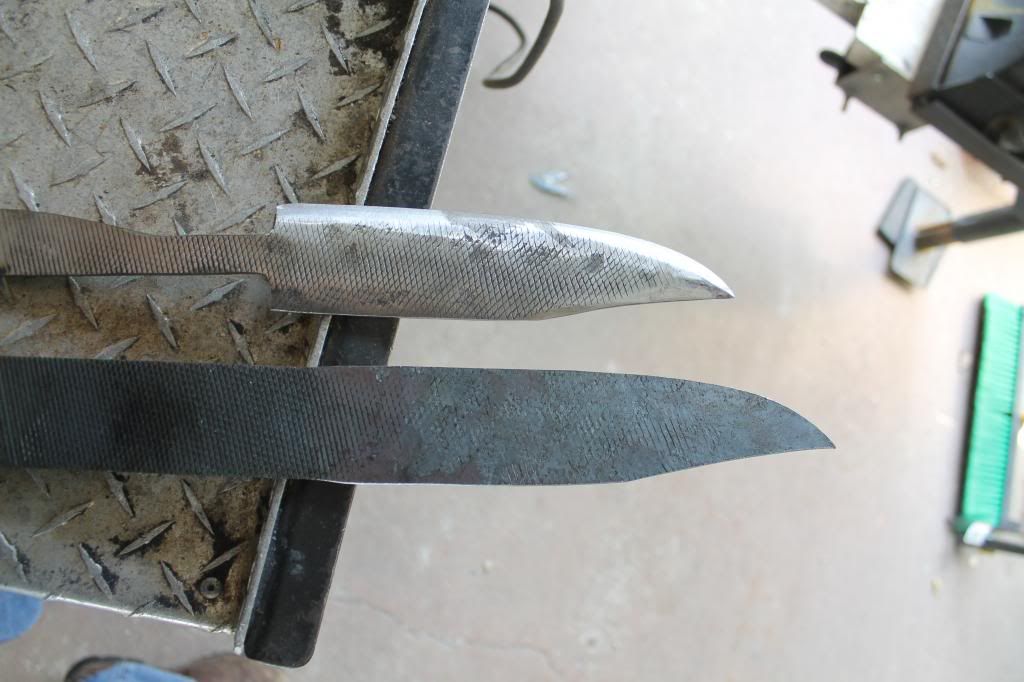
I heated the side I wanted to forge and began overlapping blows, walking down the rasp to form the shape of the blades tapered point.


When I think of a cool knife shape it always has the “kick back”. There is probably an actual term for it, but its where the top of the blade sucks in before the tip.


So you’re probably asking yourself why didn’t he just cut the shape out of the rasp and grind it down?
With a smooth piece of tool steel you could do that, but the rasp has teeth that have to be flattened otherwise the blade would have bumps and ridges in it. If you forge the teeth carefully and lay them all in the same direction the pattern it creates is really cool!
Another reason I forged it is that grinding tool steel takes a long time. It took hours! To grind down what I left, let alone if I had the whole thickness to contend with. So instead I forged out the blade into the thickness I wanted.

It’s important to try and keep it the general shape you started with because when you lay out the pattern to be cut out, the curves will be in the right direction and you won’t be short.

I marked out the pattern and used the cutting wheel to rough the shape out.


Then I used the big Baldor to get everything tightened back up.


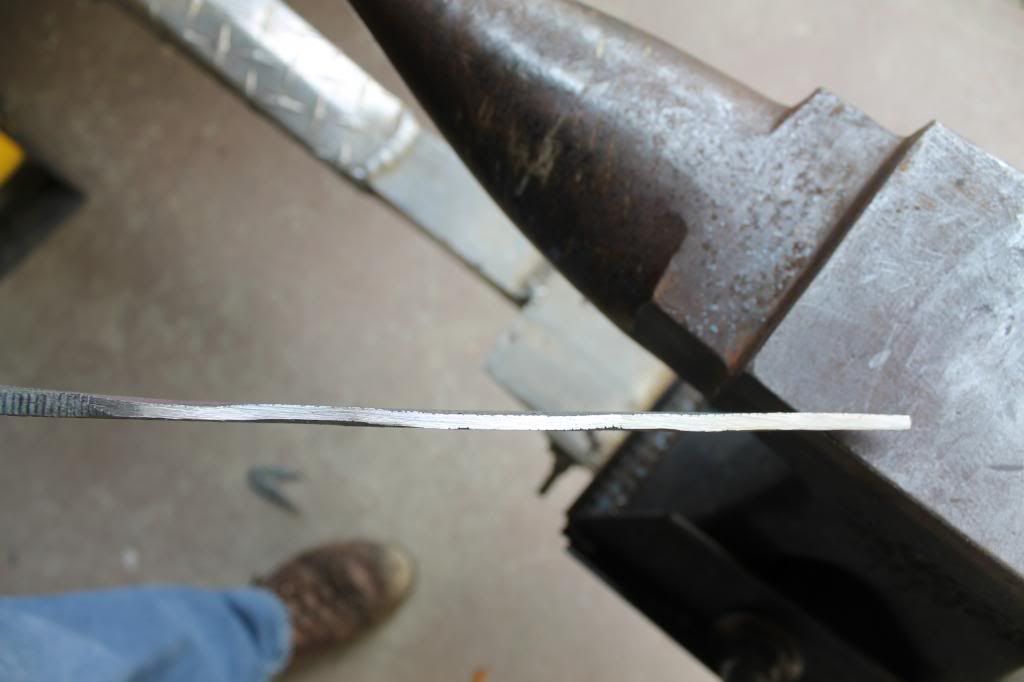
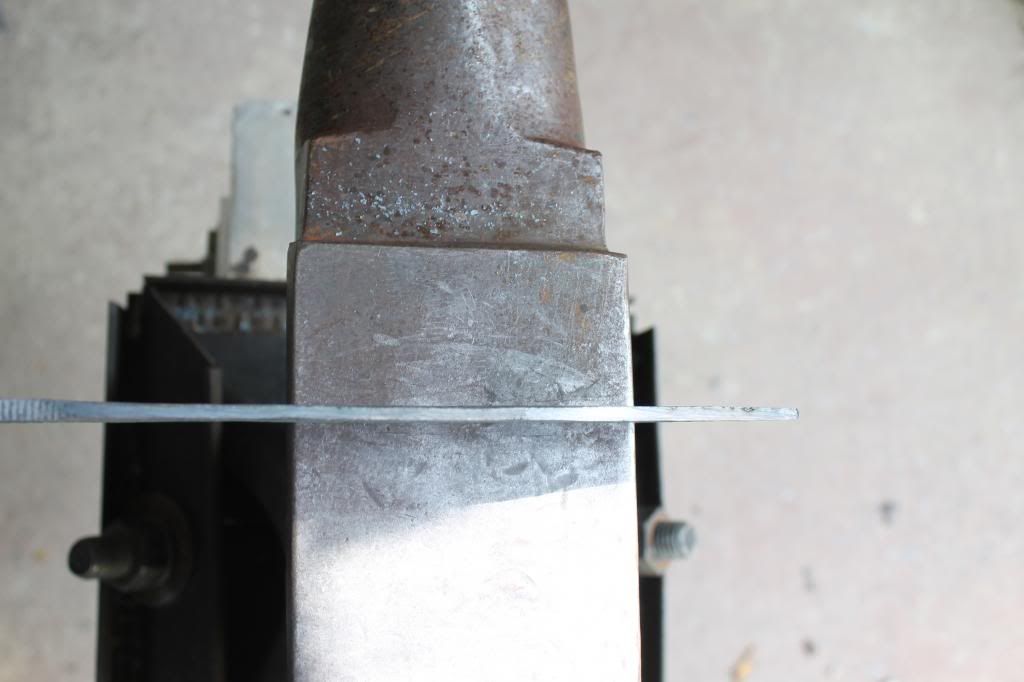
The blade had a tendency to warp under the slightest heat so it’s important that before you commit to your final shape that you carefully level the blade.


This would have been aided greatly by a tool called a “flatter hammer” but I unfortunately don’t have one.
It’s at this point that you will discover why the first knife gets turned into a hunting knife. I wasn’t paying attention and I cut out the wrong side of the handle. ;(

Instead of pitching it I cut the correct side back as well and decided to make a inserted tang hunting knife.
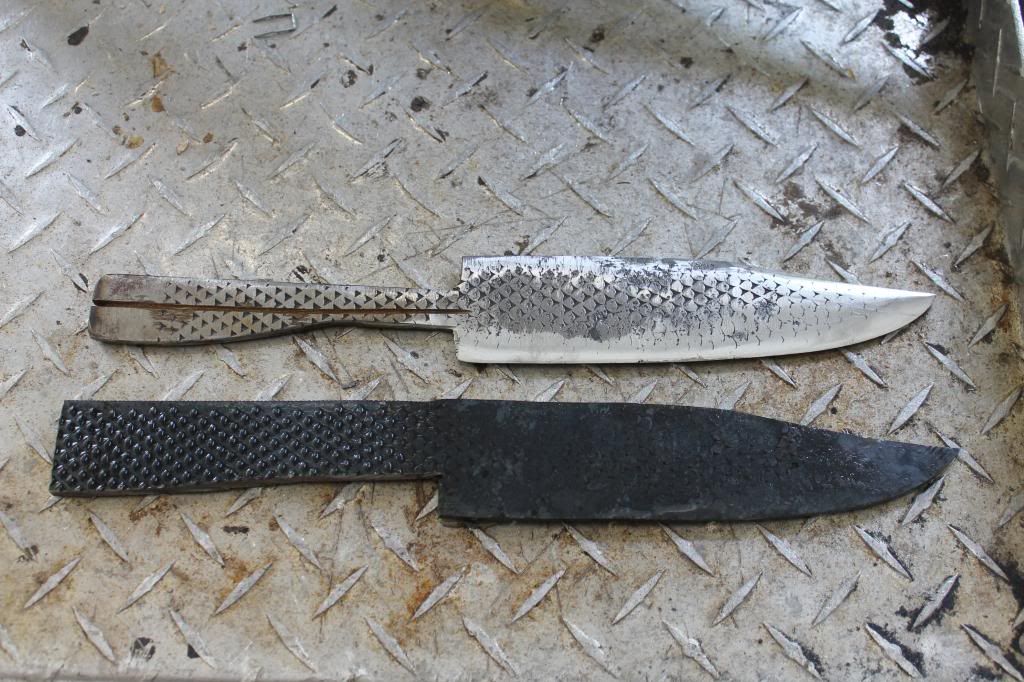
However, The second knife did not receive the same carelessness and I managed a pretty cool full tang handle. Complete with contours for the palm and thumb.

Here are some photos to show the before and after. The blades have been roughly ground at this point but still a long way from finishing.


Meet Mr. Belt Sander: - I found this guy for $25 on Craig’s list and then promptly spent another $50 on various grit belts. LOL
Without this tool or something similar I personally wouldn’t try to take on this project.

Handling the hunting Knife:
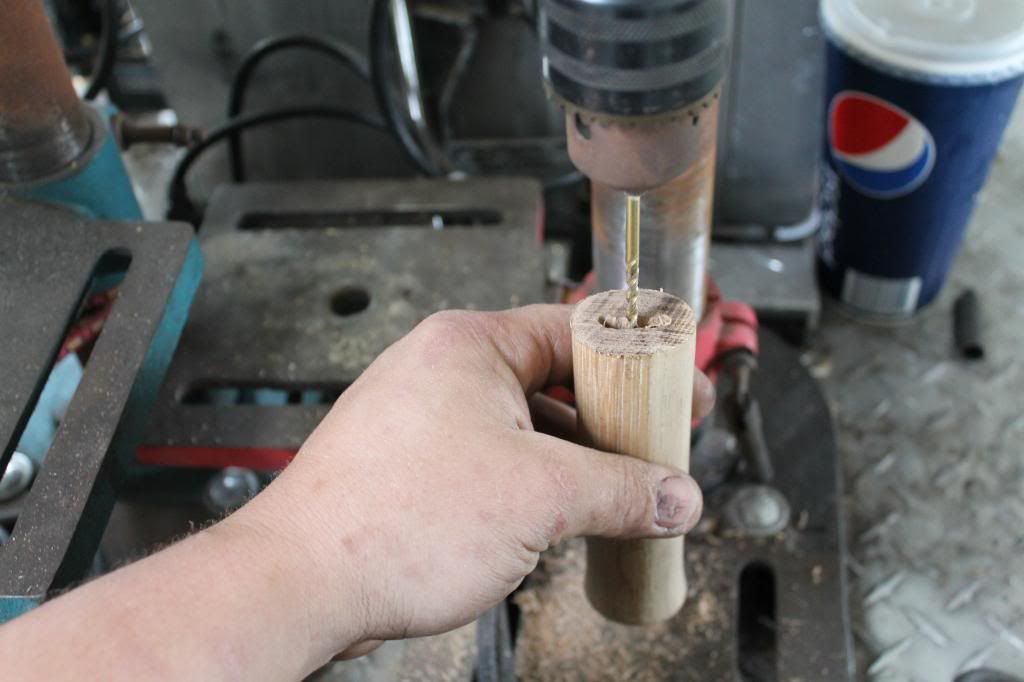
So I had a spare hammer handle in the rig and decided to use it as the starting point for the handle.

The tang on the blade was cut down to the same depth as the drill bit used to bore out the hole.
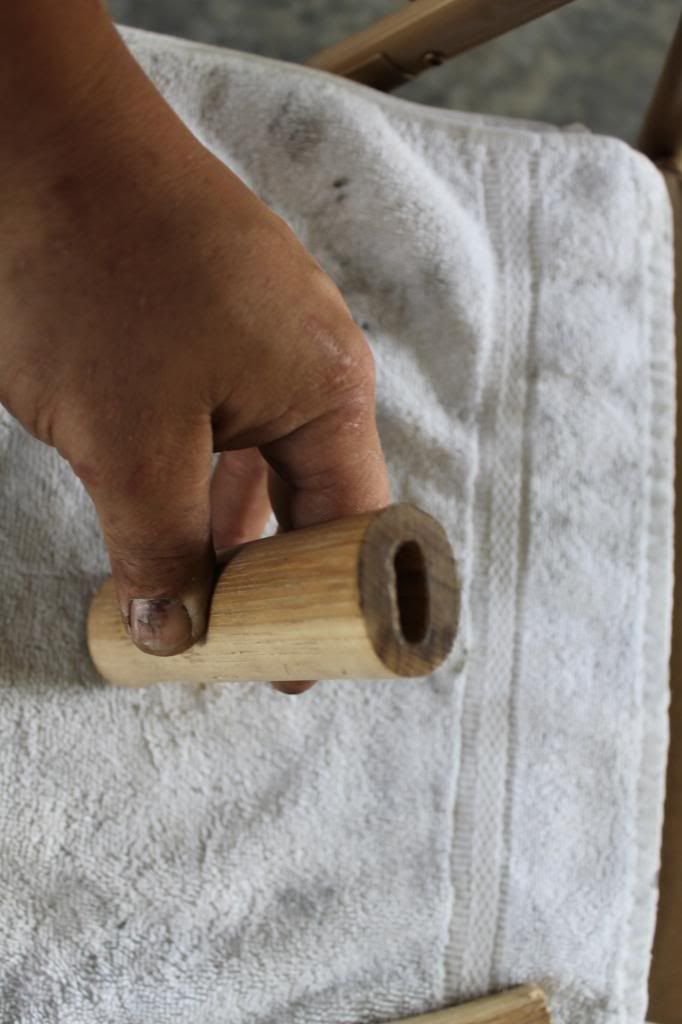
I made several pilot holes in the center of the handle and then turned on the “ H.M.M. or Human Milling Machine” ; working the bit across the groove until I had it evenly bored out.


Check the fit:

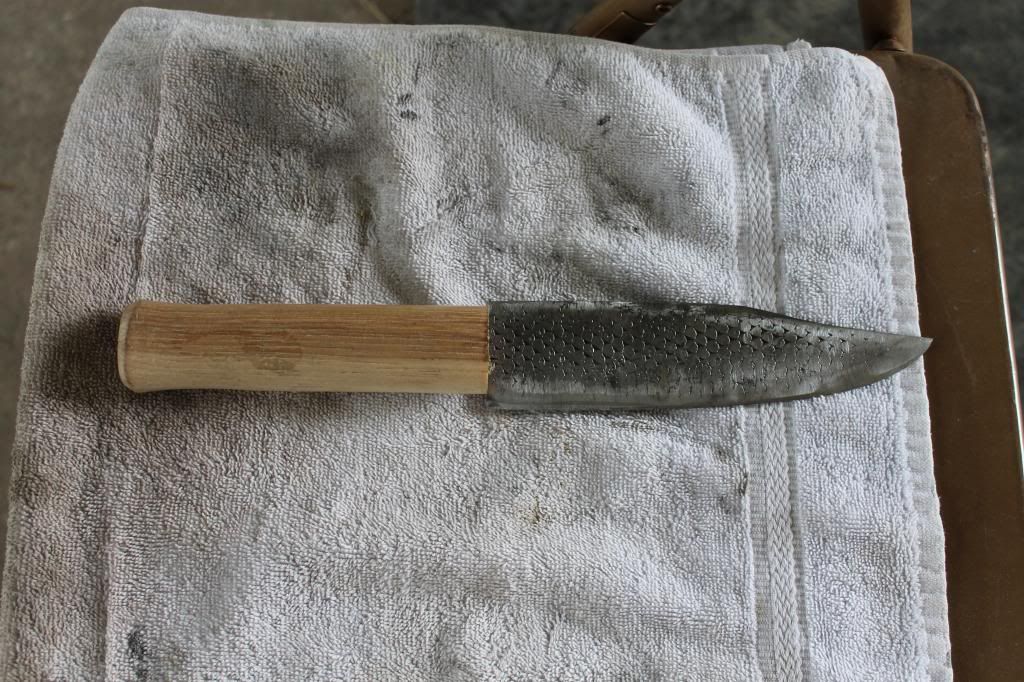
I didn’t like the way the blade sat on top of the handle so I used the finish file to notch out a catch for the lower portion of the blade.


I used a firm setting adhesive to fix the tang into the handle. Epoxy would be best but I didn’t have any on Saturday so this worked fine. Pretty self-explanatory, filled it up with adhesive, dropped in the blade , and kept the excess from getting everywhere with a towel.


while we let that cure...
Tempering the Kitchen knife blade:
The hunting knife is a “shelf sitter”. It was my rough draft but it turned out decent enough that tossing it seemed like a waste. The kitchen knife on the other hand I need to be useable and in turn it needs to be able to be sharpened. In its current state the blade is way too hard and brittle due to the hot/cold influxes it received during the forging process.
Tempering is complicated. I truthfully know almost nothing about the specifics. The basic idea is you have heated and cooled the molecules in the steel rapidly. When you quench the hot steel it condenses and the molecules are left ridged and compacted. This process is referred to as the hardening stage.
Tempering is when you bring the steel up to a certain heat slowly and then cool it off slowly. Every steel has specific tolerances for tempering, but since I don’t actually know what steel this is none of that information is very useful. A generic tempering would have to do. LOL
So I heated the forge without the knife inside it and then shut it off. It’s still plenty hot in there for a long time after so your essentially “baking” the blade and letting it cool completely naturally inside the forge.


Since this took a while I went back to the hunting knifes handling job.
I thought it looked a bit too generic so I used the half round file and carved out what the handles vison looked like in my head. It took a little while but it made a ton of difference.


The tempering was done at this point and it actually turned out pretty nice. The colors indicate what temperature the steel was brought up to. The higher it was heated the more hardness is removed. Again I don’t know the specifics but the blue areas were heated to around 600deg.F and the lighter golden areas indicate around 400deg.F. Ideally you would be evenly heated….

So buy the end of Saturday I had the Kitchen Knifes blade forged, cut, roughly ground, and tempered. The Hunting knife was forged, cut, ground, and had a basic handle.

The plain hickory color wasn’t very appealing so I did a fire treatment and then sanded back through it to give it a weathered look.


So Sunday was kind of tough because of a lot of starting and stopping, but I managed to get finished with the kitchen knife and get both knives polished up to 600 grit. I wanted to go up to 1000 grit but decided that the quality of the job didn’t merit the time it takes to polish to that level. I’ll go that far when I am totally happy with the blades finish.
To begin the handling I cut two strips of oak and used the grinder to scroll in the front section.

I ran into a problem immediately…the blade narrows so to follow the contour and run the scrolled section down and into the blade seamlessly I had to sand down the handle side in order to make a “reverse wedge”. This worked pretty well. If I had a planer it could have been more precise but it worked for today.


I stopped Saturday evening and grabbed some gel epoxy to set the handle with. I used the vice to get the best contact possible. The vices teeth would have damaged the handle so I put several layers of duct tape over it to smooth out the process.

The epoxy set up for almost two hours before I got back to the project.

The next step was pretty easy. Just grind away the overlapping wood until it matches the shape of the tang.


I wanted to add a couple of safety rivets to the handle. The epoxy is what holds the knife together but the rivets will catch and hold the blade if the epoxy were to fail. It would hold long enough for you to realize something was wrong and stop using the knife.
I used copper rivets, and the drill press to get the holes through the tool steel. It is a slow process because of how hard the steel is.


The rivits were set in epoxy as well and the excess was ground flush to the handle.

The last step was to polish out and sharpen the blades.
This took a very long time. Repetitious passes across the belt sander working my way up in belt grits. For the 400 and 600 grit wet sanding I used a sanding sponge with the paper around it and finished it by hand.

ANOTHER MISTAKE!
The darn carbon from the steel mixed with the water from the sanding and created a dye. My grand plan was to sand down the handle and finish it with Danish oil or teak oil. The stains looked really bad so I decided to do the same fire treatment that was used for the hunting knife. It was a disappointing moment but it turned out pretty good in the end.
So lesson learned. Next time I will finish the blade before I handle. Luckily this was just oak, and not an expensive exotic wood handle…


So the long and short of the rest of the day was polishing when I had a minute, and working the rest.


For my first knives I couldn’t be happier. They are sharp enough to shave the hair off my arm and functionally useful.
My biggest disappointment is in the blades, the forging marks drive me crazy. I know better…I was excited and forgot to brush the slag off the steel before I went to work on it. The slag pops loose and then gets driven back into the blade causing the divots that are left… oh well; I know the solution and will do it better next time.


Thanks for checking it out!
I hope this was enjoyable and mildly informative.
JP
Last edited by Florida83FSJCherokee on Thu May 16, 2013 7:57 pm, edited 1 time in total.
Education through restoration thread link:
http://www.fsjnetwork.com/forum/viewtop ... =12&t=1366
Blacksmithing thread link:
http://www.fsjnetwork.com/forum/viewtop ... f=6&t=1381
http://www.fsjnetwork.com/forum/viewtop ... =12&t=1366
Blacksmithing thread link:
http://www.fsjnetwork.com/forum/viewtop ... f=6&t=1381
-
AwesomeJ10
- Posts: 3031
- Joined: Sat Aug 27, 2011 10:26 am
- Location: Off the grid on Storm Mountain Colorado
- Contact:
-
Strode182
- Posts: 374
- Joined: Sat Jun 09, 2012 8:38 am
- Location: Littleton, Co
Re: Blacksmith forging project thread idea (pic heavy)
Nice work, JP! Very cool.
Why do you say tempering takes the hardness out of it? This confuses me....
Why do you say tempering takes the hardness out of it? This confuses me....
-
Florida83FSJCherokee
Topic author - Posts: 196
- Joined: Sat Mar 09, 2013 7:53 pm
- Location: Lakeland , Central Florida
Re: Blacksmith forging project thread idea (pic heavy)
Strode182 wrote:Nice work, JP! Very cool.
Why do you say tempering takes the hardness out of it? This confuses me....
When I say it softens the metal I'm talking about changing how tightly the carbon molecules are packed into the steel.
When the steel is heated and quenched quickly the molecules shrink together super tight. In turn making the density of the steel greater. The more density the harder and ridged the steel becomes. Is weird but steel actually becomes brittle in this hardened state. If you were to hit the blade on a hard surface it would break. Usually its a clean snap. This happens because there is no flexibility in the super hardened state.
When you temper the steel the heat level is brought up to a lower temperature and ideally maintained there for a set length of time. The higher the heat level and the longer the saturation time the softer the steel should become. If I knew what the steels number/carbon density was I could research and find out the suggested length of time and the correct temperature to bake the blade to get the ideal flexibility and softness.
When its heated the molecules relax and spread out. The expansion lowers the density and allows the steel to have some flexibility instead of being totally ridged.
Because the temp is brought down over a long period of time there is not shock to the molecules and they stay expanded.
Flexibility in a knife is important for the obvious reason that as you cut an object or strike an object the force is transferred to the blade and it needs to have some absorption ability.
The softness becomes important when your trying to sharpen the blade. I'm pretty sure my wife isn't gonna let me keep a belt sander on the kitchen counter so the steel needs to be soft enough to let the knife hone put the edge back on it when needed.
Keep in mind I'm using the word soft but its still very hard. Just files away easily instead of being so dense it requires high grit and rpm's to sharpen.
I hope this helped.
As I said before, metallurgy is a science and takes alot of patience to get correct.
Last edited by Florida83FSJCherokee on Thu May 16, 2013 8:39 pm, edited 1 time in total.
Education through restoration thread link:
http://www.fsjnetwork.com/forum/viewtop ... =12&t=1366
Blacksmithing thread link:
http://www.fsjnetwork.com/forum/viewtop ... f=6&t=1381
http://www.fsjnetwork.com/forum/viewtop ... =12&t=1366
Blacksmithing thread link:
http://www.fsjnetwork.com/forum/viewtop ... f=6&t=1381
-
lindel
- Posts: 923
- Joined: Tue Oct 04, 2011 2:47 pm
- Location: Tool, TX
Re: Blacksmith forging project thread idea (pic heavy)
Very nice work overall JP. I do like a knife that will willingly take an edge, but still be hard enough to keep it for a while. I absolutely cannot stand Buck knives for that reason. They will keep an edge, if you can ever get one on it.
I wouldn't have thought of using a file for a "blank", but it makes good sense.
I wouldn't have thought of using a file for a "blank", but it makes good sense.
Lindel
-
ScottsMojo
- Posts: 753
- Joined: Fri Mar 02, 2012 7:37 pm
- Location: Casa de Ducati North
- Contact:
Re: Blacksmith forging project thread idea (pic heavy)
Very nice! 
The tool marks give it character, something that a mass produced knife is sorely lacking...
The tool marks give it character, something that a mass produced knife is sorely lacking...
-
Florida83FSJCherokee
Topic author - Posts: 196
- Joined: Sat Mar 09, 2013 7:53 pm
- Location: Lakeland , Central Florida
Re: Blacksmith forging project thread idea (pic heavy)
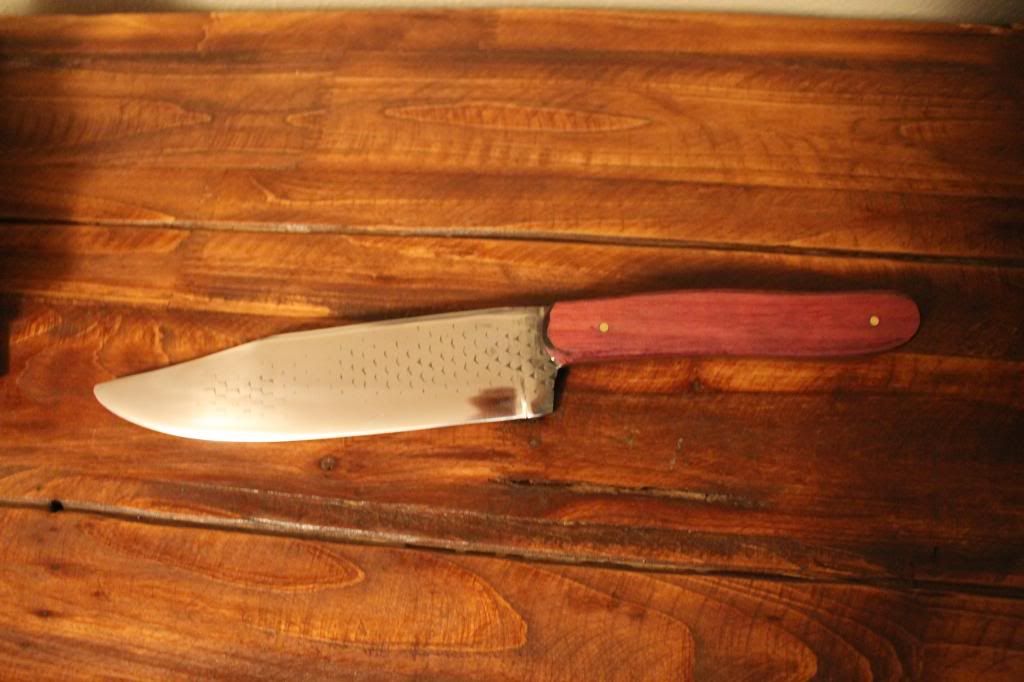
ok, so this isnt a new project but instead an update to the last knife project.
I decided to try another go at the process to see if i could do a better job.
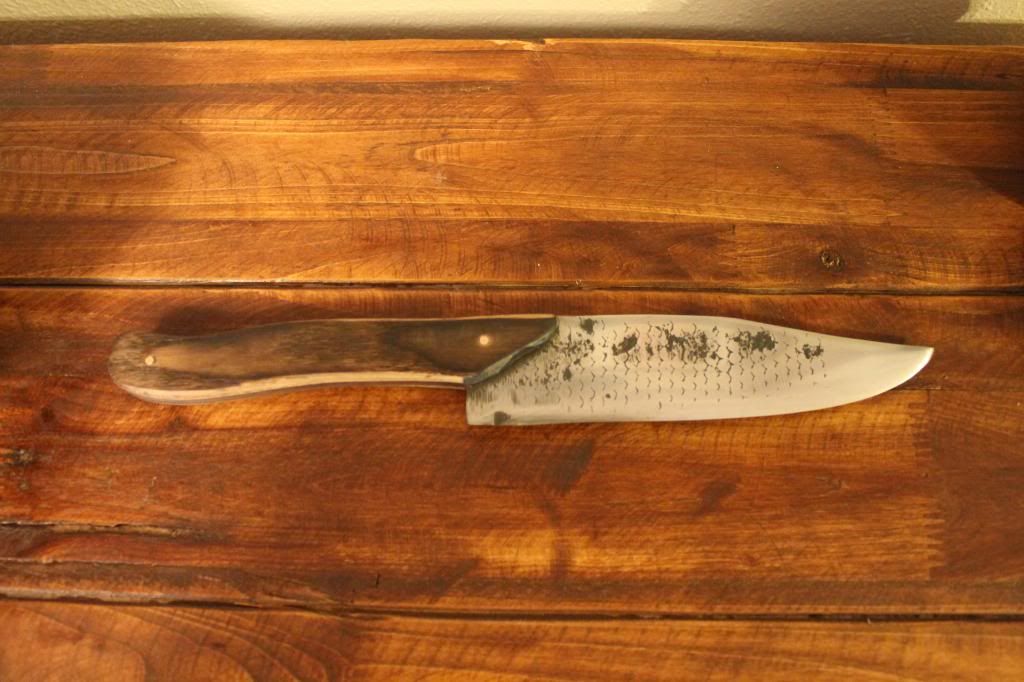
Anyway, same process as before, but I took great care in keeping the steel clean at all times and finished the polishing all the way up to 2500grit wet sand. The buffer took it the rest of the way and I couldnt be happier. I rememberd not to handle it untill after i polished it this time and got some brass rod for the rivits instead of copper.
So here she is!
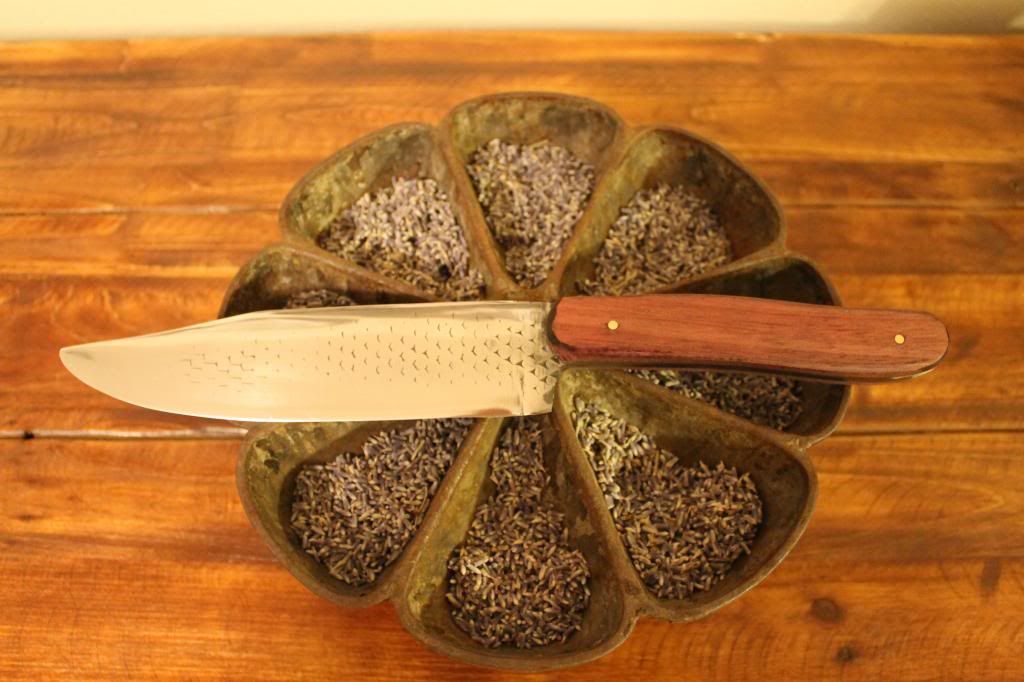
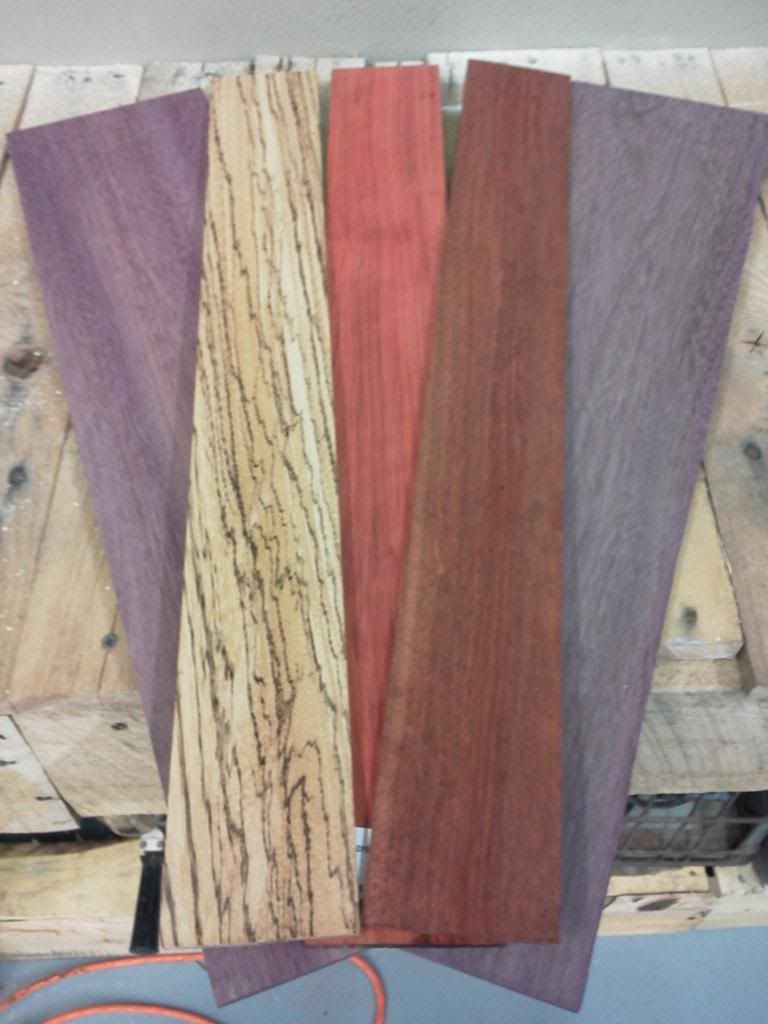
Stopped at WoodCraft and picked up some beautiful exotic hard woods to build the handles out of. For this project I used the purple heart. The others are zebra wood, Paduke, and Bloodwood.
The blades came out so much cleaner...

Thanks for checking it out.
Im working on a turning jig for making hooks and scroll designs. The hope is to have it refined enough to be able to replicate things and produce alot of the same design. Ive seen some nice ones on ebay but Im trying to make mine out of recylcled materials like 1" railroad plate, tie spikes, and scrap round tubing...guess time will tell!
JP
I decided to try another go at the process to see if i could do a better job.
Anyway, same process as before, but I took great care in keeping the steel clean at all times and finished the polishing all the way up to 2500grit wet sand. The buffer took it the rest of the way and I couldnt be happier. I rememberd not to handle it untill after i polished it this time and got some brass rod for the rivits instead of copper.
So here she is!

Stopped at WoodCraft and picked up some beautiful exotic hard woods to build the handles out of. For this project I used the purple heart. The others are zebra wood, Paduke, and Bloodwood.

The blades came out so much cleaner...


Thanks for checking it out.
Im working on a turning jig for making hooks and scroll designs. The hope is to have it refined enough to be able to replicate things and produce alot of the same design. Ive seen some nice ones on ebay but Im trying to make mine out of recylcled materials like 1" railroad plate, tie spikes, and scrap round tubing...guess time will tell!
JP
Education through restoration thread link:
http://www.fsjnetwork.com/forum/viewtop ... =12&t=1366
Blacksmithing thread link:
http://www.fsjnetwork.com/forum/viewtop ... f=6&t=1381
http://www.fsjnetwork.com/forum/viewtop ... =12&t=1366
Blacksmithing thread link:
http://www.fsjnetwork.com/forum/viewtop ... f=6&t=1381