1970 Gladiator 1 Ton 6BT 12V Cummins Build

For everything related to converting and up keeping diesel engines in an FSJ
Post Reply
User avatar

Topic author
Resbum
Posts: 466
Joined: Fri Jun 08, 2012 9:45 am
Location: North East Oregon

Re: 1970 Gladiator 1 Ton 6BT 12V Cummins Build

Post by Resbum »

.
Mocking Up Shifter Locations

From the passenger side with everything positioned.
Image

This picture shows where the knobs for the transfer case and trans shifter will be. The transfer case twin-stick assembly is actually going to get cut up and modified, so it will mount properly. Nobody makes an assembly for my combo of trans and transfer case. BJ's Offroad made me a super duper deal on this assembly because it was a proto type from when they were developing their twin stick.
Image

This shows where the transfer case shifter boot and trans shifter housing will be.
Image
Last edited by Resbum on Tue Apr 09, 2013 7:24 am, edited 2 times in total.
Originally Posted by Resbum
"What year is my truck?... Which part?" Build thread- http://www.fsjnetwork.com/forum/viewtop ... 290#p18290
User avatar

Topic author
Resbum
Posts: 466
Joined: Fri Jun 08, 2012 9:45 am
Location: North East Oregon

Re: 1970 Gladiator 1 Ton 6BT 12V Cummins Build

Post by Resbum »

It's been a long three days trying to get everything fitted into their final spots on the firewall, but the heater and wipers now have their mounting points installed.

I installed rivet nuts for things like mounting the heater to the firewall, mounting the wiper motor, mounting the trans shifter to the tunnel, etc. Instead of buying the $200 tool made to suck down the rivet nuts I just cobbled together a combo of nuts, bolts, washers, and wrenches and sucked 'em down that way. I've never used rivot nuts before. These things are slick and I'll definitely remember them in the future.
Image

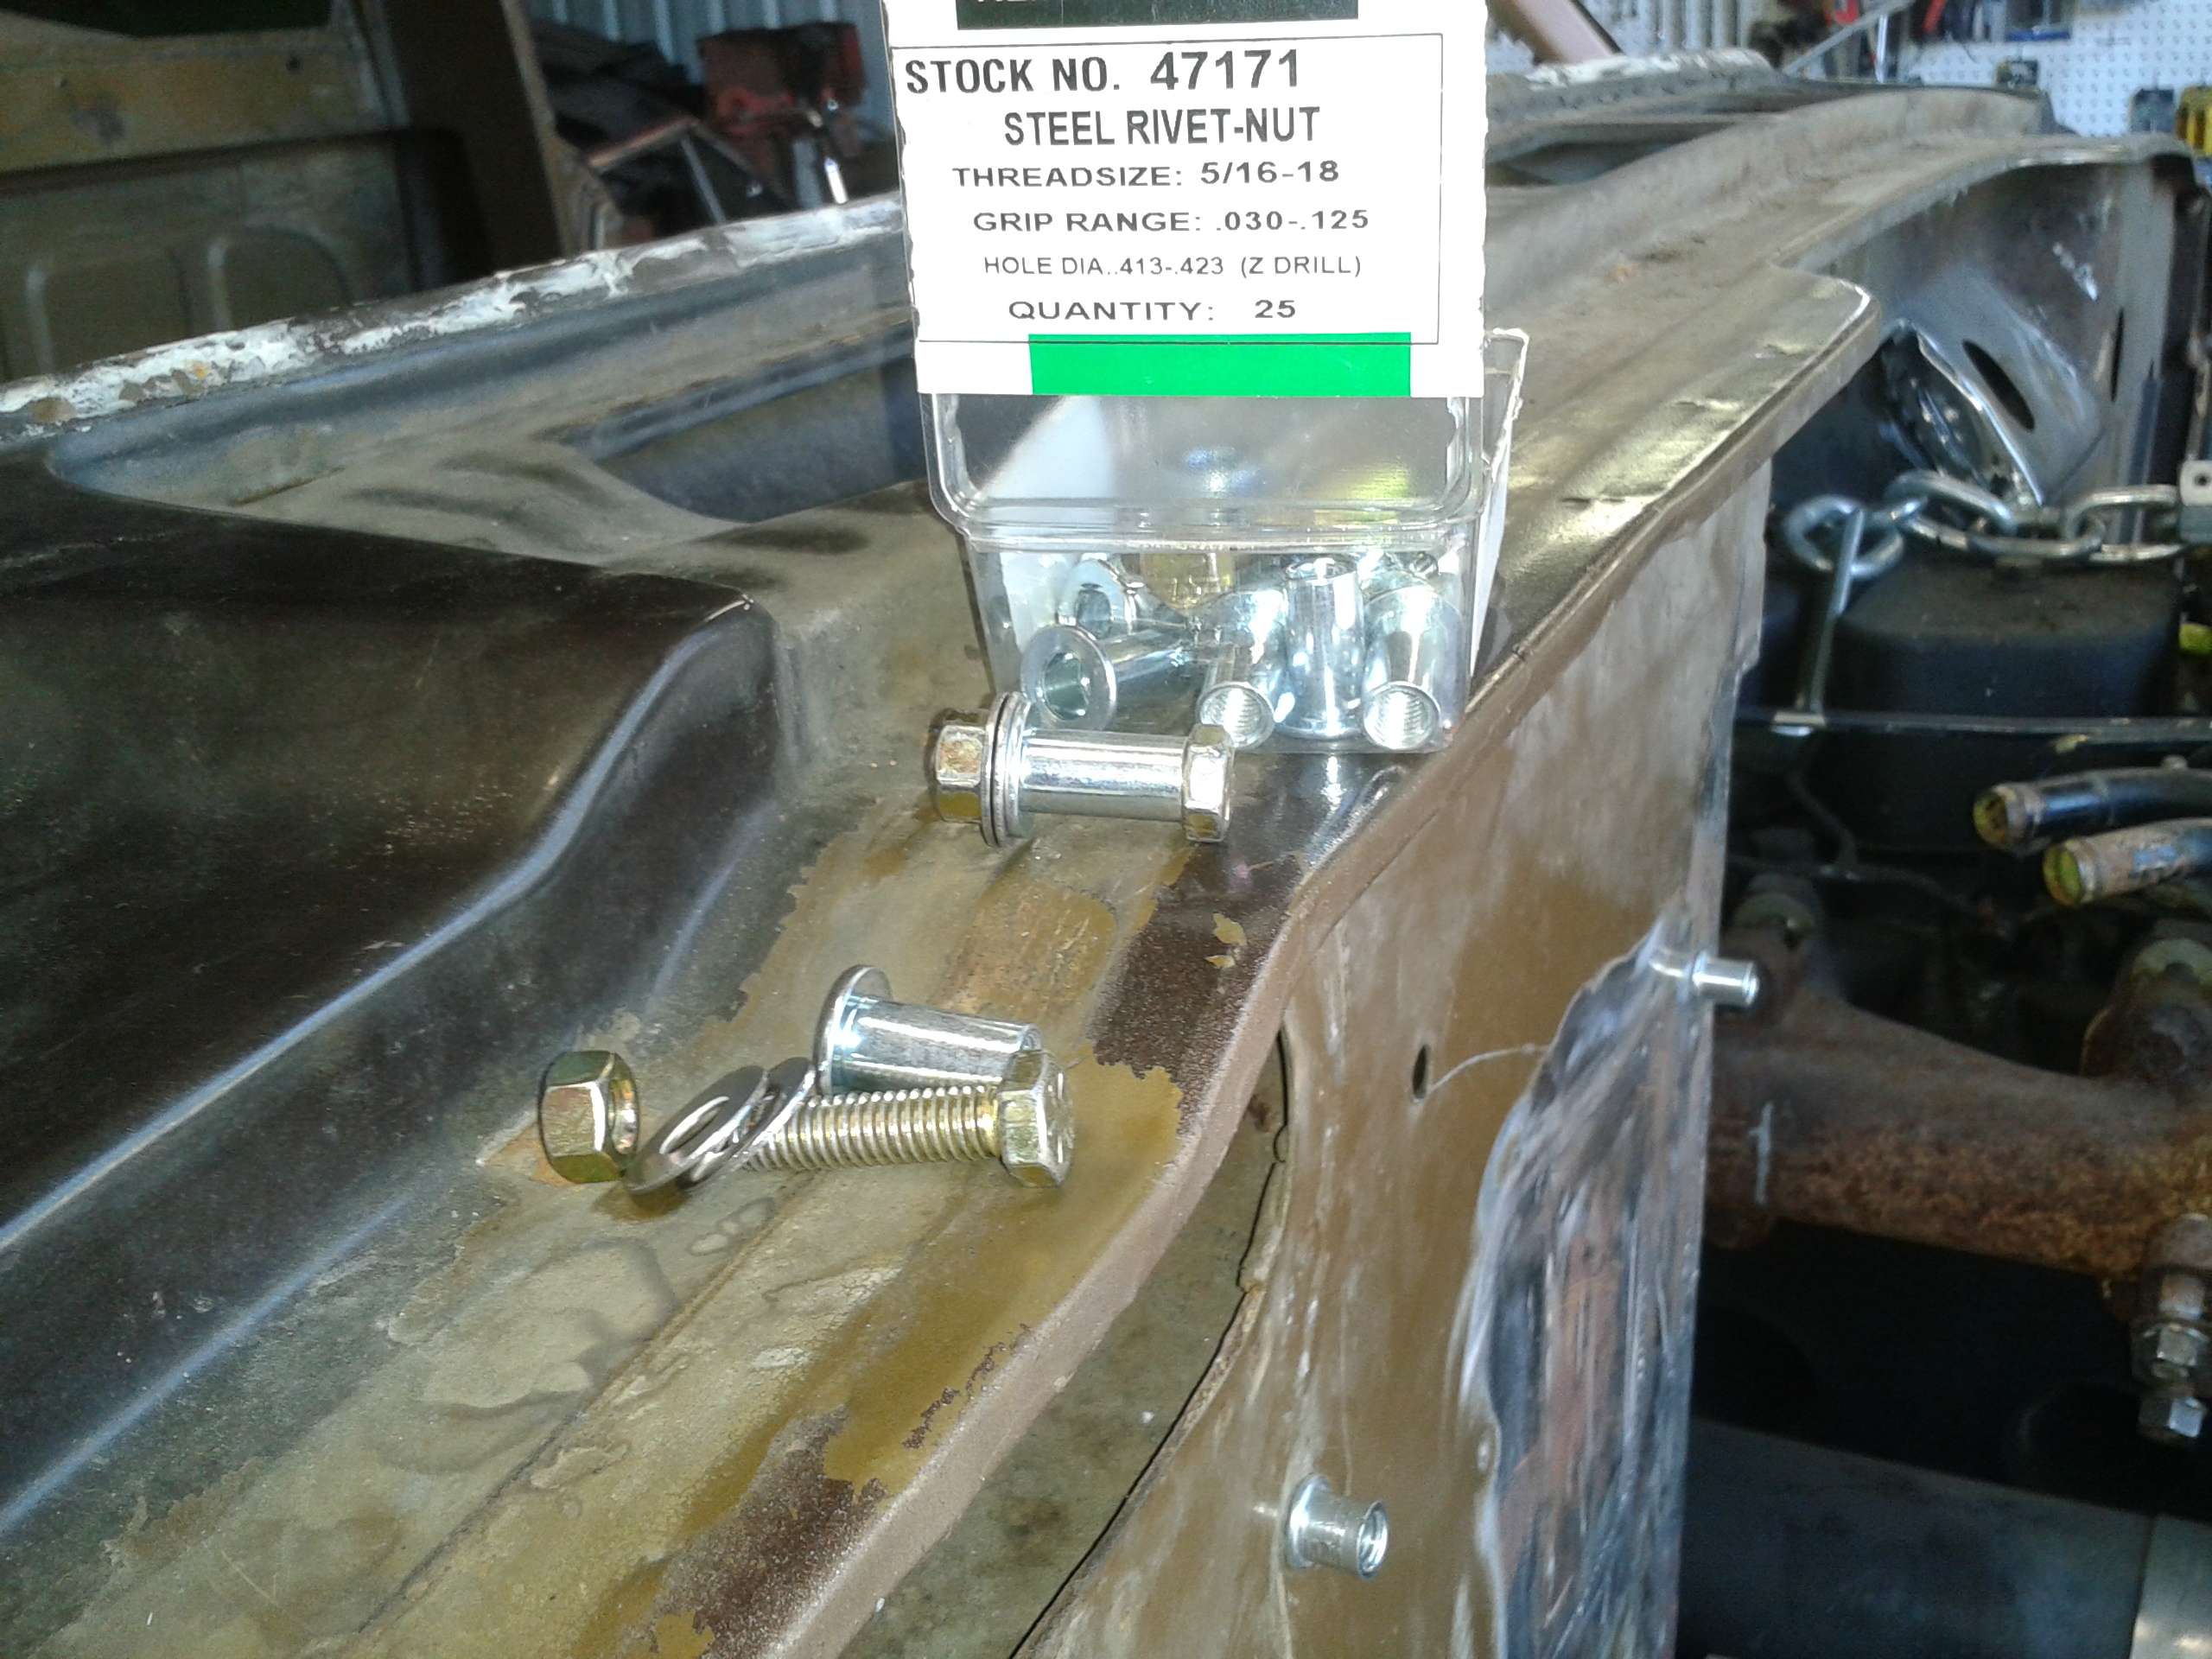
It took many trips to the store, eight bags of bolts, rivet nuts, sheetmetal screws, washers, and two different taps. All my pre-fit pieces fit really well. Trying to get the fasteners into all the blind, tight areas turned out to be ONE GIANT P.I.T.A.

The wipers
Image

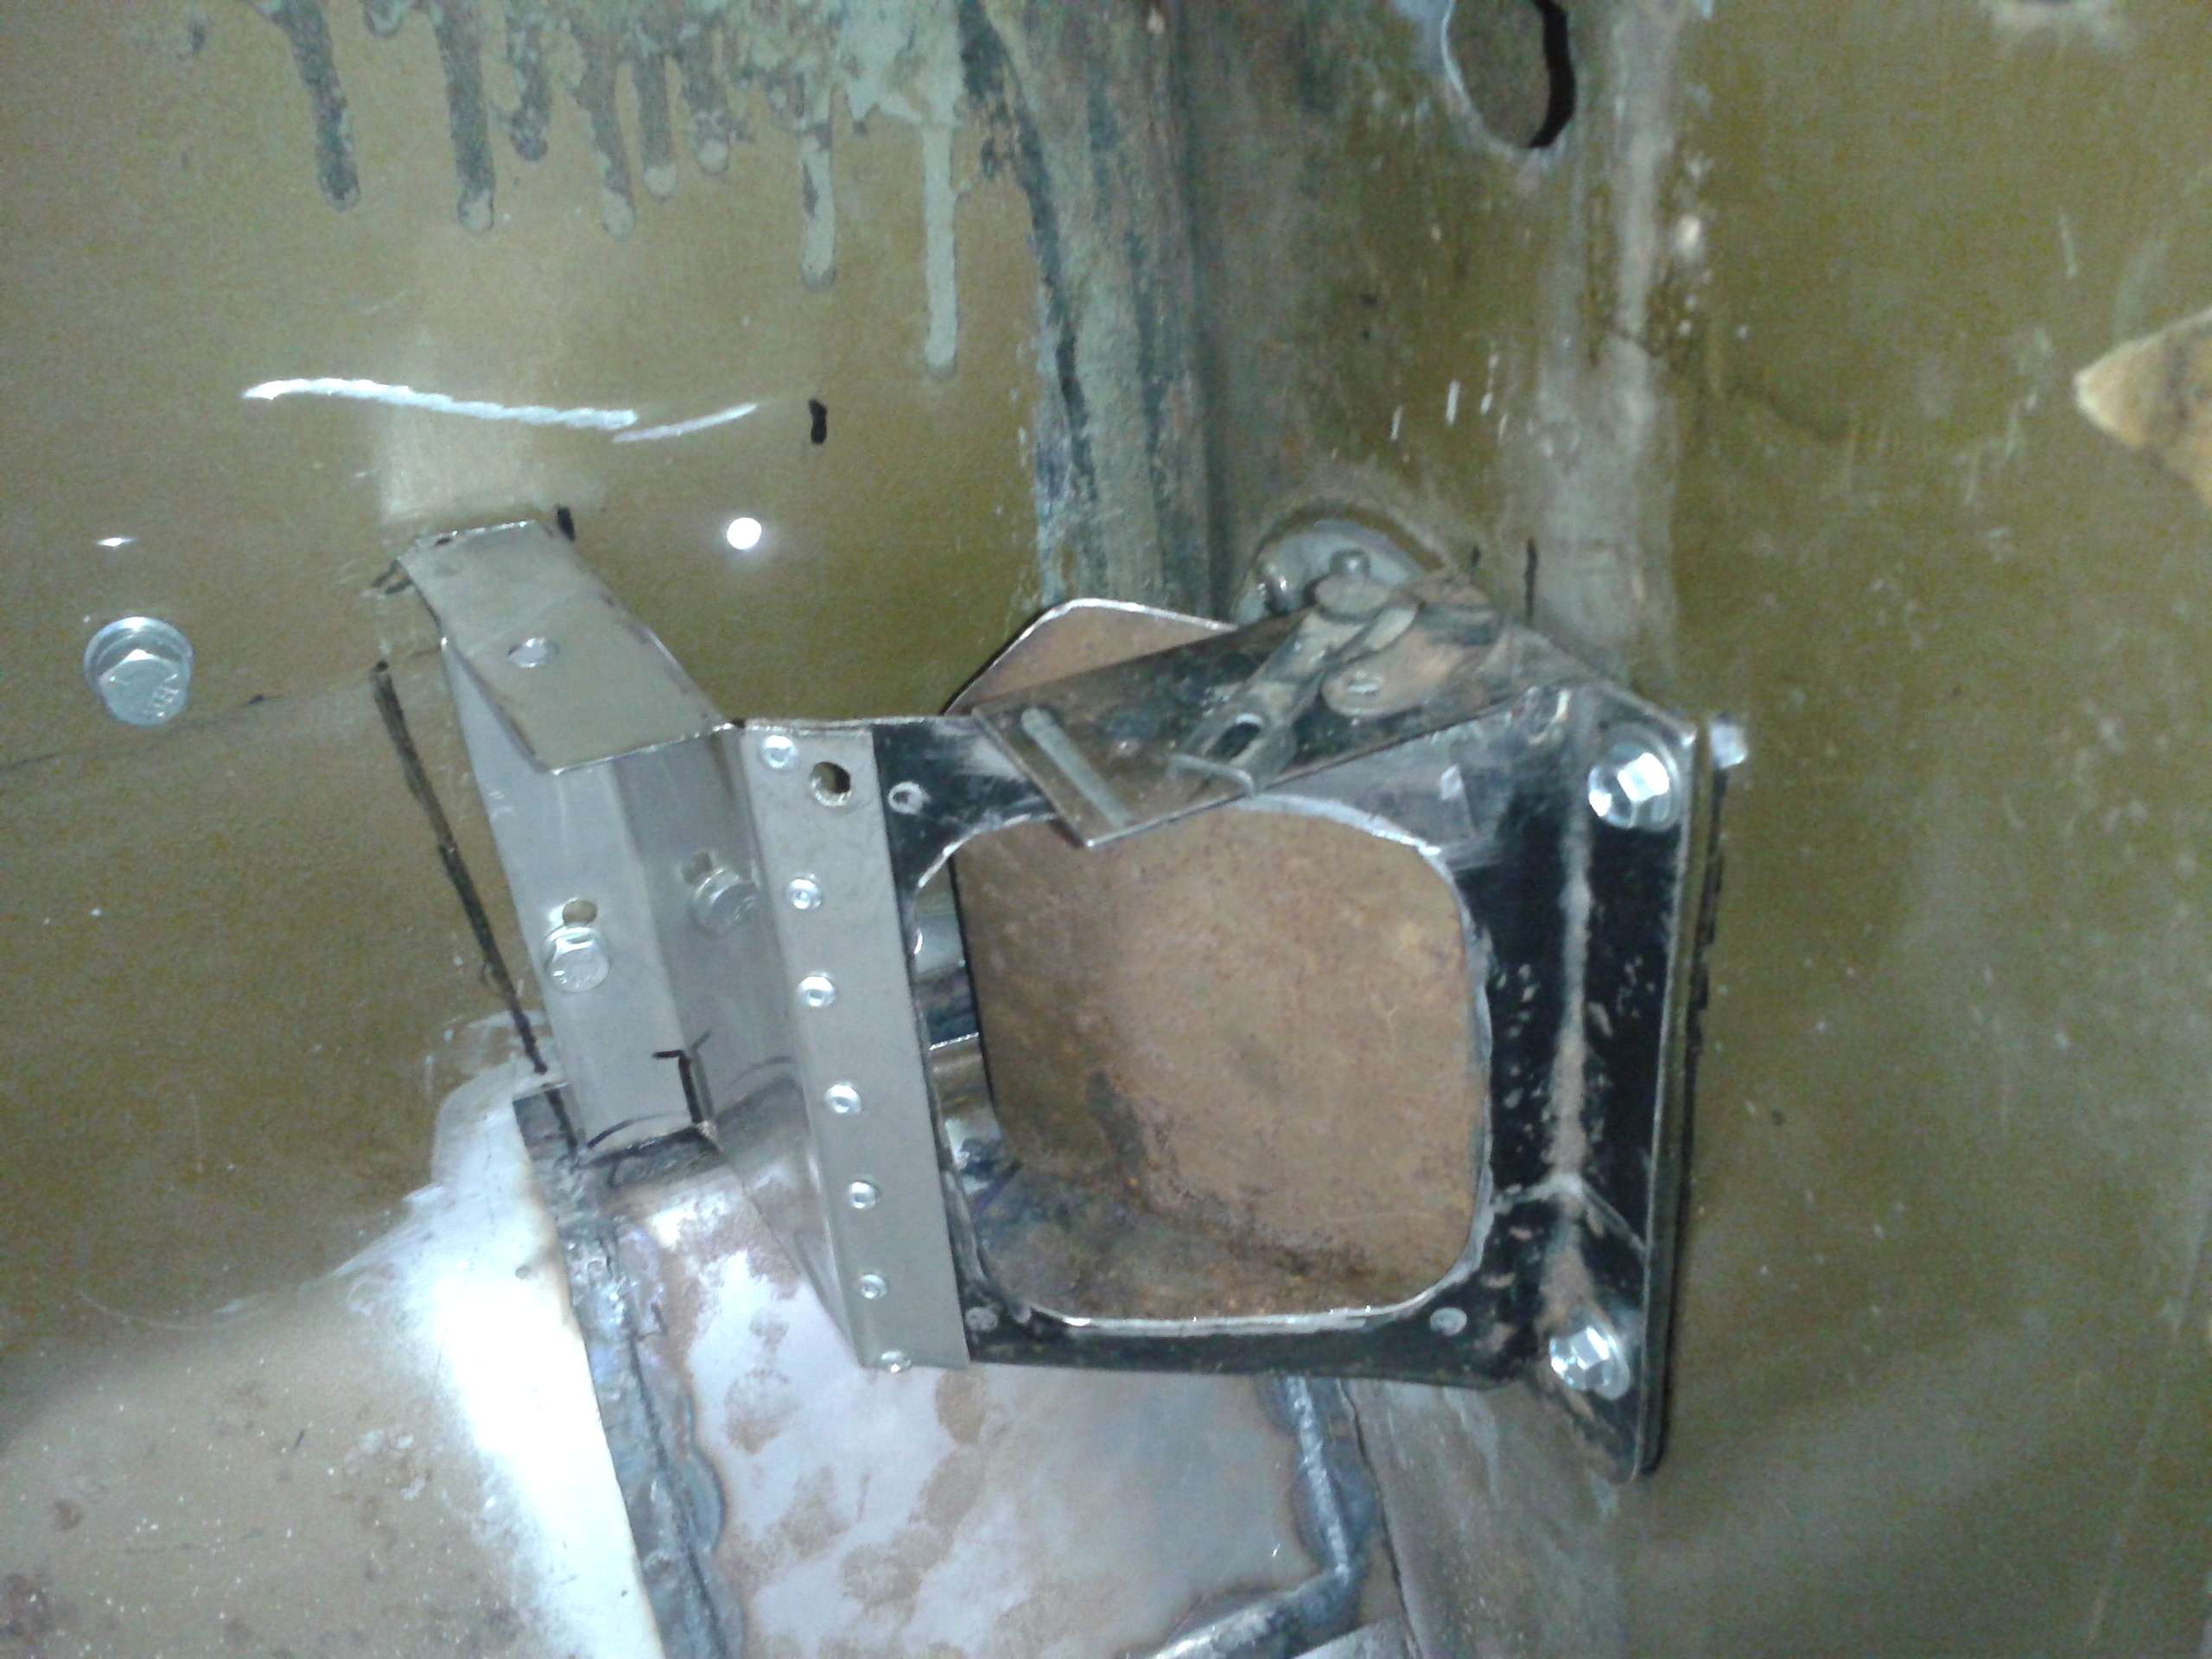
I made this out of a bunch of the old parts from the original Jeep heater. It mounts over the old passenger side foot fresh air vent. It will be a cable controlled flap that will let me choose variable fresh/recirculation air.
Image

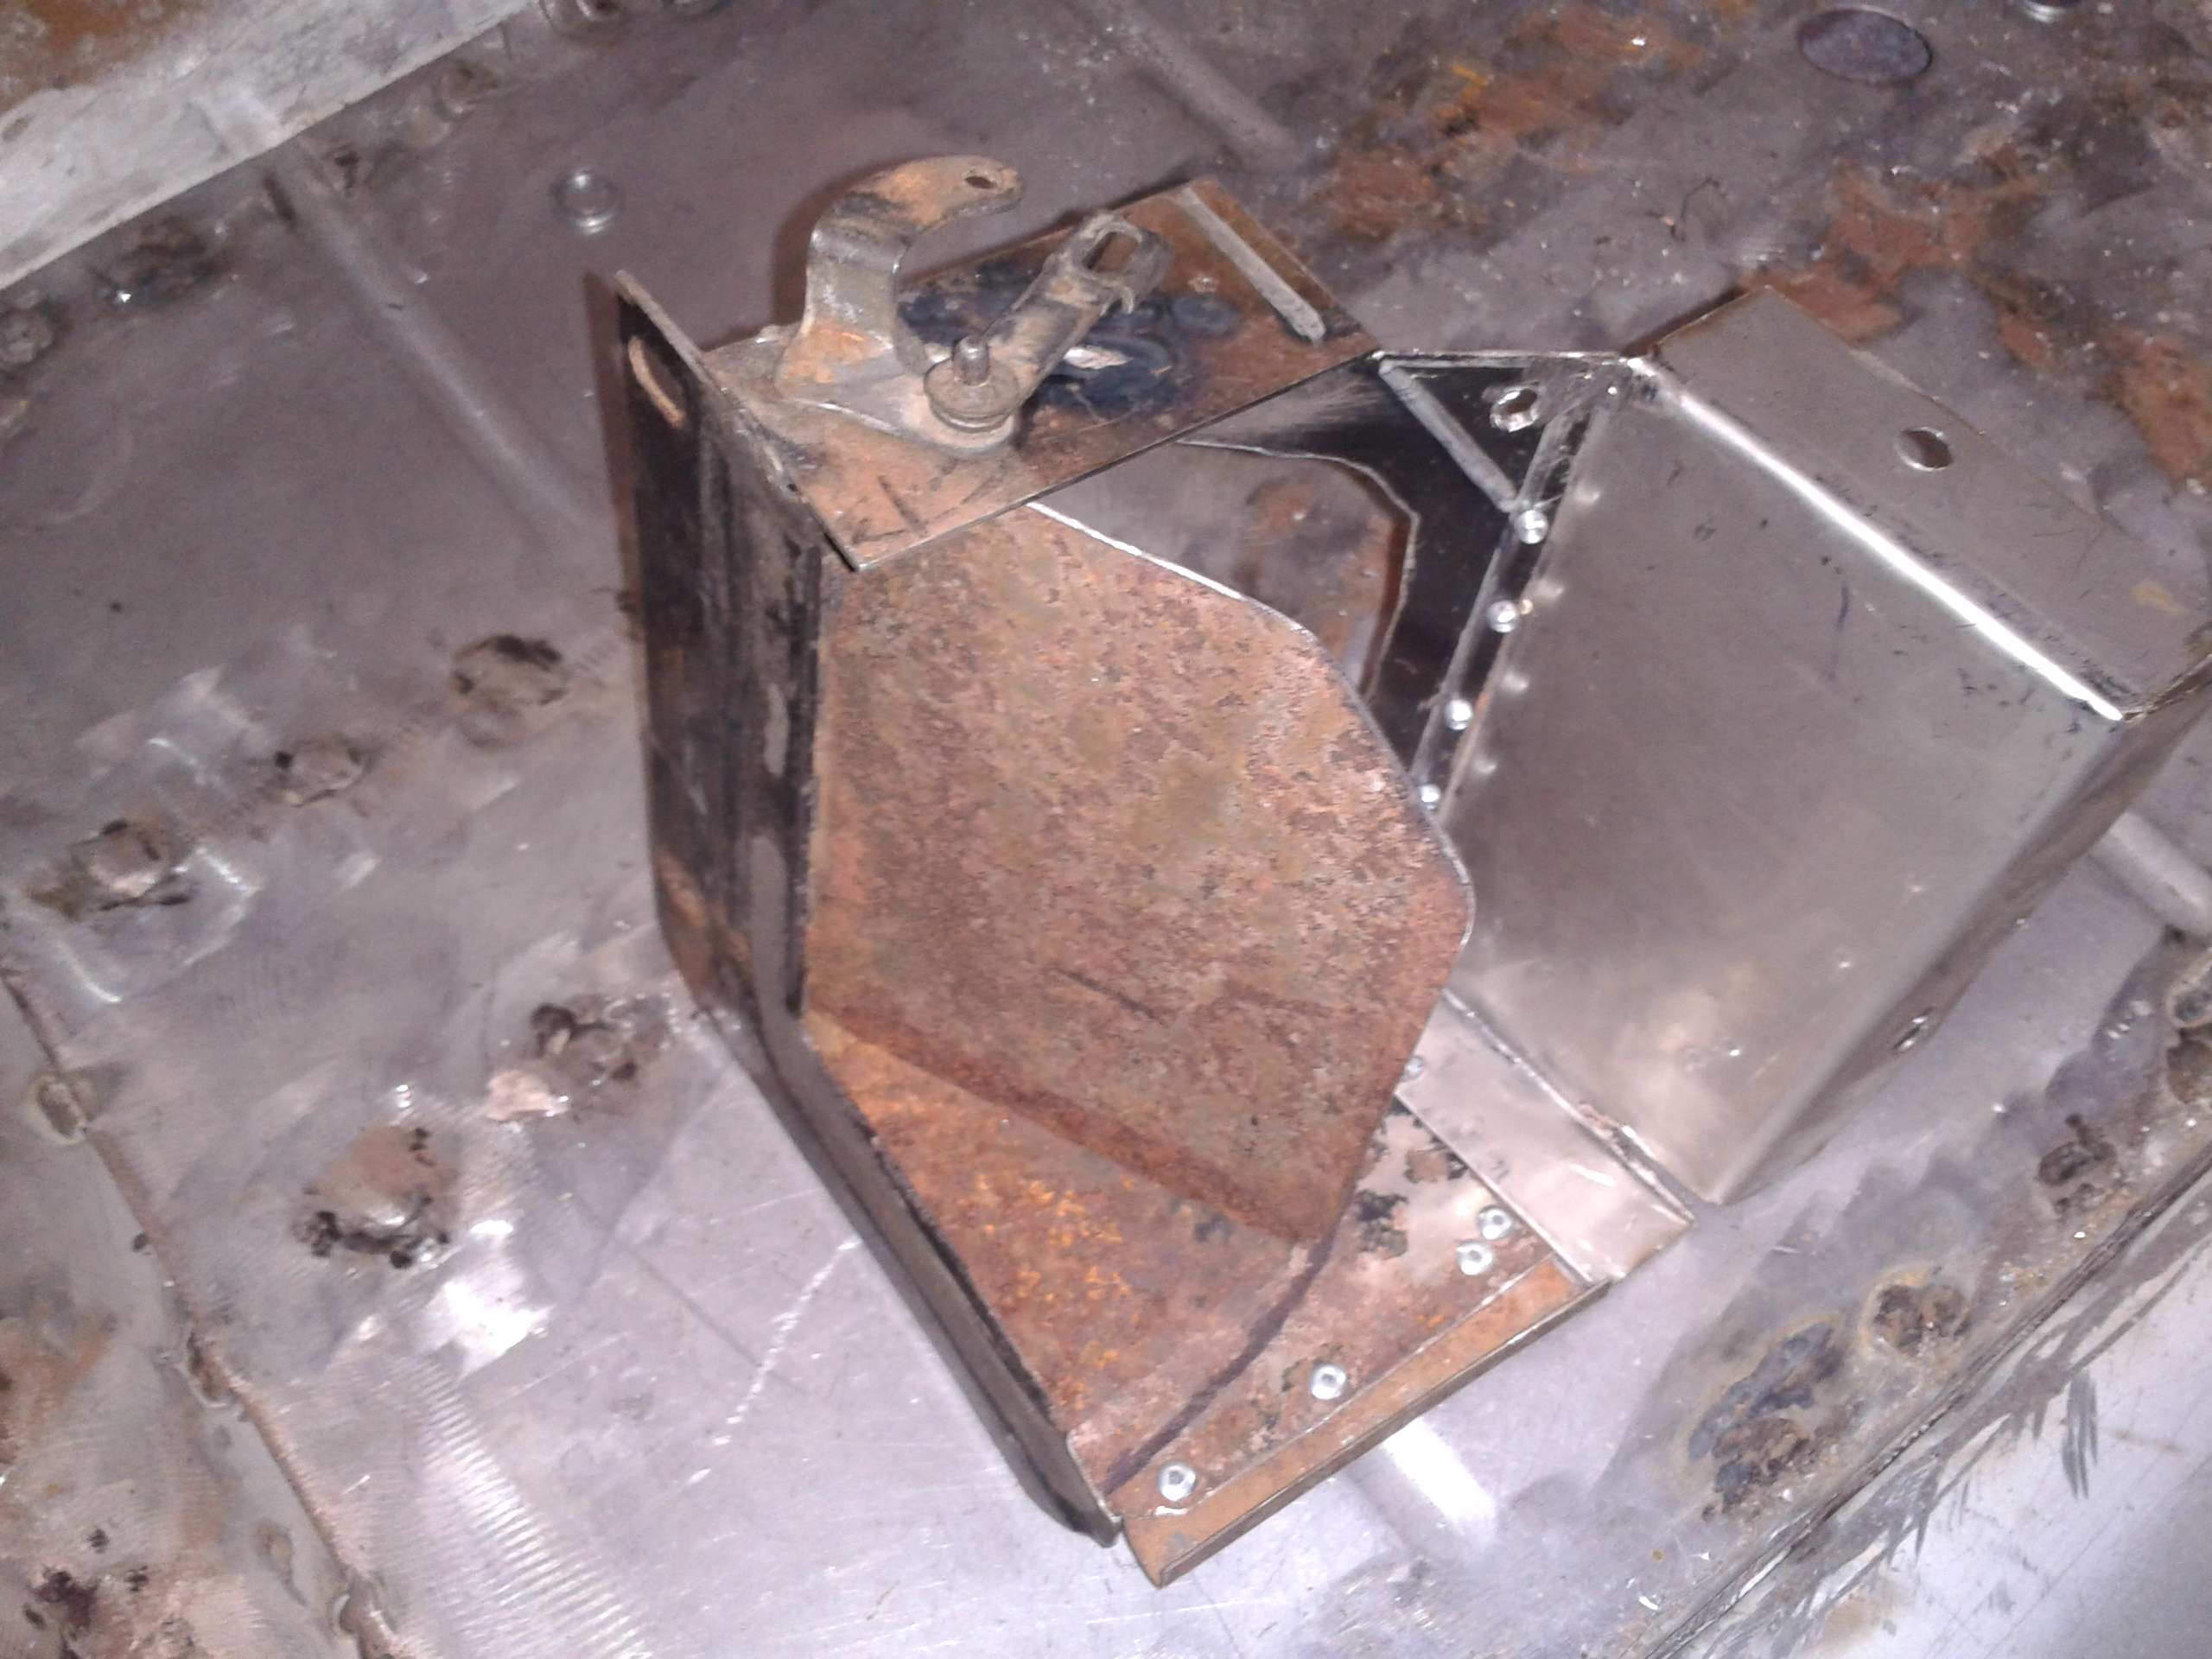
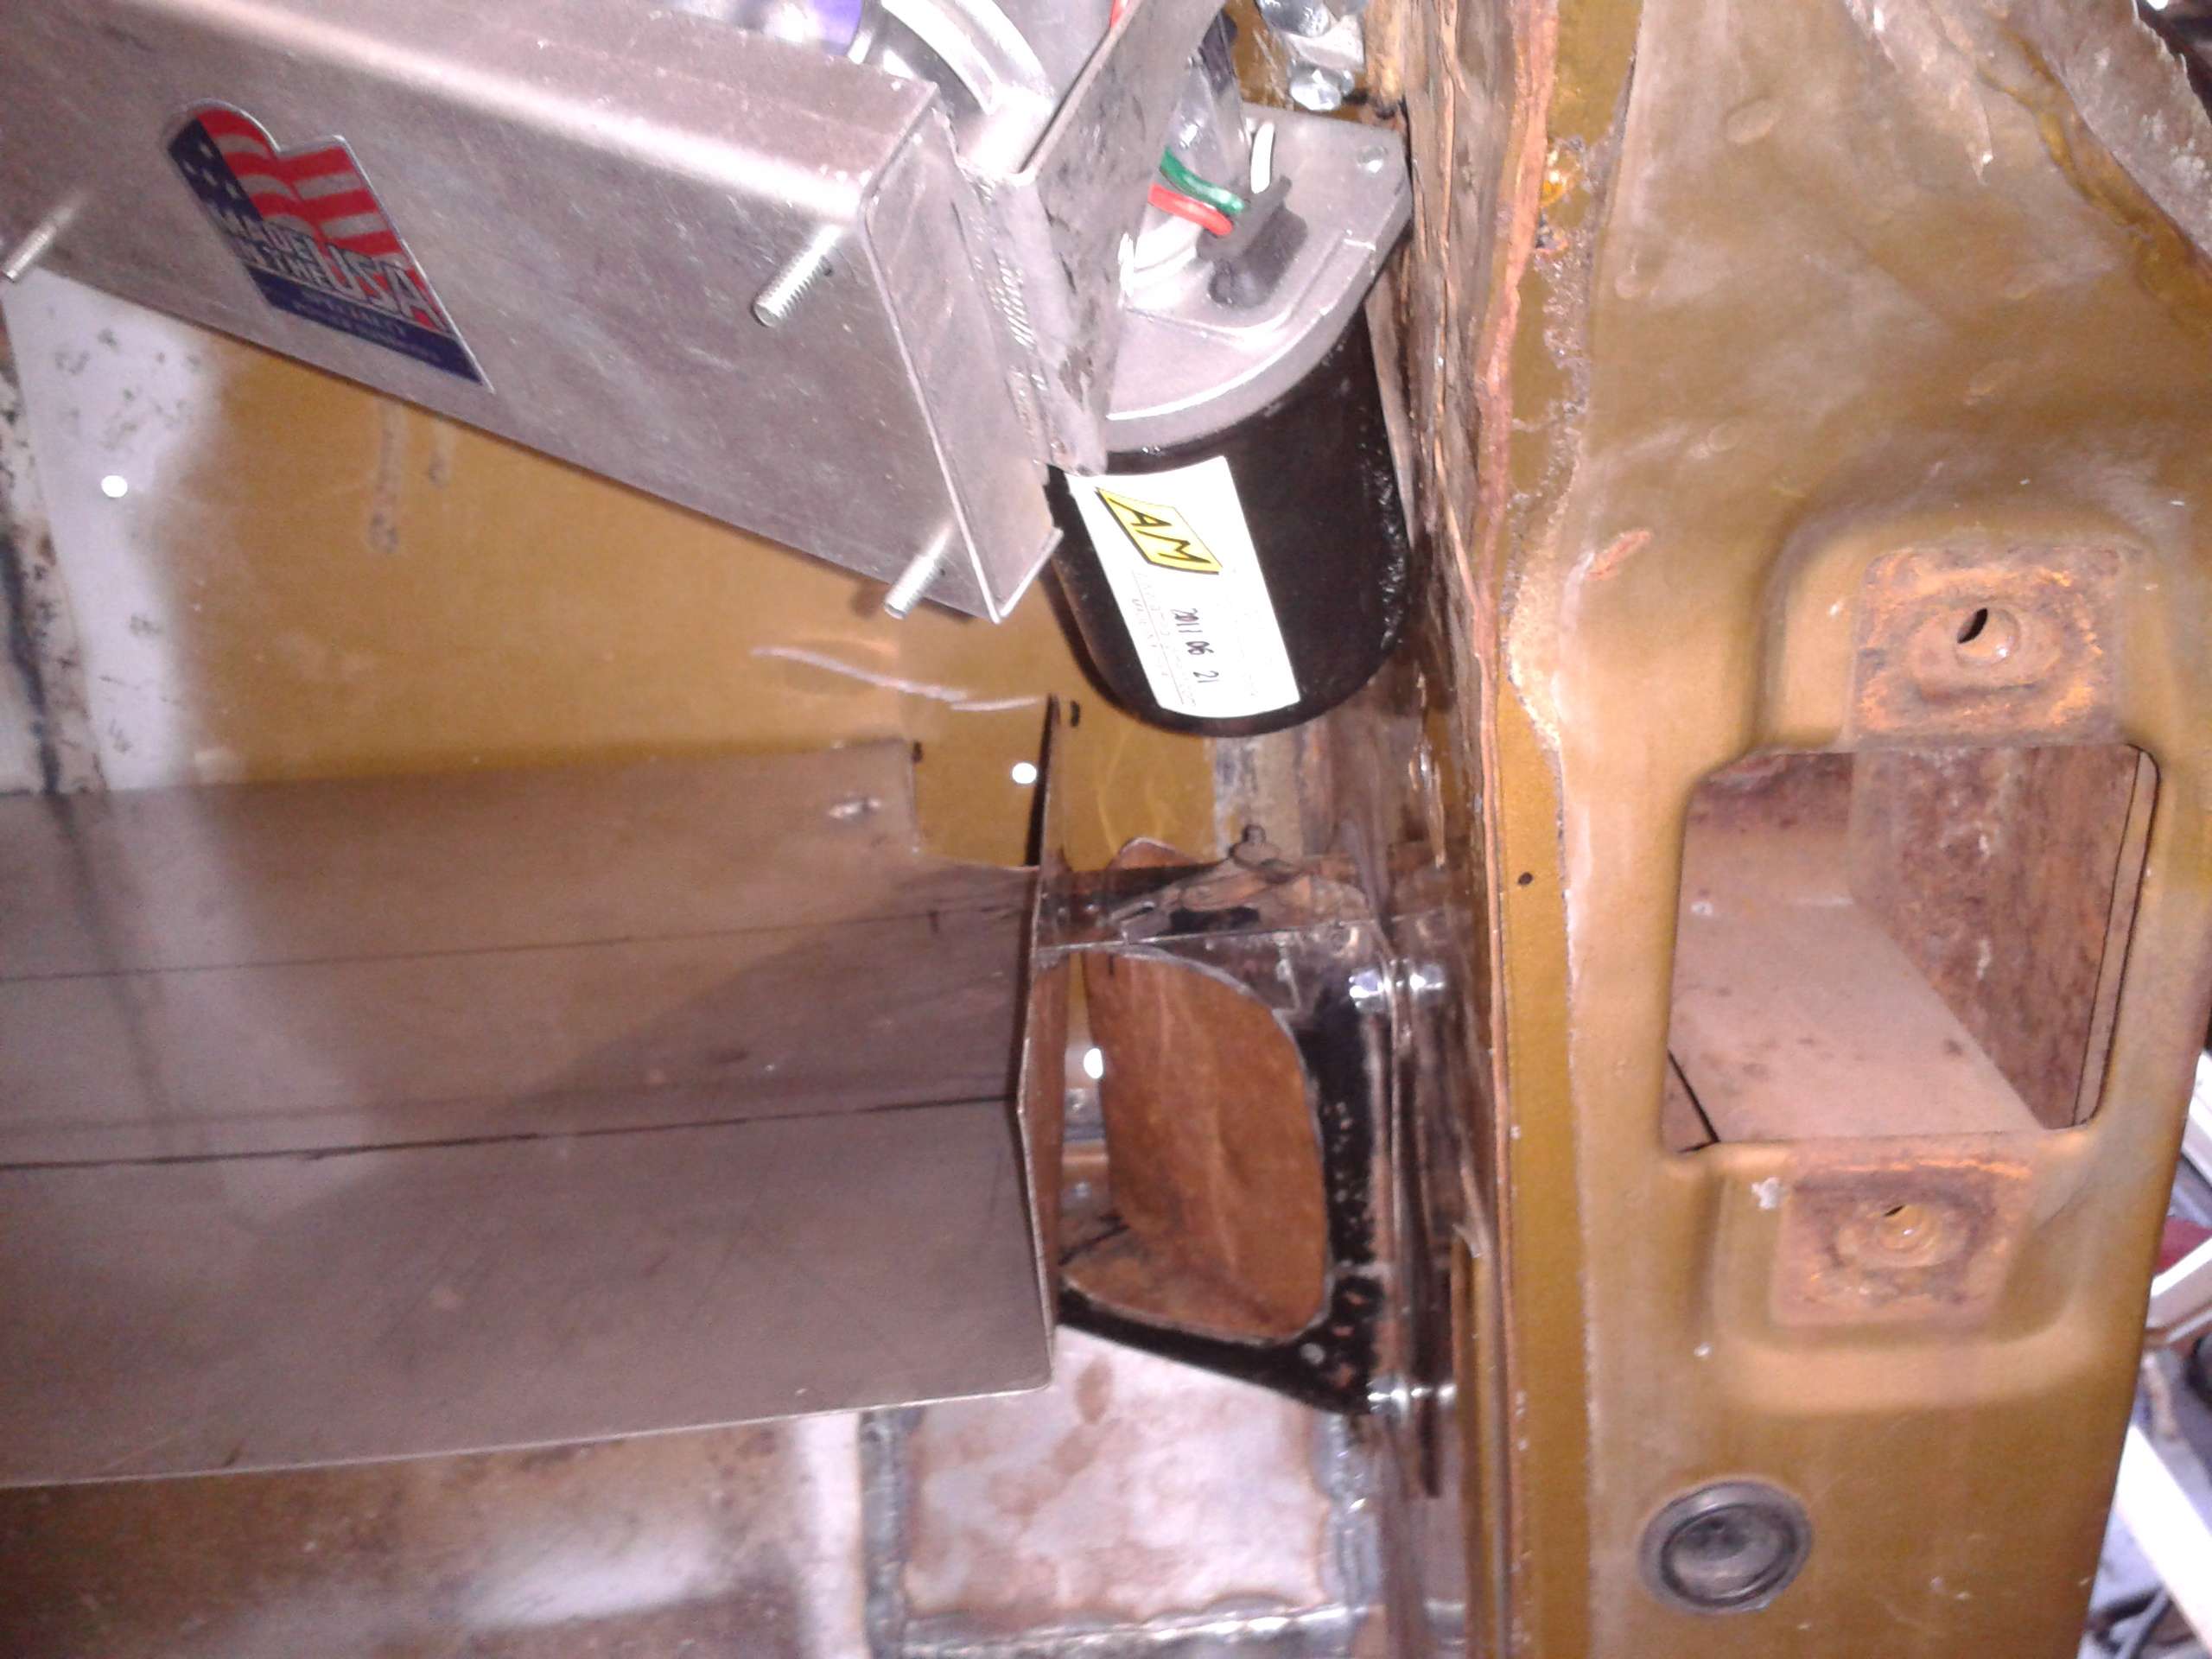
Flap mounted over old foot air outlet. Air will come in through a combination of either opening, travel upwards, then behind the heater housing to the squirel cage fan inlets.
Image

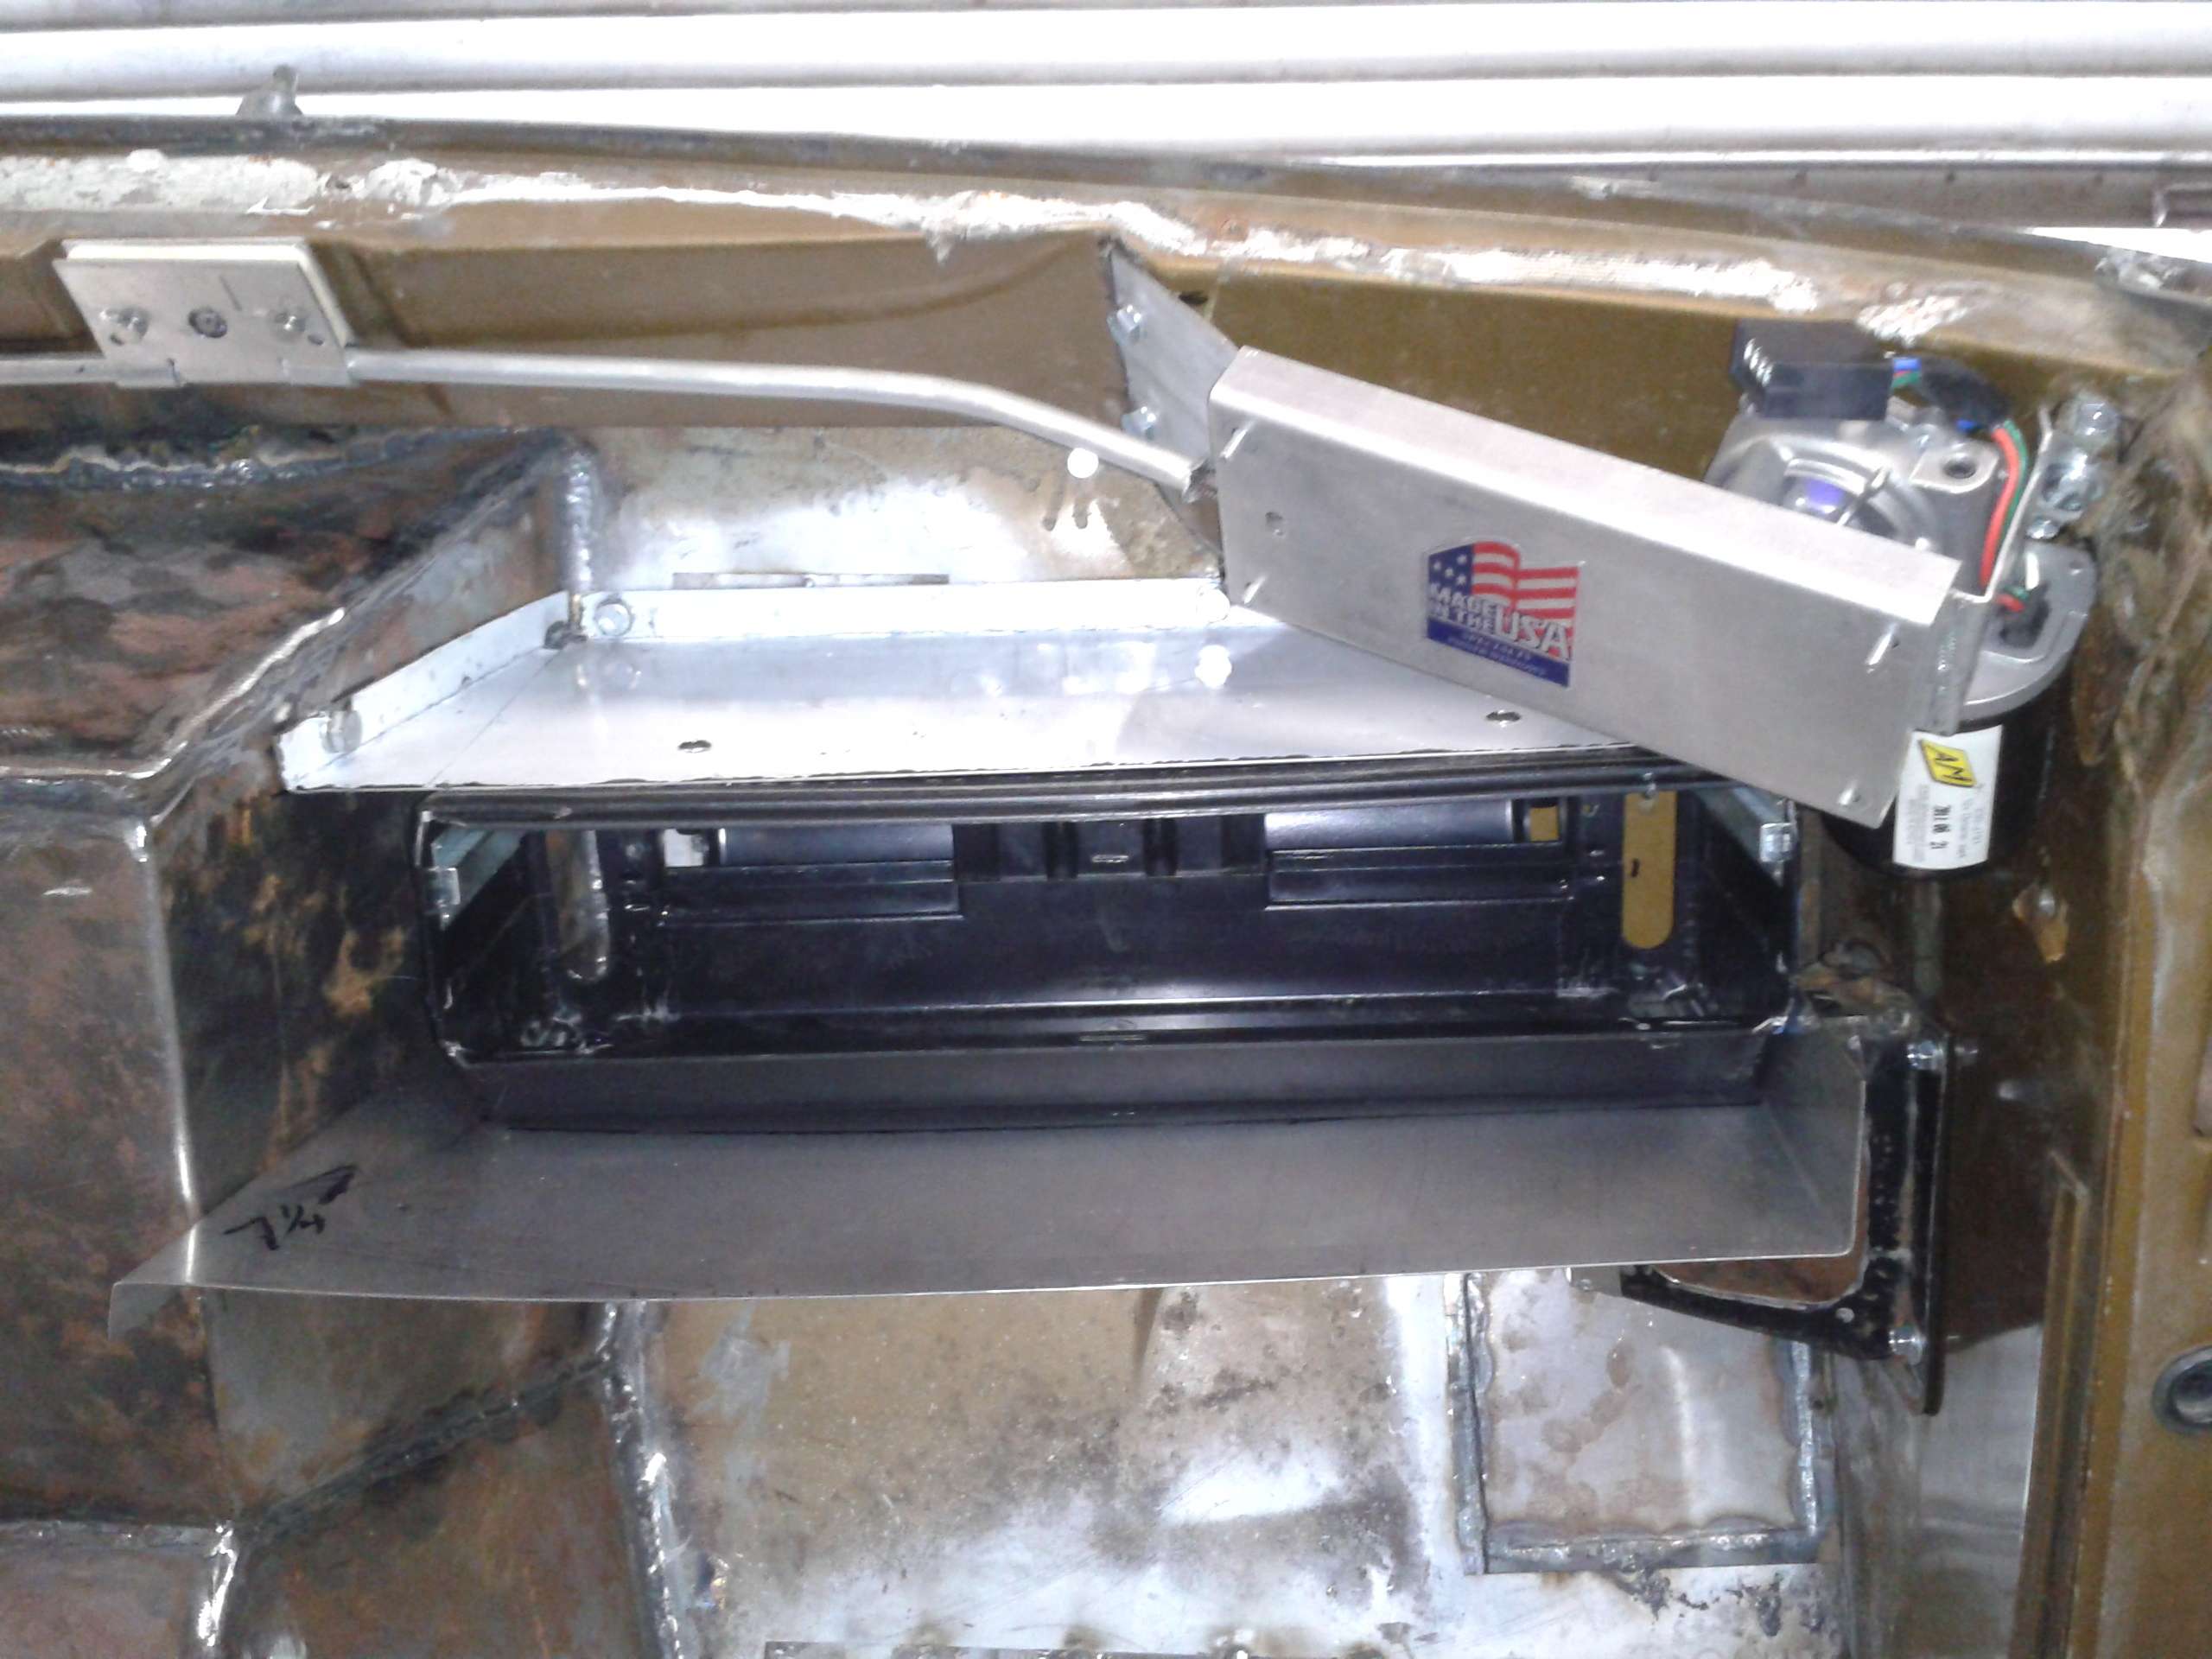
The wiper motor, Air inlet flap, and bottom heater sheetmetal in place.
Image

Everything mounted on the firewall. I'll finish the rest later, while installing the interior of the cab.
Image
Last edited by Resbum on Sat Apr 06, 2013 8:38 am, edited 1 time in total.
Originally Posted by Resbum
"What year is my truck?... Which part?" Build thread- http://www.fsjnetwork.com/forum/viewtop ... 290#p18290
User avatar

Topic author
Resbum
Posts: 466
Joined: Fri Jun 08, 2012 9:45 am
Location: North East Oregon

Re: 1970 Gladiator 1 Ton 6BT 12V Cummins Build

Post by Resbum »

Some pictures with the dashboard in place.

A small glovebox will be made through the old speaker opening, above the heater housing. The bottom of the heater is only about a half inch lower than the bottom of the dash.
Image

Image

Image

Image

Now I can strip everything back off, take the cab back off the frame, get the prep work done on the bare metal, and put a coat of primer on. I also need to finish the mechanicals on the frame. I just threw everything on temporarily to deliver to the school so they could fit the cab to the frame.

Resbum
Last edited by Resbum on Sat Apr 06, 2013 8:41 am, edited 1 time in total.
Originally Posted by Resbum
"What year is my truck?... Which part?" Build thread- http://www.fsjnetwork.com/forum/viewtop ... 290#p18290
User avatar

Topic author
Resbum
Posts: 466
Joined: Fri Jun 08, 2012 9:45 am
Location: North East Oregon

Re: 1970 Gladiator 1 Ton 6BT 12V Cummins Build

Post by Resbum »

Today I pretty much finished up the mechanicals on the rearend.

Axles in and torqued
Brake line tabs to secure the lines to the pumpkin done
LubeLocker gasket in and torqued
Gear oil added
Took final measurements to get the driveshafts ordered

I'll be running 1410 U-joints at the axles and 1350 CV's at the transfer case. The rear shaft will be 46 1/2" long and the front shaft is 46" long, so I'll be able to interchange them if I ever need to in the field.
Image

Image

Image

Image
Last edited by Resbum on Sat Apr 06, 2013 8:43 am, edited 1 time in total.
Originally Posted by Resbum
"What year is my truck?... Which part?" Build thread- http://www.fsjnetwork.com/forum/viewtop ... 290#p18290
User avatar

Topic author
Resbum
Posts: 466
Joined: Fri Jun 08, 2012 9:45 am
Location: North East Oregon

Re: 1970 Gladiator 1 Ton 6BT 12V Cummins Build

Post by Resbum »

Well, as near as I can tell I've finished the work on both the axles.

I installed the Lubelocker gasket on the front differential and got its gear oil in. Also installed a new longer remote breather hose.

The flexible brake line is now installed from the frame down to the rear axle. I also changed the axle breather over to a remote breather mounted up on the frame. And all the extra threads on the suspension and trackbar bolts have been cutoff.

Front and rear breathers are now high enough that the truck can sit in three feet of water without sucking water into the axle. When I was 17 my best friend and I learned about getting water in the axle with the destruction of the rear end in his 1963 Chevy 4X4, after getting it stuck in a mud hole.
Image

Image
Last edited by Resbum on Sat Apr 06, 2013 11:21 am, edited 1 time in total.
Originally Posted by Resbum
"What year is my truck?... Which part?" Build thread- http://www.fsjnetwork.com/forum/viewtop ... 290#p18290
User avatar

Topic author
Resbum
Posts: 466
Joined: Fri Jun 08, 2012 9:45 am
Location: North East Oregon

Re: 1970 Gladiator 1 Ton 6BT 12V Cummins Build

Post by Resbum »

.
Emergency Brake Fabrication

I got the e-brake brackets made and mounted and ran the cables up into the frame. I'll wait to finish routing them until I know exactly where the fuel tank and exhaust are going to be.
Image

Image

Image

Image
Last edited by Resbum on Tue Apr 09, 2013 7:26 am, edited 2 times in total.
Originally Posted by Resbum
"What year is my truck?... Which part?" Build thread- http://www.fsjnetwork.com/forum/viewtop ... 290#p18290
User avatar

Topic author
Resbum
Posts: 466
Joined: Fri Jun 08, 2012 9:45 am
Location: North East Oregon

Re: 1970 Gladiator 1 Ton 6BT 12V Cummins Build

Post by Resbum »

I was kinda concerned about all the things hanging off of and around the rear suspension, but it looks like it all tucks nicely out of the way. I shouldn't have any issues with snagging the e-brake cables, brake line or remote breather line on anything.
Image

Image

Image
Last edited by Resbum on Sat Apr 06, 2013 11:25 am, edited 1 time in total.
Originally Posted by Resbum
"What year is my truck?... Which part?" Build thread- http://www.fsjnetwork.com/forum/viewtop ... 290#p18290
User avatar

Topic author
Resbum
Posts: 466
Joined: Fri Jun 08, 2012 9:45 am
Location: North East Oregon

Re: 1970 Gladiator 1 Ton 6BT 12V Cummins Build

Post by Resbum »

.
Edit-Note- This was originally posted MUCH later in the build.

… I realized I hadn't fabricated the intermediate linkage for the 3 emergency brake cables that mounts to the bottom of the cab.

So,... that's what I've been doing since the last post. Luckily, I had made a cheat sheet note that had all the dimensions and travel lengths of the cables for the old system. It turned out pretty good. I even added a zerk fitting to the pivot point of the arm. While I was at it I also welded the nuts for the shifter mounting bolts to the bottom of the cab.
Image

Image
Last edited by Resbum on Tue Apr 09, 2013 7:28 am, edited 4 times in total.
Originally Posted by Resbum
"What year is my truck?... Which part?" Build thread- http://www.fsjnetwork.com/forum/viewtop ... 290#p18290
User avatar

Topic author
Resbum
Posts: 466
Joined: Fri Jun 08, 2012 9:45 am
Location: North East Oregon

Re: 1970 Gladiator 1 Ton 6BT 12V Cummins Build

Post by Resbum »

I've spent the last few days mocking up how everything is going to fit under the bed of the truck. To do this I knocked together a copy of the bed underside framework out of 2X2's and clamped it in place.

I did a major change and rearrangement of things when I discovered a pinhole rust out on my original gas tank. Go figure, it was the only rust on the tank, so I thought it was a pretty good tank. I'd seriously been thinking of adding more fuel capacity and this was the final straw that made up my mind to do so.

Originally, I was going to mount the onboard airtank above the exhaust pipe on the pas side of the driveshaft. Now it will go in the old fuel tank position. The exhaust pipe will have the passenger side all to itself. The fuel tanks are now going to be mounted behind the rear axle.

budojeepr did a great writeup of installing a Suburban 42 gallon tank, with links to other threads, in his "Swapping and 72 body onto a 81 diesel chassis" thread, posts #23-#30. Thanks to his honest assessment of how far down it hangs in post 30 I decided to look for other options. Also, a tank this size without baffles allows fuel to move around a lot and you can start sucking air while there are still gallons of fuel in the tank.

This led to literally a whole day of looking at 100's of tanks online. After a long tech phone call to Spectra Premium(extremely helpful technician) I decided to use (2) of their 16 gallon tanks that originally were in 87 to 94 Mazda pickups, part # MZ8A. They're 33"L X 14.5"W and 11.4"D. About 1.5" less deep than the 42 gallon tank. Also, they're skinny enough that with some good planning there should still be room for the exhaust pipe to run along the pas side of them.

Jesse, at High Angle Driveline is making my rear driveshaft and it should be in the mail by early next week. The fuel tanks were ordered and are already in the mail. Hopefully, the next time I post it will be to show how everything mounted up under the bed.

Resbum
Originally Posted by Resbum
"What year is my truck?... Which part?" Build thread- http://www.fsjnetwork.com/forum/viewtop ... 290#p18290
User avatar

Topic author
Resbum
Posts: 466
Joined: Fri Jun 08, 2012 9:45 am
Location: North East Oregon

Re: 1970 Gladiator 1 Ton 6BT 12V Cummins Build

Post by Resbum »

.
.
Originally posted by lobie 05-03-2012 07:21 AM
________________________________________
Did you look into the early '90's s10/blazer 20 gal tank? Thats what I used and it fits great. Gives a couple more gallons.

________________________________________
Hi lobie,

I just went to the Spectra website and looked it up. The 20 gal tank demensions are approx 41LX15WX13.5D. The space behind my axle gave me a safe area of 34X34 to work within, and less than 13" deep to be shallower than the 42 gallon tank.

I figure 32 gallons (2X16) is plenty for a day of offroading, and on a roadtrip will give longer range than my bladder. :) Side by side they'll need an area 33X29 to fit in.
Originally Posted by Resbum
"What year is my truck?... Which part?" Build thread- http://www.fsjnetwork.com/forum/viewtop ... 290#p18290
User avatar

Topic author
Resbum
Posts: 466
Joined: Fri Jun 08, 2012 9:45 am
Location: North East Oregon

Re: 1970 Gladiator 1 Ton 6BT 12V Cummins Build

Post by Resbum »

I ordered (2) Spectra Premium 16 gallon tanks that originally were in 87 to 94 Mazda pickups, part # MZ8A. They're 33"L X 14.5"W and 11.4"D.

Resbum
Originally Posted by Resbum
"What year is my truck?... Which part?" Build thread- http://www.fsjnetwork.com/forum/viewtop ... 290#p18290
User avatar

Topic author
Resbum
Posts: 466
Joined: Fri Jun 08, 2012 9:45 am
Location: North East Oregon

Re: 1970 Gladiator 1 Ton 6BT 12V Cummins Build

Post by Resbum »

Got the tanks roughly mocked in today. There's a big access panel behind the passenger side rear wheel well into the bed area. I'm going to build an enclosed box into it in the bed area for storing things that would be nice to get to from the outside, without having to get in the bed. I'm going to plumb both filler necks into that area, also.
Image

The 2X2's mock the bed frame and the level is where the floor sheetmetal is.
Image

Image

Image

They stick down a fair bit, but they're still above the approach angle line. I'll see what to do about protecting them with the bumper from directly behind. I could gain another inch of clearance if I modify the filler necks into the tanks.
Image


5/13/12 Edit- It turns out the bottom side of the bed has perfect locations of the frame members and a reinforcing piece to accept the tank mounting straps. That gained an inch of ground clearance I wasn't expecting. My rubber mallet did a beautiful job of tweaking the filler necks down for another inch of ground clearance, so now the tanks don't hang down as far as I thought they were going to. Pics will come later in the build, when I install them.
Last edited by Resbum on Sat Apr 06, 2013 11:38 am, edited 1 time in total.
Originally Posted by Resbum
"What year is my truck?... Which part?" Build thread- http://www.fsjnetwork.com/forum/viewtop ... 290#p18290
User avatar

Topic author
Resbum
Posts: 466
Joined: Fri Jun 08, 2012 9:45 am
Location: North East Oregon

Re: 1970 Gladiator 1 Ton 6BT 12V Cummins Build

Post by Resbum »

Note- After I was done and satisfied with mocking up the tanks locations I moved the cab back, so it’s now sitting on the very back of the frame.

This is what I've been doing for the last 4 days. Standing around thinking a lot, then running around collecting the last of the parts needed to install the whole fuel system. My goal is to have it done by the end of the holiday weekend. The old fuel filter and mechanical lift pump are now gone and getting replaced with an Airdog FP100.
Image
Last edited by Resbum on Sat Apr 06, 2013 11:40 am, edited 1 time in total.
Originally Posted by Resbum
"What year is my truck?... Which part?" Build thread- http://www.fsjnetwork.com/forum/viewtop ... 290#p18290
User avatar

Topic author
Resbum
Posts: 466
Joined: Fri Jun 08, 2012 9:45 am
Location: North East Oregon

Re: 1970 Gladiator 1 Ton 6BT 12V Cummins Build

Post by Resbum »

Maybe it's too early on a Sunday morning and I haven't had enough coffee yet, but I just had a thought that seems funnier than hell.

In the first pic two posts ago you can see the two old fuel filler openings in the driver’s side of the bed.

Instead of filling them in I could leave non-locking caps in fake filler necks and have them run down under the bed and dead-end.

Then when that dirty SOB comes along and tries to siphon my fuel he can spend a half hour or so just sucking air.

Or maybe have the filler necks lead his siphon hose to a push button that activates my horn. Or, even better, since they'd probably start at the rear one have it deadend, and the front one could lead to a horn button. Then they could spend 15 minutes at the rear one sucking air, move to the front one and get a real shocker.

Hell, I'd probably get a nice rubber hose and gas can out of the deal.

:thumbsup: :lol:
Last edited by Resbum on Sat Apr 06, 2013 11:41 am, edited 1 time in total.
Originally Posted by Resbum
"What year is my truck?... Which part?" Build thread- http://www.fsjnetwork.com/forum/viewtop ... 290#p18290
User avatar

Topic author
Resbum
Posts: 466
Joined: Fri Jun 08, 2012 9:45 am
Location: North East Oregon

Re: 1970 Gladiator 1 Ton 6BT 12V Cummins Build

Post by Resbum »

.
.
Originally posted by gotmike 05-27-2012 02:03 PM
________________________________________
just a tip... you might think about trimming the front inner fenders about half way up the sides... with where the fuel filter, and oil filter and everything sit it's soooo much easier to change when you can just reach in through the wheel well and get ahold of them to change them out...

build looks great though... wish i had as much time and effort to put into my build... looking forward to seeing it done...
Last edited by Resbum on Sat Apr 06, 2013 11:44 am, edited 1 time in total.
Originally Posted by Resbum
"What year is my truck?... Which part?" Build thread- http://www.fsjnetwork.com/forum/viewtop ... 290#p18290
User avatar

Topic author
Resbum
Posts: 466
Joined: Fri Jun 08, 2012 9:45 am
Location: North East Oregon

Re: 1970 Gladiator 1 Ton 6BT 12V Cummins Build

Post by Resbum »

Thanks for the tip, gotmike. I'm losing the stock fuel filter, and will be installing a remote oil filter.

I decided to switch over to the AirDog 100 pump and filters for two primary reasons.

After researching a bunch, and advice from knowledgeable Cummins mechanics, I'm convinced the stock mechanical lift pump leads to a lot of the fuel system failures. Not that it isn't pretty reliable to begin with, but if it does start to fail it can lead to a more expensive p-pump failure.

The second reason is room. Because of how far back I had to set the engine the stock fuel filter would have almost been touching the firewall sheetmetal.

This pic was taken while the cab was still about 4 inches back from its mounting points. The mechanical fuel pump is below the fuel filter.
Image

Here the cab is in place. You can see just how much room is left for putting the fuel filter back on.
Image

This is all the stuff the AirDog allowed me to remove from the engine.
Image
Last edited by Resbum on Sat Apr 06, 2013 11:49 am, edited 1 time in total.
Originally Posted by Resbum
"What year is my truck?... Which part?" Build thread- http://www.fsjnetwork.com/forum/viewtop ... 290#p18290
User avatar

Topic author
Resbum
Posts: 466
Joined: Fri Jun 08, 2012 9:45 am
Location: North East Oregon

Re: 1970 Gladiator 1 Ton 6BT 12V Cummins Build

Post by Resbum »

And this is how it looks now, with the stock parts gone. I still need to do some final securing of things, but will hold off until I run all the wiring.
Image

When I got the truck back from the school, while the cab was still in place, I took some pics and measurements of where the steering shaft, hydroboost, and brake master cylinder were going to be. Referring back to that info I plumbed the fuel lines so they wouldn't be fighting for the same space.
Image

The wiring harness runs along the fuel lines from the AirDog to the front. I should have taken a picture after I'd installed it, but forgot to.
Image

Image

The fuel system is installed from the engine to the AirDog. Today I hope to finish the rest.
Image
Last edited by Resbum on Sat Apr 06, 2013 11:52 am, edited 1 time in total.
Originally Posted by Resbum
"What year is my truck?... Which part?" Build thread- http://www.fsjnetwork.com/forum/viewtop ... 290#p18290
User avatar

Topic author
Resbum
Posts: 466
Joined: Fri Jun 08, 2012 9:45 am
Location: North East Oregon

Re: 1970 Gladiator 1 Ton 6BT 12V Cummins Build

Post by Resbum »

.
On-board Compressed Air Tank Install

I had to figure out how to mount the fuel transfer selector valve between the pump and the tanks. I rummaged through all my leftover metal and came across an old spring perch I decided not to use on the rear axle and a u-bolt of the right size. Weld a couple tabs on the perch and I ended up with this.
Image

Painted everything with the can of Cummins Titanium Black I bought earlier and mounted it. Next attach the selector valve to it. I still had a tab to use, so....
Image

... I welded another tab to this cross-member and painted it.
Image
Last edited by Resbum on Tue Apr 09, 2013 7:32 am, edited 2 times in total.
Originally Posted by Resbum
"What year is my truck?... Which part?" Build thread- http://www.fsjnetwork.com/forum/viewtop ... 290#p18290
User avatar

Topic author
Resbum
Posts: 466
Joined: Fri Jun 08, 2012 9:45 am
Location: North East Oregon

Re: 1970 Gladiator 1 Ton 6BT 12V Cummins Build

Post by Resbum »

When all was finished for the day I had the fuel system all plumbed in up to after the transfer selector valve. And, my onboard compressed air tank now has a home.
Image

The tank will be single point mounted on each end and ride on top of a 1/2" rubber pad. That should allow it to take any frame flex.
Image

I had 2X2's resting on each side of the frame. The top of them sat about an 1 1/4" below where the bed sheetmetal will be. I kept everything at or below 2X2's, so there shouldn't be any interference fits with the bed.
Image
Last edited by Resbum on Sat Apr 06, 2013 11:55 am, edited 1 time in total.
Originally Posted by Resbum
"What year is my truck?... Which part?" Build thread- http://www.fsjnetwork.com/forum/viewtop ... 290#p18290
User avatar

Topic author
Resbum
Posts: 466
Joined: Fri Jun 08, 2012 9:45 am
Location: North East Oregon

Re: 1970 Gladiator 1 Ton 6BT 12V Cummins Build

Post by Resbum »

The air tank looks a little nicer now. Sanded off the top layer of paint and rust, primed and painted it, and let it cure over night. Mounted it this morning.
Image

Image

Image
Last edited by Resbum on Sat Apr 06, 2013 11:56 am, edited 1 time in total.
Originally Posted by Resbum
"What year is my truck?... Which part?" Build thread- http://www.fsjnetwork.com/forum/viewtop ... 290#p18290
Post Reply