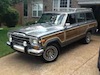
I live in Franklin, TN. I have an '88 Grand Wagoneer and the drivetrain in her is TIRED. She is completely stock, except for the radio. There is not a speck of rust on her. I bought the GW from a guy in Knoxville. He had kept it in the garage the entire time he owned it. The engine does not keep a good oil pressure. I have rebuilt the oil pump and installed a mechanical gauge just to make sure. I am running a heavy weight oil made by Rotella and the pressure starts out at 40 to 60 PSI when you first start her up. After she warms up the pressure barley reads over ZERO at idle. I have decided to rebuild the AMC 360 inside her. I am starting this thread for two reasons. To journal my work and to get advice from the forum. Also, if anyone is in the Franklin/Nashville area and wants to help just let me know.
First, a picture of her.
[img][/img]
AMC 360 Rebuild
-
 pharmdut
Topic author - Posts: 49
- Joined: Thu Feb 21, 2013 1:17 pm
- Location: Franklin, TN
AMC 360 Rebuild
You do not have the required permissions to view the files attached to this post.
Last edited by pharmdut on Fri May 17, 2013 11:45 am, edited 2 times in total.
-
pharmdut
Topic author - Posts: 49
- Joined: Thu Feb 21, 2013 1:17 pm
- Location: Franklin, TN
Re: AMC 360 Rebuild
I purchased an AMC 360 block that had been bored 30 over, it had the pistons and crank assembled by the same guy that sold it to me. He had also given me a set of heads to go with it. They needed to be rebuilt which I had done at a head shop in Nashville. They did the 3 angle valve job and rebuilt them.
You do not have the required permissions to view the files attached to this post.
Last edited by pharmdut on Fri May 17, 2013 11:46 am, edited 2 times in total.
-
pharmdut
Topic author - Posts: 49
- Joined: Thu Feb 21, 2013 1:17 pm
- Location: Franklin, TN
Valve to Piston clearance test
The first thing I did after gathering the parts that I needed was to test the valve to piston clearance. I bought a different then stock cam and wanted to make sure it wold not lift the valves too high. The test was simple.
I placed the head gasket onto the block and added two pieces of play-dough to the top of cylinder one. Next, I attached the head and the valve train for cylinder one. This pic does not show the rockers and bridge. I gave the block assembly two full rotations and watched the valves move. After taking it apart I observed that the play-dough was untouched. This isn't a high compression engine so I'm not too surprised. The thickness of the play-dough was 7mm.
I placed the head gasket onto the block and added two pieces of play-dough to the top of cylinder one. Next, I attached the head and the valve train for cylinder one. This pic does not show the rockers and bridge. I gave the block assembly two full rotations and watched the valves move. After taking it apart I observed that the play-dough was untouched. This isn't a high compression engine so I'm not too surprised. The thickness of the play-dough was 7mm.
You do not have the required permissions to view the files attached to this post.
-
 Billyj7175
- Posts: 147
- Joined: Thu Sep 20, 2012 4:34 pm
Re: AMC 360 Rebuild
Looks good. Gotta love freshly machined steel...
Looks like it had a couple of exhaust valves burnt, which is common.
I'm going through a rebuild myself...and no expert by any means. The only thing I've ran into so far that is AMC unique, is getting the correct length pushrods (there's a technique/tools required), and the oil pump, which you've already been through. The pushrod issue I would consider to really be of importance in your case as it's unknown whether or not the block was decked any (which requires shorter pushrods).
Are the cam bearings new as well?
Timing sets are another issue. Just food for thought, you might check out this thread:
http://fsjnetwork.com/forum/viewtopic.p ... yes#p12717
I know there are lots of folks both here and over at IFSJA that have ran Cloyes sets without any issues, but you can be the judge for your own build.
Did you degree the cam on the install?
Remflex exhaust gaskets (you can get them from BJ's) seem to have a good following also. A little more expensive, but worth it (or so I've read).
Also, If you don't already have a midplate for the oil pump, I ended up with 2 of them and would make you a good deal on it. PM me if you're interested.
-
Billyj7175
- Posts: 147
- Joined: Thu Sep 20, 2012 4:34 pm
Re: AMC 360 Rebuild
Nice weather outside today eh?
I live in Southern Illinois...
I live in Southern Illinois...
-
pharmdut
Topic author - Posts: 49
- Joined: Thu Feb 21, 2013 1:17 pm
- Location: Franklin, TN
Test fitting stuff
Here I am test fitting the oil pan, timing cover, and heads. Looks like everything lines up and fits nice.
You do not have the required permissions to view the files attached to this post.
-
pharmdut
Topic author - Posts: 49
- Joined: Thu Feb 21, 2013 1:17 pm
- Location: Franklin, TN
Re: AMC 360 Rebuild
Billyj7175 wrote:Looks good. Gotta love freshly machined steel...
Looks like it had a couple of exhaust valves burnt, which is common.
I'm going through a rebuild myself...and no expert by any means. The only thing I've ran into so far that is AMC unique, is getting the correct length pushrods (there's a technique/tools required), and the oil pump, which you've already been through. The pushrod issue I would consider to really be of importance in your case as it's unknown whether or not the block was decked any (which requires shorter pushrods).
Are the cam bearings new as well?
Timing sets are another issue. Just food for thought, you might check out this thread:
http://fsjnetwork.com/forum/viewtopic.p ... yes#p12717
I know there are lots of folks both here and over at IFSJA that have ran Cloyes sets without any issues, but you can be the judge for your own build.
Did you degree the cam on the install?
Remflex exhaust gaskets (you can get them from BJ's) seem to have a good following also. A little more expensive, but worth it (or so I've read).
Also, If you don't already have a midplate for the oil pump, I ended up with 2 of them and would make you a good deal on it. PM me if you're interested.
I have been thinking of the pushrods. I asked the guy who I bought the block from and he said the deck was "just kissed". The pushrods that I bought are stock size. I bought them from teamwagoneer.com
http://www.teamgrandwagoneer.com/push-r ... 1972-1991/
With pedestal rockers, how do you measure/test for the correct length pushrods?
I did not degree the cam and I did not check the timing gear for the oiling groove.
-
pharmdut
Topic author - Posts: 49
- Joined: Thu Feb 21, 2013 1:17 pm
- Location: Franklin, TN
Paint
I decided to go with AMC Blue for paint. I like the metallic sheen. I plan on everything being AMC Blue except for the intake, carb, and air filter. I haven't decided on the valve covers yet. I might refinish the original ones that came with the block or I might buy some cheap chrome covers. Don't know yet.
Got the engine all masked off.
Now it's all painted pretty.
Did the oil pan and pump housing too.
Got the engine all masked off.
Now it's all painted pretty.
Did the oil pan and pump housing too.
You do not have the required permissions to view the files attached to this post.
-
pharmdut
Topic author - Posts: 49
- Joined: Thu Feb 21, 2013 1:17 pm
- Location: Franklin, TN
Cam Shaft and Timing gears
Next I installed the cam shaft and the timing gears with chain. The timing set is from Melling (sp?) which came with the block that I bought from a third party in Alabama. The cam is the SUM-8600 from Summit. I got it for the lower end torque. I will mainly be pulling a boat and doing highway driving.
Here is the cam with the assembly lube.
Here is the cam in the block.
Here is the timing set installed.
Here is the cam with the assembly lube.
Here is the cam in the block.
Here is the timing set installed.
You do not have the required permissions to view the files attached to this post.
-
pharmdut
Topic author - Posts: 49
- Joined: Thu Feb 21, 2013 1:17 pm
- Location: Franklin, TN
Fuel eccentric gear
Next was to install the fuel pump eccentric gear. It just simply slid on. The engine is at TDC (compression stroke) in this picture. The eccentric gear has the largest part at the top. When I installed the timing cover the other day it made it really difficult to install/bolt on the fuel pump. I eventually got the pump bolted on but the pump didn't fit flush to the timing cover until after the bolts were tightened. I'm assuming this is normal?
You do not have the required permissions to view the files attached to this post.
-
pharmdut
Topic author - Posts: 49
- Joined: Thu Feb 21, 2013 1:17 pm
- Location: Franklin, TN
Distributor drive/cam gear
I ordered the gear fro teamwagoneer.com.
http://www.teamgrandwagoneer.com/distri ... 1972-1991/
Here you can see the oil slinger.
http://www.teamgrandwagoneer.com/distri ... 1972-1991/
Here you can see the oil slinger.
You do not have the required permissions to view the files attached to this post.
Last edited by pharmdut on Fri May 17, 2013 11:50 am, edited 2 times in total.
-
pharmdut
Topic author - Posts: 49
- Joined: Thu Feb 21, 2013 1:17 pm
- Location: Franklin, TN
Time to torque on the heads!!
Today I torqued on the heads. The final torque was 110 foot pounds. I did it in increments starting at 20, 40, 60, 85, 110. I followed the spiral pattern starting from the middle bolt and counted as I hit each bolt (14 on each side). Everything went very smoothly. I did break a cheap socket. I'll just replace it with a Crafts Man socket so that I never have to buy another.
First I used Acetone to clean the mating surfaces.
I used the thread grease that came with my ARP bolts.
Now the torque and finished product. Me like!!
First I used Acetone to clean the mating surfaces.
I used the thread grease that came with my ARP bolts.
Now the torque and finished product. Me like!!
You do not have the required permissions to view the files attached to this post.
-
pharmdut
Topic author - Posts: 49
- Joined: Thu Feb 21, 2013 1:17 pm
- Location: Franklin, TN
Timing Cover Seal - Front Main Seal
This was a fairly easy install.
Bought the seal.
Placed wood blocks under cover to keep the mating surface from touching the table.
Lined up the seal.
Placed wood block on top of seal and whacked with rubber hammer.
All nice and flush and installed.
Bought the seal.
Placed wood blocks under cover to keep the mating surface from touching the table.
Lined up the seal.
Placed wood block on top of seal and whacked with rubber hammer.
All nice and flush and installed.
You do not have the required permissions to view the files attached to this post.
-
pharmdut
Topic author - Posts: 49
- Joined: Thu Feb 21, 2013 1:17 pm
- Location: Franklin, TN
Water pump and timing cover install
This was also a straight forward install. The only real issue I had was installing the fuel pump. It was hard to get the bolts for the pump lined up with the cover. The eccentric gear is at its highest point on the cam right now and the pump lever has to ride on top of the eccentric gear. This caused the pump to not sit flush on the cover. After I got the bolts started and tightened them the pump mated flush with the timing cover. I bought this stainless steel bolt set for the engine. You will see them throughout this build. I like them. Each set has it's own bag. Here are the bolts for the timing cover. There was a separate bag for the water pump and fuel pump (not shown).
Now some arbitrary pictures of the assembly. Enjoy!!
Be clean!
Random shots. The holes where bolts are missing required spacers for the bolts to fit. Some of the bolts in the set are too long without the engine brackets on the front of the engine.
Now some arbitrary pictures of the assembly. Enjoy!!
Be clean!
Random shots. The holes where bolts are missing required spacers for the bolts to fit. Some of the bolts in the set are too long without the engine brackets on the front of the engine.
You do not have the required permissions to view the files attached to this post.
Last edited by pharmdut on Fri May 17, 2013 11:51 am, edited 1 time in total.
-
 j20owner
- Posts: 461
- Joined: Sat Aug 27, 2011 1:46 pm
Re: AMC 360 Rebuild
Here's the 'magazine' version of the 360 build Horsepower TV did. Just some useful(imo) info in there, like the oiling mod.
AMC 360
AMC 360
Tatsadasayago wrote:And here i thought Capitalism was hitting the Shift Key...
-
pharmdut
Topic author - Posts: 49
- Joined: Thu Feb 21, 2013 1:17 pm
- Location: Franklin, TN
Re: AMC 360 Rebuild
Thanks. Was a good read. I remember seeing this on TV, but that was some time ago.j20owner wrote:Here's the 'magazine' version of the 360 build Horsepower TV did. Just some useful(imo) info in there, like the oiling mod.
AMC 360
Sent from my iPad using Tapatalk HD
-
pharmdut
Topic author - Posts: 49
- Joined: Thu Feb 21, 2013 1:17 pm
- Location: Franklin, TN
Re: AMC 360 Rebuild
Can someone educate me on the pedestal rockers on this 360. Are there any adjustments that need to be done like rockers with studs have to? Do you have to do a zero lash or do you just torque the bridge bolts and leave it?
Sent from my iPad using Tapatalk HD
Sent from my iPad using Tapatalk HD
-
pharmdut
Topic author - Posts: 49
- Joined: Thu Feb 21, 2013 1:17 pm
- Location: Franklin, TN
Oil pick-up install
This project was pretty easy. I have a new pick up and a cleaned up oil pan. I'm not sure that the oil pan is the original, so I am going to test for pick-up to oil pan clearance. My goal is to get 1/4 to 1/2 inch clearance.
First I installed the pick-up. It just simply screwed on. The yellow paint is on there to help me find any contact areas with the pan. There where none.
Next we used some UT orange (GO VOLS) play-dough and placed it on the bottom of the pick up.
Attached the pan.
Then measured the clearance. We have about 1/2 inch.
You do not have the required permissions to view the files attached to this post.
-
pharmdut
Topic author - Posts: 49
- Joined: Thu Feb 21, 2013 1:17 pm
- Location: Franklin, TN
Oil Pan
This was also a pretty straight forward job. I could not find a one piece oil pan gasket. Maybe they don't make one....don't know. I used some Indian Head Gasket Shellac on the mating surfaces and small beads of RTV in the sharp corners. The stainless steel bolt set that I bought is great looking, however 3 of the larger pan bolts where WAY TOO long. I ended up using three of the original bolts just to get the pan tightened down so the gasket sealants could cure up.
Is this stuff good? A buddy of mine told me it was.
RTV in all four corners, below and above the mating area of the cork and rubber pieces.
I run a small amount of RTV into the small space in between the timing cover and the pan then wiped away the excess. Probably was mot necessary, but I saw someone else do this and thought, why not.
Here she is all buttoned up. The different colored bolts are the original bolts that I had to use until I get some stainless steel ones that fit.
You do not have the required permissions to view the files attached to this post.
-
Billyj7175
- Posts: 147
- Joined: Thu Sep 20, 2012 4:34 pm
Re: AMC 360 Rebuild
pharmdut wrote:Can someone educate me on the pedestal rockers on this 360. Are there any adjustments that need to be done like rockers with studs have to? Do you have to do a zero lash or do you just torque the bridge bolts and leave it?
Sent from my iPad using Tapatalk HD
I did a powerpoint a while back on how to check for pushrod length.
(I have a bum knee and with no heat in the garage makes me a dull boy...so I tried entertain myself in ways that don't involve divorce lawyers or bail).
Also...to do it right, you also need to check the valve train geometry after changing pushrod length. This is done by checking the valve stem pattern on top of the valve stem. This is to ensure that the contact "sweep" is centered and not trying to push the valve inward/outward.
Last edited by Billyj7175 on Fri Feb 22, 2013 5:54 pm, edited 1 time in total.