That black under coating was a dealer installed "up grade". Quaker State was the main supplier. It looked like oatmeal mixed with used oil. How thick it was applied depend on the talent of the gun jockey, what part of the country the dealer was in and most often what package was sold. And if it was installed before or after accessories. Some dealers sold the deluxe best warranty package that included per instructions drilling holes in the A,B,C pillars and shooting the goo in with a small tipped applicator to cover all the hidden areas. Interior and boor panels were pulled and those areas covered as well. The only place our detailer skipped was the outer section of the fender flares on the wide track because it was pretty much possible to get off the paint with out damage.
My 79 Chero has the deluxe coverage and I am glad it dose after all the time I spent in the snow the only damage found is the flares. I am removing as I do work as it now looks and feels like old sand paper in the exposed areas.
The factory looked at using it in the late 70s and 80s but couldn't justify the expense. After all they saved $9.00 per rig in paint and robot programing by not painting the inner roof panel and body panel.
'76 Wagon Rebuild Adventure
-
Cheap Hobby
- Posts: 649
- Joined: Tue Apr 22, 2014 12:53 pm
- Location: Central Valley
Re: '76 Wagon Rebuild Adventure
79 Cherokee WT QT Golden Eagle white with gold windows "Pigger" only blows hubs the night before a road trip or the clodest night of year. Has only been towed cause of stupid.
-
rherndon
Topic author - Posts: 142
- Joined: Mon Aug 11, 2014 5:25 pm
- Location: Houston, TX
Re: '76 Wagon Rebuild Adventure
i was wondering if it was an add-on. Seemed like it. and yeah, it is like dried oatmeal mixed with oil and almost 40 years of road grime. but it comes off with some effort. i am hoping to have everything cleaned up this week and then recoat the underbody with rust bullet. once i am done with undercarriage, we will roll her over, remove the other rear quarter, weld on the donors and then prep and paint. engine has been ready for 2 months now.
i sourced all NOS upholstery and vinyl. looks good.
My girls, (wife and 3 daughters) don't really like the original dark cocoa metallic. They keep telling me to change color. That seems like a huge PITA and lots of $$$'s. I am holding firm, for now. Sticking with the brown. I like it anyway.
i sourced all NOS upholstery and vinyl. looks good.
My girls, (wife and 3 daughters) don't really like the original dark cocoa metallic. They keep telling me to change color. That seems like a huge PITA and lots of $$$'s. I am holding firm, for now. Sticking with the brown. I like it anyway.
'76 Wagoneer w/401; Restoration in progress
-
rherndon
Topic author - Posts: 142
- Joined: Mon Aug 11, 2014 5:25 pm
- Location: Houston, TX
Re: '76 Wagon Rebuild Adventure
By the way, the Tapatalk app is great. you can post in the forums from your Phone and simply choose photos from your picture library - without using photobucket and copying/pasting the links. Very easy....
'76 Wagoneer w/401; Restoration in progress
-
 bbuenger71
- Posts: 217
- Joined: Thu Oct 09, 2014 4:28 pm
- Location: Simi Valley, CA
Re: '76 Wagon Rebuild Adventure
[quote="rherndon"
i sourced all NOS upholstery and vinyl. looks good.
My girls, (wife and 3 daughters) don't really like the original dark cocoa metallic. They keep telling me to change color. That seems like a huge PITA and lots of $$$'s. I am holding firm, for now. Sticking with the brown. I like it anyway.[/quote]
I agree with you! Hold firm on the color. Same color as mine and I really like it. Where did you find NOS upholstery and vinyl?
1976 Wagoneer
360/TH400/QT
Edelbrock non EGR, Holley 600cfm, 32" BFG Mud Terrain KM2's. Lots of Bondo.
http://fsjnetwork.com/forum/viewtopic.php?f=12&t=7276
360/TH400/QT
Edelbrock non EGR, Holley 600cfm, 32" BFG Mud Terrain KM2's. Lots of Bondo.
http://fsjnetwork.com/forum/viewtopic.php?f=12&t=7276
-
bbuenger71
- Posts: 217
- Joined: Thu Oct 09, 2014 4:28 pm
- Location: Simi Valley, CA
Re: '76 Wagon Rebuild Adventure
[quote="rherndon"
i sourced all NOS upholstery and vinyl. looks good.
My girls, (wife and 3 daughters) don't really like the original dark cocoa metallic. They keep telling me to change color. That seems like a huge PITA and lots of $$$'s. I am holding firm, for now. Sticking with the brown. I like it anyway.[/quote]
I agree with yuo! Hold firm on the color. Same color as mine and I really like it. Where did you find NOS upholstery and vinyl?
1976 Wagoneer
360/TH400/QT
Edelbrock non EGR, Holley 600cfm, 32" BFG Mud Terrain KM2's. Lots of Bondo.
http://fsjnetwork.com/forum/viewtopic.php?f=12&t=7276
360/TH400/QT
Edelbrock non EGR, Holley 600cfm, 32" BFG Mud Terrain KM2's. Lots of Bondo.
http://fsjnetwork.com/forum/viewtopic.php?f=12&t=7276
-
rherndon
Topic author - Posts: 142
- Joined: Mon Aug 11, 2014 5:25 pm
- Location: Houston, TX
Re: '76 Wagon Rebuild Adventure
Original Auto Interiors out of Columbus, MI. It was actually in the 77 book, not 76. Maybe I had a late year 76 build and they went with the 77 fabric....who knows but glad i found it. Dye lots can differ among fabric bolts but you take what you can get. NOS Vinyl is pretty standard stuff. I also found some perforated foam back vinyl headliner material. I think the color code was FBH-7 (ginger). Interior upholstery will be completed after body/paint. That looks like a ways off.
How is your project coming? I think I remember some undercarriage pics you posted. I am almost done cleaning mine up. It is a long process but can be done...
Rogers
How is your project coming? I think I remember some undercarriage pics you posted. I am almost done cleaning mine up. It is a long process but can be done...
Rogers
'76 Wagoneer w/401; Restoration in progress
-
bbuenger71
- Posts: 217
- Joined: Thu Oct 09, 2014 4:28 pm
- Location: Simi Valley, CA
Re: '76 Wagon Rebuild Adventure
Thank, I will check them out. My project is going very slow. Haven't had much time to do anything on it with work and a new baby consuming all of my time. It has also turned into my DD due to some unfortunate events with my ex DD Volkswagen. Hopefully I will be getting something else to drive around so I can start tearing into bigger projects. I look forward to see where your build goes! And again, Keep that color!
1976 Wagoneer
360/TH400/QT
Edelbrock non EGR, Holley 600cfm, 32" BFG Mud Terrain KM2's. Lots of Bondo.
http://fsjnetwork.com/forum/viewtopic.php?f=12&t=7276
360/TH400/QT
Edelbrock non EGR, Holley 600cfm, 32" BFG Mud Terrain KM2's. Lots of Bondo.
http://fsjnetwork.com/forum/viewtopic.php?f=12&t=7276
-
rherndon
Topic author - Posts: 142
- Joined: Mon Aug 11, 2014 5:25 pm
- Location: Houston, TX
'76 Wagon Rebuild Adventure
More undercarriage cleanup before the rain.
Invested in an oscillating multi tool and glad I did. I went with the Dremel 3.5amp. Plenty of power.


I went over it with a wire brush on grinder. I think I am about done. Need a day for degreasing and tape. Then a day for paint. Maybe next weekend if weather cooperates.
Sent from my iPhone using Tapatalk
Invested in an oscillating multi tool and glad I did. I went with the Dremel 3.5amp. Plenty of power.
I went over it with a wire brush on grinder. I think I am about done. Need a day for degreasing and tape. Then a day for paint. Maybe next weekend if weather cooperates.
Sent from my iPhone using Tapatalk
-
 Tatsadasayago
- Posts: 3684
- Joined: Thu Aug 28, 2014 2:22 pm
- Location: Sacramento, CA
Re: '76 Wagon Rebuild Adventure
That's alot of work. I got tired just looking at the pictures!
Great job.
Great job.
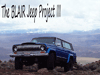
1977 Cherokee Chief - The Blair Jeep Project III
A collection of parts flying in close formation
A collection of parts flying in close formation
-
rherndon
Topic author - Posts: 142
- Joined: Mon Aug 11, 2014 5:25 pm
- Location: Houston, TX
'76 Wagon Rebuild Adventure
Making progress little by little....
Sent from my iPhone using Tapatalk
Sent from my iPhone using Tapatalk
-
rherndon
Topic author - Posts: 142
- Joined: Mon Aug 11, 2014 5:25 pm
- Location: Houston, TX
'76 Wagon Rebuild Adventure
Removed all of the prior undercoat that I could get to. Prepped and applied a coating of Rust Bullet then the black shell topcoat. I am done with undercarriage for awhile.


Sent from my iPhone using Tapatalk
Sent from my iPhone using Tapatalk
-
rherndon
Topic author - Posts: 142
- Joined: Mon Aug 11, 2014 5:25 pm
- Location: Houston, TX
'76 Wagon Rebuild Adventure
Back upright. 

Sent from my iPhone using Tapatalk
Sent from my iPhone using Tapatalk
-
 Full Size Jeeper
- Posts: 154
- Joined: Mon Feb 23, 2015 9:14 pm
- Location: Mandeville Louisiana
Re: '76 Wagon Rebuild Adventure
Looked through your build thread and it is coming along very nice.
1978 Jeep Wagoneer
401/turbo 400 transmission Quadra-Trac BW1339 (with Low) 4" Rusty's lift with 31" Summit Mud Dawgs
Mods:
Fuel Tank, Red Holley Electric Fuel Pump, Razor Grill, Rebuilt steering box
401/turbo 400 transmission Quadra-Trac BW1339 (with Low) 4" Rusty's lift with 31" Summit Mud Dawgs
Mods:
Fuel Tank, Red Holley Electric Fuel Pump, Razor Grill, Rebuilt steering box
-
rherndon
Topic author - Posts: 142
- Joined: Mon Aug 11, 2014 5:25 pm
- Location: Houston, TX
'76 Wagon Rebuild Adventure
Finally, progress. Driver rear quarter attached. Bodywork going well. Epoxy and primed. Blocking next week and passenger side will be completed. A few of the interior corner rust spots have been addressed.
Moving along nicely now. Engine is ready. Taking seats to upholsterer next week. Ordering carpet and full iweatherstripping kit from Team Grand Wagoneer.


Sent from my iPhone using Tapatalk
Moving along nicely now. Engine is ready. Taking seats to upholsterer next week. Ordering carpet and full iweatherstripping kit from Team Grand Wagoneer.


Sent from my iPhone using Tapatalk
-
 243
243
- Posts: 740
- Joined: Sat Mar 16, 2013 7:32 am
- Location: Texas
-
rherndon
Topic author - Posts: 142
- Joined: Mon Aug 11, 2014 5:25 pm
- Location: Houston, TX
'76 Wagon Rebuild Adventure
If anyone was wondering what lies behind and inside FSJ panels.....Today we cut out the passenger rear quarter. Not surprisingly it was the same or worse as the driver side. Untreated metal. Only surface rust which we will remove with wire wheel and coat with Rust Bullet.


Sent from my iPhone using Tapatalk


Sent from my iPhone using Tapatalk
-
 Stuka
Stuka
- Site Admin
- Posts: 11814
- Joined: Thu May 12, 2011 5:53 pm
- Location: CA
- Contact:
'76 Wagon Rebuild Adventure
Not as bad as some I have seen. Shame AMC could not afford to galvanize all their sheet metal like Ford did. Our lives would be so much easier.
Sent from my iPhone 6 using Tapatalk
Sent from my iPhone 6 using Tapatalk
-
rherndon
Topic author - Posts: 142
- Joined: Mon Aug 11, 2014 5:25 pm
- Location: Houston, TX
'76 Wagon Rebuild Adventure
More progress


Sent from my iPhone using Tapatalk


Sent from my iPhone using Tapatalk
-
rherndon
Topic author - Posts: 142
- Joined: Mon Aug 11, 2014 5:25 pm
- Location: Houston, TX
'76 Wagon Rebuild Adventure
Coming along. Interior should be ready next week...

Sent from my iPhone using Tapatalk


Sent from my iPhone using Tapatalk
-
rherndon
Topic author - Posts: 142
- Joined: Mon Aug 11, 2014 5:25 pm
- Location: Houston, TX
'76 Wagon Rebuild Adventure
More progress. Prima and blocking next week


Sent from my iPhone using Tapatalk


Sent from my iPhone using Tapatalk