Date: Thu, 13 Sep 2001 11:15:18 -0700 (PDT)
THE DISCUSSION has been raised about what to do with a vehicle that may be
near the World Trade Center in NYC. Anyone watching the news can see many vehicles
sitting on the streets with layers of dust and ash.
The following is what I would do to recover my vehicle. IF you have better ideas let me
know and I'll update the page. I'm going to place a copy of this in http://wagoneers.com/FSJ/tech
but also have it in the URL below.
==============================================================
If your vehicle is covered in dust or ash debris here are some of the
steps you might want to take before opening any doors, starting the vehicle
or moving it.
The objective here is to remove as much of the material without getting it
into moving parts, the interior or the engine. You also want to be careful
not to scratch the exterior or glass.
You want to remove the dust, cement material, volcanic ash or whatever else
is on the vehicle. Water or compressed air seem like the most logical choice
if they are available. A brush or broom if not. Pay attention to moving parts
and get the debris out of those areas the best you can.
========================================================
first things:
- DO NOT START THE ENGINE
- DO NOT MOVE THE VEHICLE AT ALL.
- DO NOT OPEN DOORS OR HOOD
A garden hose would be my first choice, compressed air my second,
a shop-vac my third and as a last resort a brush or soft broom...
A vacuum cleaner would probably not be effective but would be better than using your hands.
Whatever tool you us, remove all the dust that you can.
If possible, then hose it down completely.
Compressed air would also work, but raising more dust may not be desirable, or healthy.
After all the surface dust and ash is removed and the exterior is clean,
then carefully open the driver's door, check the seals to make sure
crud hasn't fallen in. Clean around the opening and anything that's fallen inside.
Pop the hood. I recommend hosing or blowing off
the engine off completely before starting it. Pay attention to the backsides
of the pulleys for the water pump, alternator, power steering and so on.
Open the air cleaner, it should be clean inside. No need to change the filter,
it's unlikely that dust got in there. You can change it if it needs it though.
Spray underneath on the axles and around the u-joints and wheel bearing seals.
Rinse everything off. Let it dry.
If it's clean when dry, then you're safe to move it.
Listen carefully when turning the engine over... if you hear abrasive action, shut it off
and squirt water or air into the idler pulleys, belts and pumps to rinse away the
material.
I'd also recommend putting a pair of pantyhose or nylons over the air filter opening
as an added precaution. That's what was used when Mount Saint Helens erupted.
Slowly move the vehicle, listening carefully to any screeching, grinding or abrasive
sounds from the wheels... Most likely if you have disc brakes you will hear some...
if you lightly apply the brakes and the sounds go away, that's what it is. Don't
worry about that right now. The wheel bearings are the concern.
Once you're clear of the dust and ashes, take it to a car wash and
hose the underside and exterior again.
It'll most likely be completely fine if you do all these things.
As an added precaution have the oil changed as soon as you can, and have the bearings
and axles checked. Having all the fluids changed is even more insurance against
future troubles.
http://www.wagoneers.com/pages/History/ ... covery.txt
-------------------------------------------------------------------------
** john-at-wagoneers.com via PINE on Linux ** (plain text please!)
** http://wagoneers.com ** ** http://freegift.net **
Snohomish, Washington USA - where Jeeps don't rust, they mold.
...and remember, leaving life without Jesus just isn't recommended...
Something interesting from wagoneers.com
-
Nikkormat
Topic author - Posts: 3623
- Joined: Sun Jun 29, 2014 11:45 pm
- Location: Salt Lake City
Something interesting from wagoneers.com
Gabe, "reformed" Jeep hoarder.
-
Nikkormat
Topic author - Posts: 3623
- Joined: Sun Jun 29, 2014 11:45 pm
- Location: Salt Lake City
Re: Something interesting from wagoneers.com
From owner-fsj-digest@digest.net Tue Feb 12 09:23:02 2002
From: fsj-digest <owner-fsj-digest@digest.net>
fsj-digest Tuesday, February 12 2002 Volume 01 : Number 1566
Forum for Discussion of Full Sized SJ Series Jeeps
Brian Colucci <ABCvoice@worldnet.att.net>
Digest Coordinator
Contents:
fsj: Re: How To Get A Real Charge Out Of Life
fsj: TF727 got fixed this weekend
fsj: Starter/Relay Custom Cable
fsj: Left Tie Rod End
Re: fsj: Trailboss's last ride
fsj: Wanted: J10 Dana 44 housing and axles
fsj: Need help locating....
fsj: Condolences (Was Trailboss's last ride)
fsj: Gary's AMC & 1941-87 Jeep Online Fleamarket Page
Re: fsj: Need help locating....
FSJ Digest Home Page: http://www.digest.net/jeeps/fsj/
Send submissions to fsj-digest@digest.net
Send administrative requests to fsj-digest-request@digest.net
To unsubscribe, include the word unsubscribe by itself in the body of
the message, unless you are sending the request from a different address
than the one that appears on the list. Include the word help in a
message to fsj-digest-request to get a list of other majordomo
commands.
----------------------------------------------------------------------
Date: Mon, 11 Feb 2002 06:32:47 -0600
From: "Vince Orr" <vorr@attbi.com>
Subject: fsj: Re: How To Get A Real Charge Out Of Life
Excellent advice!
Thanks,
- --Vince
'81 Wag
'99 TJ
- ----- Original Message -----
From: "B. C." <ABCvoice@worldnet.att.net>
To: "PHOENIX FSJ LIST" <fsj-digest@digest.net>
Sent: Monday, February 11, 2002 5:00 AM
Subject: fsj: How To Get A Real Charge Out Of Life
> Greetings To The FSJ World!
>
> The USS GW received a new positive battery lug, and harness combination
> this past Saturday. For those of you new to the group the USS GW is a
> 1989. Those who own a GW from this era know that the positive cable
> assembly is made up of two primary cables coming off of the lug. A 4
> gauge that goes to the starter, and and 8 gauge that goes to the starter
> relay to power the rest of the systems on the rig. On the #4 leg going
> to the starter is the trigger lead for the starter that comes from the
> starter relay to the starter solenoid.
>
> Time had taken its toll on this harness. It needed replaced. The
> dealer was looking at around $125 for this assembly. The local parts
> stores wanted around $95, but none of them had stock on the harness, if
> they even showed availability in their computer.
>
> Then I had an idea. These young generation X guys who like to hop up
> japanese brand X cars frequently toast the tiny electrical systems when
> they toss in a big stereo that draws a lot of juice, unless they have
> this equipment installed by a pro. We have several high end stereo
> shops here in town that specialize in these custom installations. The
> guys that do this work build custom heavy duty harnesses all of the
> time. So I took my existing harness to one of the stereo shops to see
> if it could be duplicated.
>
> Fortunately the installation guy was of the age that he remembered
> driving HEMI Cuda's when they were new. So I knew that he had some
> years of experience. For $45 he built me a very sinister looking, heavy
> duty harness for my rig. The craftsmanship in is work was quite
> apparent. Far better then what I would have purchased from the dealer.
> It fit great, and now I have a lot of juice to all of my accessories,
> and the starter fires over with a vengeance.
>
> So if you need custom battery cable you might try looking at a
> nontraditional supplier; car stereo installation shops.
>
>
> Until The Next Dimension,
> Admiral "Coluch."
> Starfleet Headquarters
> Ohio Post
> END TRANSMISSION....................................
------------------------------
Date: Mon, 11 Feb 2002 15:38:14 GMT
From: Ken Gaines <klg92733@kestrel.tamucc.edu>
Subject: fsj: TF727 got fixed this weekend
Mornin' fellow Jeepers...
Well, here's the scoop on the TF727 rebuild....
Tranny removal was as usual...a PITA. The transfer case came off without a
fight. The rebuild was nothing short of time consuming. It took 2 days to
completely disassemble, clean, and reassemble the whole thing. (Sorry I didn't
get any pics...poor college students such as myself can't afford digital
cameras until AFTER graduation.)
General transmission condition was pretty good. The pump needed a little
coaxing from the 3/8"x16 jacking bolts I bought. After that, I started to
disassemble the tranny...ONE PIECE AT A TIME. The front drum was tricky, but I
managed (against Jim's better advice) to get the seals changed out with the
help of some 4" c-clamps...and some polycarbonate safety glasses just in case.
The clutches looked like they were okay, but I went ahead and replaced them
anyway since I spent $70 on the kit and I had the parts. The one strange thing
I noticed in this tranny was that there were 4 clutch discs in the front half
of the front drum and only 3 discs in the rear half. The kit included 8 discs.
Strange though this may have seemed, I went ahead and reassembled the drum
EXACTLY as it had come apart. This, I thought, would be the worst part of the
whole thing...boy was I wrong. Once I got the front drum cleaned (with LOTS of
brake cleaner) I set the reassembled front drum to the side and covered it with
plastic sheeting. Now, I went about the task of replacing the rear tranny
seals. One piece of advice for anyone attempting this....get yourself a REALLY
good set of snap ring pliers. The ones I had weren't worth a flip and it took
me 2 hours to get the snap ring off of the output shaft so that I could get the
planetaries out of the case. With that accomplished, the removal of the output
shaft and drums was pretty easy. Replacement of the seals was simple. Then I
put the rearmost drum back into the over-running clutch. "Boy am I lucky," I
thought. "The over-running clutch didn't come apart when I took the rear drum
out." Then it happened. The internal gear of the sprag fell out and all those
fan springs and rollers fell out of the case and went everywhere in my shop.
That was REALLY a PITA to fix. Two hours later, I had them all put back where
they went and working. This was NOT fun.
The bands were in good shape, so I went ahead (for $$ sake) and reused them.
I disassembled the servos once I had both drums set aside. This was where I
found a SERIOUS problem. One that I have yet to fix. The rear servo unit was in
good shape. I replaced the piston rings and set it back in the case. (The 8" c-
clamps came in handy for this section of the rebuild.) I removed the
accumulator piston (the one that is actually under the valve body), replaced
its seals and set it back in the case. No problem. Now, I removed the FRONT
servo and started cussing when I saw what was inside. Pieces of the upper
piston (the smaller one) were in the bore of the housing. The housing wasn't
scored (much to my surprise...we will call this the grace of God) but the
smaller piston ring was fragmented and a small piece of the piston had cracked
off of the smaller diameter end. This was bad...it was also probably the source
of the problem that prompted this tranny rebuild project. Well, I set about
looking for a piston ring to replace the broken one and found that my kit did
not include one. More cussing. The temp fix here is a Viton o-ring on the
bottom of that piston. I also smoothed the broken area with a Dremel tool so
that it wouldn't score the inside of the tranny housing. I don't know if it
worked yet, but I will find out when I get home from work today. I am going to
open the test ports on the tranny case and test the servos with my air
compressor. If it works, I will leave it alone until I can find another piston
to replace the broken one. (Any ideas out there?) I am planning to go to my
friend's junkyard and get the front servo piston out of another TF727 that I
gave to him.
The last part of the rebuild was to replace the seals in the tailshaft housing.
This was pretty easy after I made 3 trips to the parts house to exchange the
seal from my kit for the correct seal. Next was the CAREFUL reinstallation of
the output shaft assembly. With that done, I set the parking pawl rod back into
place and bolted the housing back on the tranny case. The reinstallation of
that planetaries and front drum was last. I bolted the rebuilt front pump back
on the housing and finished my weekend project.
A few pieces of advice for anyone attempting this project. First off, and I
can't stress this enough...make sure you have a CLEAN work area. I actually had
to lock the door to my shop from the outside to keep the ever-present South
Texas wind from blowing sand into my transmission. Sand is bad. Second, Make
sure you don't let those little rollers and springs in the sprag clutch fall
out all over your workshop floor. They are not easy to reinstall. Third, buy
lots of brake cleaner. You will need it. Fourth, if you have a bench where you
can put the tranny and its associated guts at about chest level, do the work
there. I don't have a bench that has enough available space for a transmission.
My back and legs are really giving me fits this morning because I was bent over
a transmission all weekend long. Fifth, soak all the clutches and seals in
transmission fluid before you install them. I started soaking the clutch discs
the night before I planned to start the project. I even went so far as to soak
each and every part I removed for several minutes before I replaced it. I wire-
brushed every bolt, the shafts, and all the other steel parts. After I brushed
them off, I wiped them down with a clean, lint-free rag soaked in tranny fluid
before I reassembled them. I used 2 cans of brake cleaner to hose out the
inside of the tranny case before I started reinstalling parts. Lastly, the best
way to do this is in the order that you remove parts. Take a part out,
disassemble it, soak its new parts in tranny fluid, and reassemble it. Set the
reassembled part to the side and cover it so that nothing like sand or metal
flakes can settle on it. The tools you will need the most are c-clamps, snap
ring pliers, and a torque wrench that reads in inch-pounds.
So, now that you have the scoop on automatic tranny rebuilding, I will ask a
question. I can't seem to find my shop manual and I don't know the values for
adjusting the front and rear bands. The adjustment for the rear band is inside
the oil pan and I can't close the thing up until I get the band adjusted. If
anyone out there in FSJ-Land has these values handy, please send them to me
ASAP so that I can button this thing up.
Have a great week everyone. Let's all keep Jim in our thoughts and prayers.
Talk to you soon.
O)||||||(O
Ken
"Life is a journey that's measured not in miles or years, but in experiences"
- -Jimmy Buffett
"A Pirate Looks at Fifty"
1998
------------------------------
Date: Mon, 11 Feb 2002 10:09:38 -0600
From: Landon Tesar <r16884@email.sps.mot.com>
Subject: fsj: Starter/Relay Custom Cable
Hey, Brian,
do you have any specs on this ? Could this supplier duplicate
this for the rest of us?
I think I replaced my power cable, and broke it down into
individual links.
- - Landon
'89 GW
- ---------------------
> Date: Mon, 11 Feb 2002 06:00:00 -0500
> From: "B. C."
> Subject: fsj: How To Get A Real Charge Out Of Life
>
> Greetings To The FSJ World!
>
> The USS GW received a new positive battery lug, and harness combination
> this past Saturday. For those of you new to the group the USS GW is a
> 1989. Those who own a GW from this era know that the positive cable
> assembly is made up of two primary cables coming off of the lug. A 4
> gauge that goes to the starter, and and 8 gauge that goes to the starter
> relay to power the rest of the systems on the rig. On the #4 leg going
> to the starter is the trigger lead for the starter that comes from the
> starter relay to the starter solenoid.
------------------------------
Date: Mon, 11 Feb 2002 10:21:42 -0600
From: Landon Tesar <r16884@email.sps.mot.com>
Subject: fsj: Left Tie Rod End
Hi,
I replaced the driver's tie rod end on the Wag. Pretty simple,
common sense. The ball shaft was loose and may have worn the
hub link oblong, I'm not sure. It's tight now, but could
quickly get loose again. I had to tighten it several threads.
Nice to get into something like that and have it work out
easily.
- - Landon
'89 GW
------------------------------
Date: Tue, 12 Feb 2002 09:36:45 -0800
From: "Jim B" <carnuck@hotmail.com>
Subject: Re: fsj: Trailboss's last ride
Thanks to all for the condolences. There are 2 ways we can look at things. Our
own selfishness at wanting to keep a family member around no matter what, or
the removal of their personal pain. Since he has been in ill health for
several years, his body just gave out, but he is no longer in pain.
------------------------------
Date: Tue, 12 Feb 2002 12:00:05 -0800
From: "Jim B" <carnuck@hotmail.com>
Subject: fsj: Wanted: J10 Dana 44 housing and axles
I came across a deal on some good used gears from a friend of mine, and now I
need a centered housing ('80 and newer or possibly from a J10 with Dana 20
transfercase) and axles (unless my Model 20 are the same). I have some stuff I
can swap or buy it outright. I'm in Seattle, so cross country stuff probably
wouldn't be worthwhile. I'm going to try Oly4x4.com tomorrow (they are closed
sunday/monday)
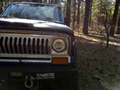
Blackie before pics and my homepage
http://wagoneers.com/JEEPS/FESTS/Snohom ... C00004.JPG
http://www.geocities.com/eaglemania2002/
------------------------------
Date: Mon, 11 Feb 2002 14:29:29 -0800
From: "Phillips, Scott" <scott.phillips@attws.com>
Subject: fsj: Need help locating....
I've got a '76 401 that used to be in front of a TH400. Now it's going in
front of a T-18. What do I have to do with the flywheel?
Basically I know nothing!!! So I come before the FSJ guru's to ask for
advise.
As I understand it I need to do *something* to change the flywheel so that it
works with a manual rather than an auto but I don't know what.
Any hints/tips/tricks/advise would be most appreciated!
Thanks,
Scott
'84 CYJ-7
'76 Wagoneer
------------------------------
Date: Mon, 11 Feb 2002 15:36:55 -0800
From: "Phillips, Scott" <scott.phillips@attws.com>
Subject: fsj: Condolences (Was Trailboss's last ride)
Jim,
My condolences on your fathers passing. It's tought to loose a loved one.
There will always be regrets but just remember that as you move on you'll has
memorise to share with your children and family members. You'll be able to
leave them with positive stories and experiences about your father and his
memory will live on with them.
Scott
___________________________________
From: "Jim B" <carnuck@hotmail.com>
Subject: fsj: Trailboss's last ride
A: About noon yesterday The Trailboss (aka my dad) passed on and left me some
mighty big shoes to fill (except for my uncle, I'm the oldest male in the
family now). He loved the wild backcountry and fishing at lakes far from the
Madding crowd as often as he could. I had planned to take him camping last
summer, but my job turned down my vacation time 3 times (I've now gone a year
and a half w/o vacation or a raise) due to lack of replacement people. Had I
known I wouldn't have this summer to spend with my dad, I would have told
them
to take this job and shove it! (those of you lucky enough to have family
worth
spending time with, pull them close because you never know!)
He wasn't always the easiest to get along with (till after he quit
drinking) but if you knew his background you'd understand. (his Father left
home when he was barely a teen, then he ran off at 16 to join the US Army and
came back a Korean war vet, promoted to Sargeant in the field after
Heartbreak
Ridge and the battle at Da Nangh {sp?})
Sometimes I think Clint's movie of that name was about him, but he didn't
want to talk about the war and he drank to try to forget it and the internal
pain it caused him. I don't really know why I had to send this out, but I
did.
------------------------------
Date: Tue, 12 Feb 2002 22:07:10 -0800
From: "Jim B" <carnuck@hotmail.com>
Subject: fsj: Gary's AMC & 1941-87 Jeep Online Fleamarket Page
http://www.carr.lib.md.us/~gripper/amcclassified.html
Blackie before pics and my homepage
http://wagoneers.com/JEEPS/FESTS/Snohom ... C00004.JPG
http://www.geocities.com/eaglemania2002/
------------------------------
Date: Tue, 12 Feb 2002 13:33:46 GMT
From: Ken Gaines <klg92733@kestrel.tamucc.edu>
Subject: Re: fsj: Need help locating....
Scott,
First of all, you need to remove the ALMOST invisible spacer that lives in the
end of the 401's crankshaft. If you don't remove it, you will never get a pilot
bushing in it. Second, you have to get the flywheel that came from a 401. If
you want a new one, you can get one at www.partsmike.com. He sells them new and
used. Anyway, if you use a flywheel from an I-6 or a smaller V8, it probably
will be bad for your engine because the balancing between AMC engines is
different. I know the I-6 is internally balanced where the AMC V8's were
externally balanced.
Congrats on finding a 401. I have been looking for one here in South Texas for
about 2 years now.
Hope this helps.
O)||||||(O
Ken
> I've got a '76 401 that used to be in front of a TH400. Now it's going in
> front of a T-18. What do I have to do with the flywheel?
>
> Basically I know nothing!!! So I come before the FSJ guru's to ask for
> advise.
>
> As I understand it I need to do *something* to change the flywheel so that it
> works with a manual rather than an auto but I don't know what.
> Any hints/tips/tricks/advise would be most appreciated!
>
> Thanks,
>
> Scott
> '84 CYJ-7
> '76 Wagoneer
"Life is a journey that's measured not in miles or years, but in experiences"
- -Jimmy Buffett
"A Pirate Looks at Fifty"
1998
------------------------------
End of fsj-digest V1 #1566
**************************
From: fsj-digest <owner-fsj-digest@digest.net>
fsj-digest Tuesday, February 12 2002 Volume 01 : Number 1566
Forum for Discussion of Full Sized SJ Series Jeeps
Brian Colucci <ABCvoice@worldnet.att.net>
Digest Coordinator
Contents:
fsj: Re: How To Get A Real Charge Out Of Life
fsj: TF727 got fixed this weekend
fsj: Starter/Relay Custom Cable
fsj: Left Tie Rod End
Re: fsj: Trailboss's last ride
fsj: Wanted: J10 Dana 44 housing and axles
fsj: Need help locating....
fsj: Condolences (Was Trailboss's last ride)
fsj: Gary's AMC & 1941-87 Jeep Online Fleamarket Page
Re: fsj: Need help locating....
FSJ Digest Home Page: http://www.digest.net/jeeps/fsj/
Send submissions to fsj-digest@digest.net
Send administrative requests to fsj-digest-request@digest.net
To unsubscribe, include the word unsubscribe by itself in the body of
the message, unless you are sending the request from a different address
than the one that appears on the list. Include the word help in a
message to fsj-digest-request to get a list of other majordomo
commands.
----------------------------------------------------------------------
Date: Mon, 11 Feb 2002 06:32:47 -0600
From: "Vince Orr" <vorr@attbi.com>
Subject: fsj: Re: How To Get A Real Charge Out Of Life
Excellent advice!
Thanks,
- --Vince
'81 Wag
'99 TJ
- ----- Original Message -----
From: "B. C." <ABCvoice@worldnet.att.net>
To: "PHOENIX FSJ LIST" <fsj-digest@digest.net>
Sent: Monday, February 11, 2002 5:00 AM
Subject: fsj: How To Get A Real Charge Out Of Life
> Greetings To The FSJ World!
>
> The USS GW received a new positive battery lug, and harness combination
> this past Saturday. For those of you new to the group the USS GW is a
> 1989. Those who own a GW from this era know that the positive cable
> assembly is made up of two primary cables coming off of the lug. A 4
> gauge that goes to the starter, and and 8 gauge that goes to the starter
> relay to power the rest of the systems on the rig. On the #4 leg going
> to the starter is the trigger lead for the starter that comes from the
> starter relay to the starter solenoid.
>
> Time had taken its toll on this harness. It needed replaced. The
> dealer was looking at around $125 for this assembly. The local parts
> stores wanted around $95, but none of them had stock on the harness, if
> they even showed availability in their computer.
>
> Then I had an idea. These young generation X guys who like to hop up
> japanese brand X cars frequently toast the tiny electrical systems when
> they toss in a big stereo that draws a lot of juice, unless they have
> this equipment installed by a pro. We have several high end stereo
> shops here in town that specialize in these custom installations. The
> guys that do this work build custom heavy duty harnesses all of the
> time. So I took my existing harness to one of the stereo shops to see
> if it could be duplicated.
>
> Fortunately the installation guy was of the age that he remembered
> driving HEMI Cuda's when they were new. So I knew that he had some
> years of experience. For $45 he built me a very sinister looking, heavy
> duty harness for my rig. The craftsmanship in is work was quite
> apparent. Far better then what I would have purchased from the dealer.
> It fit great, and now I have a lot of juice to all of my accessories,
> and the starter fires over with a vengeance.
>
> So if you need custom battery cable you might try looking at a
> nontraditional supplier; car stereo installation shops.
>
>
> Until The Next Dimension,
> Admiral "Coluch."
> Starfleet Headquarters
> Ohio Post
> END TRANSMISSION....................................
------------------------------
Date: Mon, 11 Feb 2002 15:38:14 GMT
From: Ken Gaines <klg92733@kestrel.tamucc.edu>
Subject: fsj: TF727 got fixed this weekend
Mornin' fellow Jeepers...
Well, here's the scoop on the TF727 rebuild....
Tranny removal was as usual...a PITA. The transfer case came off without a
fight. The rebuild was nothing short of time consuming. It took 2 days to
completely disassemble, clean, and reassemble the whole thing. (Sorry I didn't
get any pics...poor college students such as myself can't afford digital
cameras until AFTER graduation.)
General transmission condition was pretty good. The pump needed a little
coaxing from the 3/8"x16 jacking bolts I bought. After that, I started to
disassemble the tranny...ONE PIECE AT A TIME. The front drum was tricky, but I
managed (against Jim's better advice) to get the seals changed out with the
help of some 4" c-clamps...and some polycarbonate safety glasses just in case.
The clutches looked like they were okay, but I went ahead and replaced them
anyway since I spent $70 on the kit and I had the parts. The one strange thing
I noticed in this tranny was that there were 4 clutch discs in the front half
of the front drum and only 3 discs in the rear half. The kit included 8 discs.
Strange though this may have seemed, I went ahead and reassembled the drum
EXACTLY as it had come apart. This, I thought, would be the worst part of the
whole thing...boy was I wrong. Once I got the front drum cleaned (with LOTS of
brake cleaner) I set the reassembled front drum to the side and covered it with
plastic sheeting. Now, I went about the task of replacing the rear tranny
seals. One piece of advice for anyone attempting this....get yourself a REALLY
good set of snap ring pliers. The ones I had weren't worth a flip and it took
me 2 hours to get the snap ring off of the output shaft so that I could get the
planetaries out of the case. With that accomplished, the removal of the output
shaft and drums was pretty easy. Replacement of the seals was simple. Then I
put the rearmost drum back into the over-running clutch. "Boy am I lucky," I
thought. "The over-running clutch didn't come apart when I took the rear drum
out." Then it happened. The internal gear of the sprag fell out and all those
fan springs and rollers fell out of the case and went everywhere in my shop.
That was REALLY a PITA to fix. Two hours later, I had them all put back where
they went and working. This was NOT fun.
The bands were in good shape, so I went ahead (for $$ sake) and reused them.
I disassembled the servos once I had both drums set aside. This was where I
found a SERIOUS problem. One that I have yet to fix. The rear servo unit was in
good shape. I replaced the piston rings and set it back in the case. (The 8" c-
clamps came in handy for this section of the rebuild.) I removed the
accumulator piston (the one that is actually under the valve body), replaced
its seals and set it back in the case. No problem. Now, I removed the FRONT
servo and started cussing when I saw what was inside. Pieces of the upper
piston (the smaller one) were in the bore of the housing. The housing wasn't
scored (much to my surprise...we will call this the grace of God) but the
smaller piston ring was fragmented and a small piece of the piston had cracked
off of the smaller diameter end. This was bad...it was also probably the source
of the problem that prompted this tranny rebuild project. Well, I set about
looking for a piston ring to replace the broken one and found that my kit did
not include one. More cussing. The temp fix here is a Viton o-ring on the
bottom of that piston. I also smoothed the broken area with a Dremel tool so
that it wouldn't score the inside of the tranny housing. I don't know if it
worked yet, but I will find out when I get home from work today. I am going to
open the test ports on the tranny case and test the servos with my air
compressor. If it works, I will leave it alone until I can find another piston
to replace the broken one. (Any ideas out there?) I am planning to go to my
friend's junkyard and get the front servo piston out of another TF727 that I
gave to him.
The last part of the rebuild was to replace the seals in the tailshaft housing.
This was pretty easy after I made 3 trips to the parts house to exchange the
seal from my kit for the correct seal. Next was the CAREFUL reinstallation of
the output shaft assembly. With that done, I set the parking pawl rod back into
place and bolted the housing back on the tranny case. The reinstallation of
that planetaries and front drum was last. I bolted the rebuilt front pump back
on the housing and finished my weekend project.
A few pieces of advice for anyone attempting this project. First off, and I
can't stress this enough...make sure you have a CLEAN work area. I actually had
to lock the door to my shop from the outside to keep the ever-present South
Texas wind from blowing sand into my transmission. Sand is bad. Second, Make
sure you don't let those little rollers and springs in the sprag clutch fall
out all over your workshop floor. They are not easy to reinstall. Third, buy
lots of brake cleaner. You will need it. Fourth, if you have a bench where you
can put the tranny and its associated guts at about chest level, do the work
there. I don't have a bench that has enough available space for a transmission.
My back and legs are really giving me fits this morning because I was bent over
a transmission all weekend long. Fifth, soak all the clutches and seals in
transmission fluid before you install them. I started soaking the clutch discs
the night before I planned to start the project. I even went so far as to soak
each and every part I removed for several minutes before I replaced it. I wire-
brushed every bolt, the shafts, and all the other steel parts. After I brushed
them off, I wiped them down with a clean, lint-free rag soaked in tranny fluid
before I reassembled them. I used 2 cans of brake cleaner to hose out the
inside of the tranny case before I started reinstalling parts. Lastly, the best
way to do this is in the order that you remove parts. Take a part out,
disassemble it, soak its new parts in tranny fluid, and reassemble it. Set the
reassembled part to the side and cover it so that nothing like sand or metal
flakes can settle on it. The tools you will need the most are c-clamps, snap
ring pliers, and a torque wrench that reads in inch-pounds.
So, now that you have the scoop on automatic tranny rebuilding, I will ask a
question. I can't seem to find my shop manual and I don't know the values for
adjusting the front and rear bands. The adjustment for the rear band is inside
the oil pan and I can't close the thing up until I get the band adjusted. If
anyone out there in FSJ-Land has these values handy, please send them to me
ASAP so that I can button this thing up.
Have a great week everyone. Let's all keep Jim in our thoughts and prayers.
Talk to you soon.
O)||||||(O
Ken
"Life is a journey that's measured not in miles or years, but in experiences"
- -Jimmy Buffett
"A Pirate Looks at Fifty"
1998
------------------------------
Date: Mon, 11 Feb 2002 10:09:38 -0600
From: Landon Tesar <r16884@email.sps.mot.com>
Subject: fsj: Starter/Relay Custom Cable
Hey, Brian,
do you have any specs on this ? Could this supplier duplicate
this for the rest of us?
I think I replaced my power cable, and broke it down into
individual links.
- - Landon
'89 GW
- ---------------------
> Date: Mon, 11 Feb 2002 06:00:00 -0500
> From: "B. C."
> Subject: fsj: How To Get A Real Charge Out Of Life
>
> Greetings To The FSJ World!
>
> The USS GW received a new positive battery lug, and harness combination
> this past Saturday. For those of you new to the group the USS GW is a
> 1989. Those who own a GW from this era know that the positive cable
> assembly is made up of two primary cables coming off of the lug. A 4
> gauge that goes to the starter, and and 8 gauge that goes to the starter
> relay to power the rest of the systems on the rig. On the #4 leg going
> to the starter is the trigger lead for the starter that comes from the
> starter relay to the starter solenoid.
------------------------------
Date: Mon, 11 Feb 2002 10:21:42 -0600
From: Landon Tesar <r16884@email.sps.mot.com>
Subject: fsj: Left Tie Rod End
Hi,
I replaced the driver's tie rod end on the Wag. Pretty simple,
common sense. The ball shaft was loose and may have worn the
hub link oblong, I'm not sure. It's tight now, but could
quickly get loose again. I had to tighten it several threads.
Nice to get into something like that and have it work out
easily.
- - Landon
'89 GW
------------------------------
Date: Tue, 12 Feb 2002 09:36:45 -0800
From: "Jim B" <carnuck@hotmail.com>
Subject: Re: fsj: Trailboss's last ride
Thanks to all for the condolences. There are 2 ways we can look at things. Our
own selfishness at wanting to keep a family member around no matter what, or
the removal of their personal pain. Since he has been in ill health for
several years, his body just gave out, but he is no longer in pain.
------------------------------
Date: Tue, 12 Feb 2002 12:00:05 -0800
From: "Jim B" <carnuck@hotmail.com>
Subject: fsj: Wanted: J10 Dana 44 housing and axles
I came across a deal on some good used gears from a friend of mine, and now I
need a centered housing ('80 and newer or possibly from a J10 with Dana 20
transfercase) and axles (unless my Model 20 are the same). I have some stuff I
can swap or buy it outright. I'm in Seattle, so cross country stuff probably
wouldn't be worthwhile. I'm going to try Oly4x4.com tomorrow (they are closed
sunday/monday)
Blackie before pics and my homepage
http://wagoneers.com/JEEPS/FESTS/Snohom ... C00004.JPG
http://www.geocities.com/eaglemania2002/
------------------------------
Date: Mon, 11 Feb 2002 14:29:29 -0800
From: "Phillips, Scott" <scott.phillips@attws.com>
Subject: fsj: Need help locating....
I've got a '76 401 that used to be in front of a TH400. Now it's going in
front of a T-18. What do I have to do with the flywheel?
Basically I know nothing!!! So I come before the FSJ guru's to ask for
advise.
As I understand it I need to do *something* to change the flywheel so that it
works with a manual rather than an auto but I don't know what.
Any hints/tips/tricks/advise would be most appreciated!
Thanks,
Scott
'84 CYJ-7
'76 Wagoneer
------------------------------
Date: Mon, 11 Feb 2002 15:36:55 -0800
From: "Phillips, Scott" <scott.phillips@attws.com>
Subject: fsj: Condolences (Was Trailboss's last ride)
Jim,
My condolences on your fathers passing. It's tought to loose a loved one.
There will always be regrets but just remember that as you move on you'll has
memorise to share with your children and family members. You'll be able to
leave them with positive stories and experiences about your father and his
memory will live on with them.
Scott
___________________________________
From: "Jim B" <carnuck@hotmail.com>
Subject: fsj: Trailboss's last ride
A: About noon yesterday The Trailboss (aka my dad) passed on and left me some
mighty big shoes to fill (except for my uncle, I'm the oldest male in the
family now). He loved the wild backcountry and fishing at lakes far from the
Madding crowd as often as he could. I had planned to take him camping last
summer, but my job turned down my vacation time 3 times (I've now gone a year
and a half w/o vacation or a raise) due to lack of replacement people. Had I
known I wouldn't have this summer to spend with my dad, I would have told
them
to take this job and shove it! (those of you lucky enough to have family
worth
spending time with, pull them close because you never know!)
He wasn't always the easiest to get along with (till after he quit
drinking) but if you knew his background you'd understand. (his Father left
home when he was barely a teen, then he ran off at 16 to join the US Army and
came back a Korean war vet, promoted to Sargeant in the field after
Heartbreak
Ridge and the battle at Da Nangh {sp?})
Sometimes I think Clint's movie of that name was about him, but he didn't
want to talk about the war and he drank to try to forget it and the internal
pain it caused him. I don't really know why I had to send this out, but I
did.
------------------------------
Date: Tue, 12 Feb 2002 22:07:10 -0800
From: "Jim B" <carnuck@hotmail.com>
Subject: fsj: Gary's AMC & 1941-87 Jeep Online Fleamarket Page
http://www.carr.lib.md.us/~gripper/amcclassified.html
Blackie before pics and my homepage
http://wagoneers.com/JEEPS/FESTS/Snohom ... C00004.JPG
http://www.geocities.com/eaglemania2002/
------------------------------
Date: Tue, 12 Feb 2002 13:33:46 GMT
From: Ken Gaines <klg92733@kestrel.tamucc.edu>
Subject: Re: fsj: Need help locating....
Scott,
First of all, you need to remove the ALMOST invisible spacer that lives in the
end of the 401's crankshaft. If you don't remove it, you will never get a pilot
bushing in it. Second, you have to get the flywheel that came from a 401. If
you want a new one, you can get one at www.partsmike.com. He sells them new and
used. Anyway, if you use a flywheel from an I-6 or a smaller V8, it probably
will be bad for your engine because the balancing between AMC engines is
different. I know the I-6 is internally balanced where the AMC V8's were
externally balanced.
Congrats on finding a 401. I have been looking for one here in South Texas for
about 2 years now.
Hope this helps.
O)||||||(O
Ken
> I've got a '76 401 that used to be in front of a TH400. Now it's going in
> front of a T-18. What do I have to do with the flywheel?
>
> Basically I know nothing!!! So I come before the FSJ guru's to ask for
> advise.
>
> As I understand it I need to do *something* to change the flywheel so that it
> works with a manual rather than an auto but I don't know what.
> Any hints/tips/tricks/advise would be most appreciated!
>
> Thanks,
>
> Scott
> '84 CYJ-7
> '76 Wagoneer
"Life is a journey that's measured not in miles or years, but in experiences"
- -Jimmy Buffett
"A Pirate Looks at Fifty"
1998
------------------------------
End of fsj-digest V1 #1566
**************************
Gabe, "reformed" Jeep hoarder.
-
 fulsizjeep
- Moderator
- Posts: 5012
- Joined: Sun Nov 06, 2011 7:21 am
- Location: Fruitville, FL
- Contact:
Re: Something interesting from wagoneers.com
Been there, done that. It was before been there, done that t-shirts. 
Flint Boardman
88 GW, 401/727/208, 5" lift, D44s/4.10s/locked up, 35s
https://jubileejeeps.org/quadratrac
88 GW, 401/727/208, 5" lift, D44s/4.10s/locked up, 35s
https://jubileejeeps.org/quadratrac