Advice for Welding thin Sheet Metal

This is a place to share about tools and workspaces

MP&C
Posts: 28
Joined: Tue Aug 26, 2014 3:53 am
Location: Southern MD

Re: Advice for Welding thin Sheet Metal

Post by MP&C »

A few of the projects showed up this evening (Wednesday) for the class, more to come tomorrow....

Image

Image

Image

Image

One of the attendees brought a CP hammer for us to use...

Image

Image

I'm going to have to get Peter here more often, forces me to clean up the place!

Image

Image

Image

MP&C
Posts: 28
Joined: Tue Aug 26, 2014 3:53 am
Location: Southern MD

Re: Advice for Welding thin Sheet Metal

Post by MP&C »

Here are some of the highlights of the first day's class (Thursday)....
Peter shows how to prepare a stump for shrinking....

Image

Image

Image

Image

As he explained, the typical round dish that many of us have been taught here in the states is useful for making "bowls", and not much else. For a longer shape the confines of the dished area leaves dings on the opposite side. The carved hollow should be longer/flat to one side to better accommodate these longer shapes, and tapers up to nothing. This gives us varying heights, thus produces smaller shrinks the farther out you come. Much more useable in a wider variety of shapes..

Discussing weld location in panel forming....

Image

Image

Using magnets to hold a paper pattern for layout....

Image

Image

Image

Image

Image

Wheeling, tuck shrinking and annealing aluminum sheet...

Image

Image

Image

Image

Capturing the tuck and shrinking on aluminum sheet

Image

Image

Image

Image

Image

Image

Blocking and wheeling our 19 gauge steel fender panel...

Image

Image

Forming the rear corner for a Model A..

Image

Image

Image

Image

Blocking on the sand bags and shrinking on the stump....

Image

Image

Image

Image

Wheeling....

Image

MP&C
Posts: 28
Joined: Tue Aug 26, 2014 3:53 am
Location: Southern MD

Re: Advice for Welding thin Sheet Metal

Post by MP&C »

Here's some of Friday's class projects.

The start of a scooter fender...

Image

Test fit of a fender panel...

Image

Copper work, trash can taking shape...

Image

Image

Image

Image

Image

Image

Paper pattern on a roadster quarter panel....

Image

Image

Image

Using the blocking hammer to pre-stretch

Image

Making a pattern for the dies

Image

Image

Image

Image

Image

Image

Making a pattern of luan board for a divider offset in trimming the top edge..

Image

What happens when a metal shaper gets around wood products...

Image

Image

Trimming and filing up the top edge....

Image

On to the Lennox....

Image

Image

Image

MP&C
Posts: 28
Joined: Tue Aug 26, 2014 3:53 am
Location: Southern MD

Re: Advice for Welding thin Sheet Metal

Post by MP&C »

Project updates for Saturdays class:

Wiring top edge of the copper trash can..


Image

Image

Image

Image

Image

Image

Image

Roadster quarter, making dies for the upper bead detail....

Image

Image

Image

Image

Sharpening the crease

Image

Image

A bit of shrinking....

Image

Test fit...

Image

Image

Marking for trimming the wheel opening...

Image

Image

Inside radius backstop

Image

Image

Scooter fender...

Image

Trimming...

Image

Image

Image

Prepping for Sport Coupe door skin removal

Image

Image

Image

We took a short break for a Maryland treat...

Image

Image

of course, using only the correct utensils....

Image

Image

Blocking the top section of the roadster quarter.....

Image

Image

Image

MP&C
Posts: 28
Joined: Tue Aug 26, 2014 3:53 am
Location: Southern MD

Re: Advice for Welding thin Sheet Metal

Post by MP&C »

Final day of the class (Sunday).....

Wheeling door skin for a sport coupe:

Image

Image

Image

Annealing copper wire to use as rivets:

Image

Image

Image

Image

Cover plate for military vehicle:

Image

Paper pattern

Image

Image

Image

Tuck shrinking on post dolly

Image

Image

Forming upper quarter reverse

Image

Image

Image

Image

Wheel opening bead detail added

Image

Image

Image

Tipping flange with vise grips with jaws that have been smoothed...

Image

Stretching

Image

Image

Image

Image

Image

Image

Image

Image

Image

Loading stumps for the journey to their new home..

Image

Image

Image

MP&C
Posts: 28
Joined: Tue Aug 26, 2014 3:53 am
Location: Southern MD

Re: Advice for Welding thin Sheet Metal

Post by MP&C »

More work on the scooter fender..,

Image

Marked for trimming...

Image

Image

Image

Tipping wheel to set the side flange....

Image

Image

Image

Profile comparison, front to rear...

Image

Image

.....and side to side...

Image

Image

almost ready.....

Image

MP&C
Posts: 28
Joined: Tue Aug 26, 2014 3:53 am
Location: Southern MD

Re: Advice for Welding thin Sheet Metal

Post by MP&C »

Final touches on the scooter fender(s). The original (rear) had been loose at some point as the fender mounting holes were nice and elongated from flopping around. So I'll get them filled in and Randy will need to match drill them to the frame..

Image

Image

Use the right tools for the job....

Image

After marking, when cutting out such a small piece I like to leave a "handle" until the very end..

Image

Image

....gives you something to hold onto while fine tuning the fit

Image

Nice and snug....

Image

Tacking in the filler piece...

Image

Image

Image

Image

Image

Next was to trim a nice radius on the front and back ends of the new front fender....

Image

Image

Last on the list, the forming process with the old fender left some "pie crust" edging, as seen here and in an original photo...

Image

Image

So we needed a special tool in order to duplicate this feature...

Image

Image

Spacing all marked out....

Image

Finished edge...

Image

Image

Image

All ready for delivery!
User avatar

tgreese
Posts: 7092
Joined: Fri Jun 08, 2012 6:31 am
Location: Medford MA USA

Re: Advice for Welding thin Sheet Metal

Post by tgreese »

Always fascinating to read your posts Robert. Makes me want to go out to the shop and try to duplicate what you've shown! Thanks for posting such detailed replies. Your skill and expertise are quite inspiring.

I have a specific question about planishing. What do you do when you are repairing something like a rocker panel where you have no access to the back side after it is welded? I would guess that you use the same dot-by-dot technique, with grinding using the cutoff wheel, and skip the planishing. Must you make your replacement panel slightly oversize, so that the shrinkage from welding gives you the right final profile? If so, how do you guess how much extra panel length is needed?
Tim Reese
Maine beekeeper's truck: '77 J10 LWB, 258/T15/D20/3.54 bone stock, low options (delete radio), PS/PDB, hubcaps.
Browless and proud: '82 J20 360/T18/NP208/3.73, Destination A/Ts, 7600 GVWR
Copper Polly: '75 CJ-6, 304/T15, PS, BFG KM2s, soft top
GTI without the badges: '95 VW Golf Sport 2000cc 2D
Dual Everything: '15 Chryco Jeep Cherokee KL Trailhawk, ECO Green
Blockchain the vote.
User avatar

Strode182
Posts: 374
Joined: Sat Jun 09, 2012 8:38 am
Location: Littleton, Co

Re: Advice for Welding thin Sheet Metal

Post by Strode182 »

Absolutely amazing, as always, Robert. So much to study and absorb.

Thanks for posting!

MP&C
Posts: 28
Joined: Tue Aug 26, 2014 3:53 am
Location: Southern MD

Re: Advice for Welding thin Sheet Metal

Post by MP&C »

tgreese wrote:I have a specific question about planishing. What do you do when you are repairing something like a rocker panel where you have no access to the back side after it is welded? I would guess that you use the same dot-by-dot technique, with grinding using the cutoff wheel, and skip the planishing. Must you make your replacement panel slightly oversize, so that the shrinkage from welding gives you the right final profile? If so, how do you guess how much extra panel length is needed?

Tim, one of the most important decisions in making your patches for anything is weld location. For something like a rocker panel, if you're only patching a small hole, then I would caution that rust is seldom limited to what shows on the outside, so my suggestion would be to replace the entire rocker if available or within your fabrication skill level. The factory method of spot welds or the alternative of plug welds will be the best installation method to eliminate the shrinkage encountered on a butt welded seam.

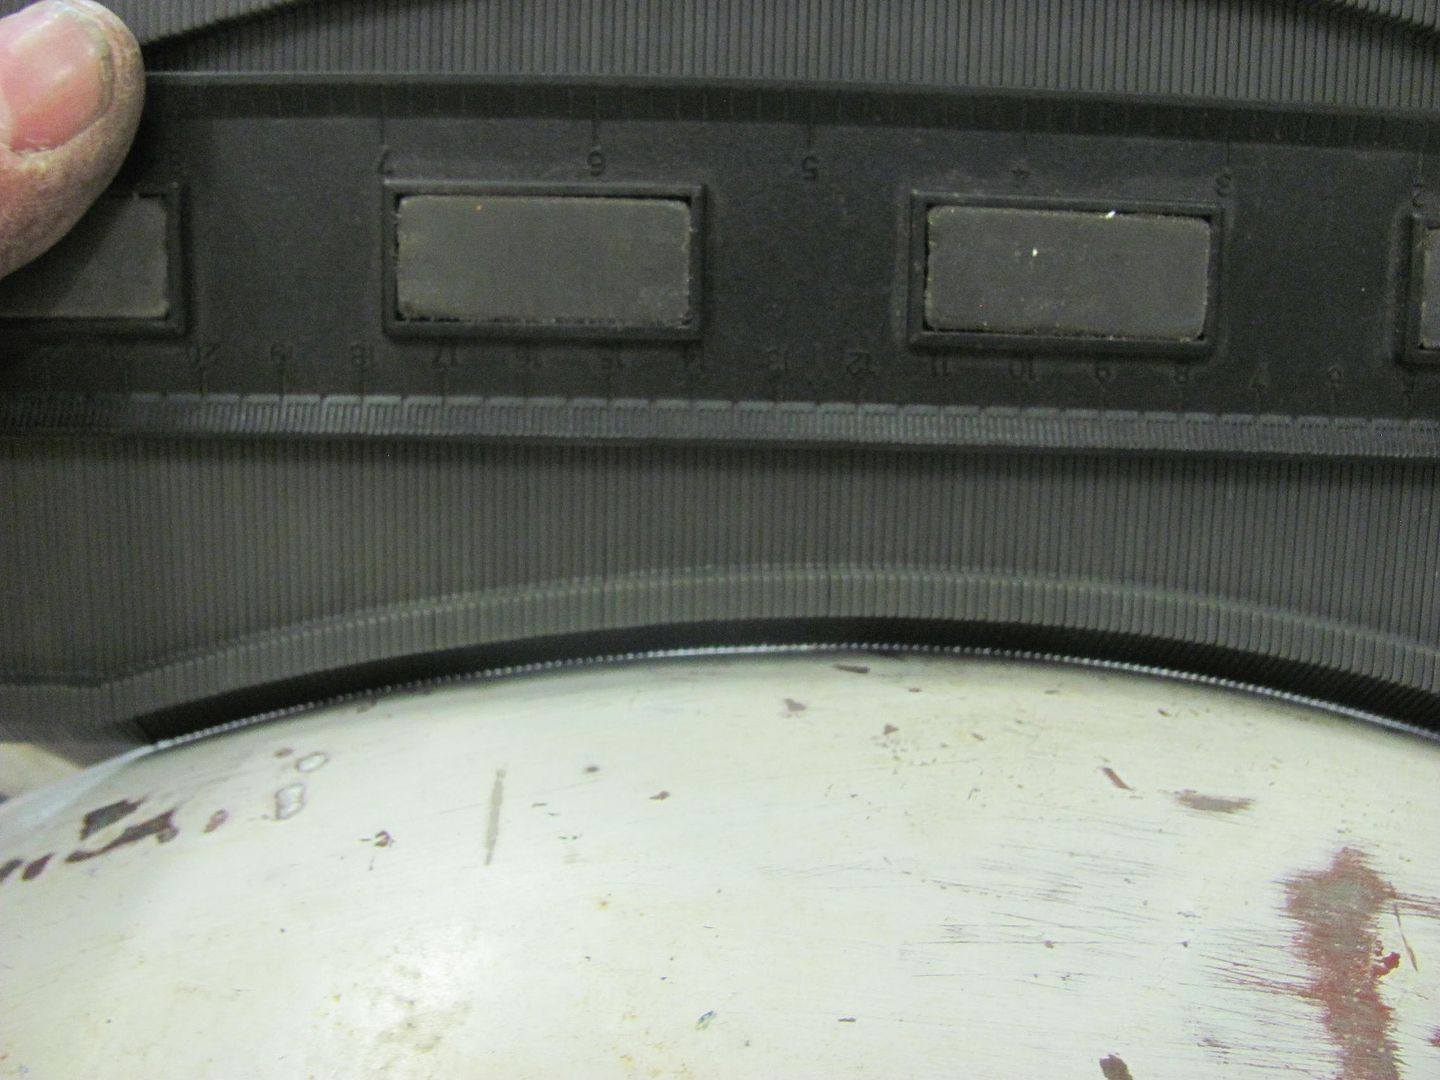
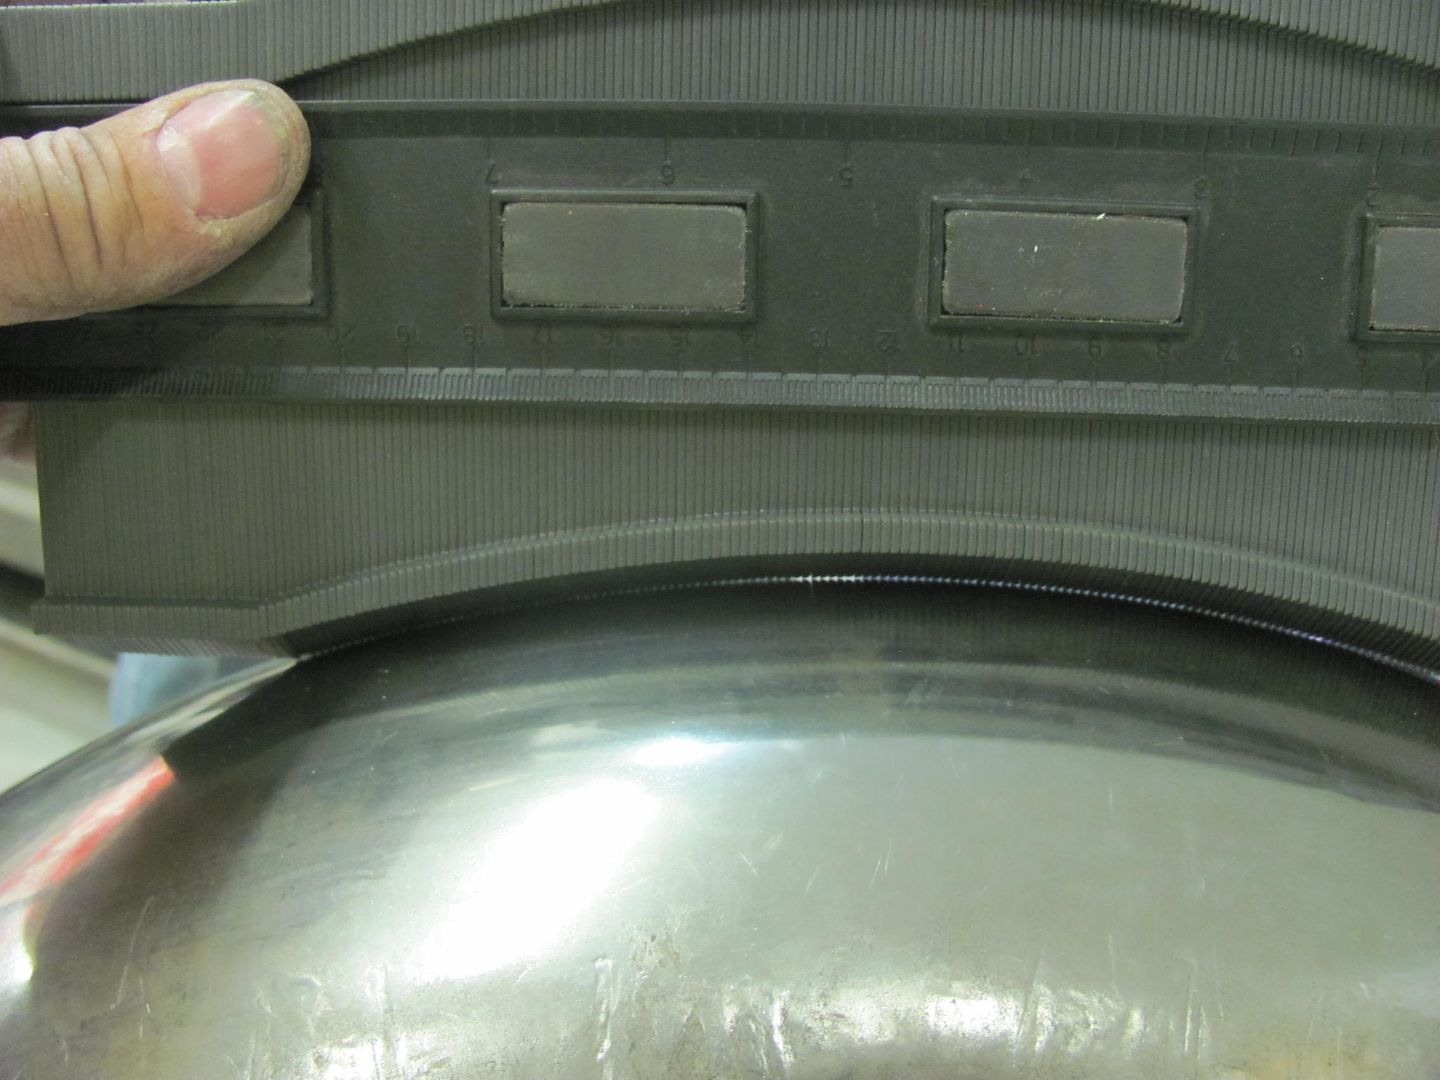
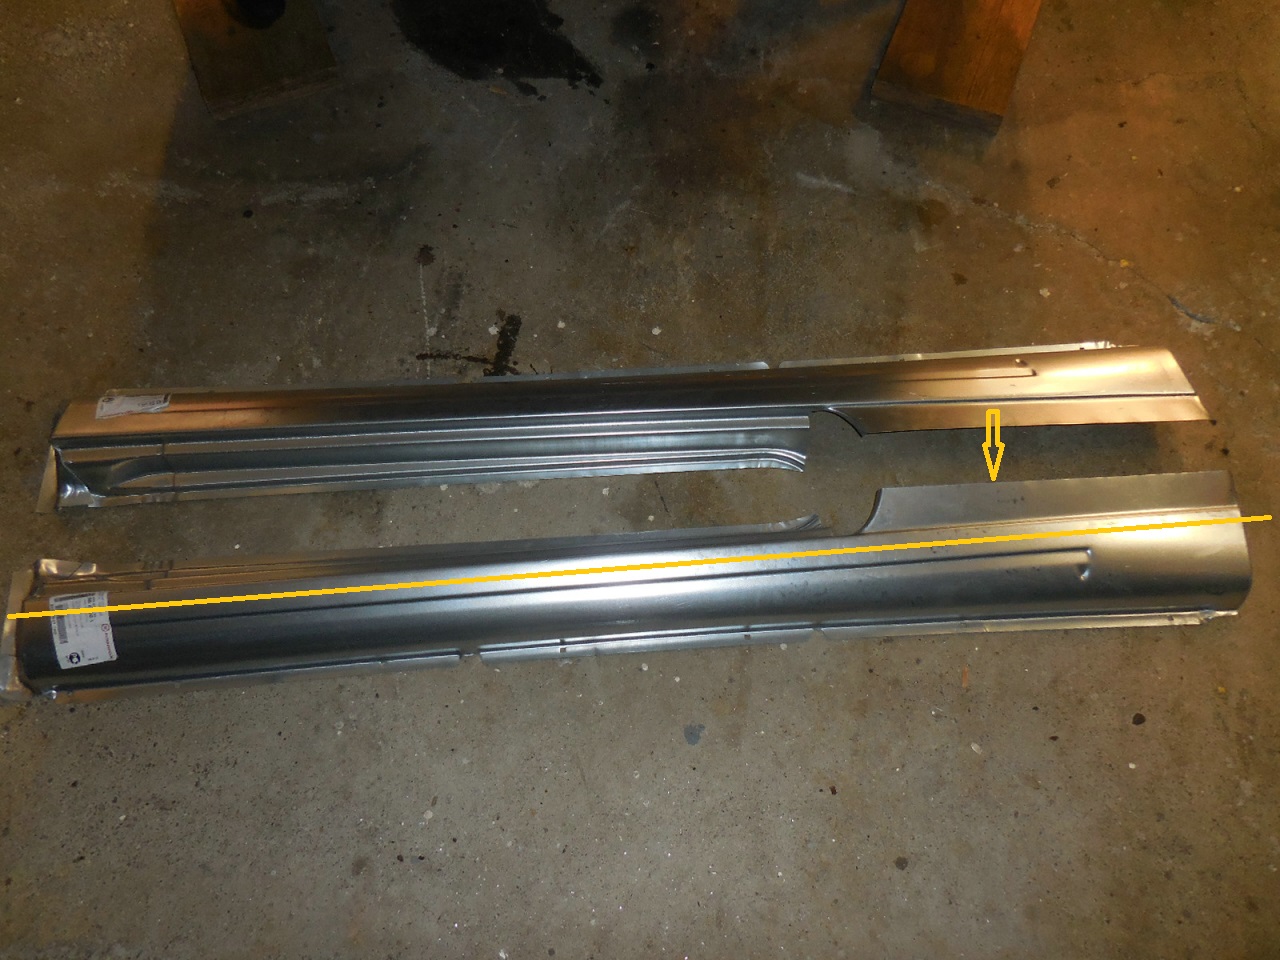
To preface the second option, let's assume you are replacing a small section in the rocker about 6" wide. Rather than use a square patch on the outer surface only, I would rather extend the top and bottom to include any flanges as per factory style that would allow the factory weld method to be used in the horizontal attachment, and would limit butt welded seams to qty of two vertical instead of four around a perimeter. Now let's look at a vertical butt welded seam. Here is a cross section of a crowned panel, makes no difference if it's a quarter panel or rocker panel, the crown will act the same.


Image


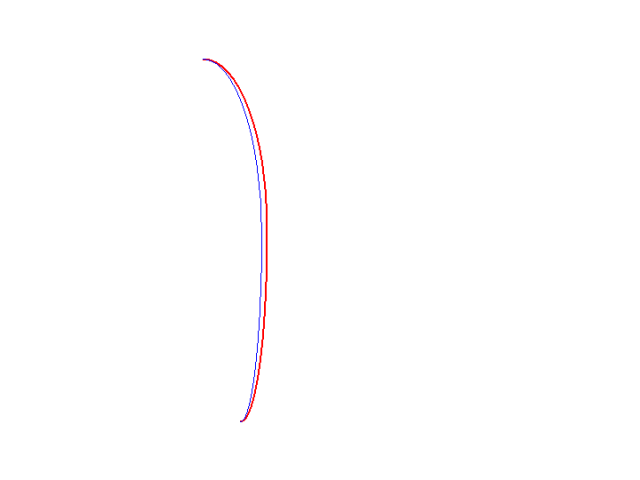
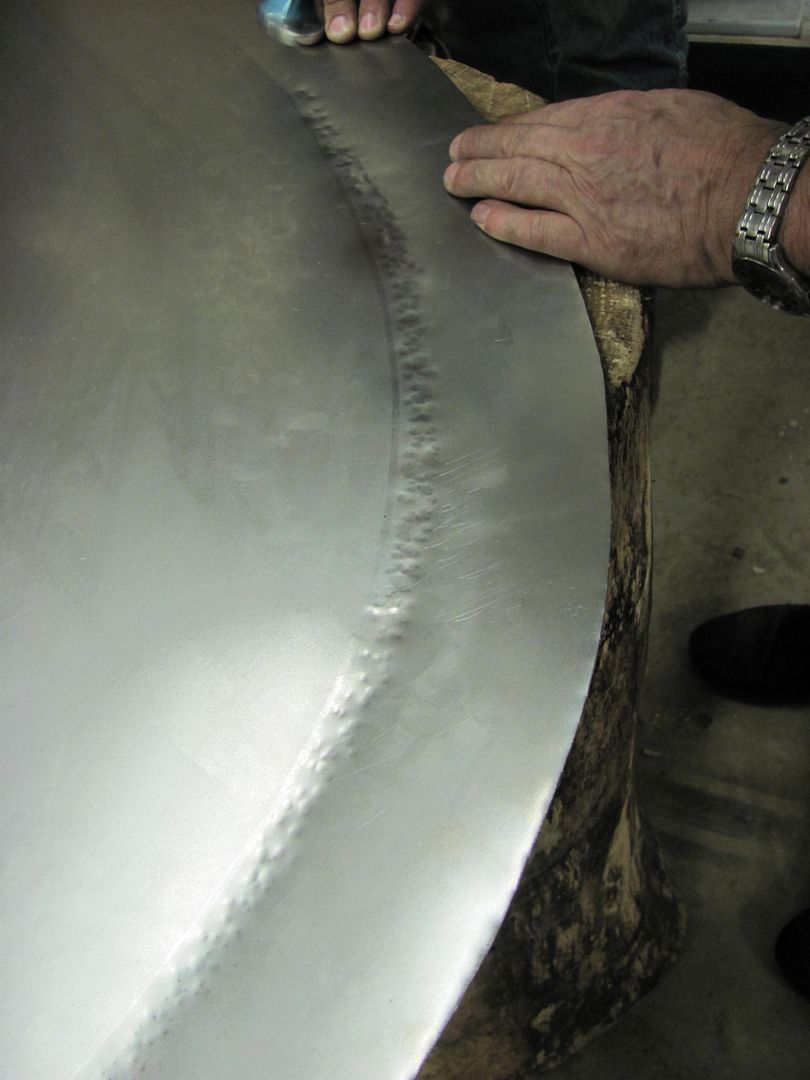
The red line represents a cross section of the panel in it's normal state. Now given a vertical weld seam from top to bottom of said panel, the shrinkage that occurs from welding will shrink circumferentially around each and every weld dot. With the cumulative shrinking effects along that seam, it will shrink to the extent that the weld seam now sits along the blue line. This is why any such weld seam along an outward crowned panel always ends up with a valley caved in. Many people will misread all this movement as the panel stretching, but it is indeed a result of shrinking, and needs some planishing to stretch the area in order to return to normal.

Following that info, this next option would be to prestretch along the vertical seams, only at the edges of the adjacent panels, and insure the excess protrudes outward. The amount needed is something that is going to come with experience, but it is likely less than you think. As an example, the process of cutting with Wiss shears that contain the tiny serrations in the jaw will actually cause a bit of a stretch as you cut. You would likely need more stretch than that, but not much more. In this method, I would use flanges at the top and bottom for factory style spot/plug welds and two vertical butt welds, having the pre-stretch needed only along the vertical seams.

The other consideration here, addressed earlier in this thread, is that the starting and stopping of using Mig welded dots introduces more deformity than if you did a continuous weld seam, like that possible with Tig or O/A gas welding on sheet metal. A continuous non-stop weld process heats up gradually across the panel adjacent to the weld seam and cools down gradually as you progress, so the weld shrinking is less than you'll experience with the circumferential shrink around each and every Mig weld dot.

Last option, some quality filler can fill in the low spots. Sure, we'd all like to accomplish a repair without it, but in some cases doing a partial repair (ie: not replacing the entire panel) does not leave you with much choice. We all need to accomplish what is within our skillset, and work toward improvement each time we do a similar repair.

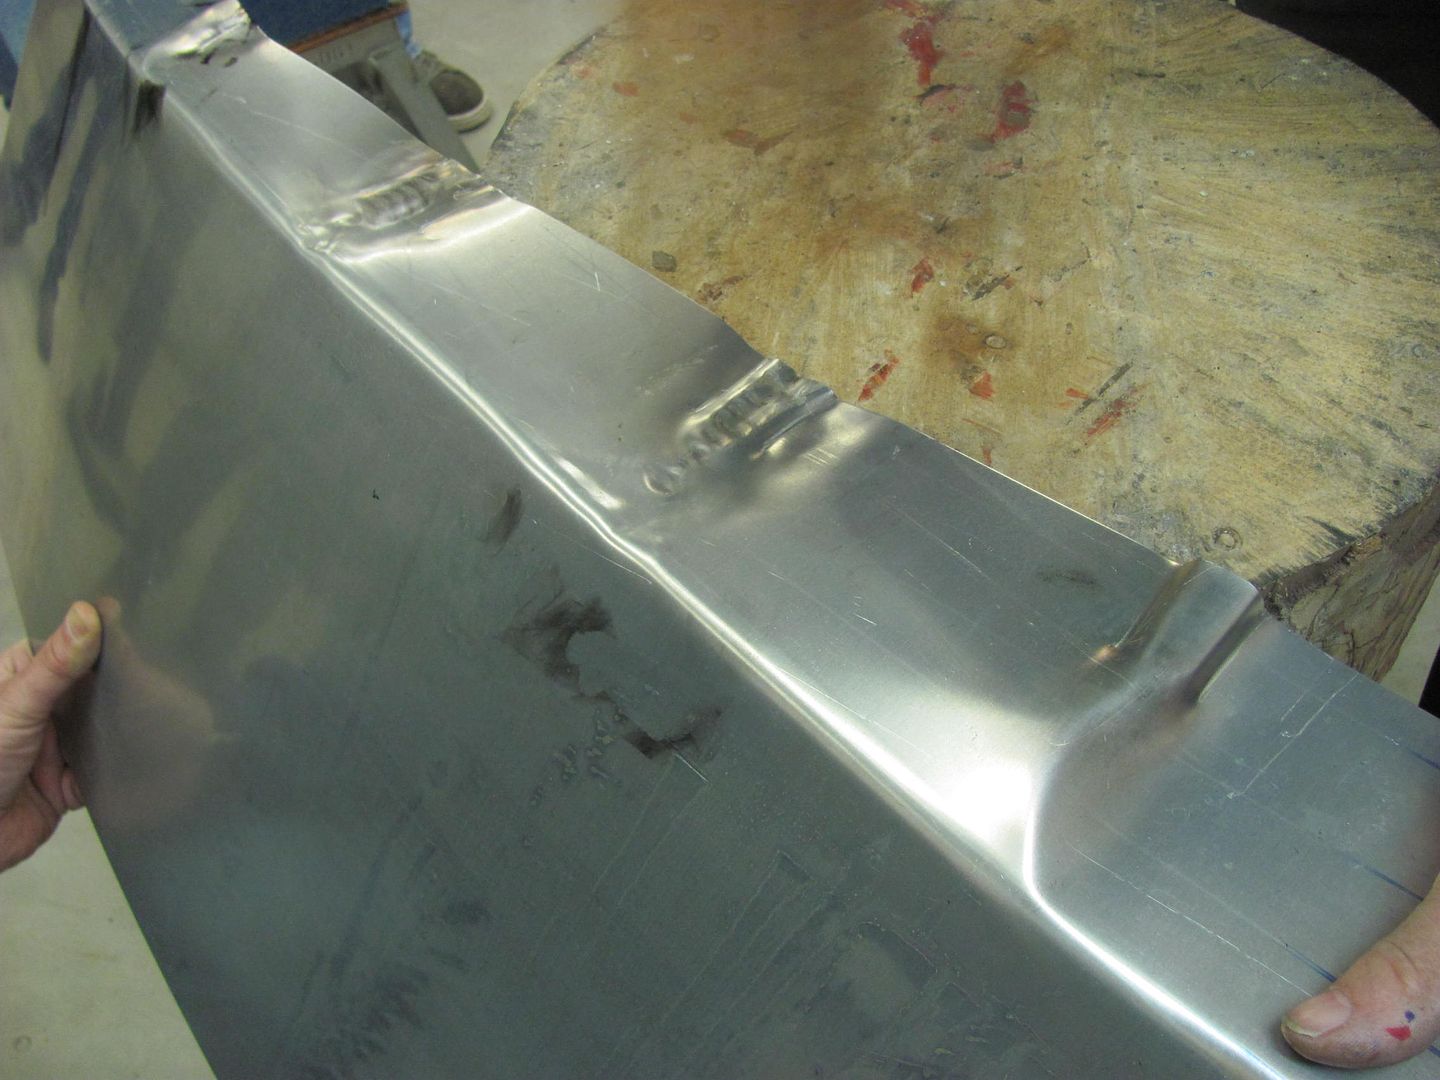
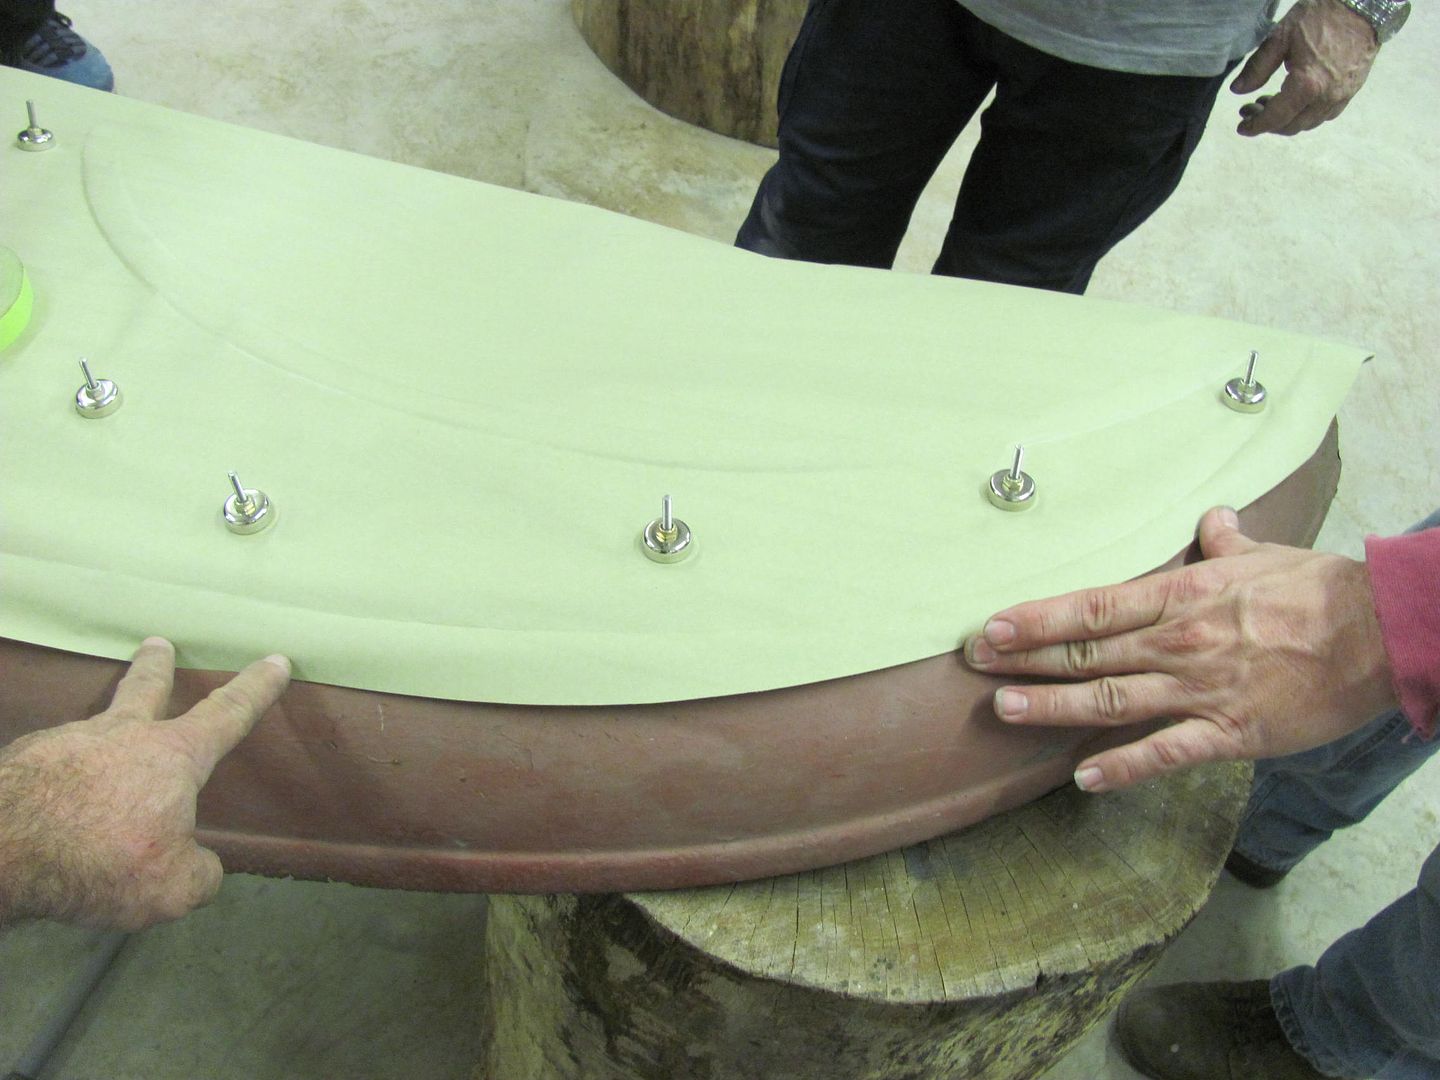
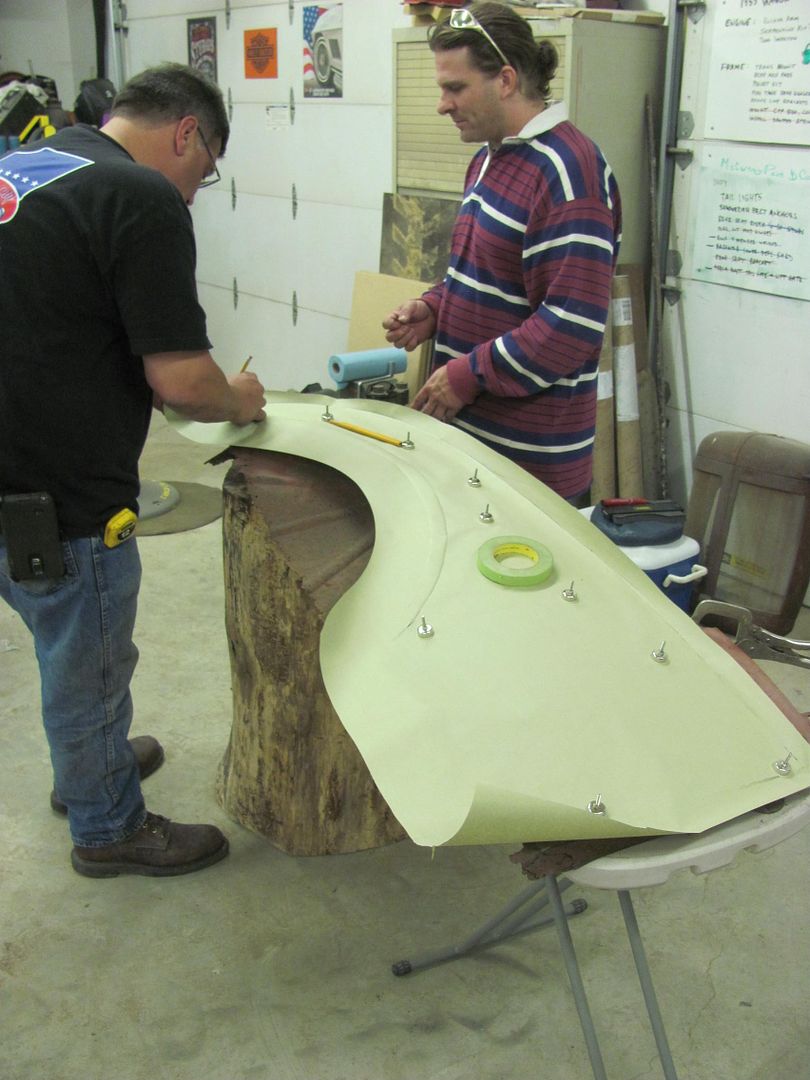
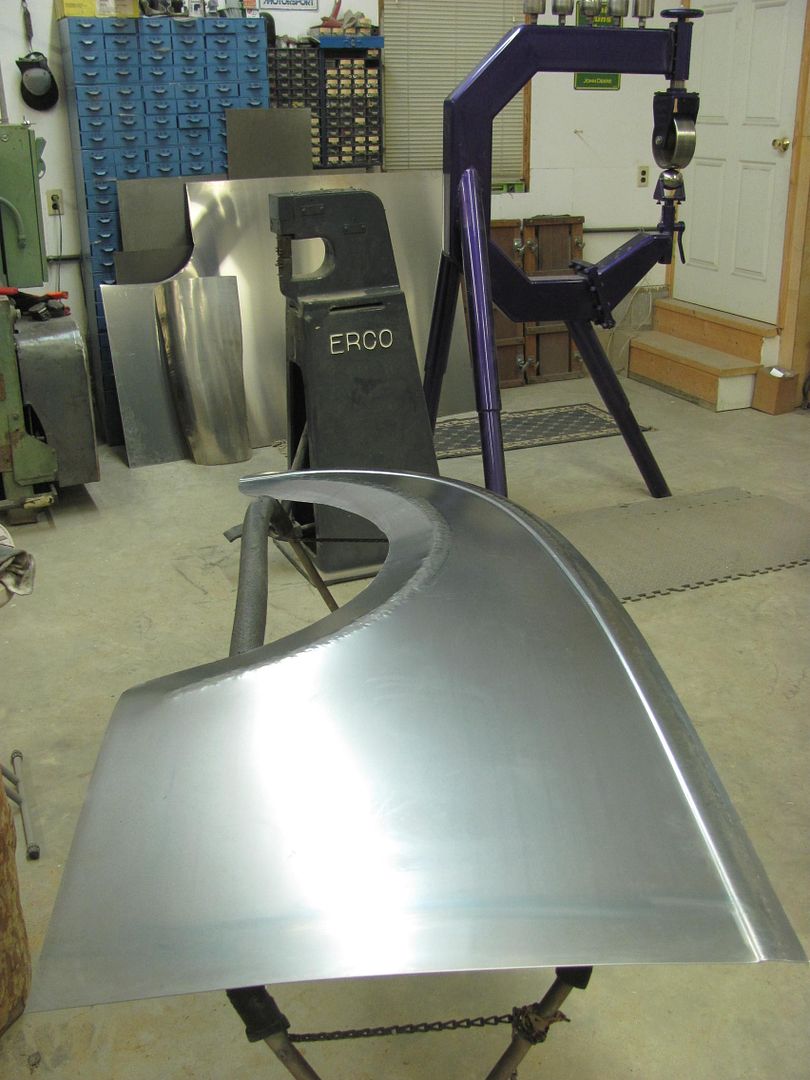
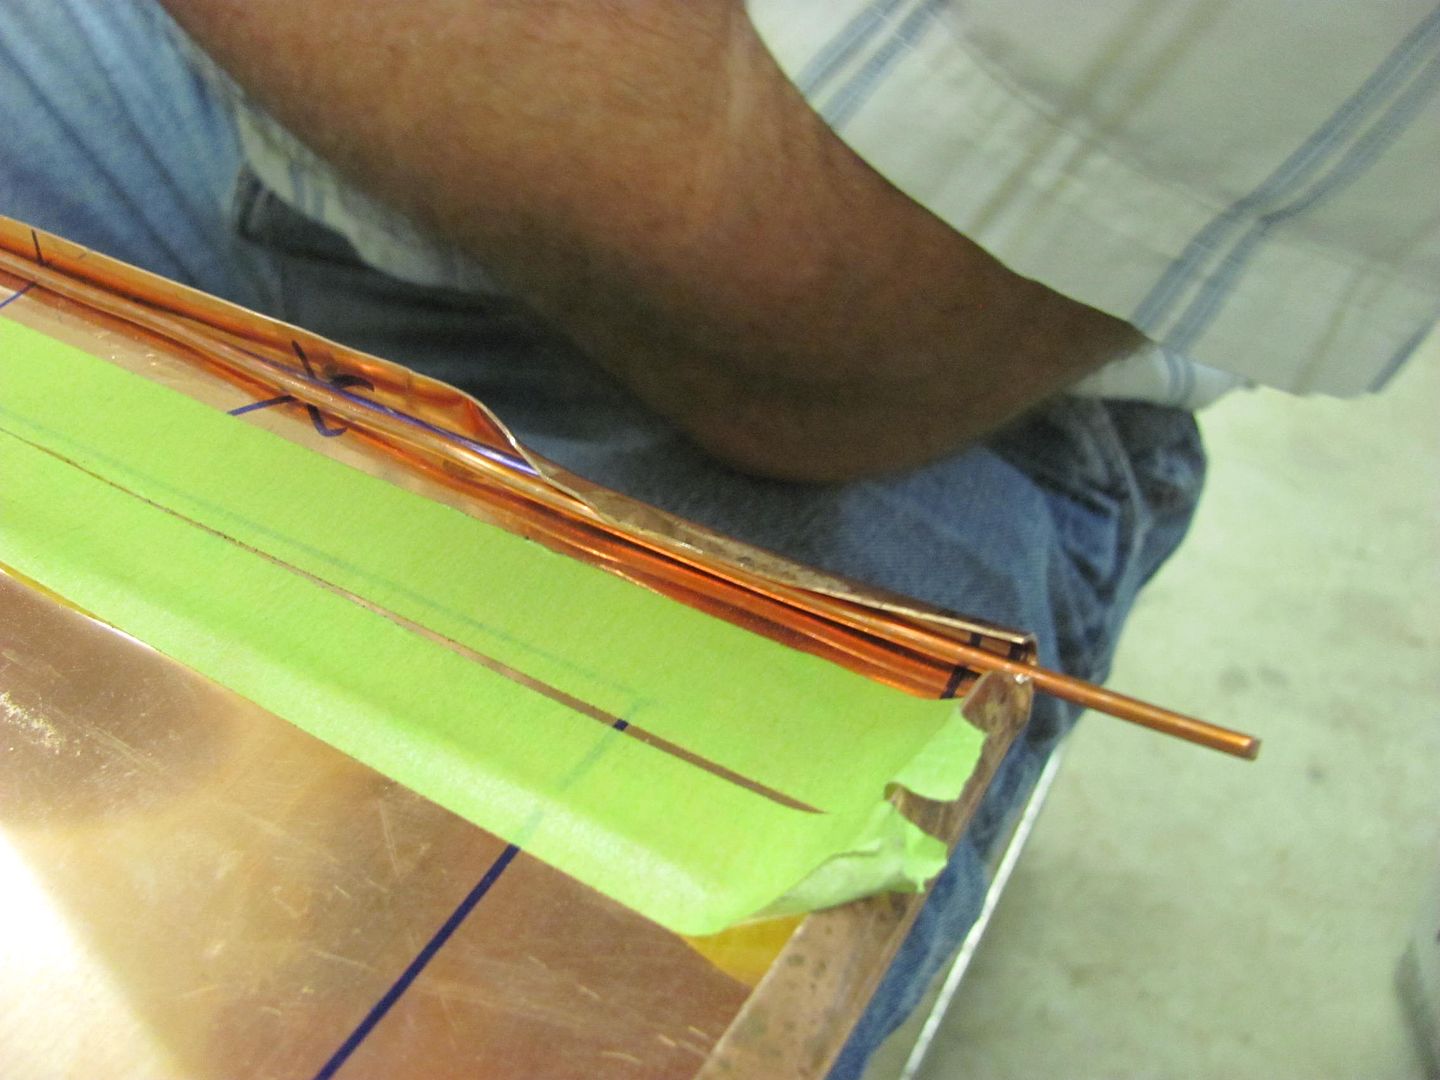
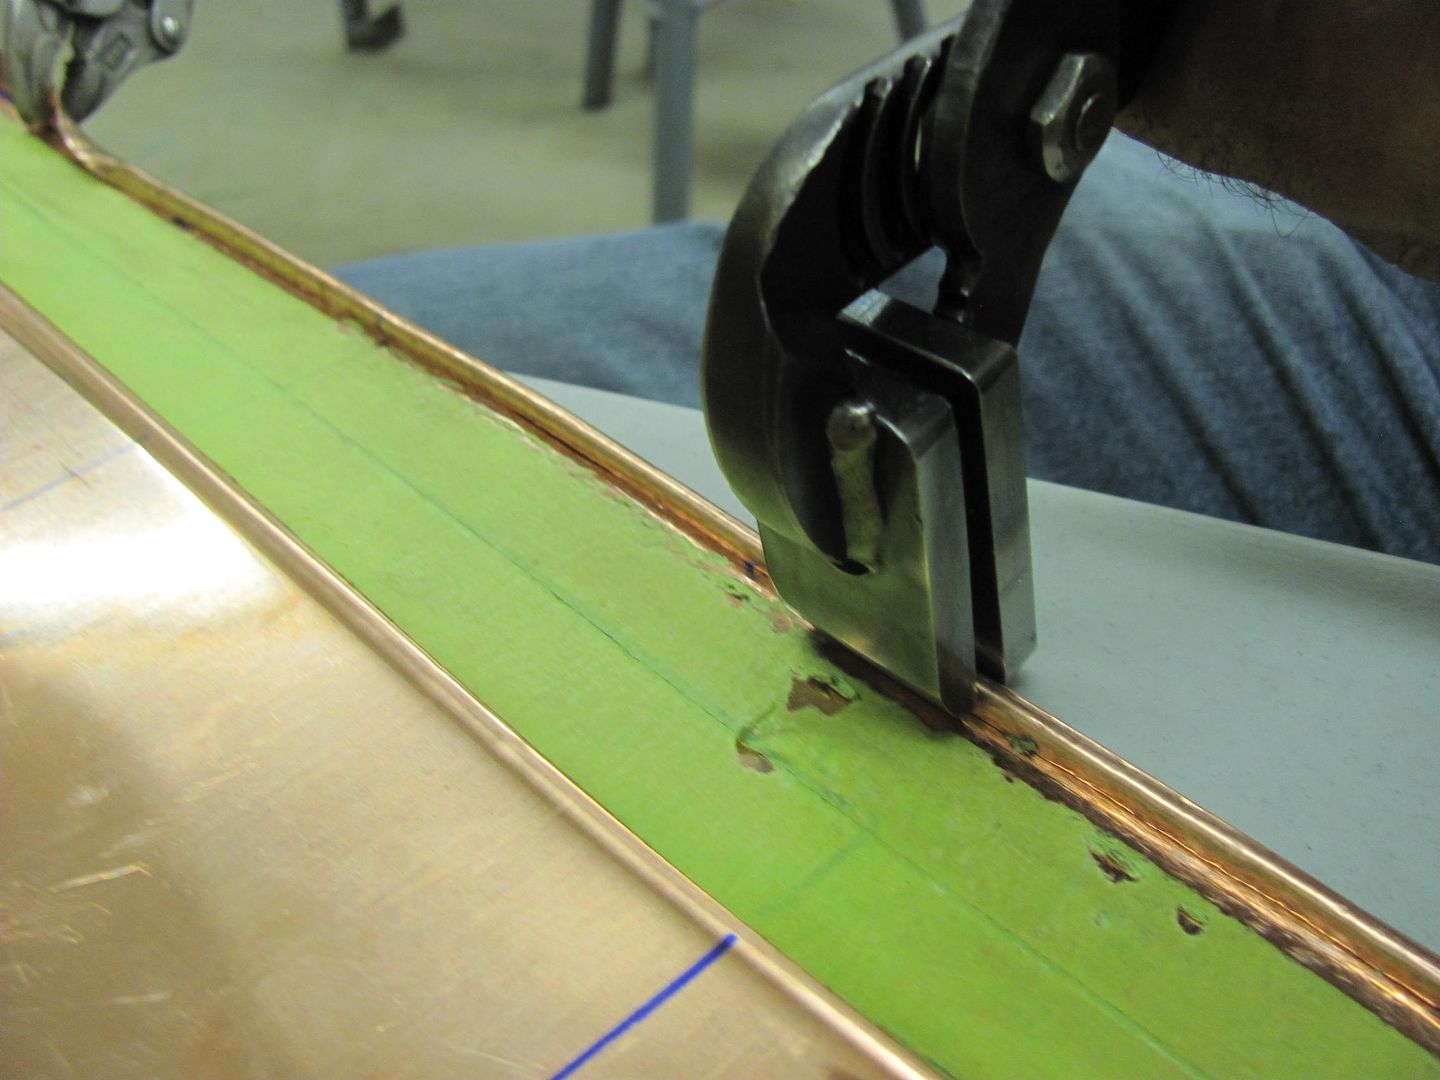
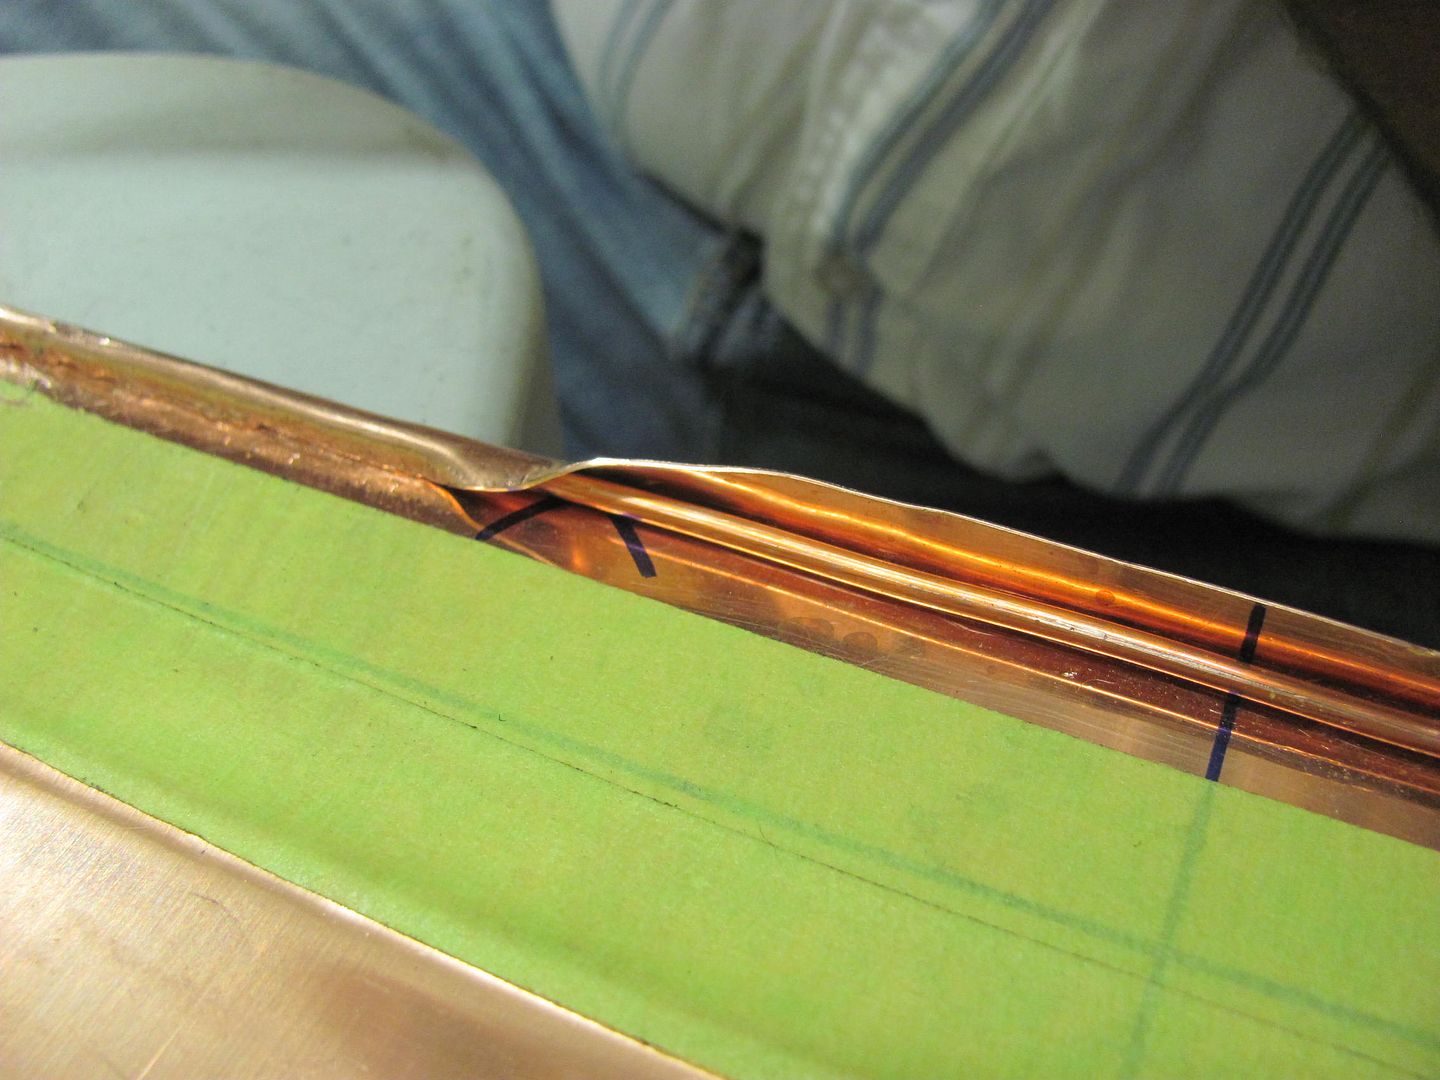
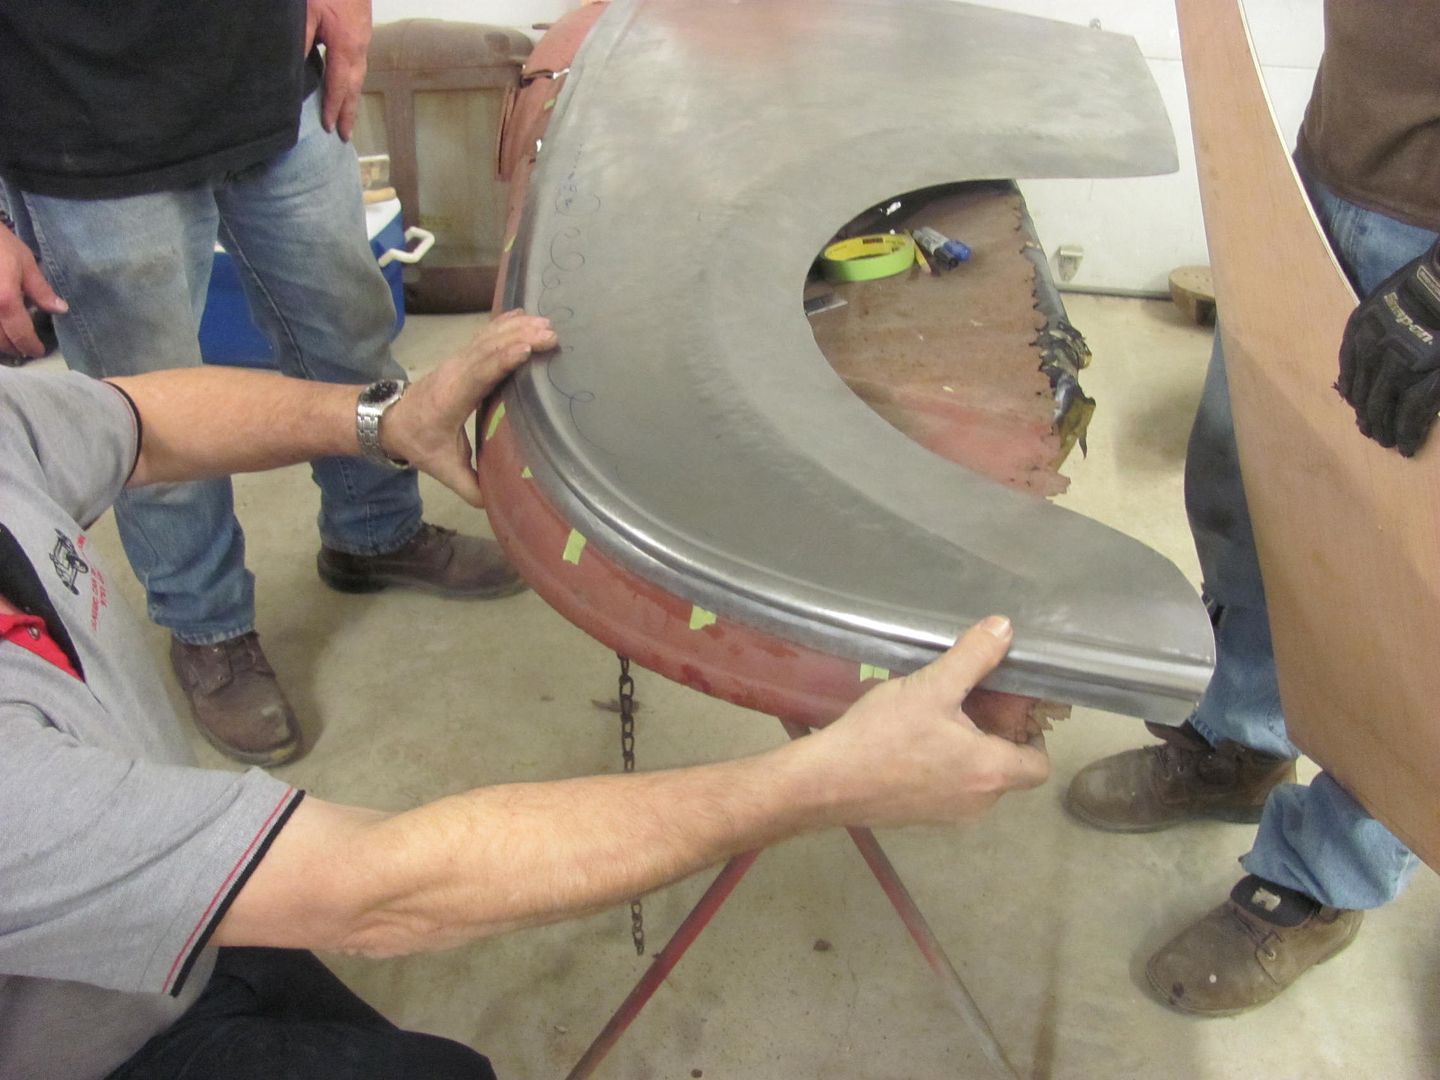
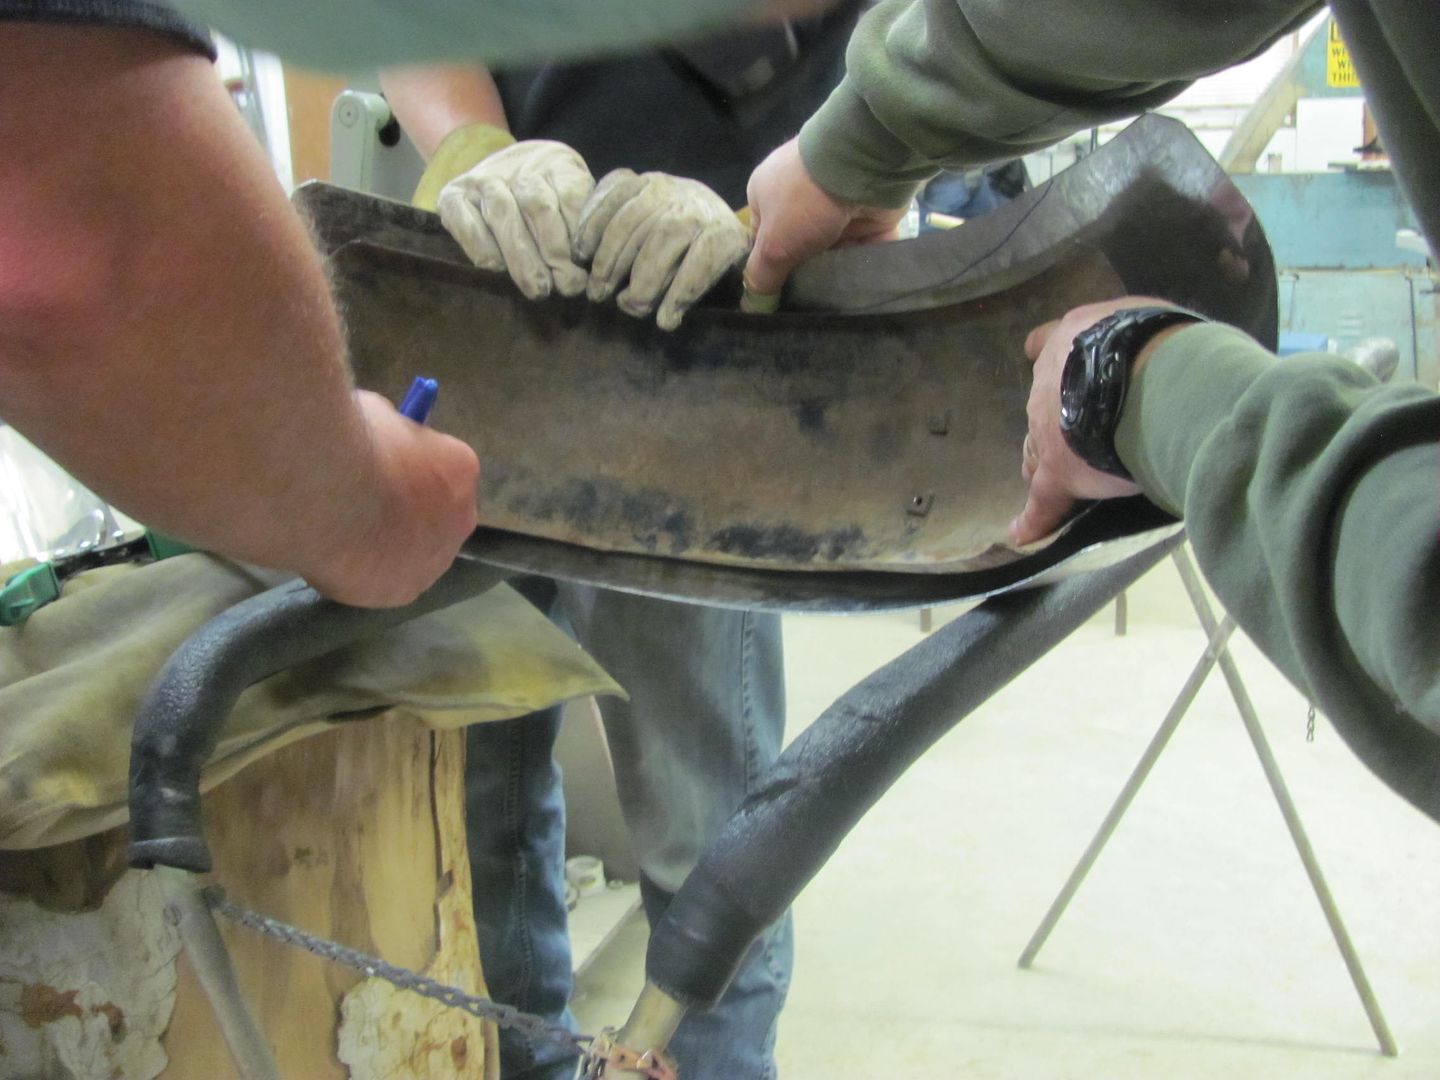
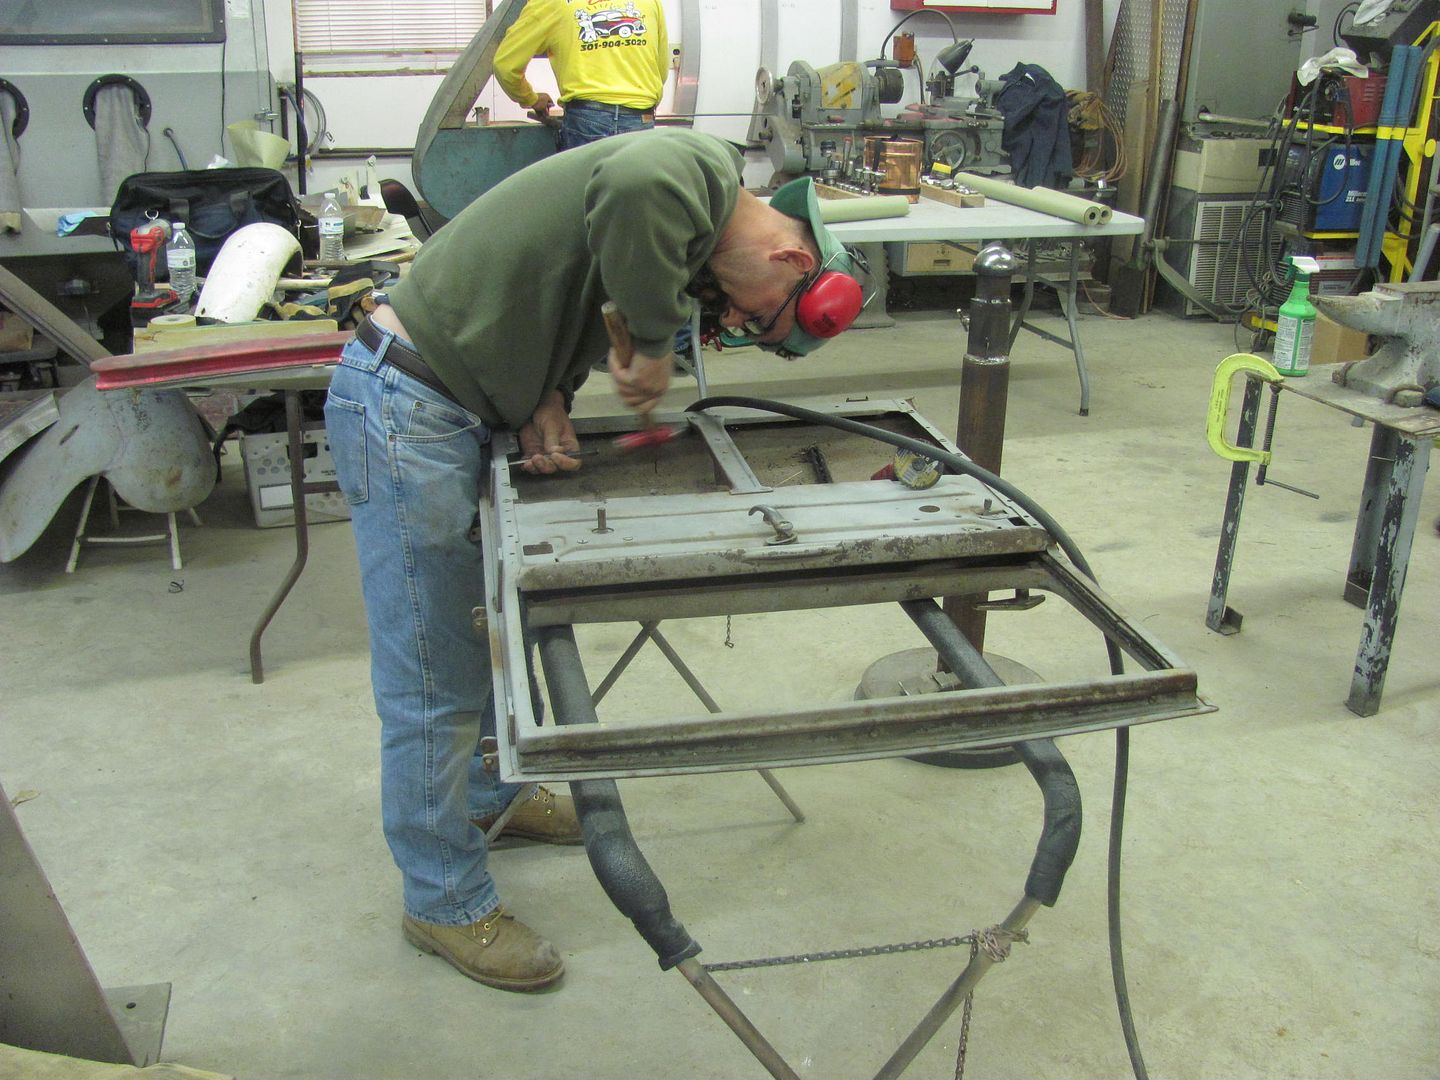
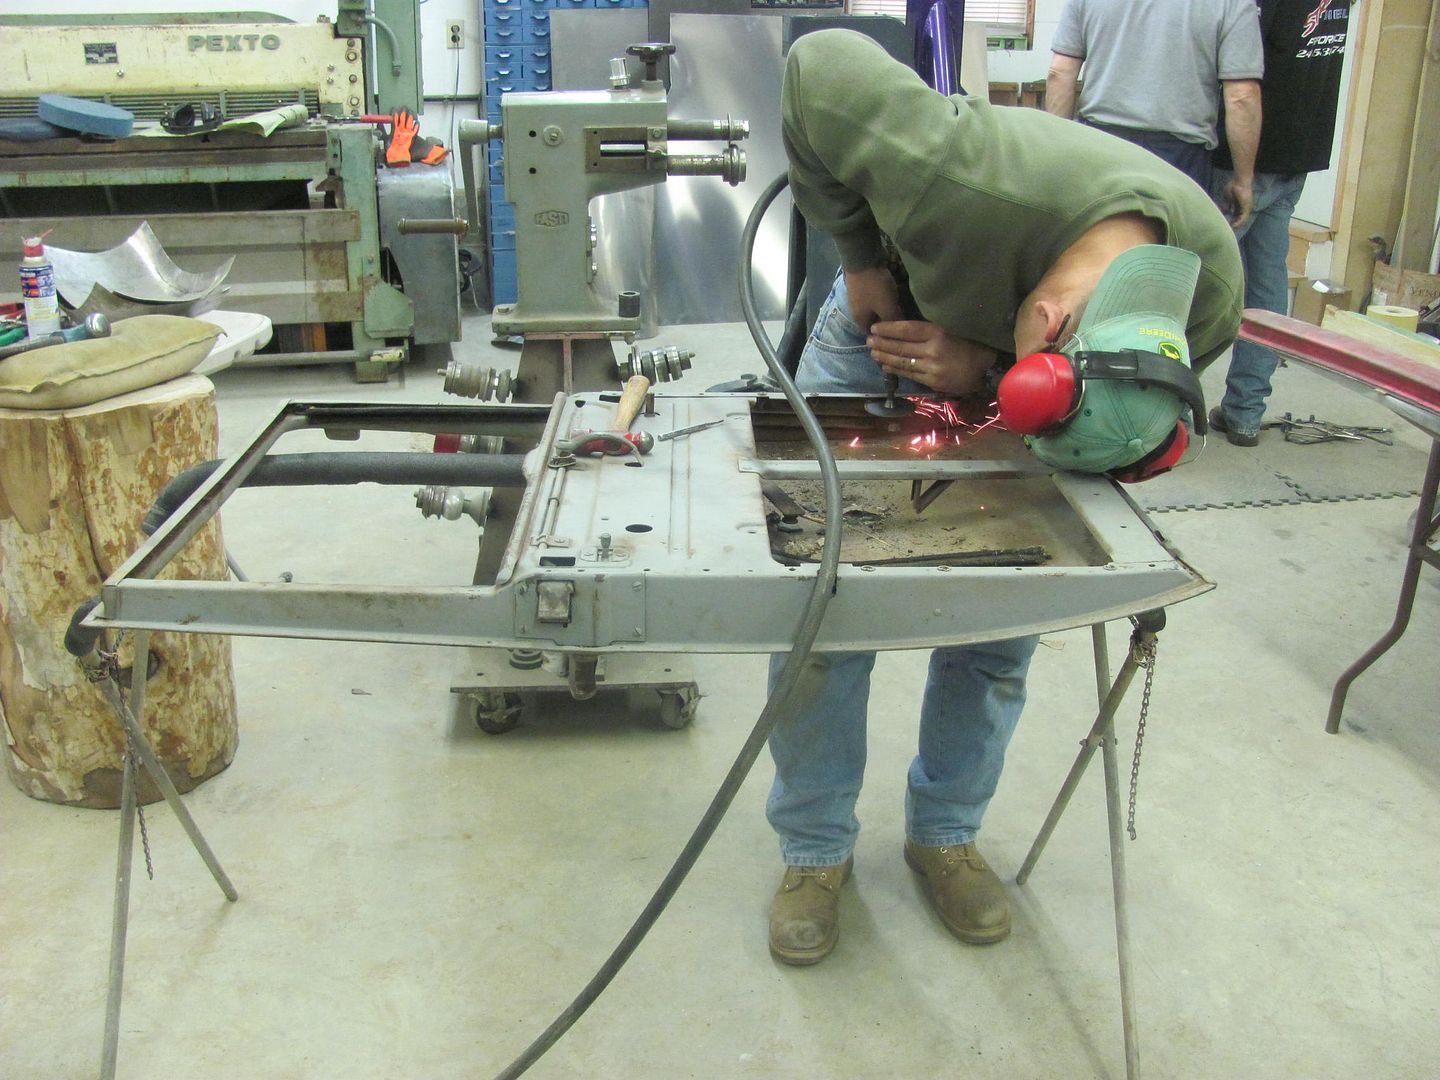
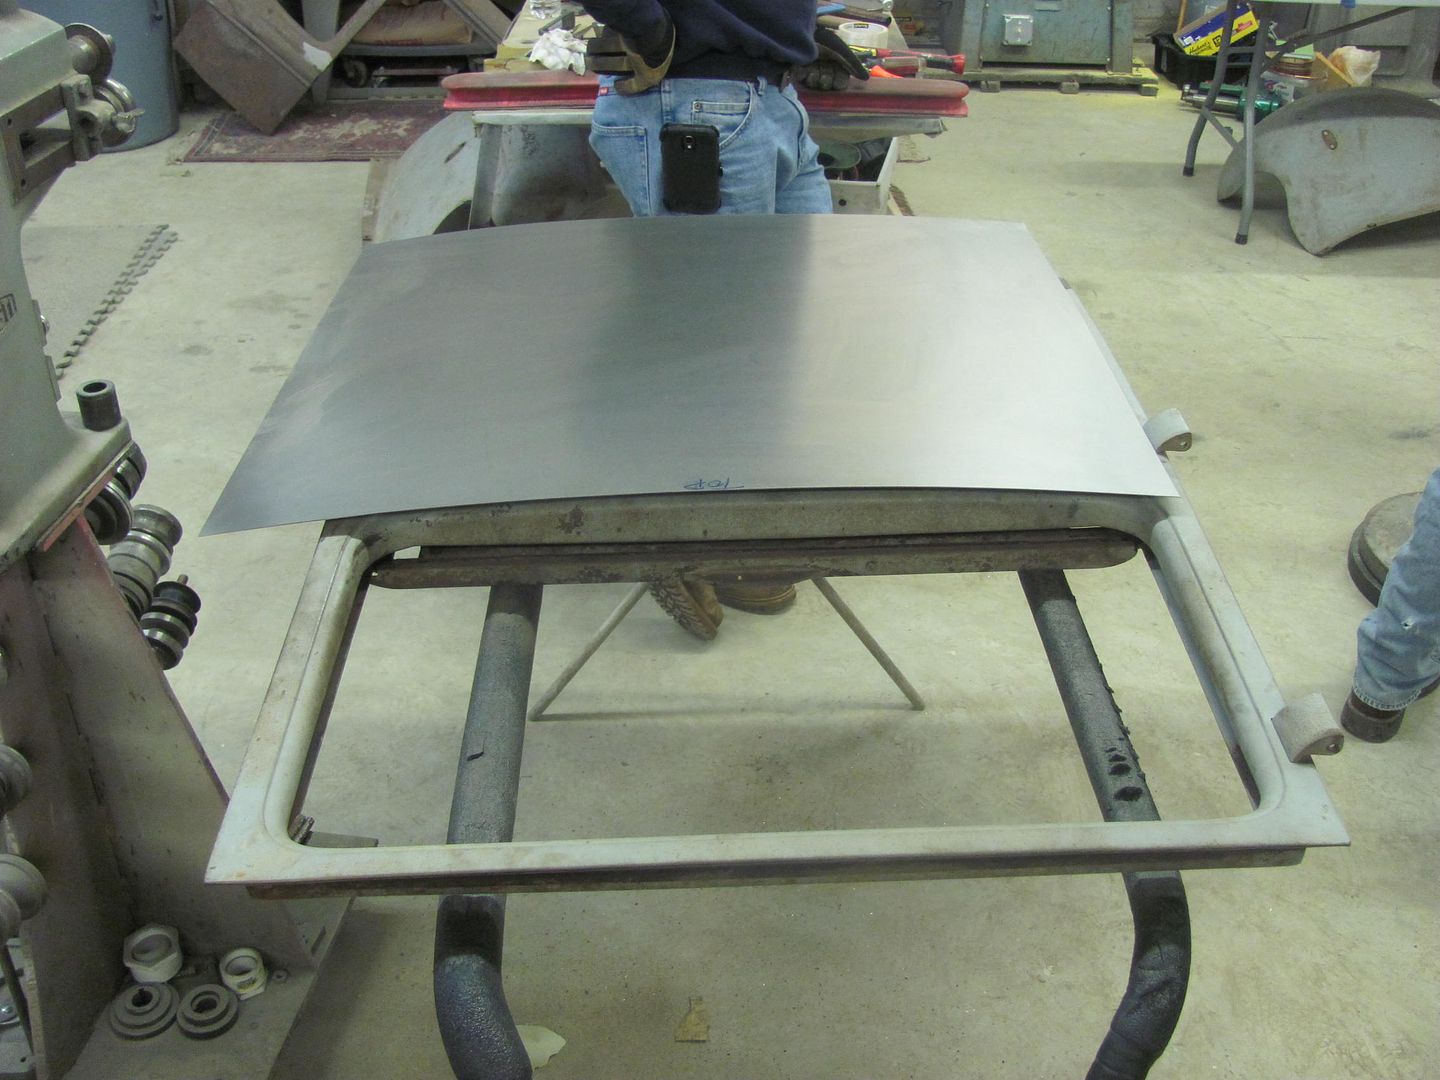
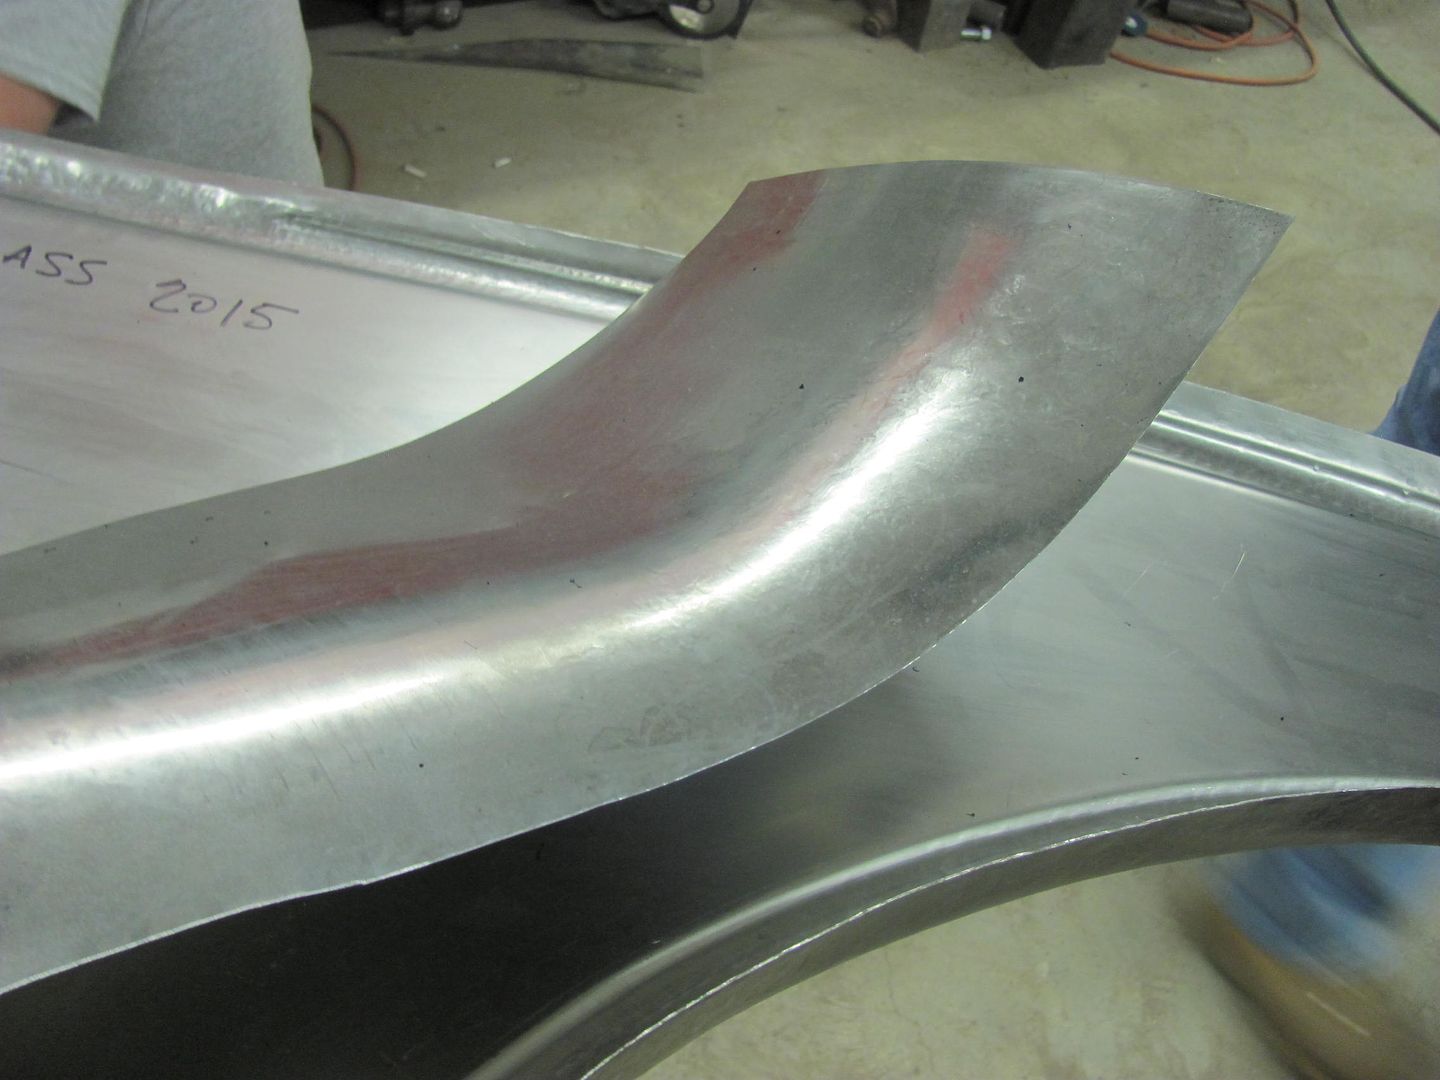
Food for thought, looking at the lift gate repair I've shown at the bottom of Pg 1 of this thread, there is minimal distortion along those two welded seams. But here we have two "opposing" crowns, in the horizontal direction you have an outward crown, in the vertical direction you have an inward crown. So as the shrinking effects were realized, the opposing crowns held the panel in place with no discernible distortion. This is about the only place I have seen such minimal distortion with the Mig welded butt seam, and it did fit your criteria of no access from the back side. Perfect example of my earlier statement of weld location being one of the most important decisions.
Last edited by MP&C on Sat Oct 24, 2015 9:04 pm, edited 2 times in total.
User avatar

Tatsadasayago
Posts: 3684
Joined: Thu Aug 28, 2014 2:22 pm
Location: Sacramento, CA

Re: Advice for Welding thin Sheet Metal

Post by Tatsadasayago »

Damn impressive!
I am in awe of your skills Sir!
1977 Cherokee Chief - The Blair Jeep Project III
A collection of parts flying in close formation
User avatar

tgreese
Posts: 7092
Joined: Fri Jun 08, 2012 6:31 am
Location: Medford MA USA

Re: Advice for Welding thin Sheet Metal

Post by tgreese »

Thanks for the detailed advice, Robert. I will reread it a couple of times and think about where I'm going with this.

The question was inspired by my non-Jeep, so maybe I could carry it over to Garage Journal if it's too off-topic here.

Here's what I'm working with -

Image

These are for my Golf. Rocker rust is a common problem for these cars, since the lower pinch weld between the bottom floor, rip plate (membrane, vertical intermediate panel) and rocker gets beat up by improper jacking and curbs/potholes/etc. This admits water/salt and breaks the factory coating. So I've got these nice panels, a MIG, and a pretty nice low-mileage little car that is increasing in value except for the rocker damage. I'll need to fab and replace some lower sections of rip plate, but I've explored and the rust seems to be limited to the lower curved part of the rocker. So I'm undecided about how much to remove and how much to keep.
Tim Reese
Maine beekeeper's truck: '77 J10 LWB, 258/T15/D20/3.54 bone stock, low options (delete radio), PS/PDB, hubcaps.
Browless and proud: '82 J20 360/T18/NP208/3.73, Destination A/Ts, 7600 GVWR
Copper Polly: '75 CJ-6, 304/T15, PS, BFG KM2s, soft top
GTI without the badges: '95 VW Golf Sport 2000cc 2D
Dual Everything: '15 Chryco Jeep Cherokee KL Trailhawk, ECO Green
Blockchain the vote.

MP&C
Posts: 28
Joined: Tue Aug 26, 2014 3:53 am
Location: Southern MD

Re: Advice for Welding thin Sheet Metal

Post by MP&C »

Another consideration, what did VW do for rustproofing on the inside of the rocker? You may have other areas in your existing rocker that may be solid now, but also has rust starting from the inside. Given you have the full rocker, I would prep the inside for paint and spray a nice coat of epoxy in there prior to assembling to the car. Then install the entire rocker so you'll know full well what you have behind it before paint work.. It would be a shame to install a partial patch now only to have more rust come through in another year or so. To me there is only one option here.....
User avatar

tgreese
Posts: 7092
Joined: Fri Jun 08, 2012 6:31 am
Location: Medford MA USA

Re: Advice for Welding thin Sheet Metal

Post by tgreese »

Thanks for the helpful reply. I hear you about painting the back side. The cavities are painted with what I assume is electrocoat, and then the factory appears to have sprayed some cavity wax through the abundant holes they left in the cavities. Then they plugged everything with plastic plugs and coated the whole underside with a thick tan hardening undercoat that looks and feels like seam sealer.

I had thought about cutting the panel at the line I drew above, but your advice is to use the whole panel, from pinch seam in the door to pinch seam under the car. I expect that I can get to the back side of the seam at the arrow by removing more of the interior, and planish that part of the joint. I can see the reasoning behind this, and it seems likely that the panel was supplied in this size with that approach in mind.
Tim Reese
Maine beekeeper's truck: '77 J10 LWB, 258/T15/D20/3.54 bone stock, low options (delete radio), PS/PDB, hubcaps.
Browless and proud: '82 J20 360/T18/NP208/3.73, Destination A/Ts, 7600 GVWR
Copper Polly: '75 CJ-6, 304/T15, PS, BFG KM2s, soft top
GTI without the badges: '95 VW Golf Sport 2000cc 2D
Dual Everything: '15 Chryco Jeep Cherokee KL Trailhawk, ECO Green
Blockchain the vote.

j2sax
Posts: 147
Joined: Mon Mar 25, 2013 9:00 pm

Re: Advice for Welding thin Sheet Metal

Post by j2sax »

There are a lot of less expensive options for TIG welding... TIG can make this a lot easier.

All prior advice is great for MIG. Flux is cheap and simple, but as stated, there's a lot more cleanup and additional grinding adds more potential for overheating and warping!

One thing I would ad is weldable primer... as soon as you strip something down hit it with some weldable primer (I use 3M).. won't hinder your welding but will keep things from flash rusting also makes it easier to clean up after flux!
Post Reply