I've always gone to Performance Coatings, in Auburn, WA. to ceramic coat parts.
http://www.performancecoatings.com/index2.html
A true ceramic coating has to be put on properly; similar to powder coating, but even more finicky.
I have no first hand experience with anything that sprays/rolls on.
1970 Gladiator 1 Ton 6BT 12V Cummins Build
-
 Resbum
Topic author - Posts: 466
- Joined: Fri Jun 08, 2012 9:45 am
- Location: North East Oregon
Re: 1970 Gladiator 1 Ton 6BT 12V Cummins Build
Originally Posted by Resbum
"What year is my truck?... Which part?" Build thread- http://www.fsjnetwork.com/forum/viewtop ... 290#p18290
"What year is my truck?... Which part?" Build thread- http://www.fsjnetwork.com/forum/viewtop ... 290#p18290
-
Resbum
Topic author - Posts: 466
- Joined: Fri Jun 08, 2012 9:45 am
- Location: North East Oregon
Re: 1970 Gladiator 1 Ton 6BT 12V Cummins Build
Finally... Got the primer to lay down nice on the firewall.
I ended up making a condenser to cool down the compressed air before going through a water/oil separator at each end of a 50' hose, then a filter at the gun. The booth was surgical room clean and the firewall was as clean as anything that's ever seen primer.
What it ultimately came down to was a very steep learning curve, inexperience, and the inability to read what was really going on. Gotta love on the job training.
It turned out that I wasn't running enough pressure through the gun and the primer wasn't atomizing properly and a little moisture was getting through. Now I know.


Last edited by Resbum on Sat Apr 06, 2013 8:05 pm, edited 2 times in total.
Originally Posted by Resbum
"What year is my truck?... Which part?" Build thread- http://www.fsjnetwork.com/forum/viewtop ... 290#p18290
"What year is my truck?... Which part?" Build thread- http://www.fsjnetwork.com/forum/viewtop ... 290#p18290
-
Resbum
Topic author - Posts: 466
- Joined: Fri Jun 08, 2012 9:45 am
- Location: North East Oregon
Re: 1970 Gladiator 1 Ton 6BT 12V Cummins Build
The digital humidity/thermometer is reading 31% humidity and 79*F. Let it simmer overnight. Now I'll move on to seam sealer and the paint.

Last edited by Resbum on Sat Apr 06, 2013 8:05 pm, edited 2 times in total.
Originally Posted by Resbum
"What year is my truck?... Which part?" Build thread- http://www.fsjnetwork.com/forum/viewtop ... 290#p18290
"What year is my truck?... Which part?" Build thread- http://www.fsjnetwork.com/forum/viewtop ... 290#p18290
-
Resbum
Topic author - Posts: 466
- Joined: Fri Jun 08, 2012 9:45 am
- Location: North East Oregon
Re: 1970 Gladiator 1 Ton 6BT 12V Cummins Build
.
.
Originally posted by twisted frame 01-27-2013 07:55 PM
________________________________________
Way to go! Must be nice to see that custom trans tunnel all grey and smooth.
.
Originally posted by twisted frame 01-27-2013 07:55 PM
________________________________________
Way to go! Must be nice to see that custom trans tunnel all grey and smooth.
Last edited by Resbum on Sat Apr 06, 2013 8:02 pm, edited 1 time in total.
Originally Posted by Resbum
"What year is my truck?... Which part?" Build thread- http://www.fsjnetwork.com/forum/viewtop ... 290#p18290
"What year is my truck?... Which part?" Build thread- http://www.fsjnetwork.com/forum/viewtop ... 290#p18290
-
Resbum
Topic author - Posts: 466
- Joined: Fri Jun 08, 2012 9:45 am
- Location: North East Oregon
Re: 1970 Gladiator 1 Ton 6BT 12V Cummins Build
Yep, it was a big relief.
I would much rather have the problems be operator error, than an ongoing case of unexplained contaminant somehow being present. What I thought were fish-eyes, weren't. So, every time it happened I'd call the bodywork/paint guys giving me advise and say "fish-eyes", and that's what they geared their answers towards solving. I finally went down and showed one of them the close up pictures and he instantly asked, "What air pressure is at your gun?” 100% operator error.
Although extremely frustrating, this was a great learning experience. It taught me a mess load of what can go wrong and how to identify it. I also ended up with a much better air system for painting.
Originally Posted by Resbum
"What year is my truck?... Which part?" Build thread- http://www.fsjnetwork.com/forum/viewtop ... 290#p18290
"What year is my truck?... Which part?" Build thread- http://www.fsjnetwork.com/forum/viewtop ... 290#p18290
-
Resbum
Topic author - Posts: 466
- Joined: Fri Jun 08, 2012 9:45 am
- Location: North East Oregon
Re: 1970 Gladiator 1 Ton 6BT 12V Cummins Build
Here's what I've been doing the last few days.
When I prep'd and primered the inside of the cab roof I noticed a few dents that I couldn't see or feel from the outside. I figured there was a little Bondo up there. That didn't really surprise me because while doing the earlier work on the cab it was obvious it had been worked on before.
What I wasn't expecting was this.
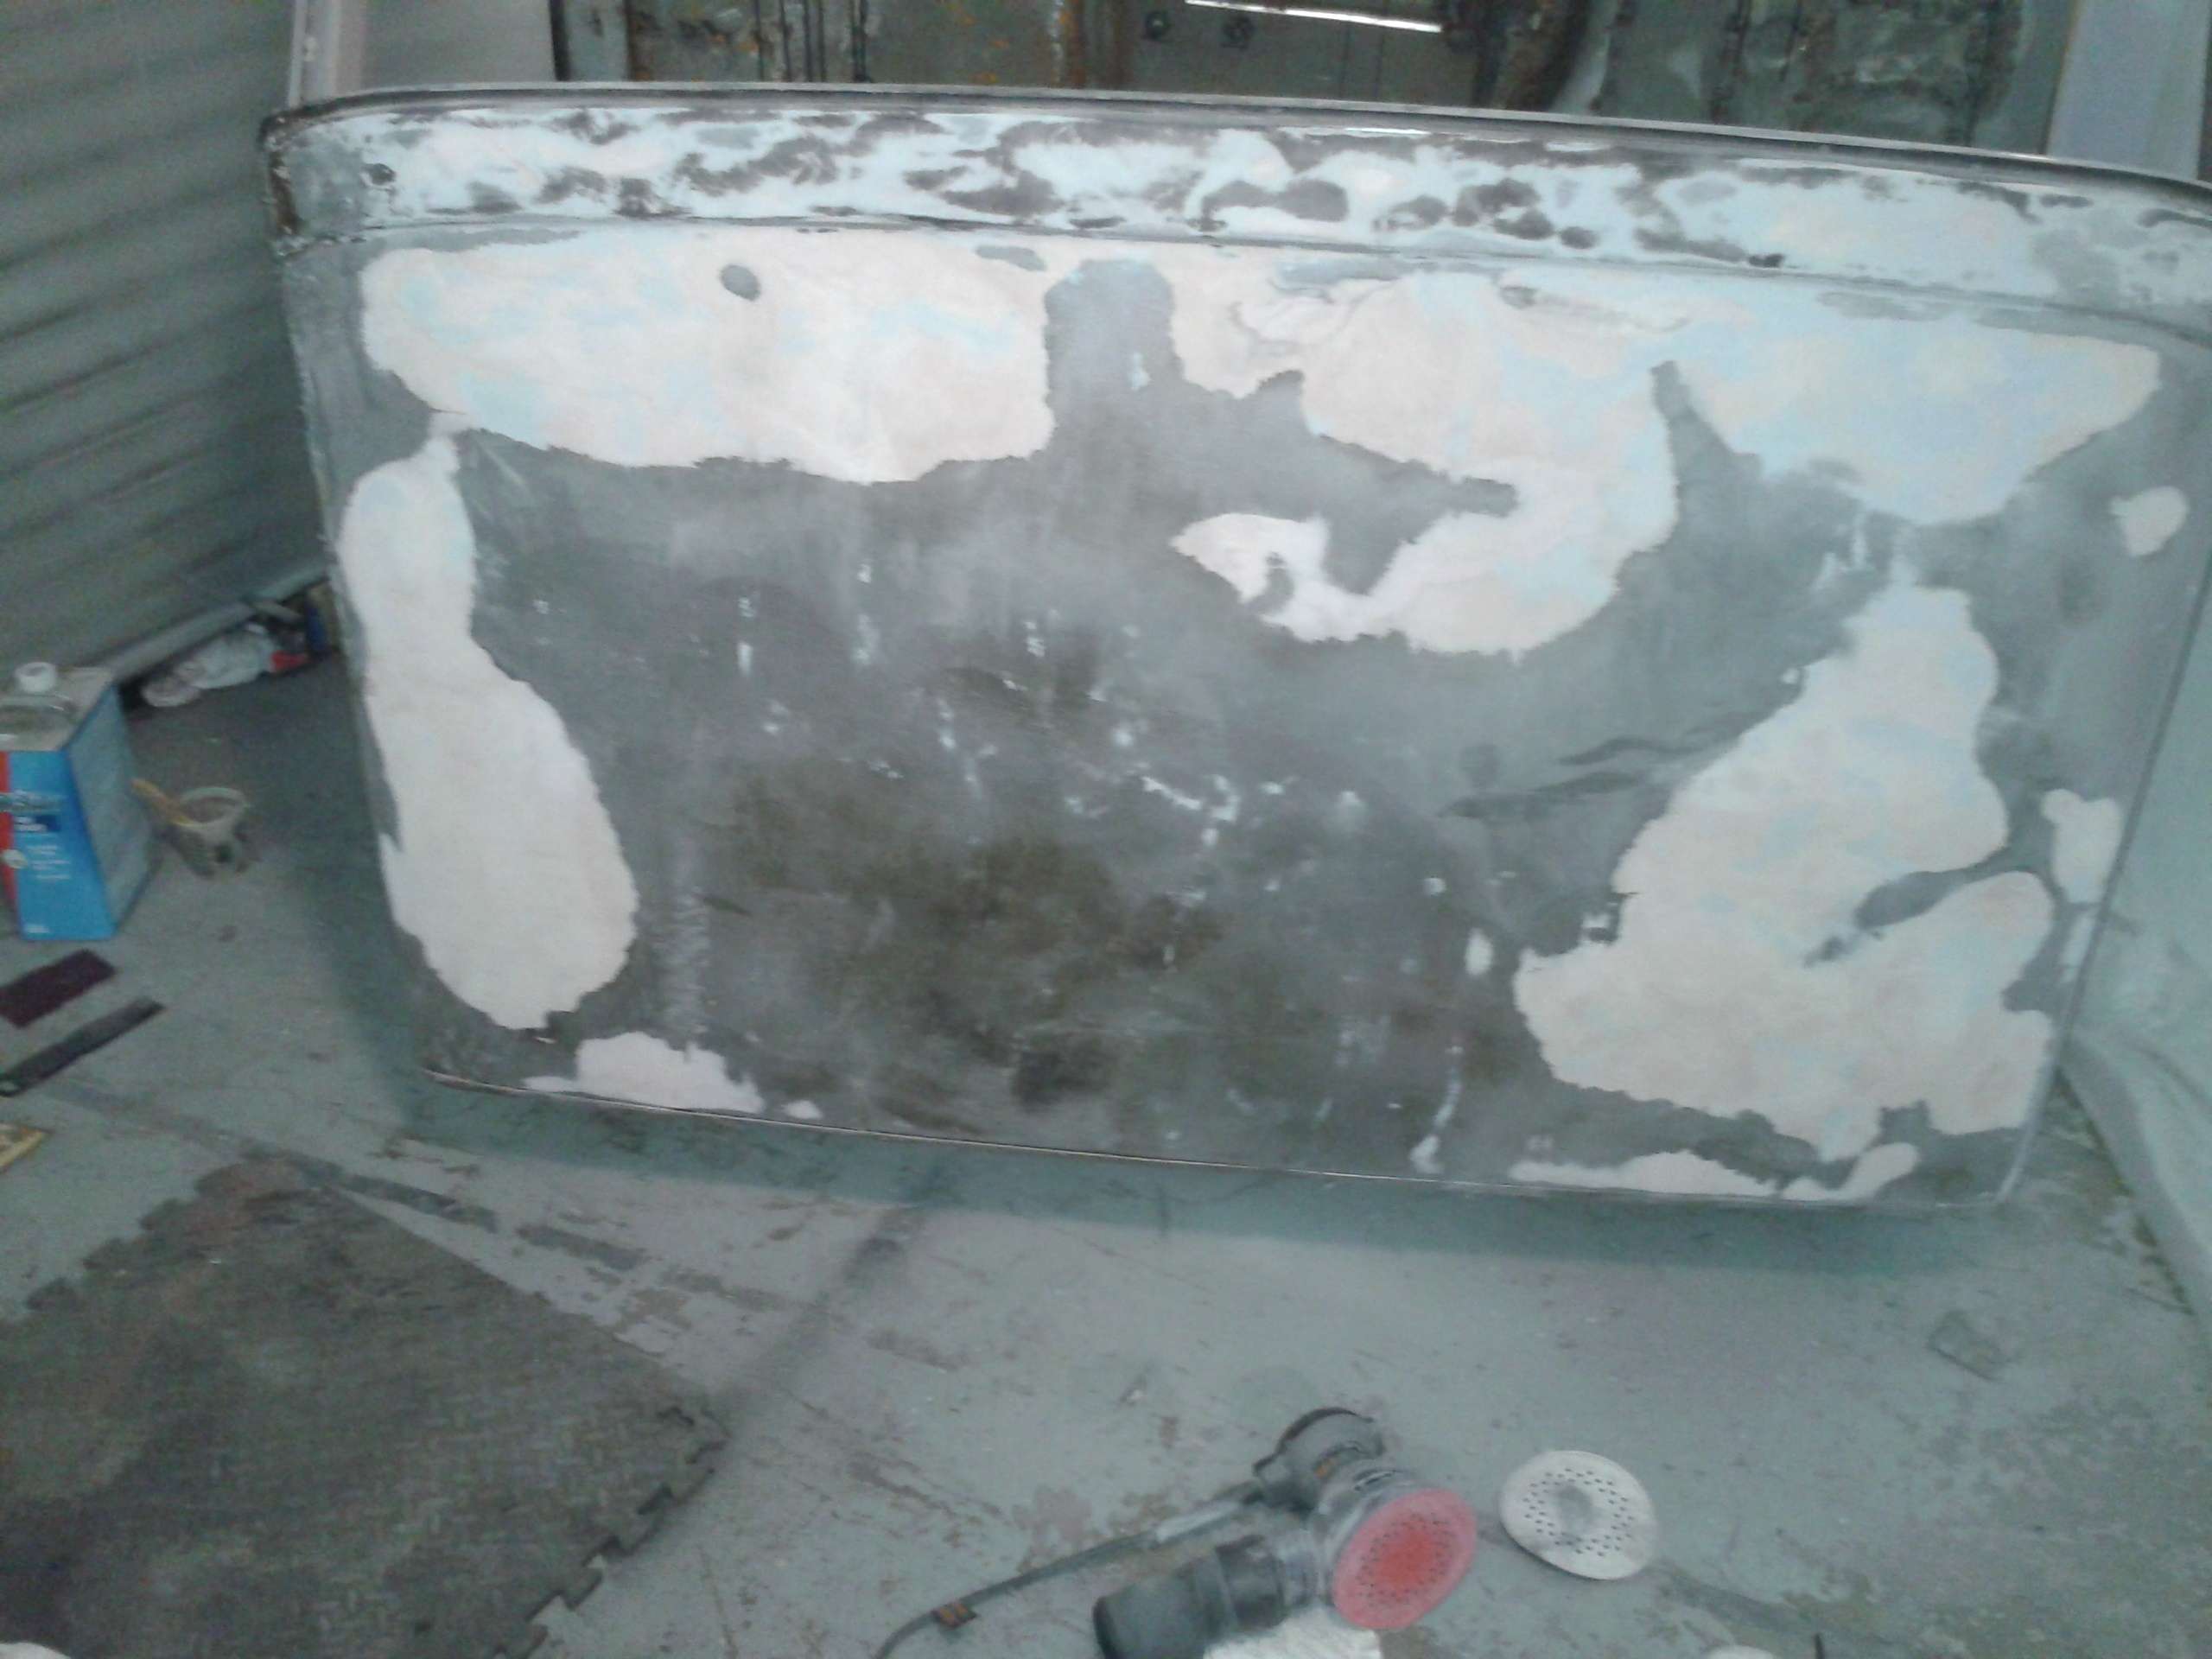
There was a lot. Something I hadn't noticed before was that the drivers side of the brow seam and the whole seam above the drivers door was packed with bondo. Bondo on metal isn't a bad thing. Using bondo to cover and repair things improperly is a bad thing. So, one long, messy session with my grinder and wire wheel got me to this.
The good news is the bondo wasn't covering rust or other core metal problems. The bad news is that at some point in the past the cab was either rested on the roof or someone danced a jig up there. Once I saw the bondo I knew what to feel for on the inside of the roof. Then I could feel it all. It's like they made no effort to smooth things out first. Just fill everything with bondo. That's the ticket.
Yesterday I attacked all the seams with gusto. I ground, scraped, sanded, and wire wheeled every last bit of rusty or suspicious material out of them and ended the day hitting them with rust converter to get anything I couldn't reach. Today I'll work out all the dents as much as my limited skills will allow, and then, I'll skim bondo on to smooth everything out.
When I prep'd and primered the inside of the cab roof I noticed a few dents that I couldn't see or feel from the outside. I figured there was a little Bondo up there. That didn't really surprise me because while doing the earlier work on the cab it was obvious it had been worked on before.
What I wasn't expecting was this.

There was a lot. Something I hadn't noticed before was that the drivers side of the brow seam and the whole seam above the drivers door was packed with bondo. Bondo on metal isn't a bad thing. Using bondo to cover and repair things improperly is a bad thing. So, one long, messy session with my grinder and wire wheel got me to this.

The good news is the bondo wasn't covering rust or other core metal problems. The bad news is that at some point in the past the cab was either rested on the roof or someone danced a jig up there. Once I saw the bondo I knew what to feel for on the inside of the roof. Then I could feel it all. It's like they made no effort to smooth things out first. Just fill everything with bondo. That's the ticket.
Yesterday I attacked all the seams with gusto. I ground, scraped, sanded, and wire wheeled every last bit of rusty or suspicious material out of them and ended the day hitting them with rust converter to get anything I couldn't reach. Today I'll work out all the dents as much as my limited skills will allow, and then, I'll skim bondo on to smooth everything out.
Last edited by Resbum on Sat Apr 06, 2013 8:07 pm, edited 2 times in total.
Originally Posted by Resbum
"What year is my truck?... Which part?" Build thread- http://www.fsjnetwork.com/forum/viewtop ... 290#p18290
"What year is my truck?... Which part?" Build thread- http://www.fsjnetwork.com/forum/viewtop ... 290#p18290
-
Resbum
Topic author - Posts: 466
- Joined: Fri Jun 08, 2012 9:45 am
- Location: North East Oregon
Re: 1970 Gladiator 1 Ton 6BT 12V Cummins Build
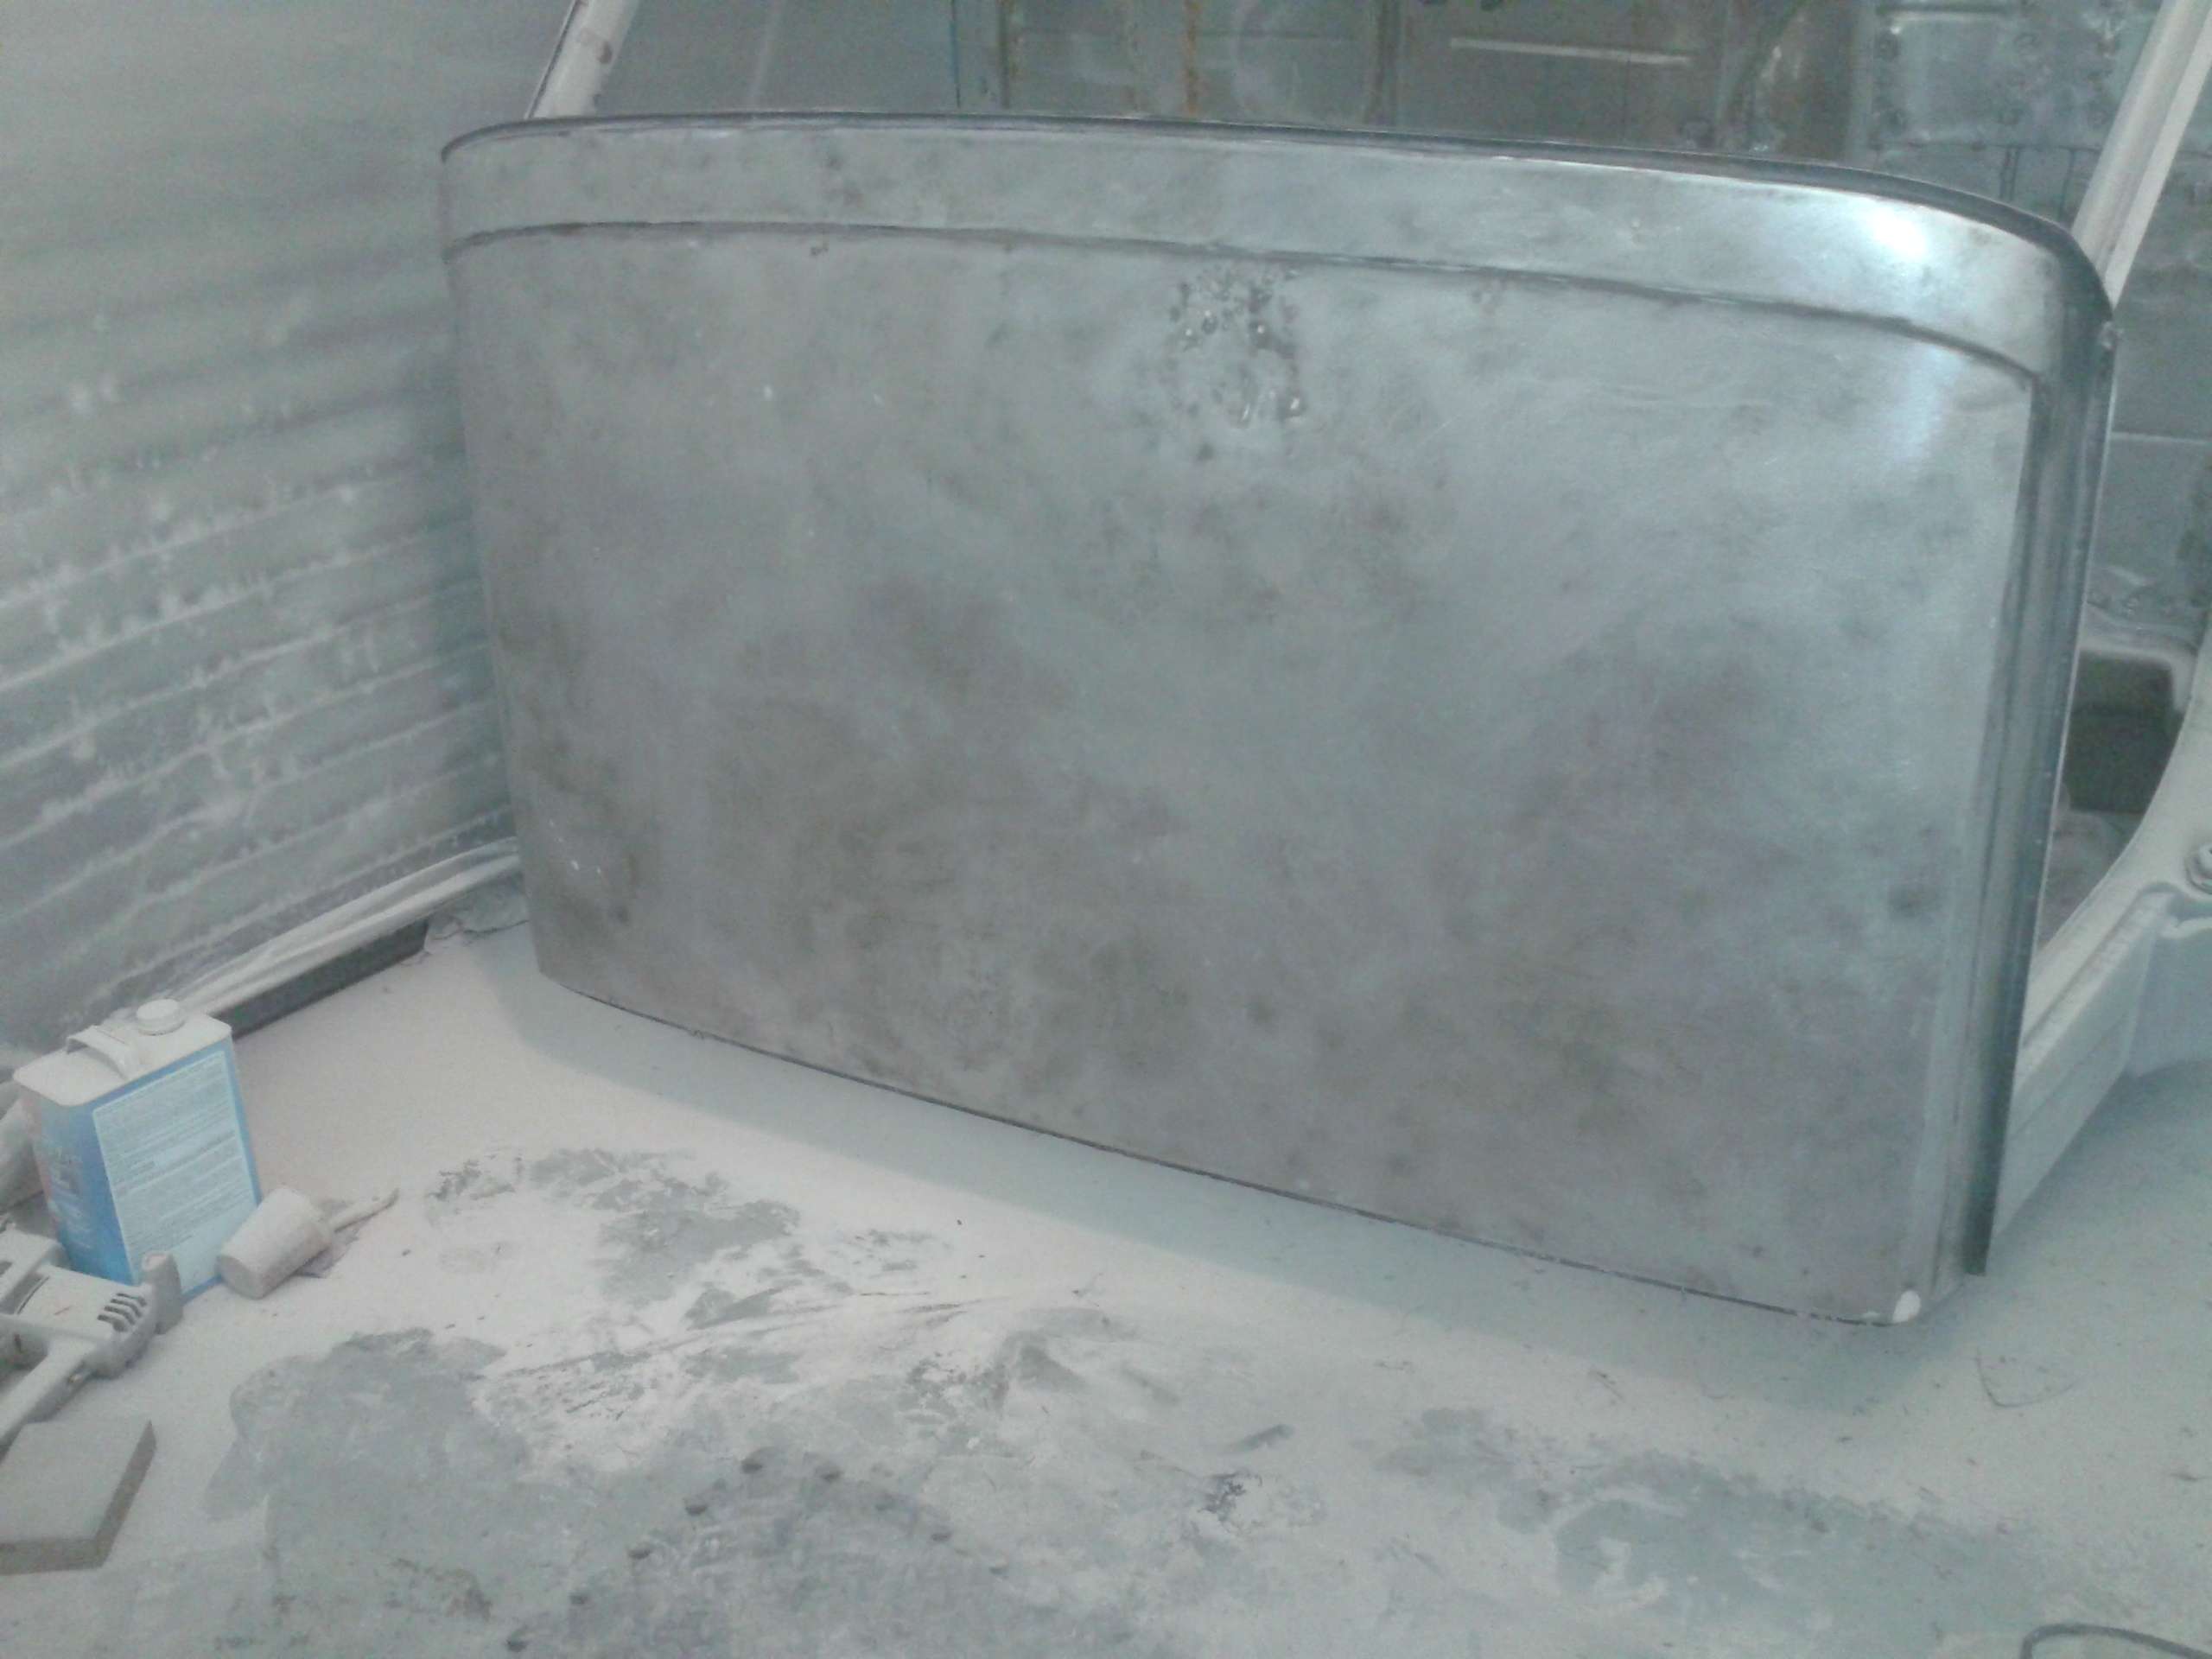
I promise to never again b¡tch about how much a body shop wants to charge. Okay, I may b¡tch but I won't think it's outrageously overpriced. Doing the initial work isn't too hard. Getting the finished surface ready for top coat takes skill and work.
I now have a dedicated pair of pants and shoes for Bondo.
The brow was flattened more in the middle then it was above the corners so I had to pound it back up from the inside. Then I finished shaping it. I ended the day with getting the rough work and bondo done above the driver’s door. Now it just needs the skim coat and final sanding.
After 36 years of turning wrenches the last 5 weeks of learning bodywork has been fun and interesting, even if there has been frustrating points.
Originally Posted by Resbum
"What year is my truck?... Which part?" Build thread- http://www.fsjnetwork.com/forum/viewtop ... 290#p18290
"What year is my truck?... Which part?" Build thread- http://www.fsjnetwork.com/forum/viewtop ... 290#p18290
-
Resbum
Topic author - Posts: 466
- Joined: Fri Jun 08, 2012 9:45 am
- Location: North East Oregon
Re: 1970 Gladiator 1 Ton 6BT 12V Cummins Build
Well, it's been a productive week. A month ago I was learning how to paint and this week I've been learning bodywork. I included the sanding blocks in this picture because they're some of the best money I've ever spent. 8", 16", and 24". They identified every little ripple, wave, and out of shape spot. The roof ended up with more area covered, but less bondo used than was originally on it. Almost all of it is a skim coat to smooth out the wavy areas.
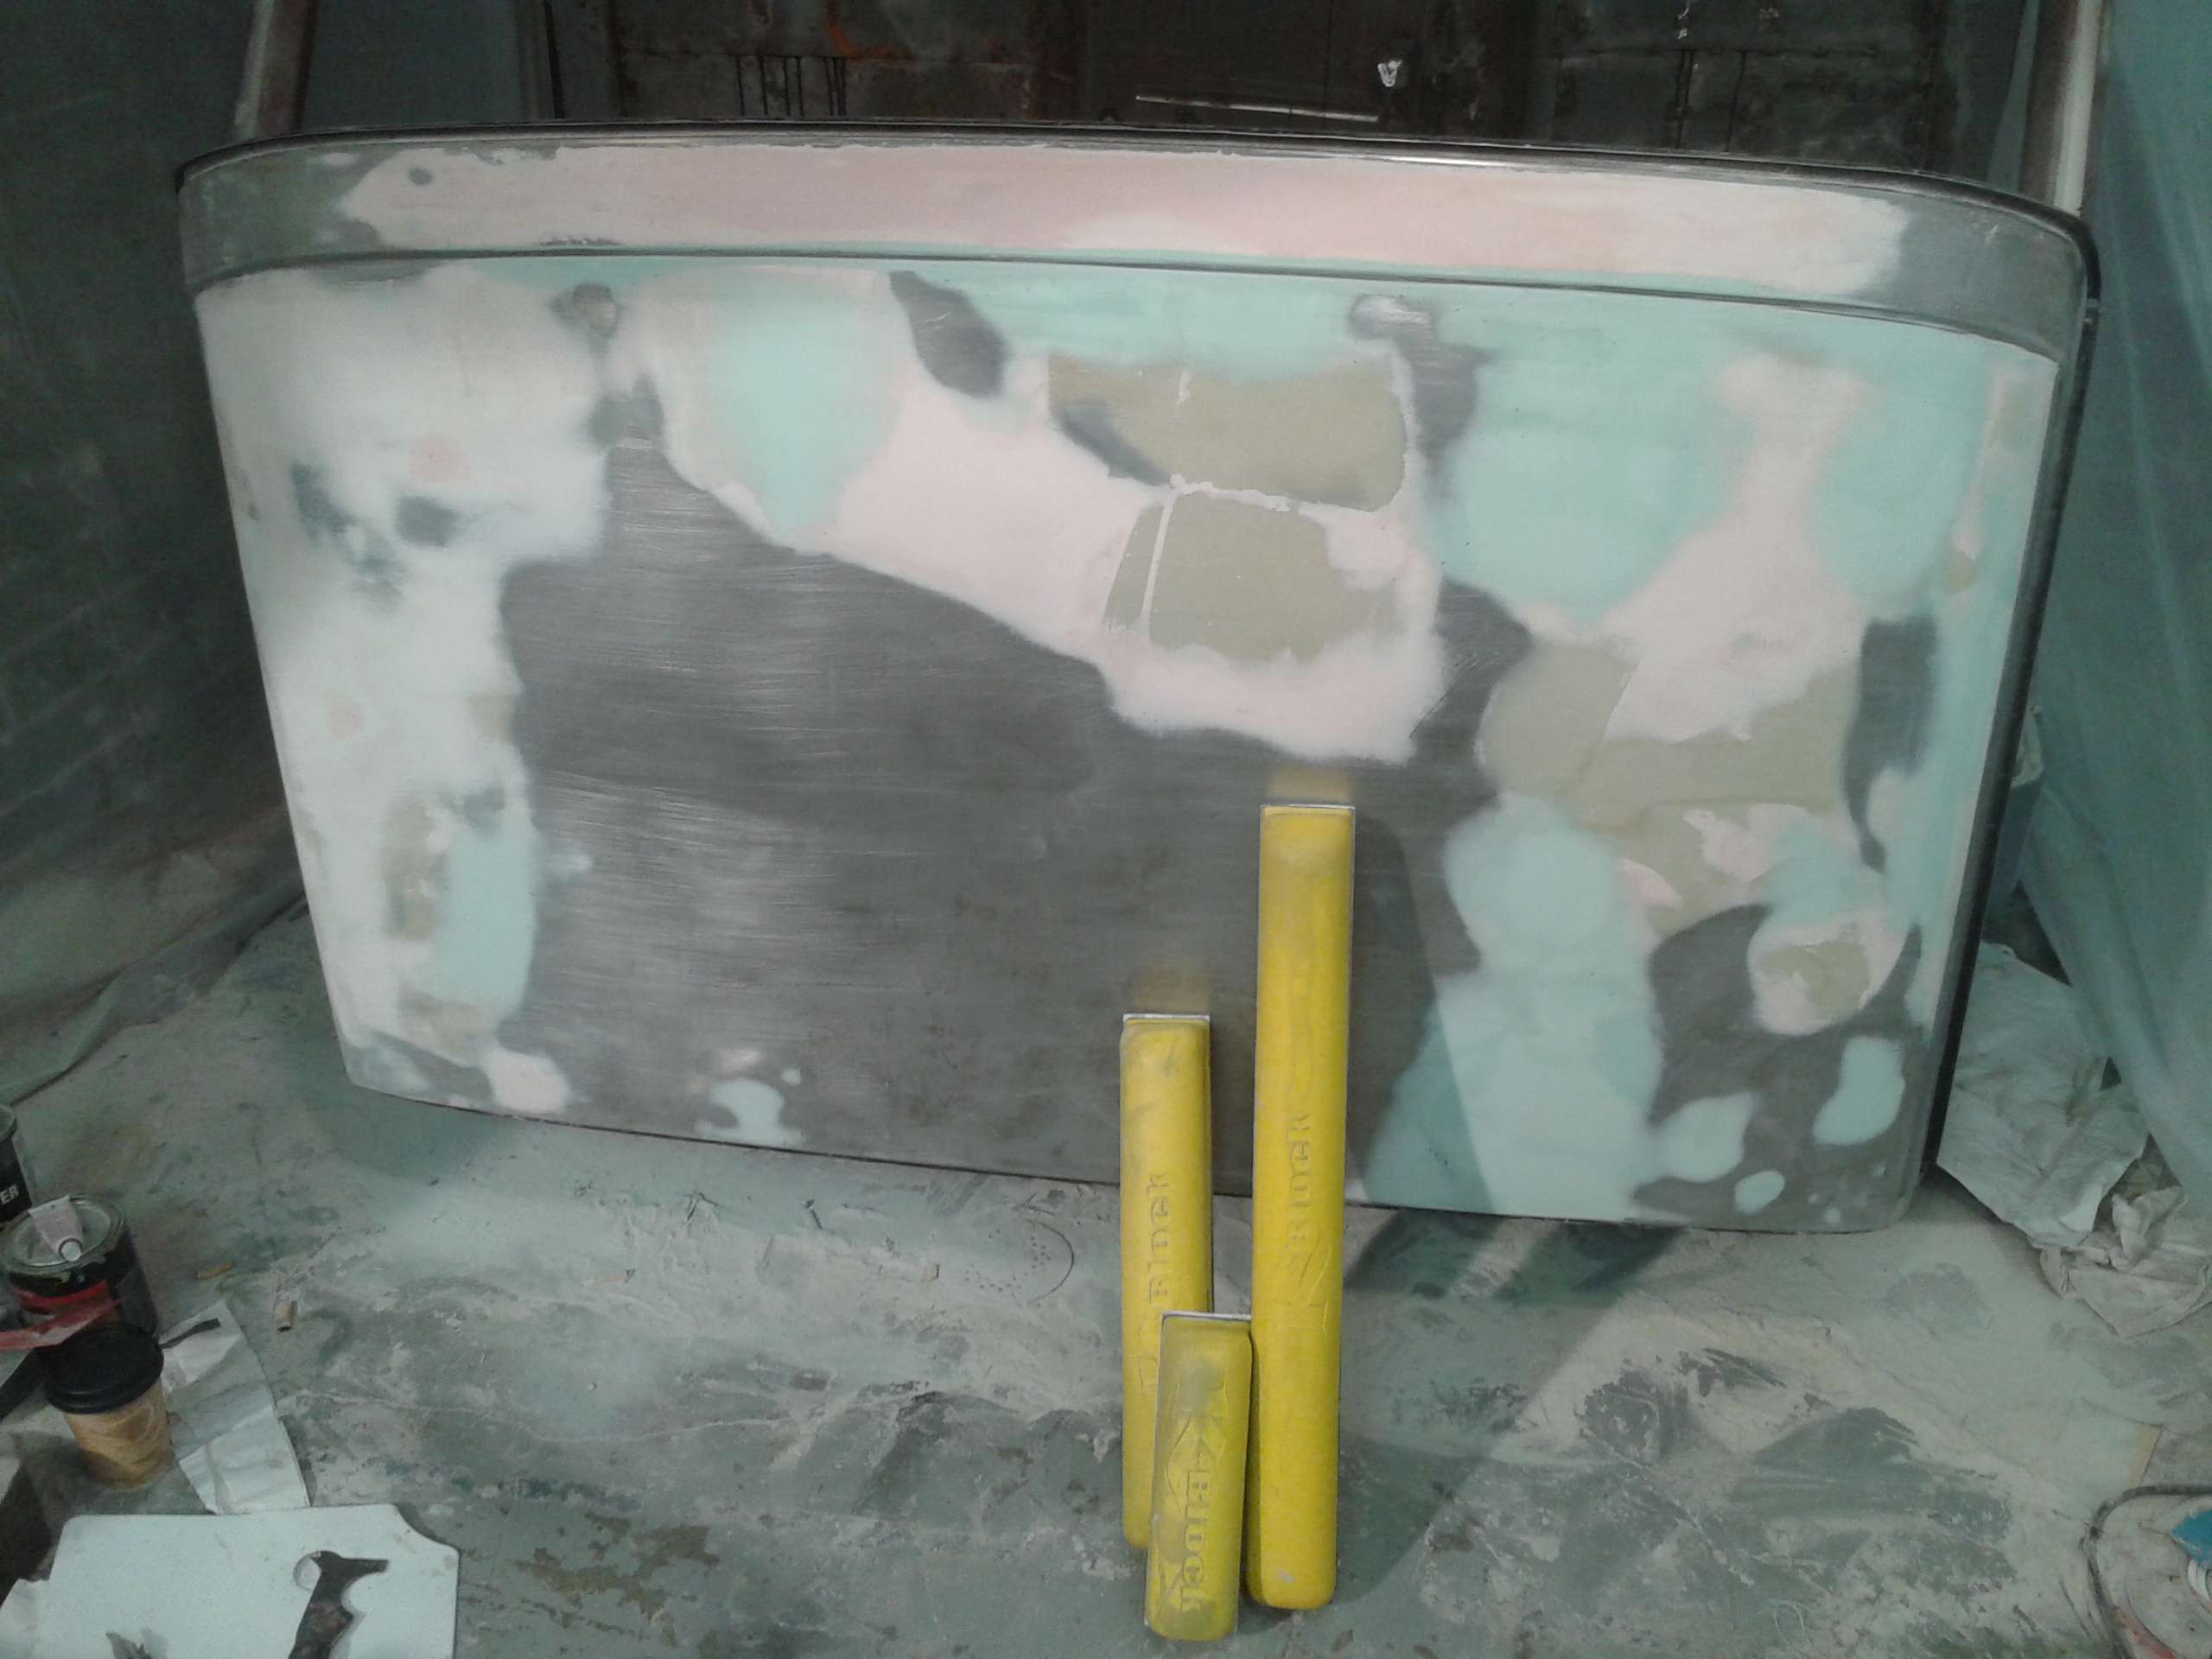
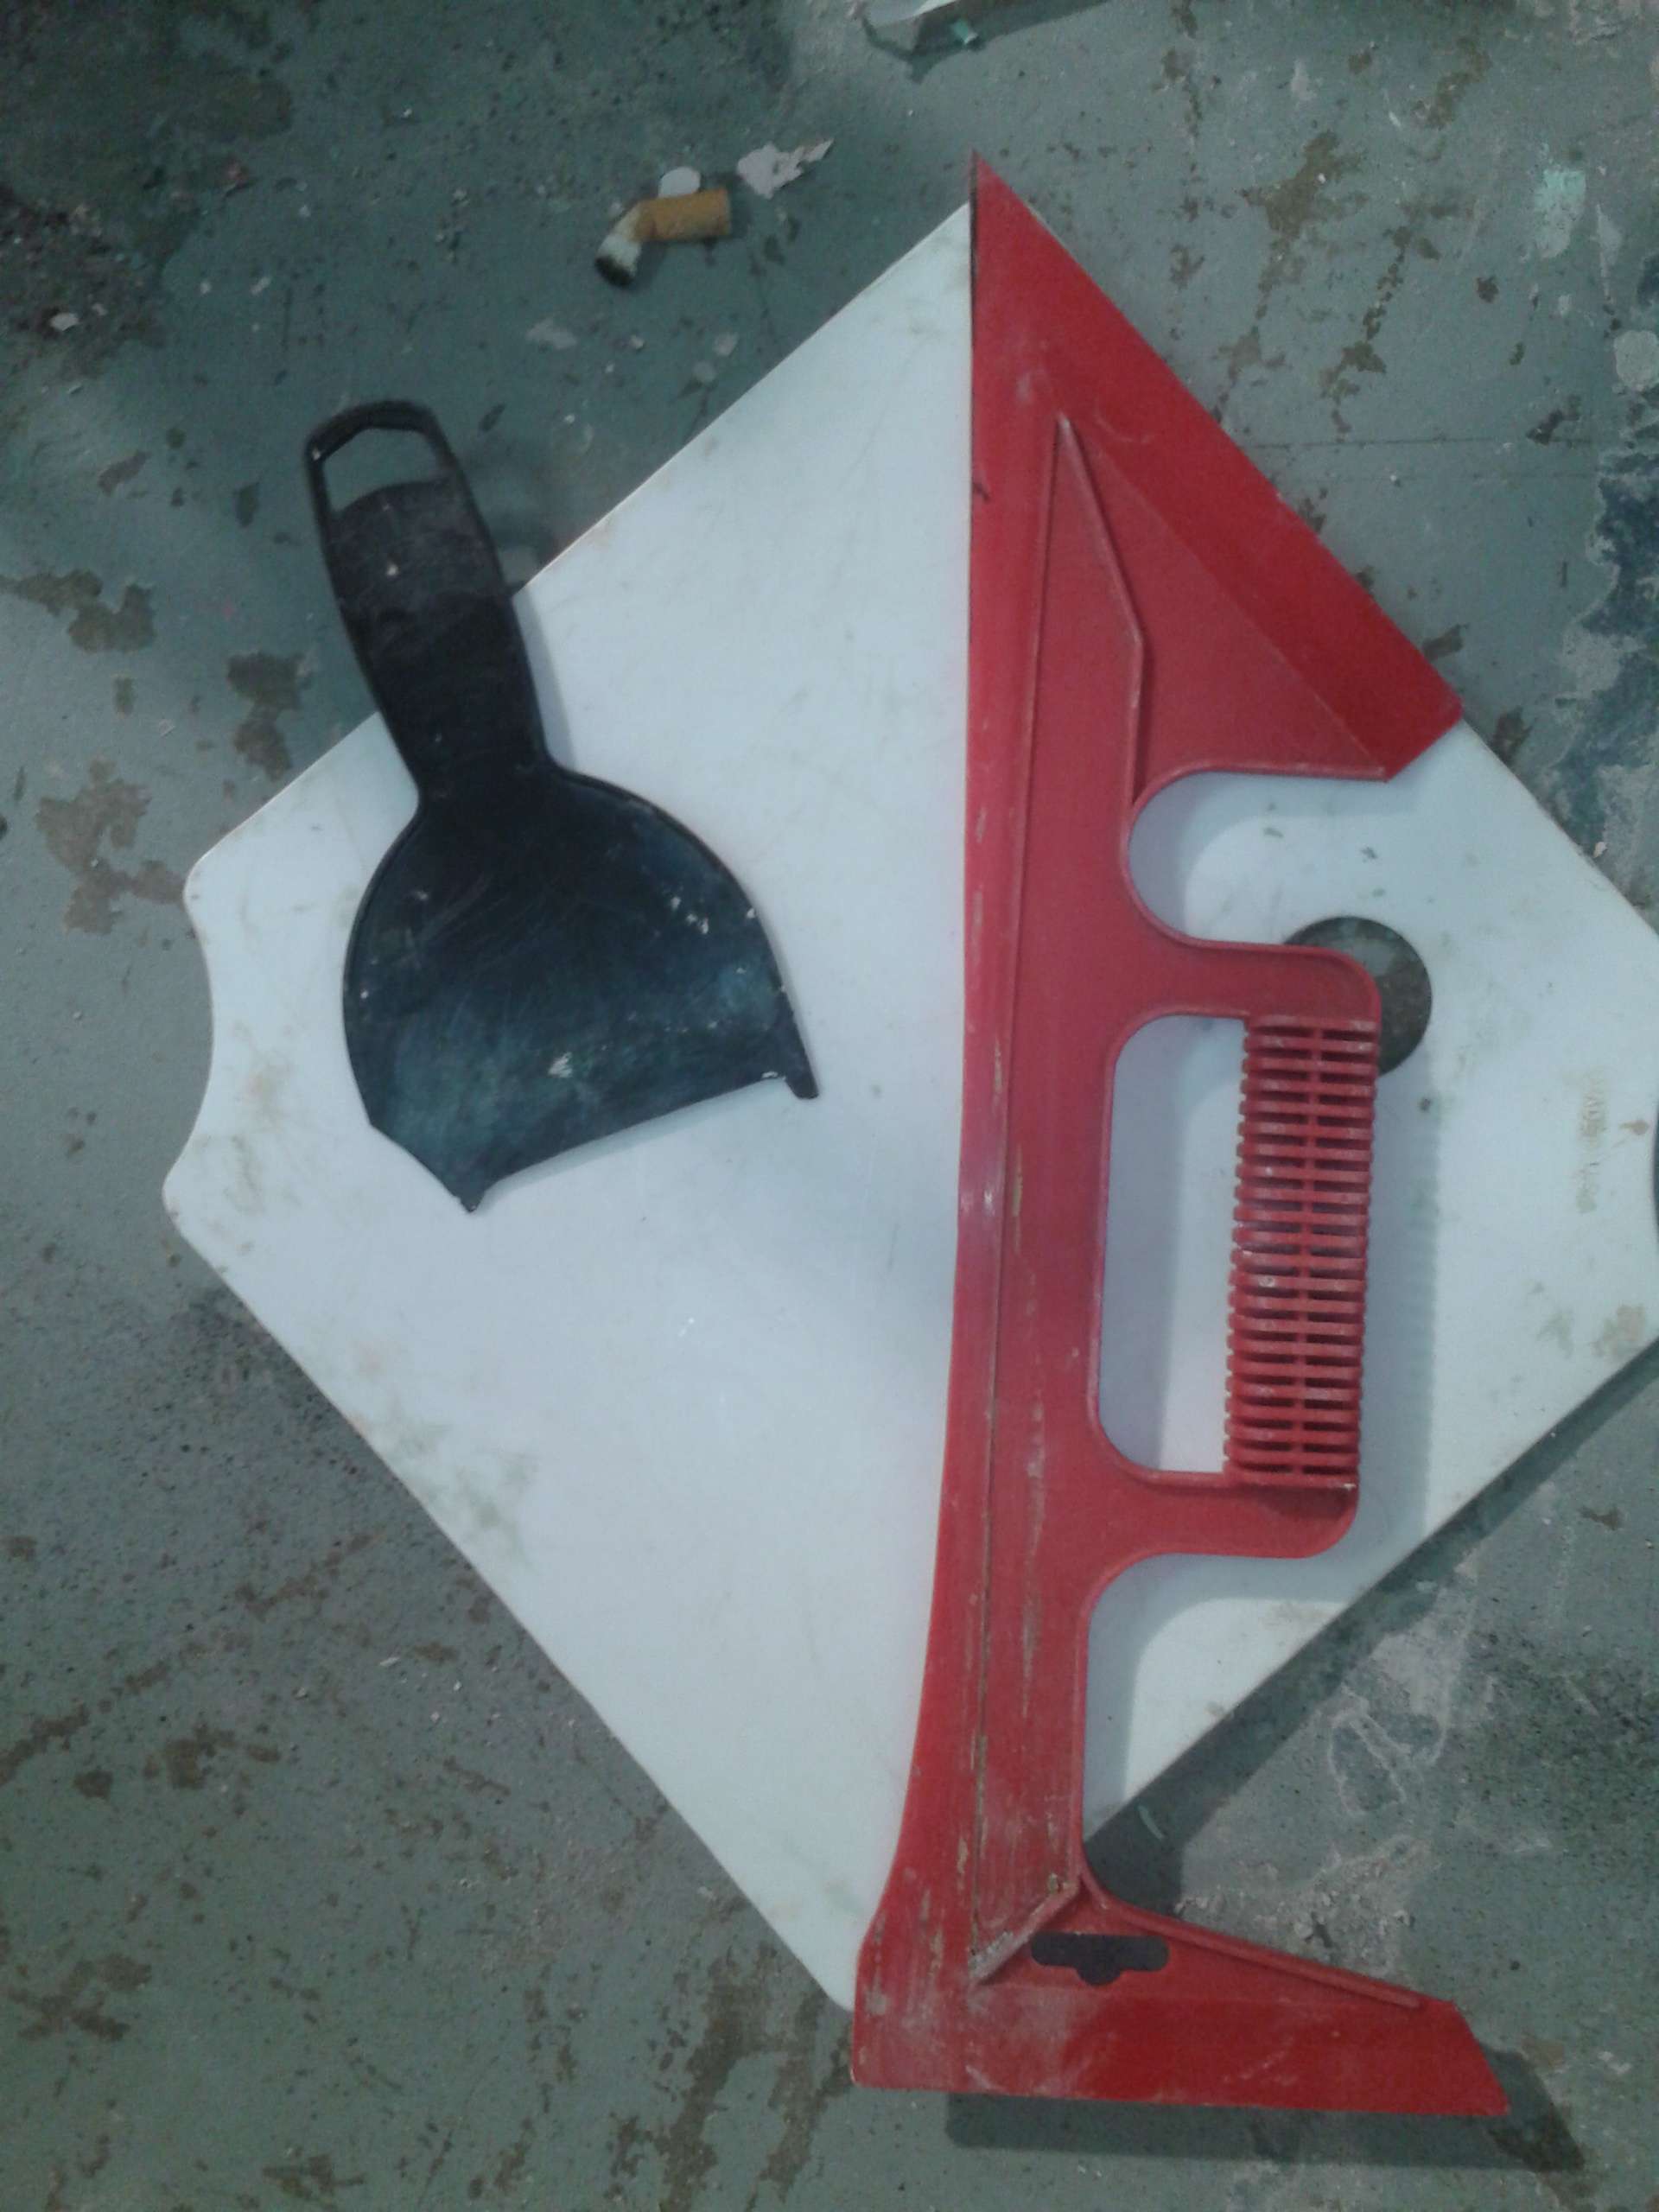
I also made these templates out of plastic spatulas to get the shape of the brow and curves above the doors right and uniform. I found the best area above the doors and the brow and used those places to make the shape of the templates. The red one is from Lowes and is normally used for drywall.
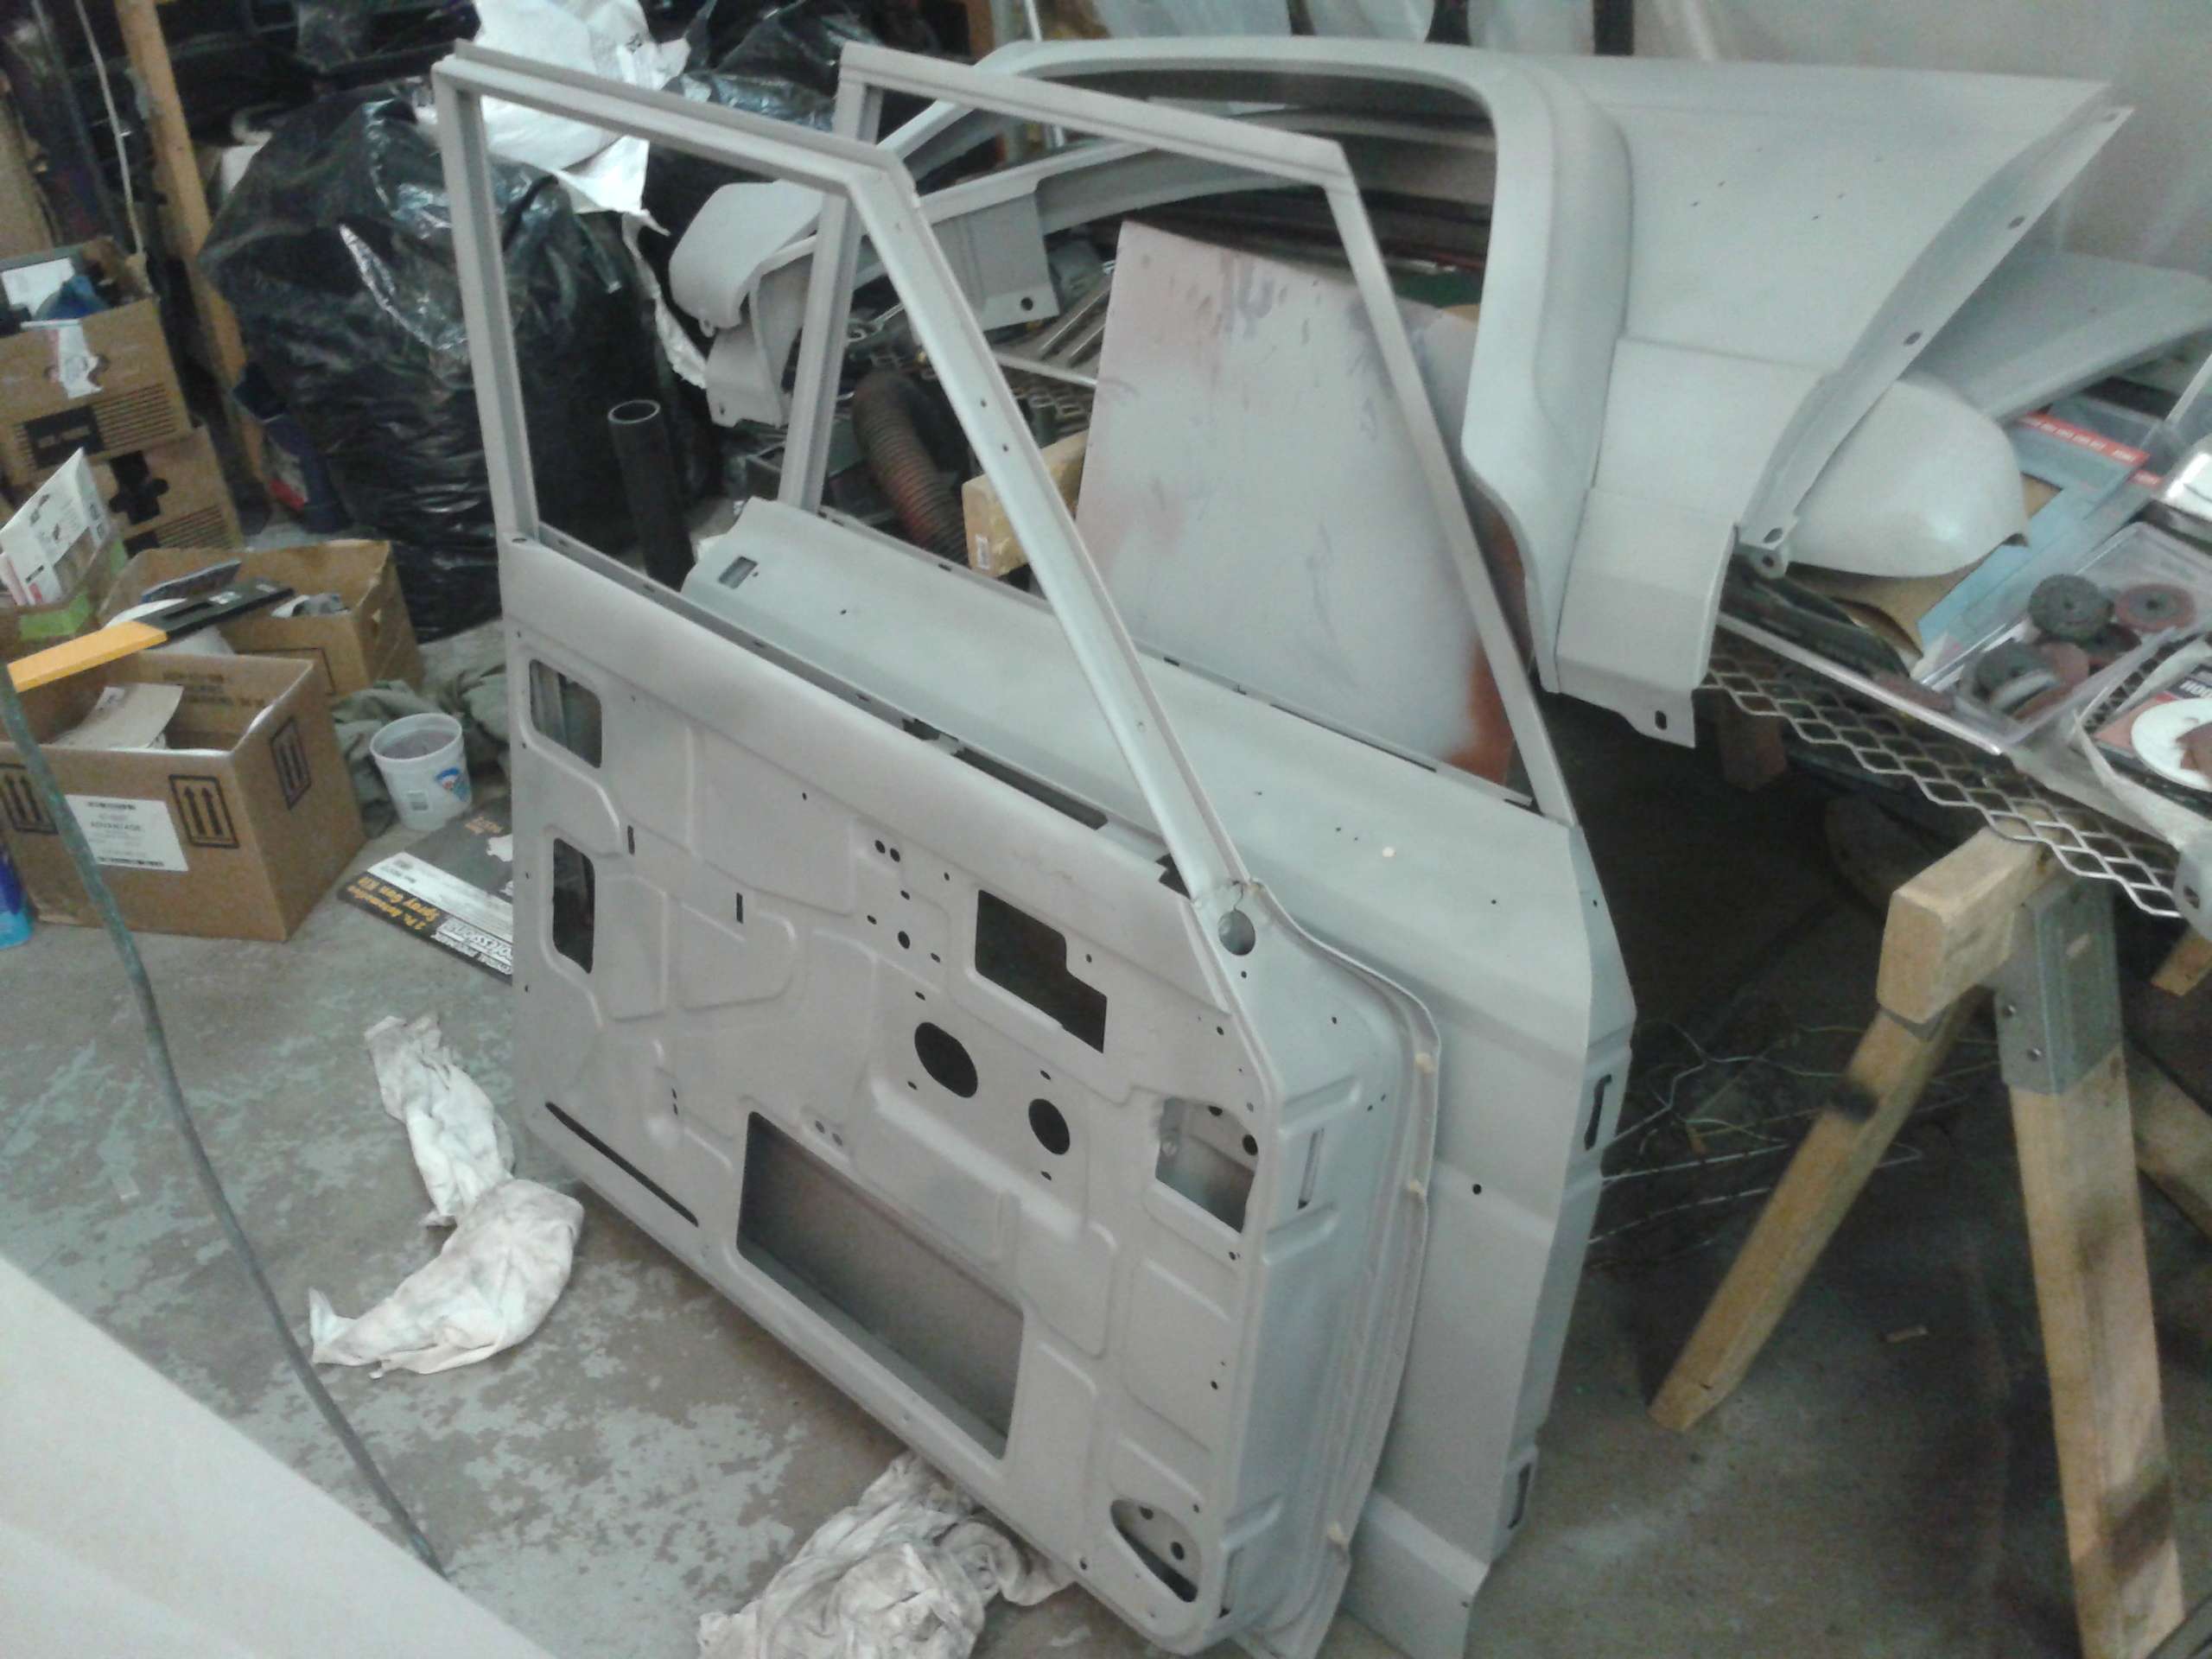
I also spent two days disassembling the doors and bit the money bullet to have the doors, fenders, and hood hinges media blasted. Hand stripping was just taking to much time. That just leaves the hood and the sidewalls of the bed to hand strip. Those don't have a bunch of nooks, crannies, and seams that I can't get to.
Luckily, the roof was the absolutely worst area of the truck that needed bodywork. About the only things I have to deal with on the rest of the truck is skim coats over minor dents and dings, and there's not many of those.

I also made these templates out of plastic spatulas to get the shape of the brow and curves above the doors right and uniform. I found the best area above the doors and the brow and used those places to make the shape of the templates. The red one is from Lowes and is normally used for drywall.

I also spent two days disassembling the doors and bit the money bullet to have the doors, fenders, and hood hinges media blasted. Hand stripping was just taking to much time. That just leaves the hood and the sidewalls of the bed to hand strip. Those don't have a bunch of nooks, crannies, and seams that I can't get to.

Luckily, the roof was the absolutely worst area of the truck that needed bodywork. About the only things I have to deal with on the rest of the truck is skim coats over minor dents and dings, and there's not many of those.
Last edited by Resbum on Sat Apr 06, 2013 8:08 pm, edited 2 times in total.
Originally Posted by Resbum
"What year is my truck?... Which part?" Build thread- http://www.fsjnetwork.com/forum/viewtop ... 290#p18290
"What year is my truck?... Which part?" Build thread- http://www.fsjnetwork.com/forum/viewtop ... 290#p18290
-
Resbum
Topic author - Posts: 466
- Joined: Fri Jun 08, 2012 9:45 am
- Location: North East Oregon
Re: 1970 Gladiator 1 Ton 6BT 12V Cummins Build
After all the troubles I had primering the firewall I was procrastinating shooting the top of the cab. Last night I finally sucked it up and did it. I'm glad to say it looks like I figured out what I was doing wrong. I'm still on a learning curve with bodywork/painting, so I'm going to have to scuff sand it and hit it with one more coat to get it uniform. Besides that it turned out good. Now I can start seam sealing the top and bottom of the cab.
What I am very happy with is how all the contouring turned out. All the lines are perfect as near as I can tell.
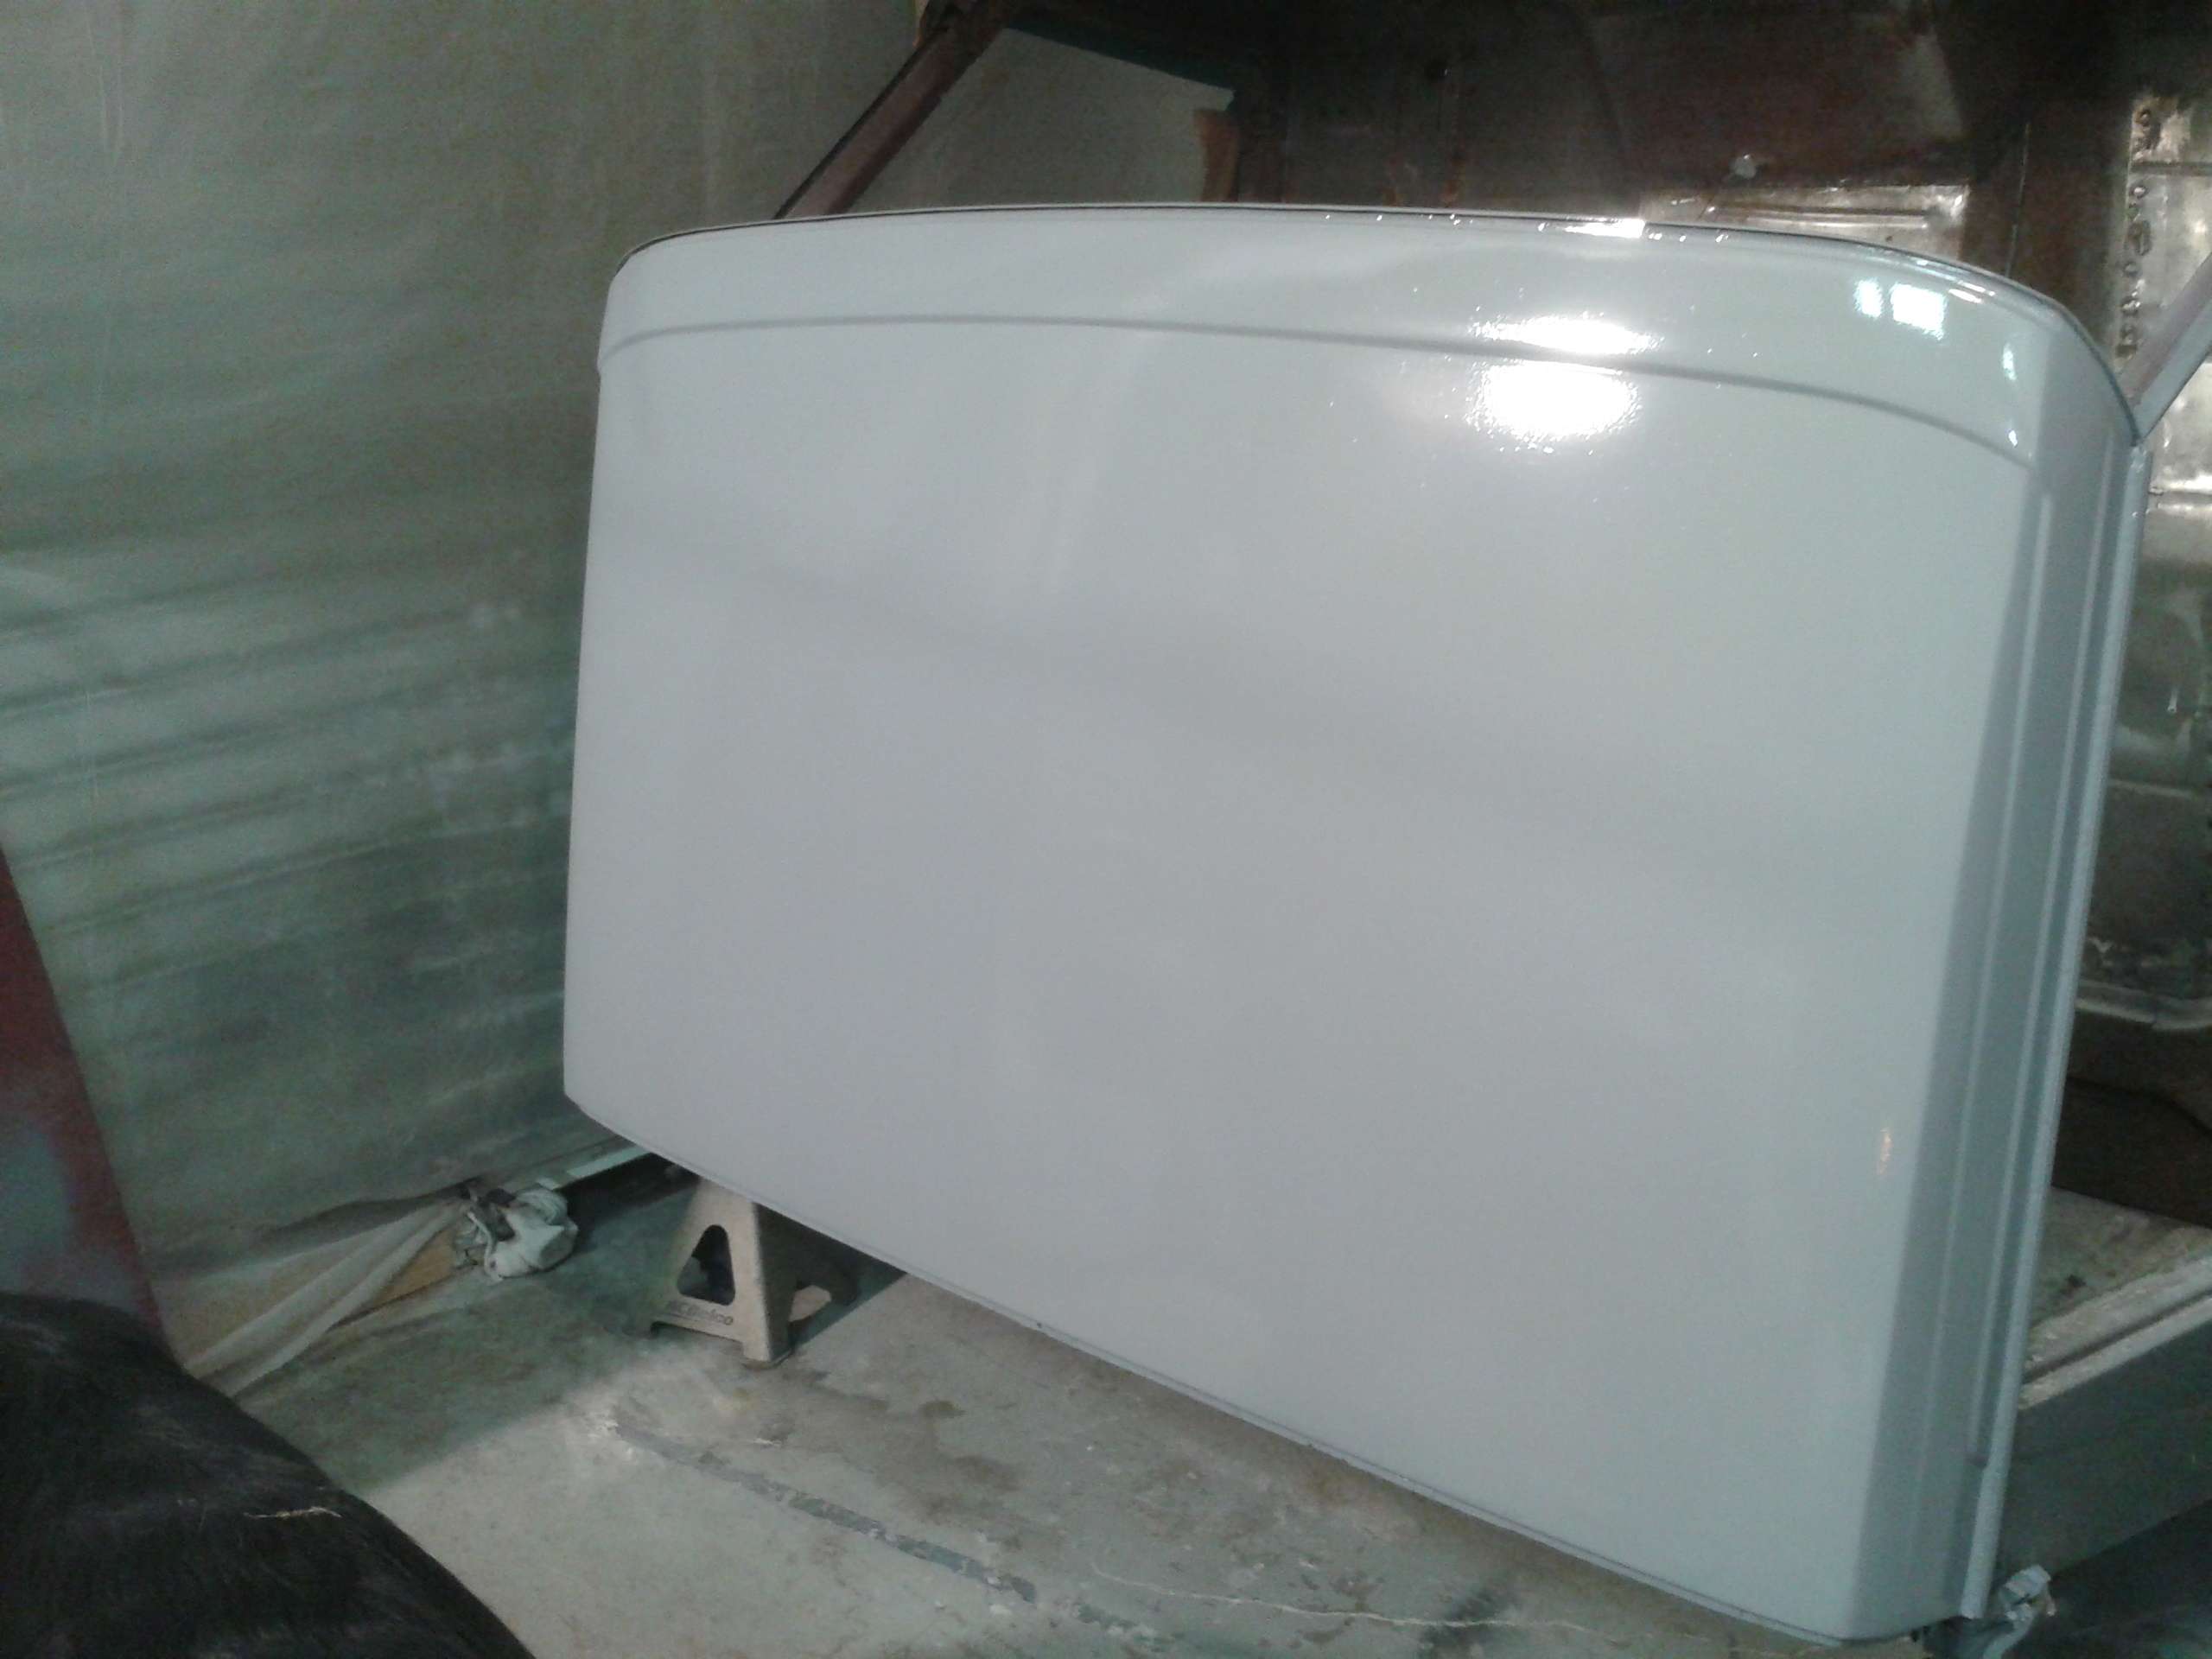
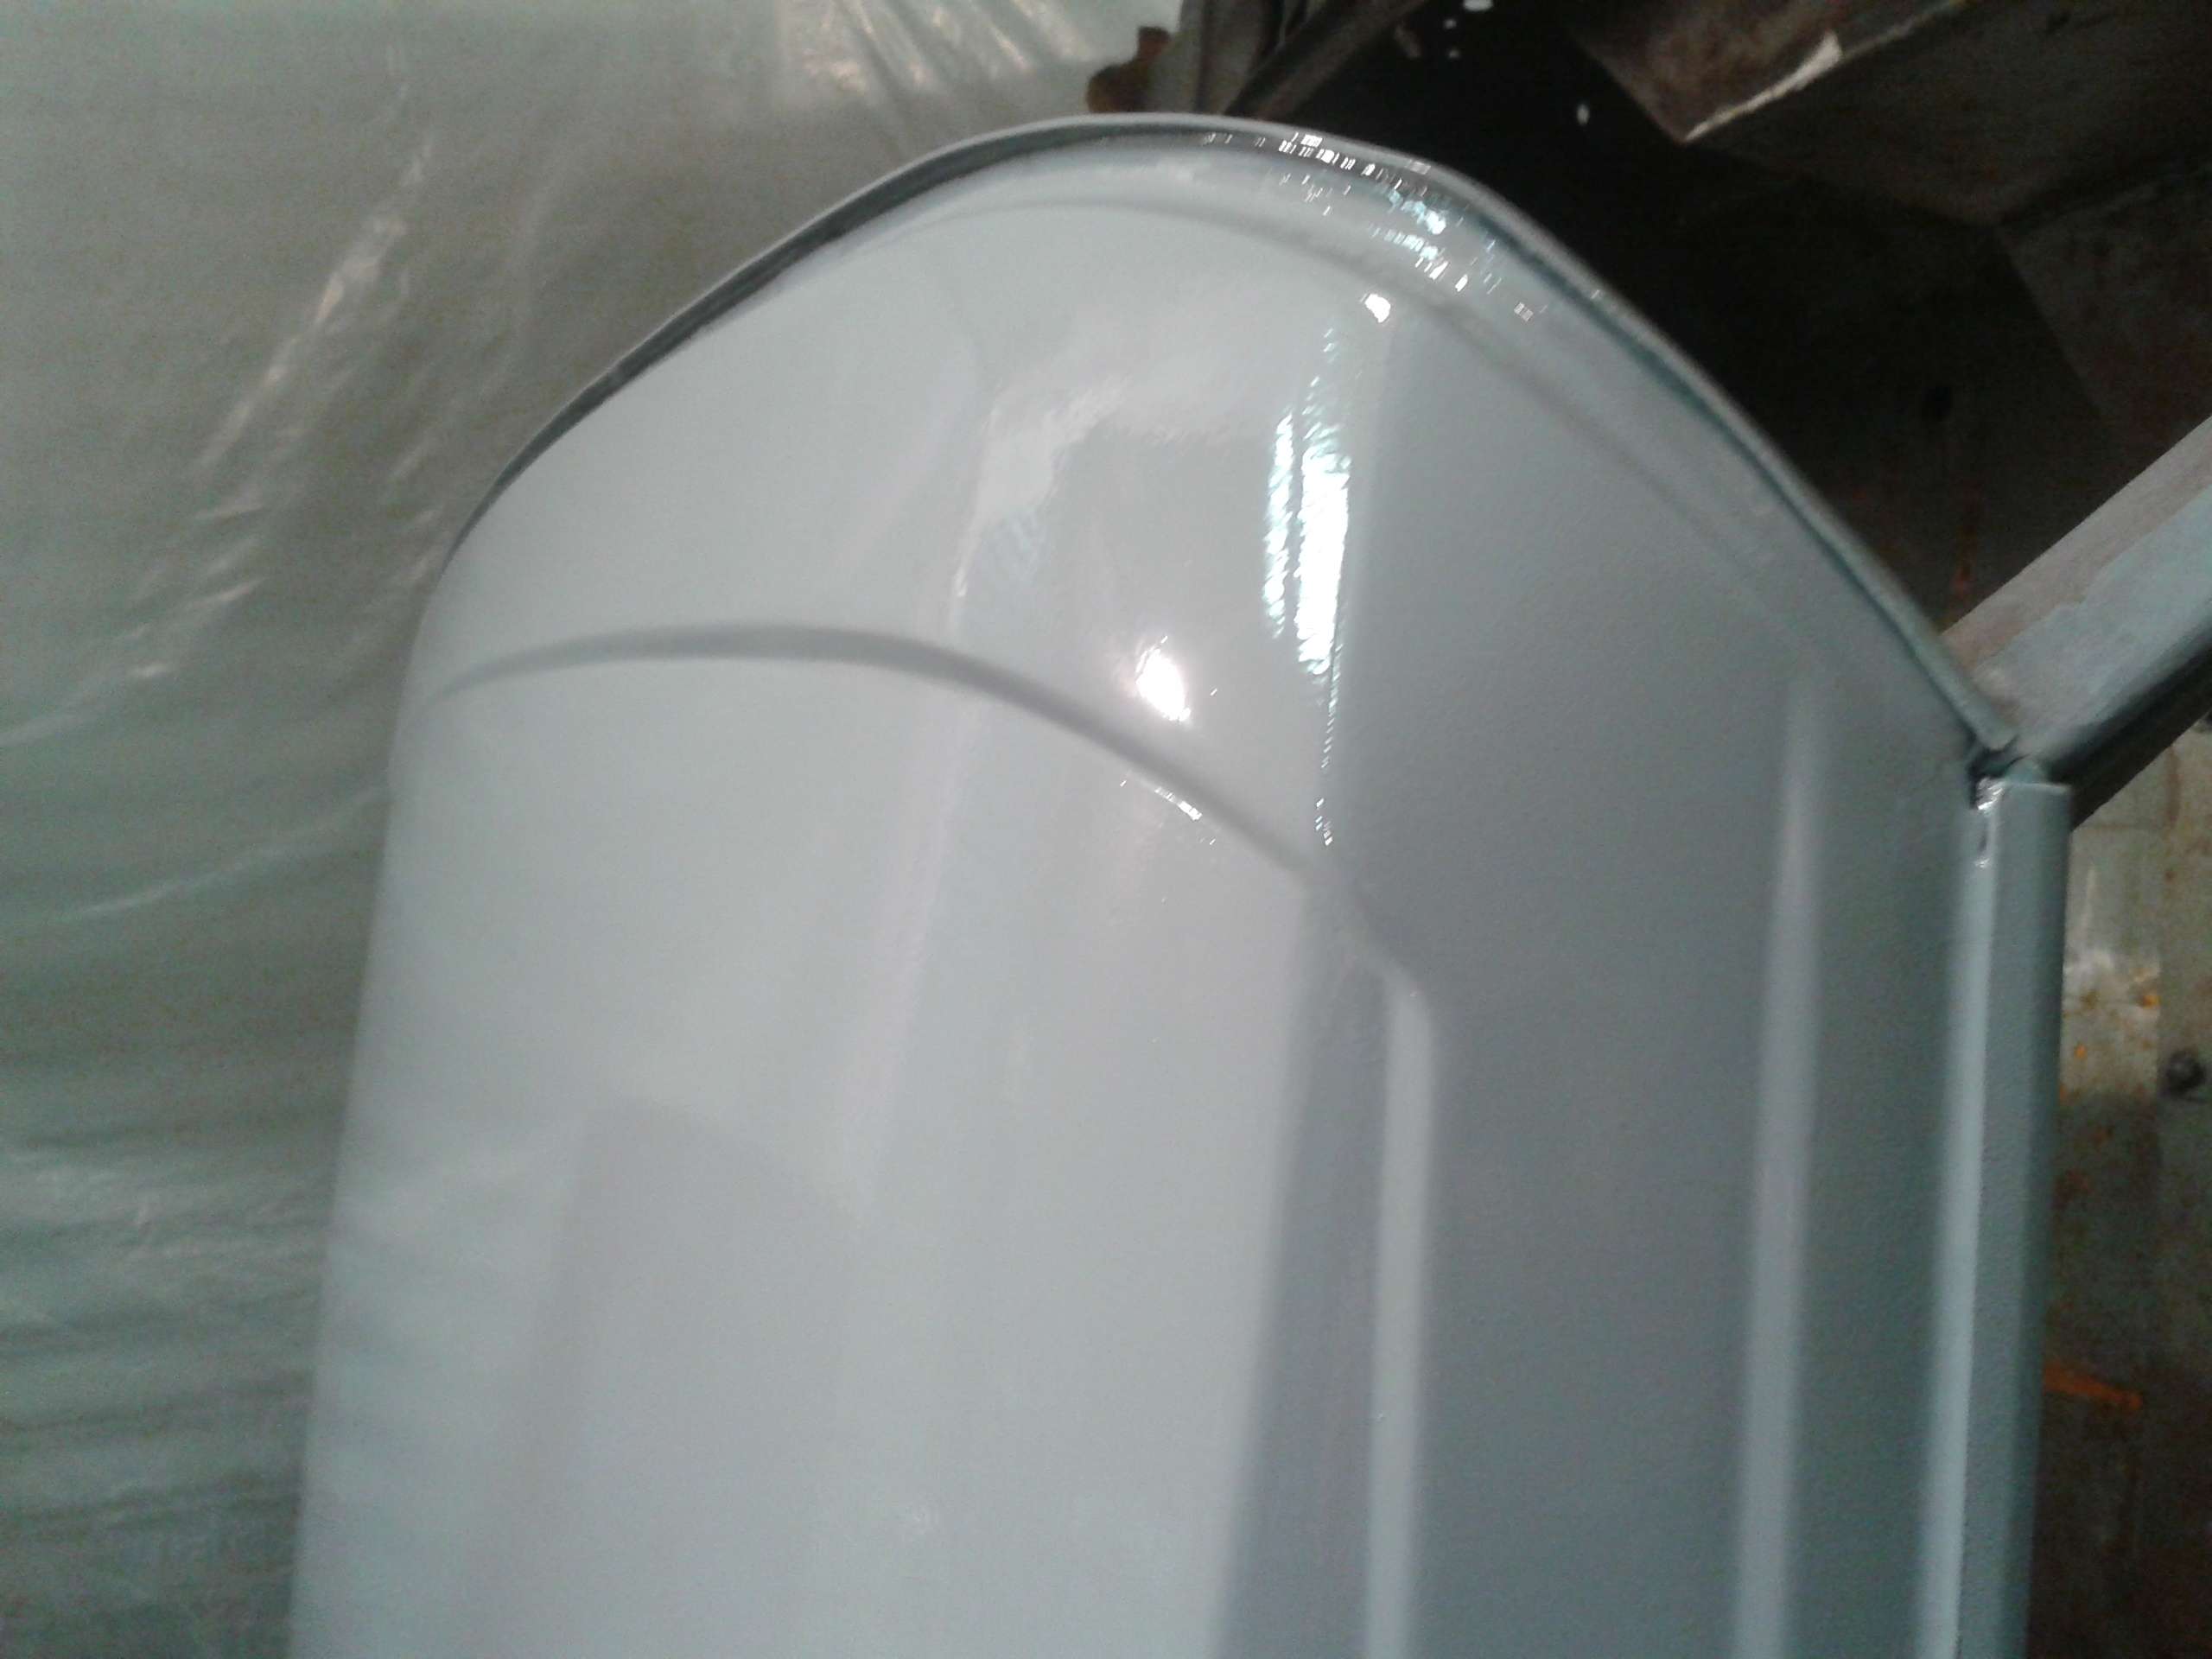

What I am very happy with is how all the contouring turned out. All the lines are perfect as near as I can tell.


Last edited by Resbum on Sat Apr 06, 2013 8:09 pm, edited 1 time in total.
Originally Posted by Resbum
"What year is my truck?... Which part?" Build thread- http://www.fsjnetwork.com/forum/viewtop ... 290#p18290
"What year is my truck?... Which part?" Build thread- http://www.fsjnetwork.com/forum/viewtop ... 290#p18290
-
Resbum
Topic author - Posts: 466
- Joined: Fri Jun 08, 2012 9:45 am
- Location: North East Oregon
Re: 1970 Gladiator 1 Ton 6BT 12V Cummins Build
.
.
Originally posted by Tnfalconer 02-15-2013 06:28 PM
________________________________________
remind me what color you are painting your truck?
.
.
Resbum 02-15-2013 06:45 PM
________________________________________
Cummins Beige (Tan). I made a paint chip with the same OEM Cummins rattle can paint I used on the engine and had the paint shop match it.
.
.
Tnfalconer 02-15-2013 07:22 PM
________________________________________
I following the same road, just with Desert tan. It will be very similar I think. Matching the rattle can color I like to the paint and tinting for the raptor bedliner that I plan to spray it with. I am thinking two tone and doing the rocker panels black bedliner.
.
.
Resbum 02-15-2013 07:35 PM
________________________________________
I'm painting the whole truck with Raptor. I have two gallons of tintable Raptor and a half gallon of paint without binder in it to tint the Raptor with.
I got the idea from a guy who painted his whole ratrod with it (black). He reduced it 10% and shot it with a 1.4mm jet in the spray gun. It self-levelled really well and had the satin finish I want.
.
Originally posted by Tnfalconer 02-15-2013 06:28 PM
________________________________________
remind me what color you are painting your truck?
.
.
Resbum 02-15-2013 06:45 PM
________________________________________
Cummins Beige (Tan). I made a paint chip with the same OEM Cummins rattle can paint I used on the engine and had the paint shop match it.
.
.
Tnfalconer 02-15-2013 07:22 PM
________________________________________
I following the same road, just with Desert tan. It will be very similar I think. Matching the rattle can color I like to the paint and tinting for the raptor bedliner that I plan to spray it with. I am thinking two tone and doing the rocker panels black bedliner.
.
.
Resbum 02-15-2013 07:35 PM
________________________________________
I'm painting the whole truck with Raptor. I have two gallons of tintable Raptor and a half gallon of paint without binder in it to tint the Raptor with.
I got the idea from a guy who painted his whole ratrod with it (black). He reduced it 10% and shot it with a 1.4mm jet in the spray gun. It self-levelled really well and had the satin finish I want.
Last edited by Resbum on Sat Apr 06, 2013 8:10 pm, edited 1 time in total.
Originally Posted by Resbum
"What year is my truck?... Which part?" Build thread- http://www.fsjnetwork.com/forum/viewtop ... 290#p18290
"What year is my truck?... Which part?" Build thread- http://www.fsjnetwork.com/forum/viewtop ... 290#p18290
-
Resbum
Topic author - Posts: 466
- Joined: Fri Jun 08, 2012 9:45 am
- Location: North East Oregon
Re: 1970 Gladiator 1 Ton 6BT 12V Cummins Build
Yesterday Tnfalconer sent me a PM. I thought there was a lot of good info in his question and my reply so I asked him if I could post his PM here.
If any experienced body people read this and see an error PLEASE feel free to speak up. Now is the time to correct things
Resbum
Quote:
________________________________________
Originally Posted by Tnfalconer
I worked with a friend at a body shop for a little while and applied many Raptor bedliners. Is the application of primer on a smooth surface not counterproductive to applying Raptor? The surface is supposed to have tooth so that the bedliner has something to bite to. Do you plan to rough the primer after doing such a nice job on it? Raptor won't stick for very long to a smooth shiny surface. I actually did some testing with this while there, inadvertantly. We cut the paint to metal with a nylon abrasive cup, the rougher the better. It will stay forever.
________________________________________
Thanks for sharing the first-hand working experience with Raptor. It goes exactly with everything I've learned about the stuff. From what I've learned, if you apply the Raptor wet-on-wet to the primer, after it's flashed, it will chemically bind to the primer well. However, you can't apply the Tiger seal to the primer until it's completely off-gassed. And, I don't completely trust just chemically binding. So, I am going to have to rough up the primer before applying the Raptor. That's actually what I spent the major part of yesterday doing and was going to be a part of my next post to the build thread.
Here are the materials I'm using and the sequence I'm going to follow to apply everything.
Materials:
2 gallons U-Tech E380/381 (grey/black) epoxy primer
4 tubes U-POL Tiger Seal (seam sealer)
2 quarts OMNI MBC paint WITH binder
2 quarts OMNI MBC paint WITHOUT binder to tint the Raptor
2 gallons U-POL Raptor Bedliner
Sequence:
1- E380 primer was designed to go over media blasted surfaces. Any surface that wasn't blasted I stripped to bare metal and left a 120 grit texture.
2- Let the primer cure, then thoroughly scuff with 180 grit. There will be no shiny areas left. I also give it a light skuff with 80 grit.
3- Apply Tiger seal to all seams.
Note- This next step was recommended to help, 1) Get the color coverage without using so much of the Raptor (save some $$$) 2) Help give the Raptor something to chemically bind to, as well as, mechanically bind to.
4- Using the OMNI MBC paint WITH binder, shoot a light coat of paint onto the roughed up primer. It will mechanically bind to the primer.
5- After the OMNI MBC WITH binder flashes, but while it’s still wet, shoot the tinted (OMNI WITHOUT binder) Raptor top coat. The initial light coat of paint will still leave some of the rough primer surface exposed for the Raptor to mechanically bind to. The Raptor will also chemically bind to the still wet initial light coat of paint.
I’m new enough to bodywork/paint to not know if this theory is true, but in thinking it out, it does make sense that this will help everything mechanically and chemically bind together.
Again, if any experienced body people read this and see an error PLEASE feel free to speak up. Now is the time to correct things
Resbum
If any experienced body people read this and see an error PLEASE feel free to speak up. Now is the time to correct things
Resbum
Quote:
________________________________________
Originally Posted by Tnfalconer
I worked with a friend at a body shop for a little while and applied many Raptor bedliners. Is the application of primer on a smooth surface not counterproductive to applying Raptor? The surface is supposed to have tooth so that the bedliner has something to bite to. Do you plan to rough the primer after doing such a nice job on it? Raptor won't stick for very long to a smooth shiny surface. I actually did some testing with this while there, inadvertantly. We cut the paint to metal with a nylon abrasive cup, the rougher the better. It will stay forever.
________________________________________
Thanks for sharing the first-hand working experience with Raptor. It goes exactly with everything I've learned about the stuff. From what I've learned, if you apply the Raptor wet-on-wet to the primer, after it's flashed, it will chemically bind to the primer well. However, you can't apply the Tiger seal to the primer until it's completely off-gassed. And, I don't completely trust just chemically binding. So, I am going to have to rough up the primer before applying the Raptor. That's actually what I spent the major part of yesterday doing and was going to be a part of my next post to the build thread.
Here are the materials I'm using and the sequence I'm going to follow to apply everything.
Materials:
2 gallons U-Tech E380/381 (grey/black) epoxy primer
4 tubes U-POL Tiger Seal (seam sealer)
2 quarts OMNI MBC paint WITH binder
2 quarts OMNI MBC paint WITHOUT binder to tint the Raptor
2 gallons U-POL Raptor Bedliner
Sequence:
1- E380 primer was designed to go over media blasted surfaces. Any surface that wasn't blasted I stripped to bare metal and left a 120 grit texture.
2- Let the primer cure, then thoroughly scuff with 180 grit. There will be no shiny areas left. I also give it a light skuff with 80 grit.
3- Apply Tiger seal to all seams.
Note- This next step was recommended to help, 1) Get the color coverage without using so much of the Raptor (save some $$$) 2) Help give the Raptor something to chemically bind to, as well as, mechanically bind to.
4- Using the OMNI MBC paint WITH binder, shoot a light coat of paint onto the roughed up primer. It will mechanically bind to the primer.
5- After the OMNI MBC WITH binder flashes, but while it’s still wet, shoot the tinted (OMNI WITHOUT binder) Raptor top coat. The initial light coat of paint will still leave some of the rough primer surface exposed for the Raptor to mechanically bind to. The Raptor will also chemically bind to the still wet initial light coat of paint.
I’m new enough to bodywork/paint to not know if this theory is true, but in thinking it out, it does make sense that this will help everything mechanically and chemically bind together.
Again, if any experienced body people read this and see an error PLEASE feel free to speak up. Now is the time to correct things

Resbum
Originally Posted by Resbum
"What year is my truck?... Which part?" Build thread- http://www.fsjnetwork.com/forum/viewtop ... 290#p18290
"What year is my truck?... Which part?" Build thread- http://www.fsjnetwork.com/forum/viewtop ... 290#p18290
-
Resbum
Topic author - Posts: 466
- Joined: Fri Jun 08, 2012 9:45 am
- Location: North East Oregon
Re: 1970 Gladiator 1 Ton 6BT 12V Cummins Build
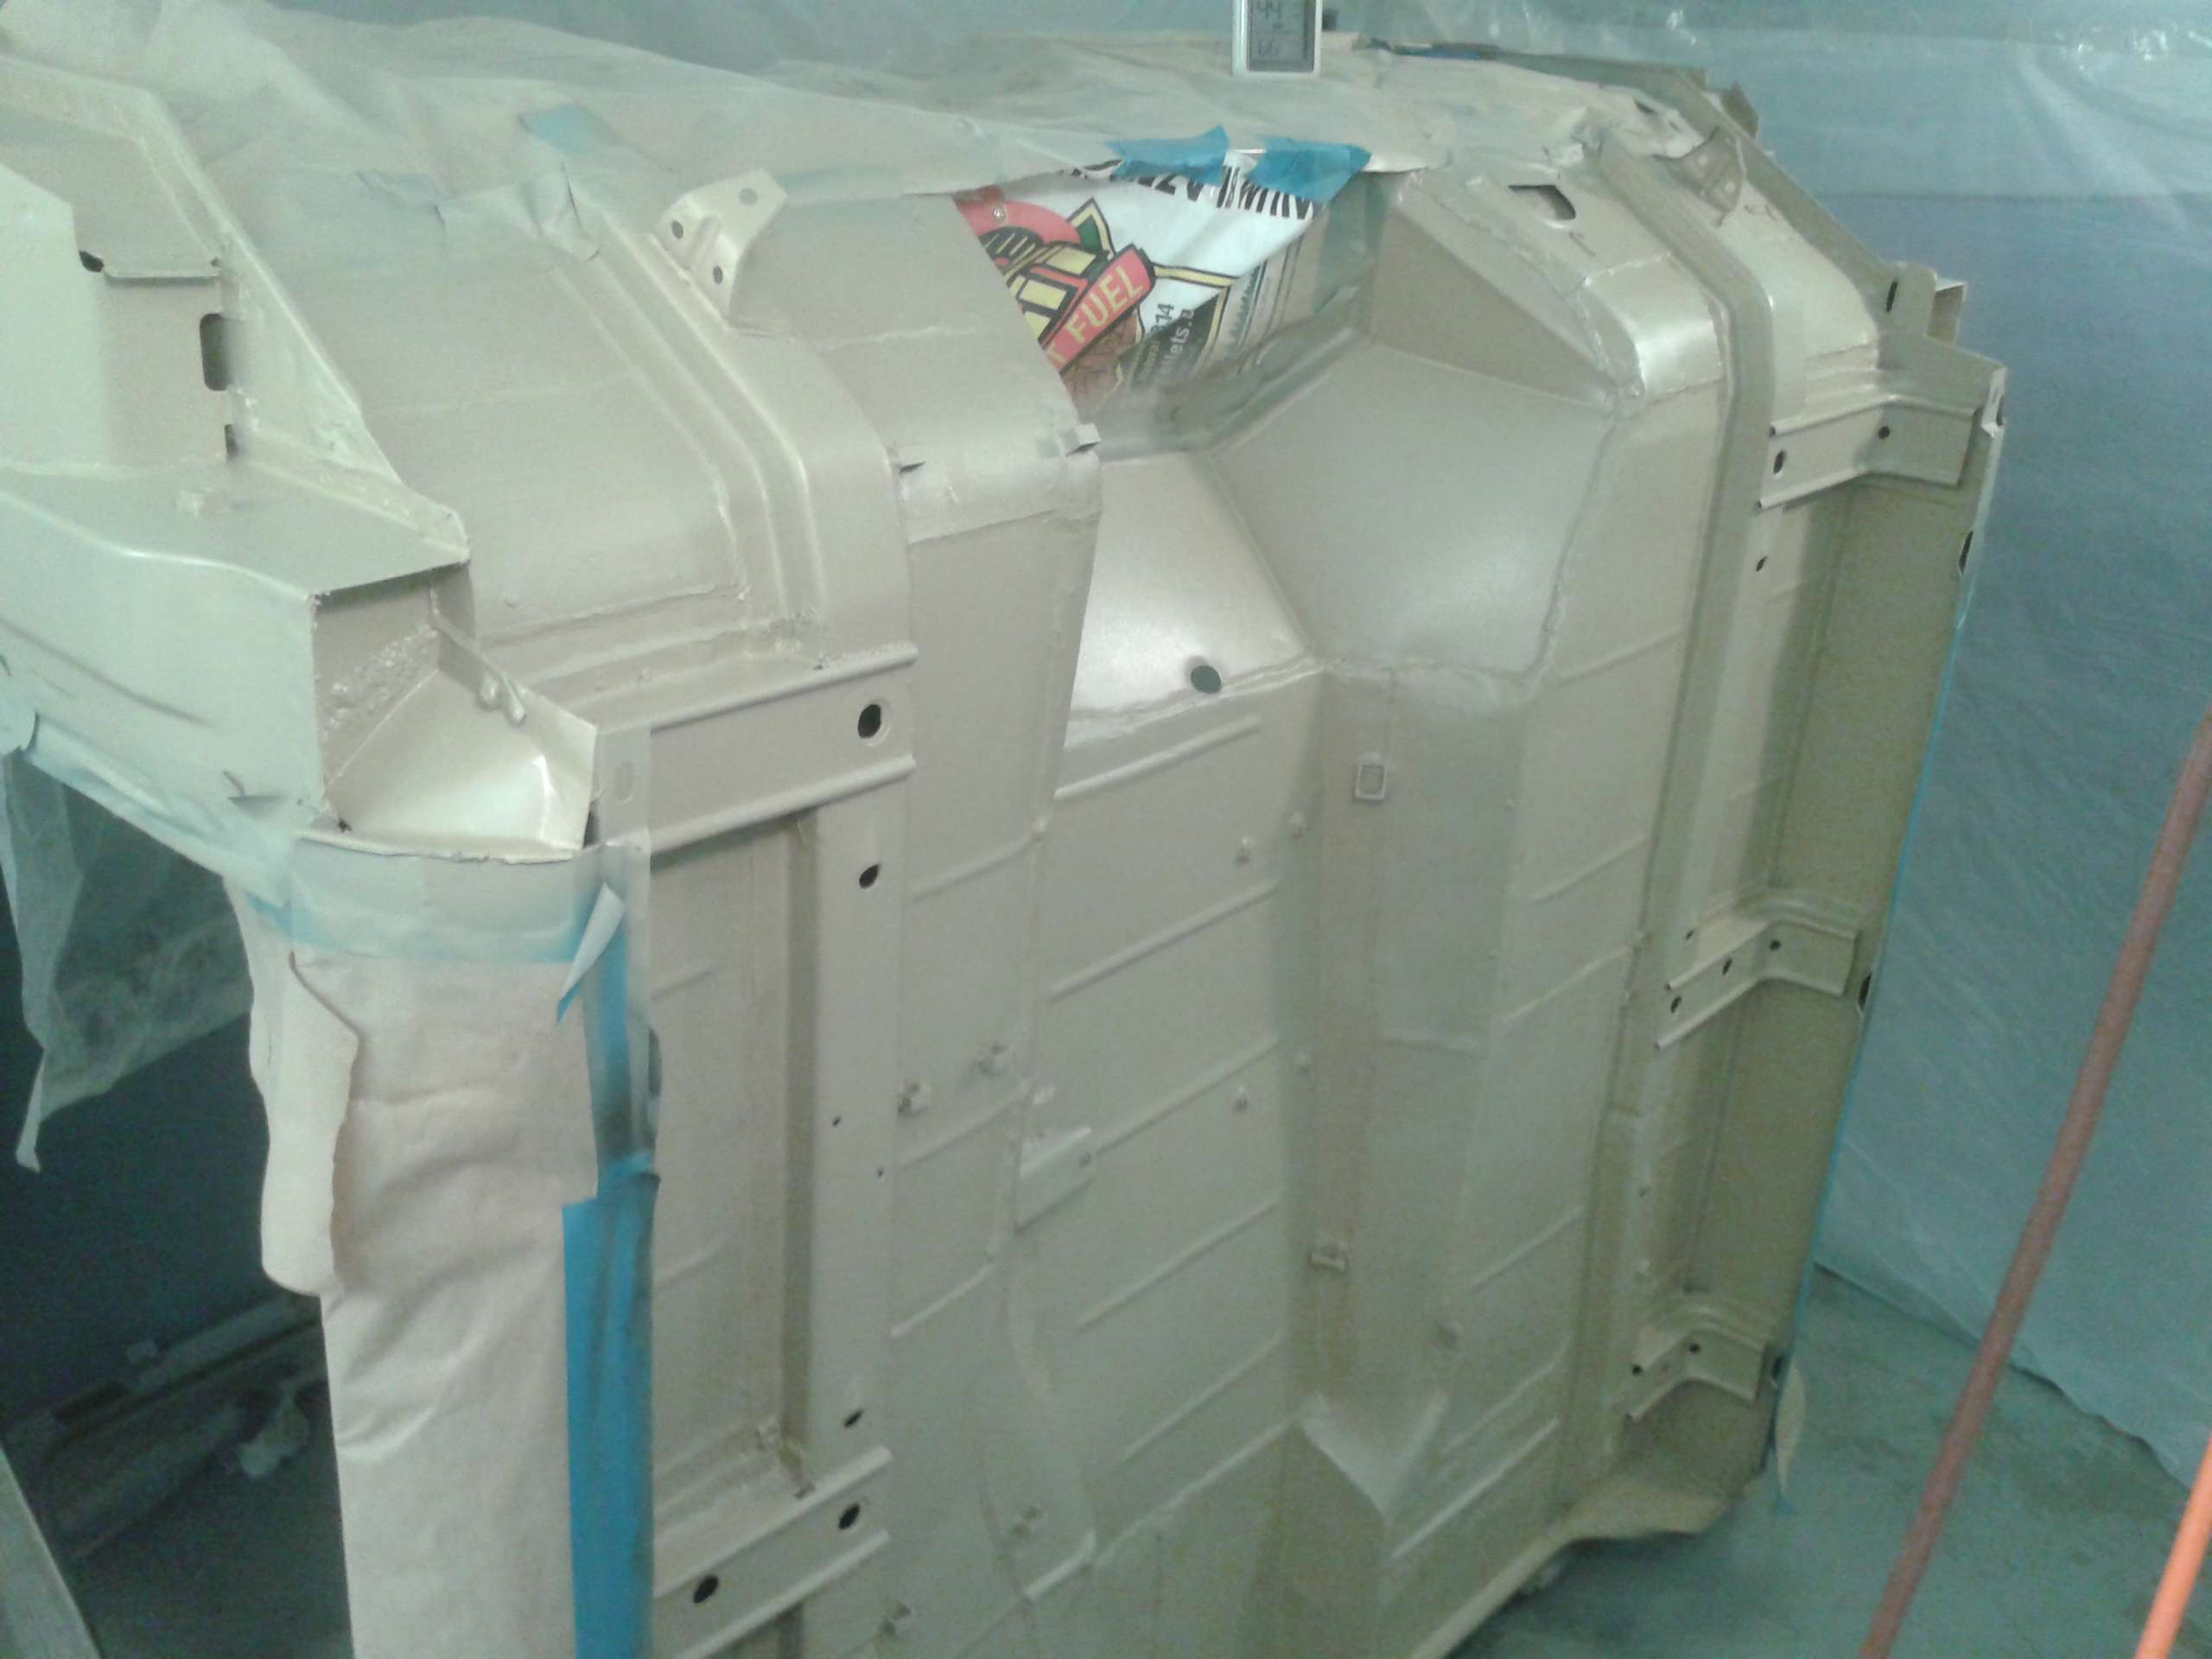
IT'S ALIVE!!! Franken-cab is now seam sealed on the bottom. My hands are very sore and tired from squeezing the chalking gun handle so many times. It's amazing how many seams there are when you've notched the firewall, replaced the floors, made a new trans tunnel, and replaced one rocker panel.
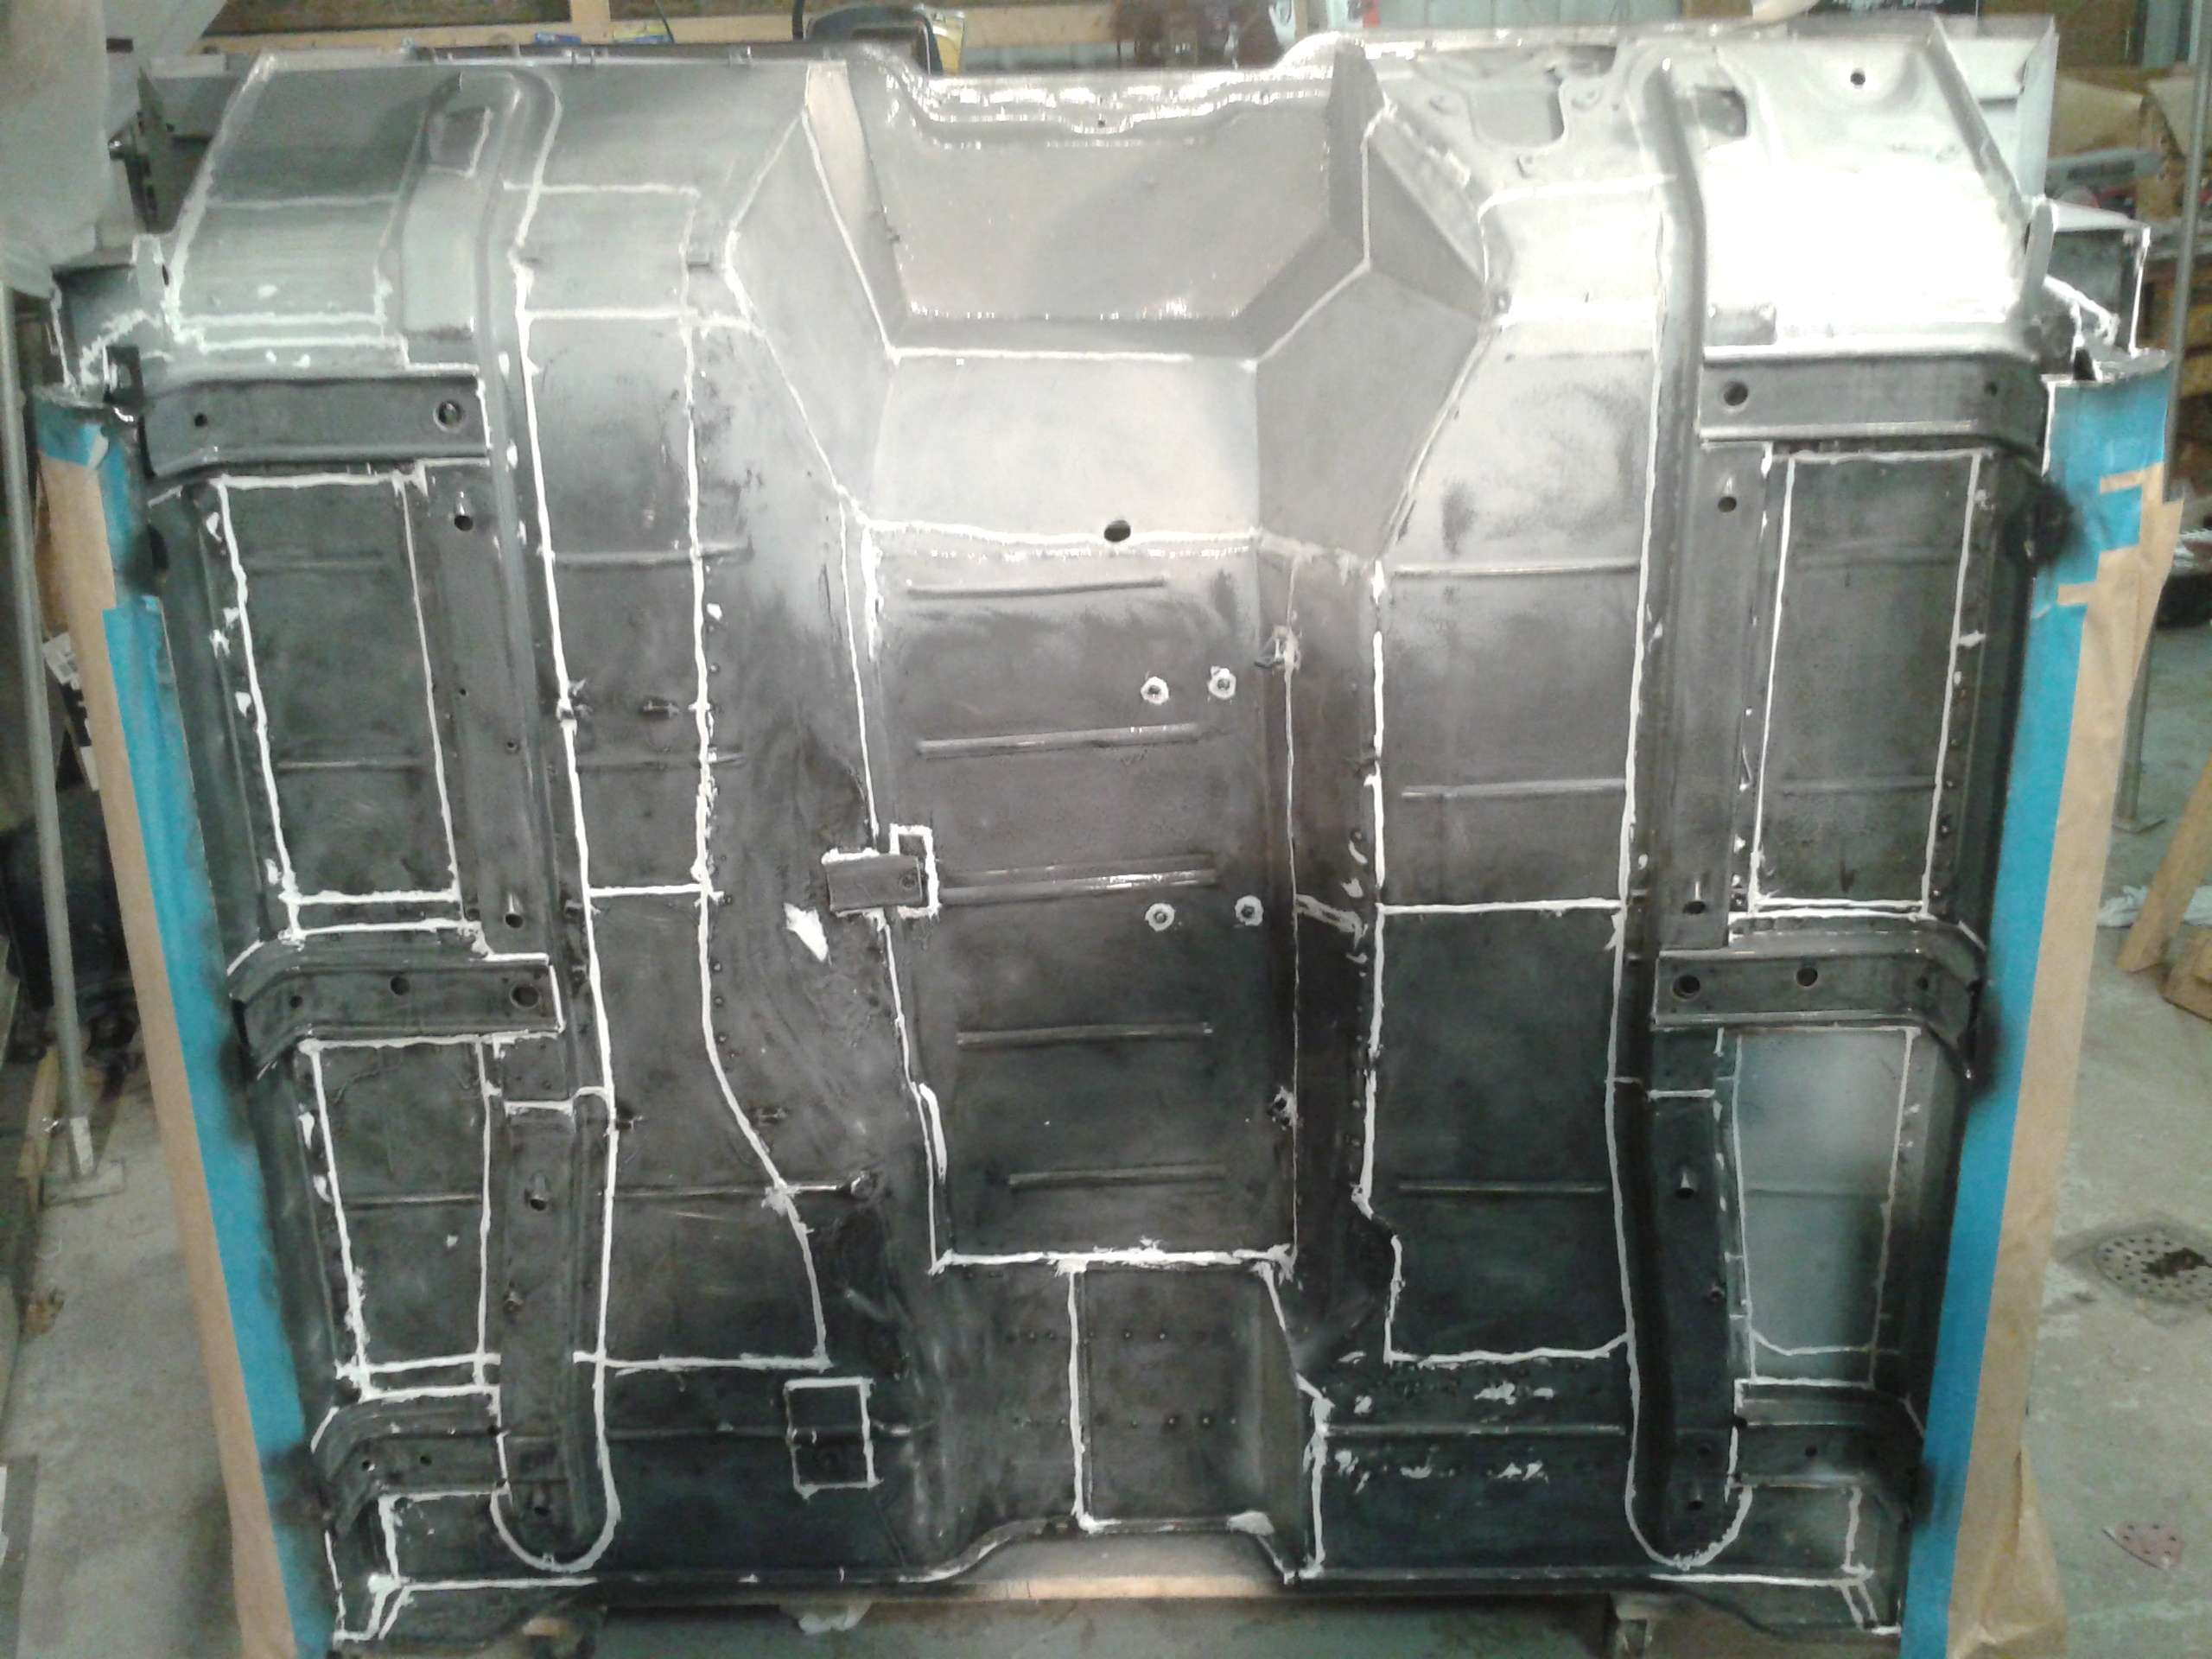
I ended the day reviewing all the tech data sheets for the OMNI paint and Raptor bedliner. I then setup up the piece of sheetmetal I've been using to practice primering on and shot an experimental layer of the Raptor, following the guidelines I explained in the last post. The texture is not quite what I want, so I still need to fine tune that, but everything went really smoothly. The picture doesn't really show it, but the color is the perfect Cummins Beige I was shooting for.
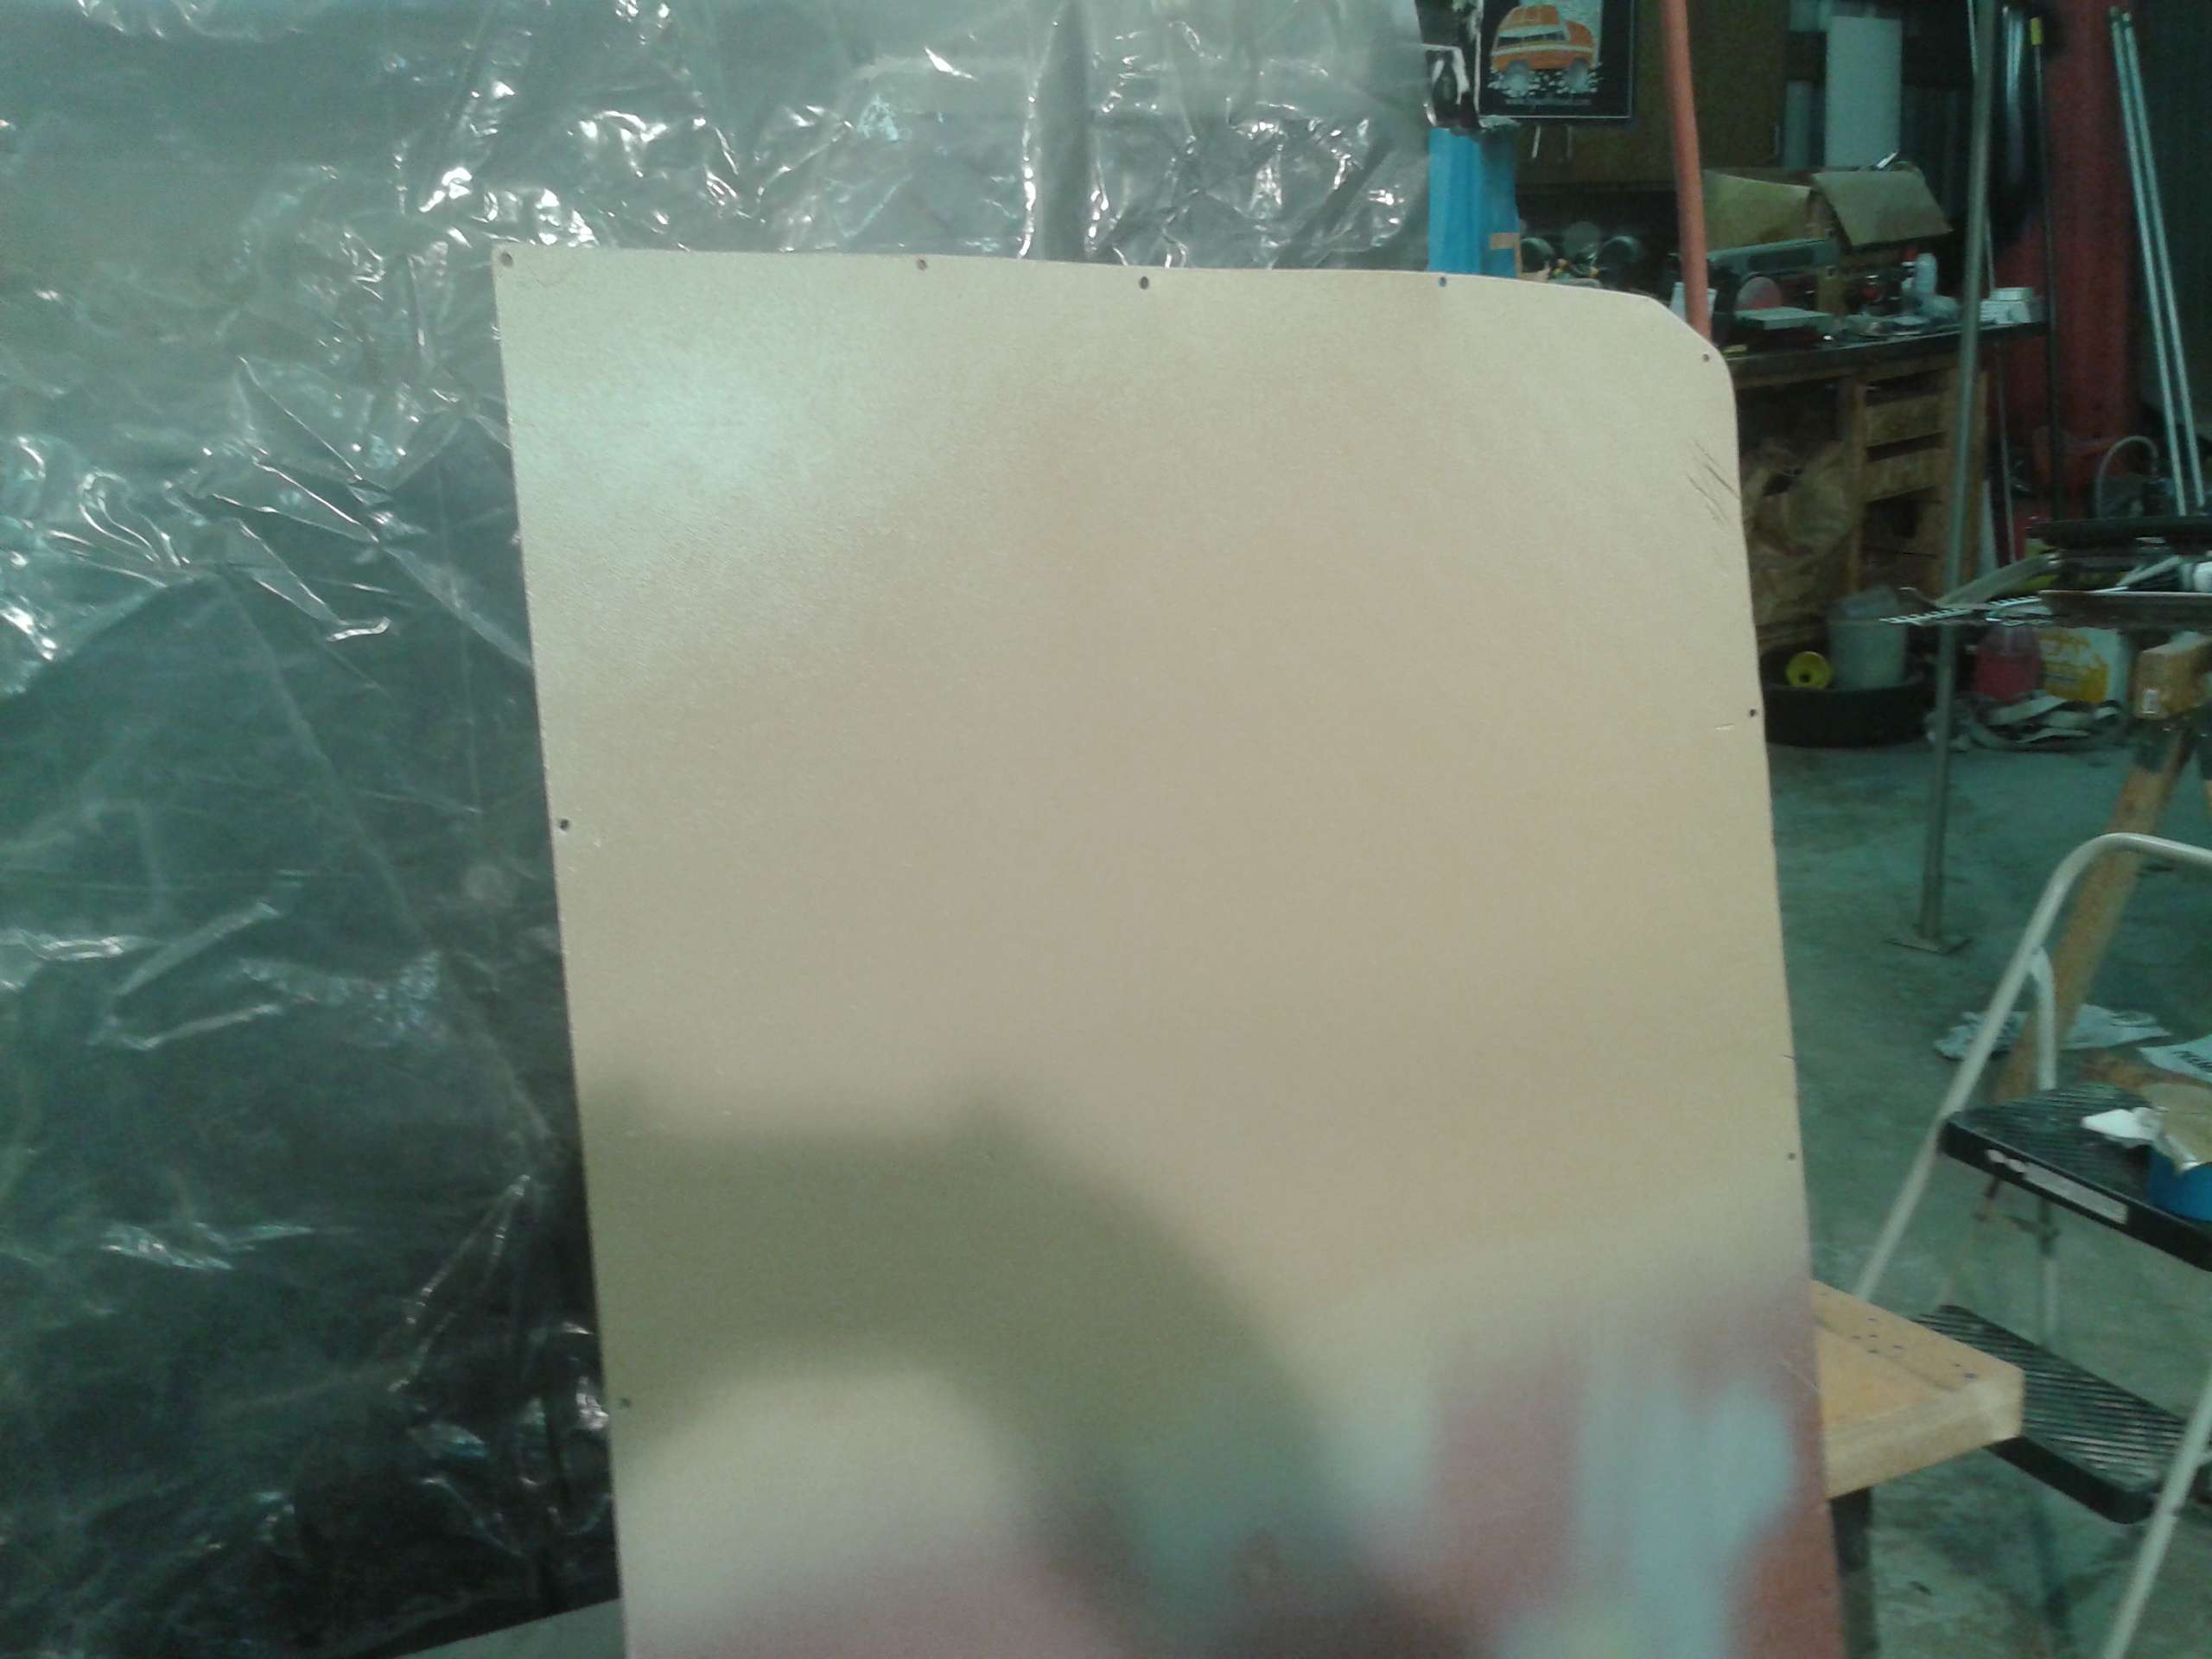
I ended the day reviewing all the tech data sheets for the OMNI paint and Raptor bedliner. I then setup up the piece of sheetmetal I've been using to practice primering on and shot an experimental layer of the Raptor, following the guidelines I explained in the last post. The texture is not quite what I want, so I still need to fine tune that, but everything went really smoothly. The picture doesn't really show it, but the color is the perfect Cummins Beige I was shooting for.
Originally Posted by Resbum
"What year is my truck?... Which part?" Build thread- http://www.fsjnetwork.com/forum/viewtop ... 290#p18290
"What year is my truck?... Which part?" Build thread- http://www.fsjnetwork.com/forum/viewtop ... 290#p18290
-
Resbum
Topic author - Posts: 466
- Joined: Fri Jun 08, 2012 9:45 am
- Location: North East Oregon
Re: 1970 Gladiator 1 Ton 6BT 12V Cummins Build
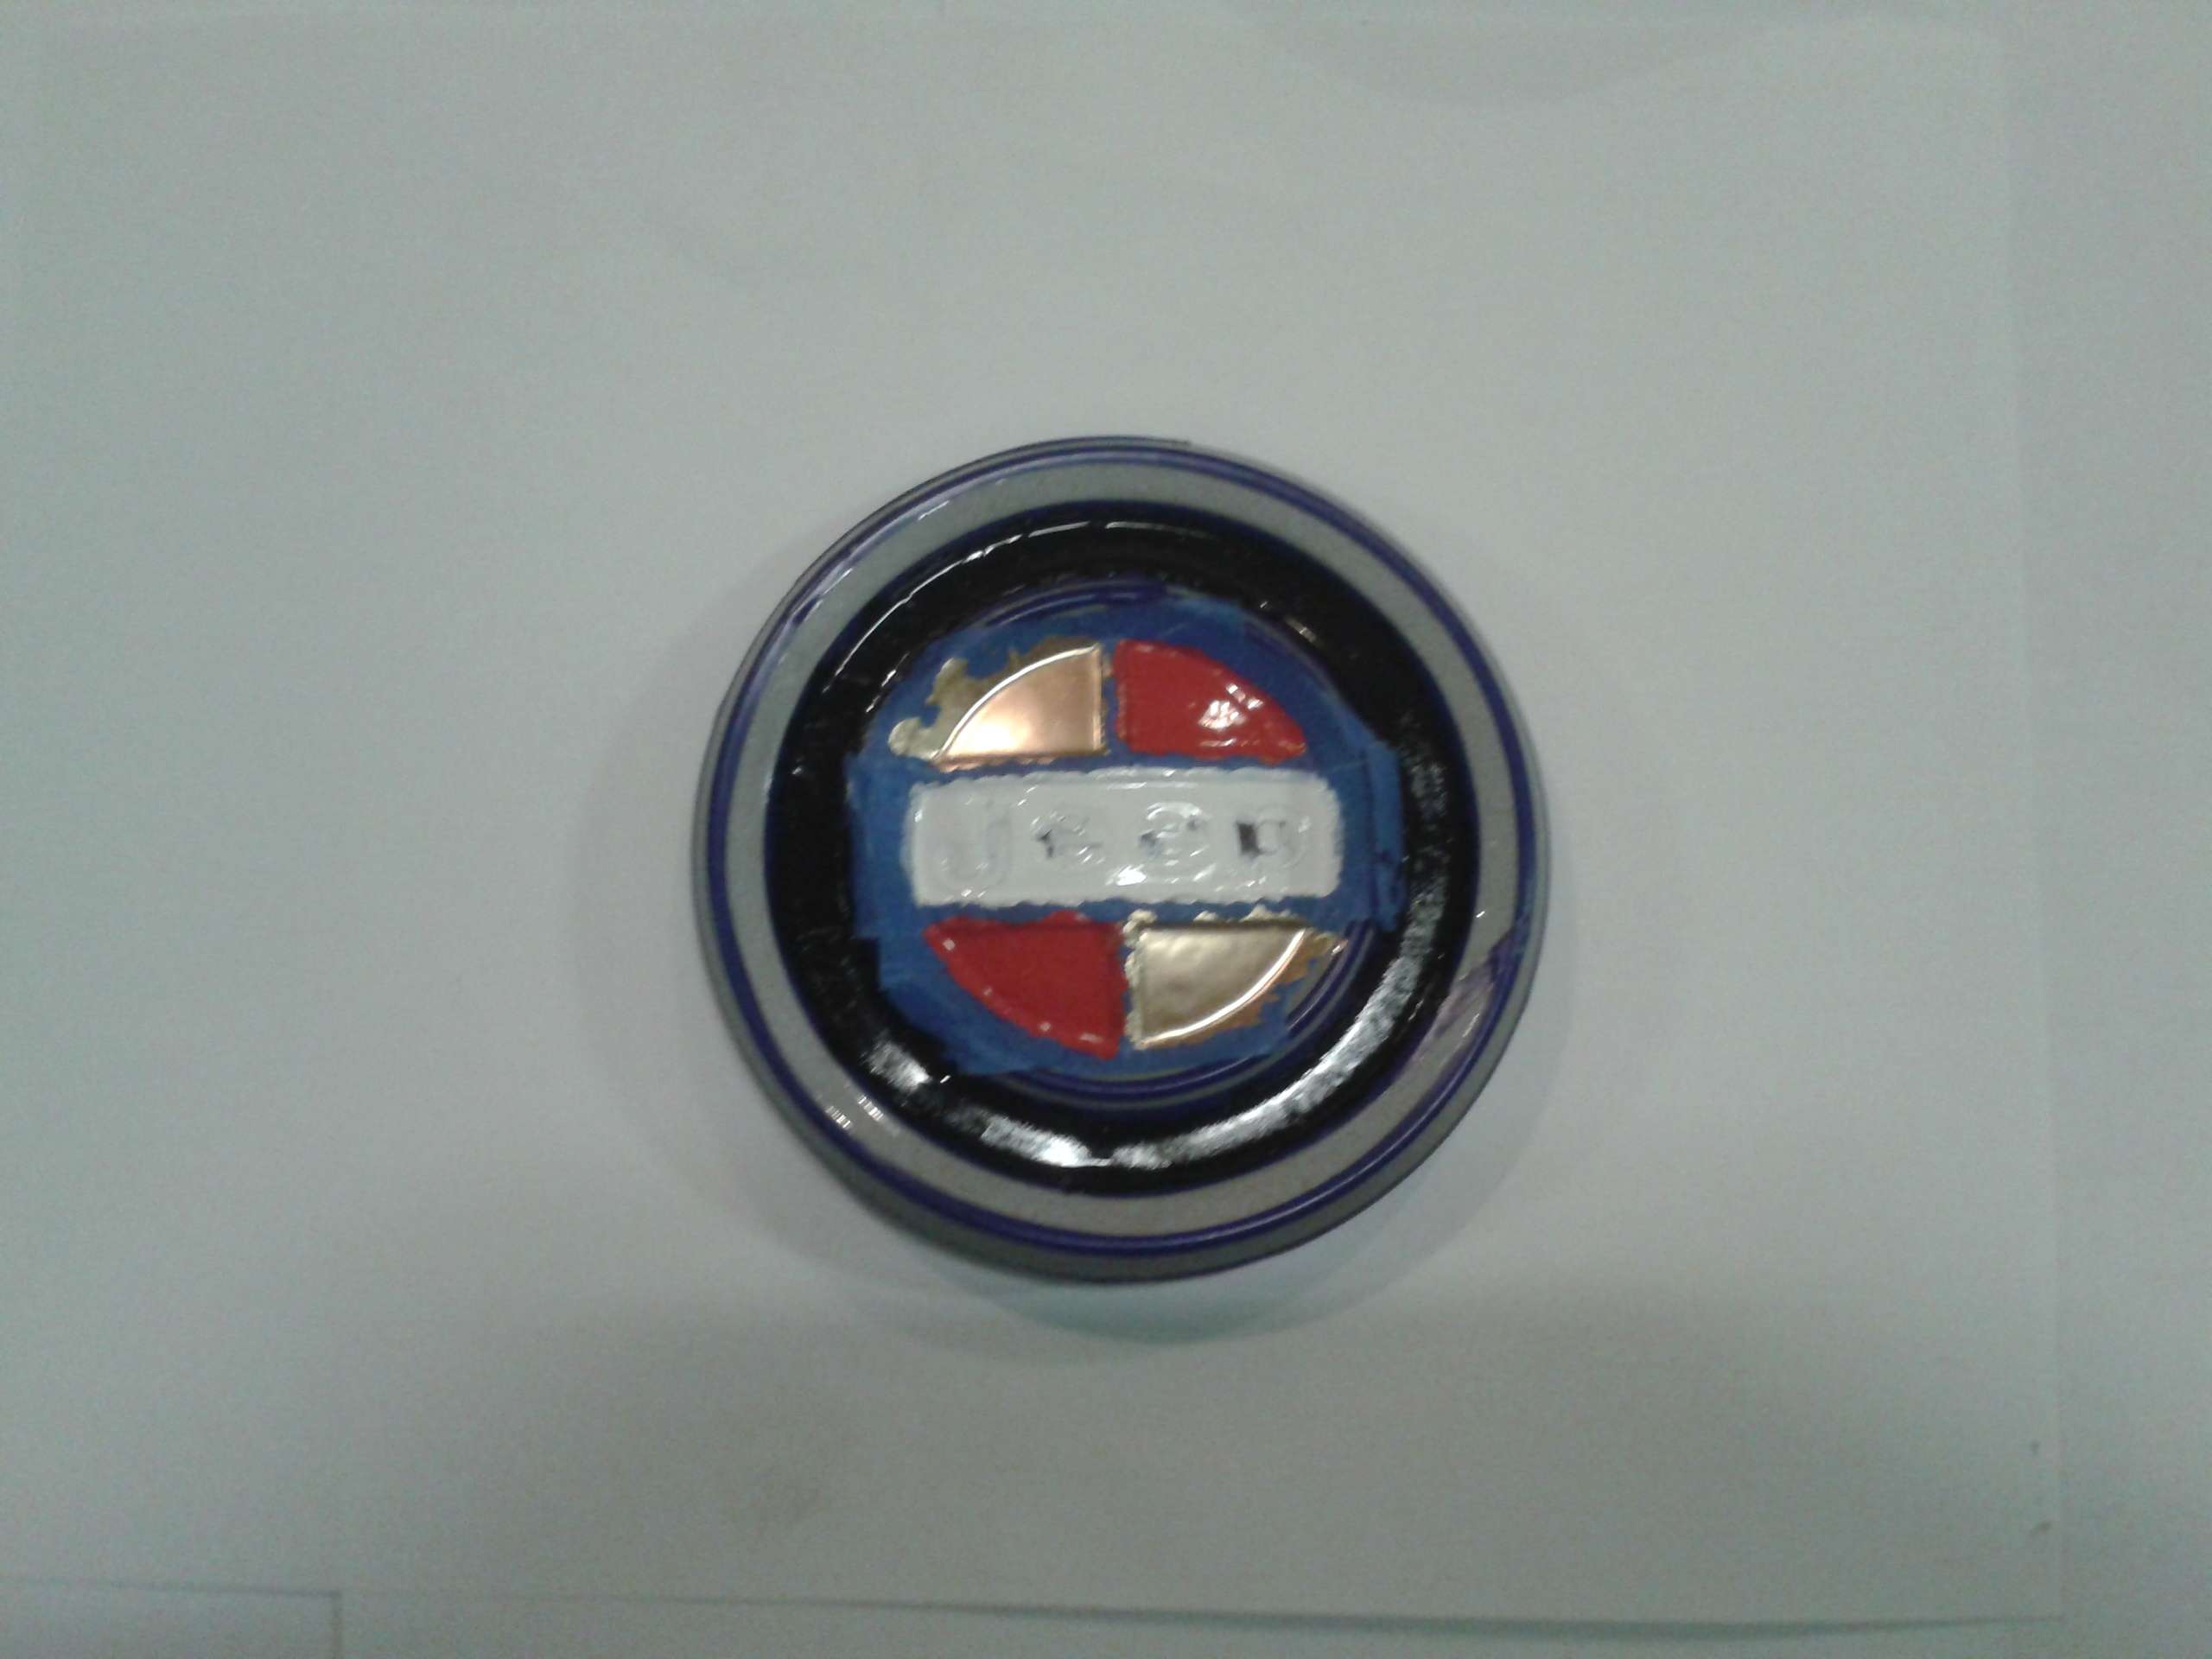
Here's something I've been working on in the evenings while watching the boob tube. I've experimented with three types of paint and right now good old Testors model paint is working the best. Unfortunately, the colors aren't as exact as some of the other paints I've tried, but they weren't working at all.
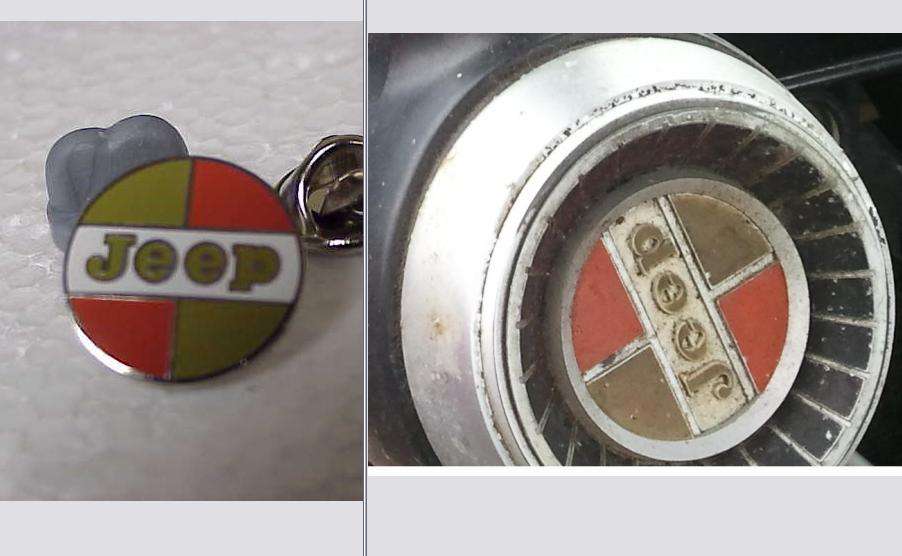
This is not the final product, so it doesn't look that good half finished with all the tape on it.
Edit-Note- This is still an ongoing experiment. I haven’t got results I like yet.
This is not the final product, so it doesn't look that good half finished with all the tape on it.
Edit-Note- This is still an ongoing experiment. I haven’t got results I like yet.
Originally Posted by Resbum
"What year is my truck?... Which part?" Build thread- http://www.fsjnetwork.com/forum/viewtop ... 290#p18290
"What year is my truck?... Which part?" Build thread- http://www.fsjnetwork.com/forum/viewtop ... 290#p18290
-
Resbum
Topic author - Posts: 466
- Joined: Fri Jun 08, 2012 9:45 am
- Location: North East Oregon
Re: 1970 Gladiator 1 Ton 6BT 12V Cummins Build
Quote:
________________________________________
Originally Posted by Tnfalconer
... What consistency are you looking for? Or rather what "grit" as a reference?
________________________________________
The ratrod I saw that inspired me to try it was literally smooth. The Raptor self-leveled really well. It looked like paint. The only reason I knew it was Raptor was because the guy told me. His car was in a parking lot and I liked the satin/low gloss look so I walked over and asked what he did to get it.
Ironically, I had already bought one gallon of Raptor for doing the bed and bottom of my truck, so I only had to buy another gallon. I had learned about Raptor from Clover Park Tech College when they were doing all the sheetmetal work on the cab. I later learned one of the project cars I had been looking at there had also been sprayed with Raptor and it was smooth, also.
The test area I sprayed yesterday had the "grit" of sand/salt, but not as pronounced. I used a "fast" reducer, so I think the next time I shoot I'll use the "medium" reducer and reduce it just a little more. That should help it self-level better.
I have all the areas of the truck nobody will ever see to experiment on. I won't shoot the visible areas until I'm getting the results I want.
________________________________________
Originally Posted by Tnfalconer
... What consistency are you looking for? Or rather what "grit" as a reference?
________________________________________
The ratrod I saw that inspired me to try it was literally smooth. The Raptor self-leveled really well. It looked like paint. The only reason I knew it was Raptor was because the guy told me. His car was in a parking lot and I liked the satin/low gloss look so I walked over and asked what he did to get it.
Ironically, I had already bought one gallon of Raptor for doing the bed and bottom of my truck, so I only had to buy another gallon. I had learned about Raptor from Clover Park Tech College when they were doing all the sheetmetal work on the cab. I later learned one of the project cars I had been looking at there had also been sprayed with Raptor and it was smooth, also.
The test area I sprayed yesterday had the "grit" of sand/salt, but not as pronounced. I used a "fast" reducer, so I think the next time I shoot I'll use the "medium" reducer and reduce it just a little more. That should help it self-level better.
I have all the areas of the truck nobody will ever see to experiment on. I won't shoot the visible areas until I'm getting the results I want.
Originally Posted by Resbum
"What year is my truck?... Which part?" Build thread- http://www.fsjnetwork.com/forum/viewtop ... 290#p18290
"What year is my truck?... Which part?" Build thread- http://www.fsjnetwork.com/forum/viewtop ... 290#p18290
-
Resbum
Topic author - Posts: 466
- Joined: Fri Jun 08, 2012 9:45 am
- Location: North East Oregon
Re: 1970 Gladiator 1 Ton 6BT 12V Cummins Build
.
.
Originally posted by Tnfalconer 02-20-2013 10:14 AM
________________________________________
I like it. I had a similar thought, that if I was going to shoot it everywhere I wanted it with a low "Grit" as it will be harder to clean. However the higher the grit the tougher and more rock resistant it will be. I am sure there is a point where thinning it too much will become nothing more than urethane paint. Are you planning any contrast to the beige? Rocker panels, bedliner or anything? I have been doing some colr comparisons on my cab with rattle cans and I really like the coyote (khaki) against the desert tan. It will take more thought on my part but I am liking what I see..
Last edited by Resbum on Sat Apr 06, 2013 8:12 pm, edited 1 time in total.
Originally Posted by Resbum
"What year is my truck?... Which part?" Build thread- http://www.fsjnetwork.com/forum/viewtop ... 290#p18290
"What year is my truck?... Which part?" Build thread- http://www.fsjnetwork.com/forum/viewtop ... 290#p18290
-
Resbum
Topic author - Posts: 466
- Joined: Fri Jun 08, 2012 9:45 am
- Location: North East Oregon
Re: 1970 Gladiator 1 Ton 6BT 12V Cummins Build
I'm not planning on doing any color contrasts. I am thinking of doing the bottom 6" and the fender flares in the traditional bedliner texture. I haven't decided yet.
This morning, when I got to the shop, I looked at the test panel and its texture started to grow on me. I loaded the panel in the car and drove around asking everybody what they thought. Everyone thought it looks good, so I think I'm going to paint the truck with a slight texture to the finish.
This is how wacked out my phone camera is. I took these two pictures one right after the other and this is how different they came out.
The test panel next to the engine. The block is slightly shaded by the exhaust manifold. As near as my eye can tell they're the same color.
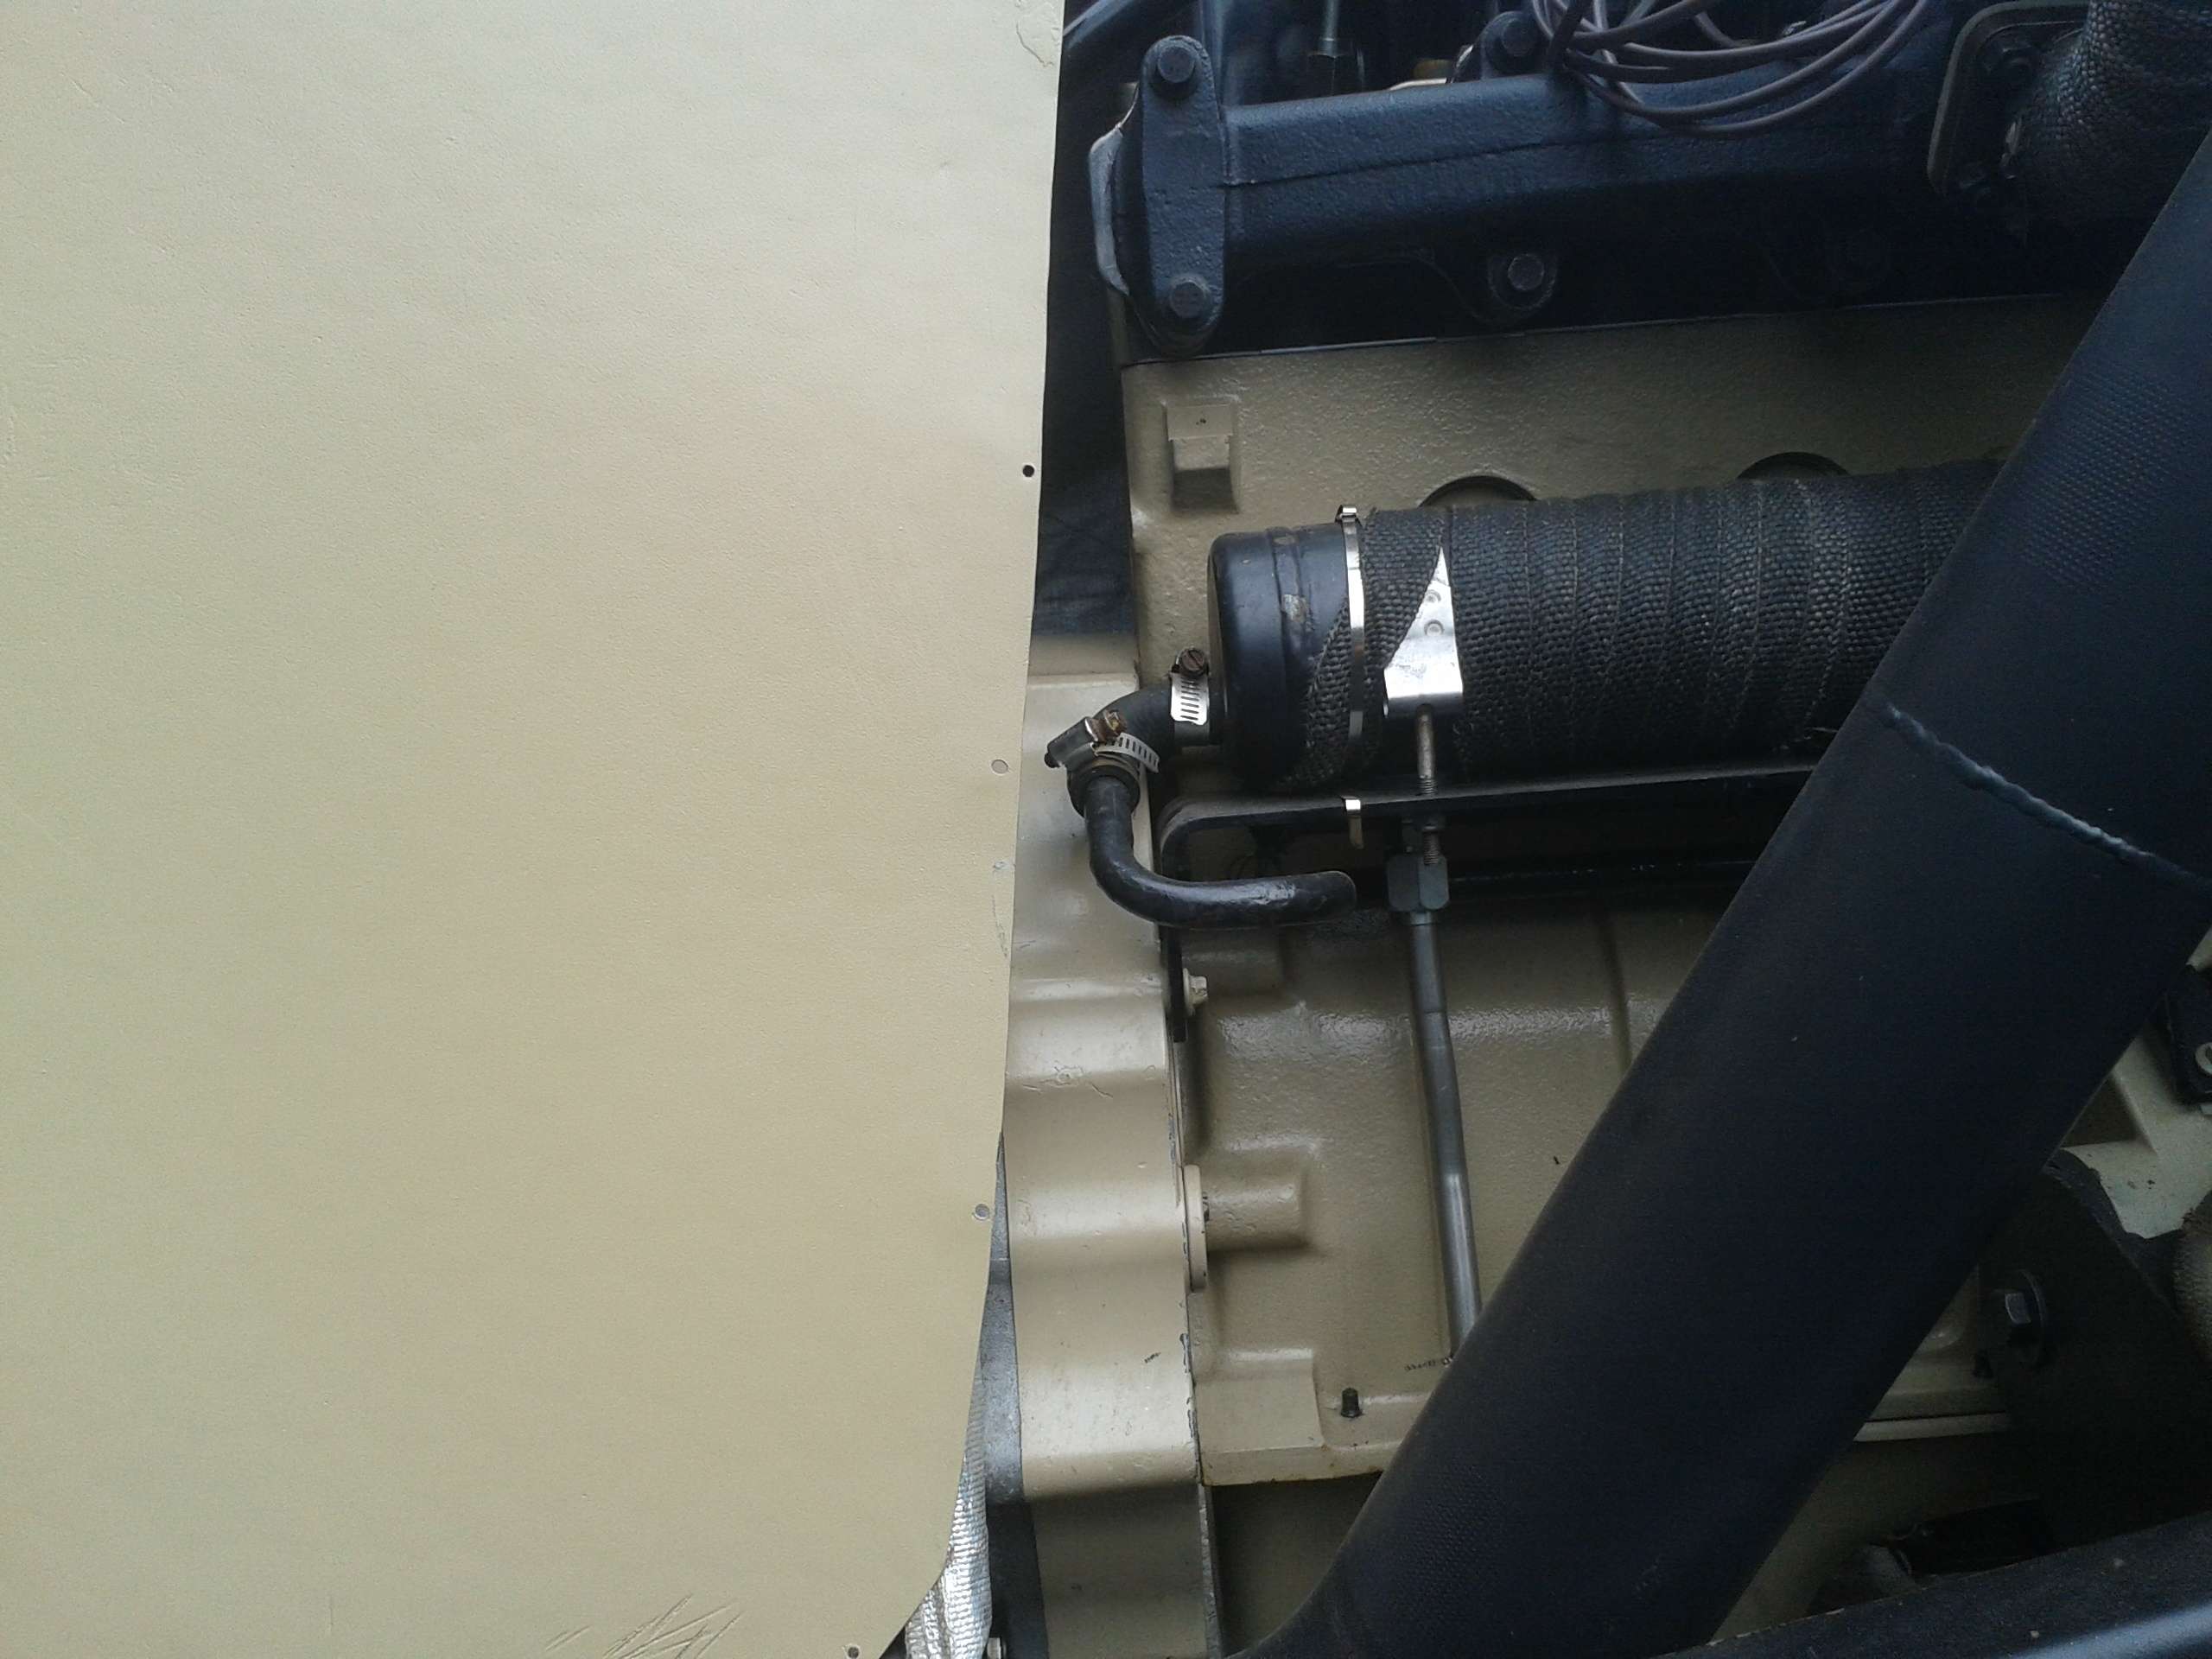
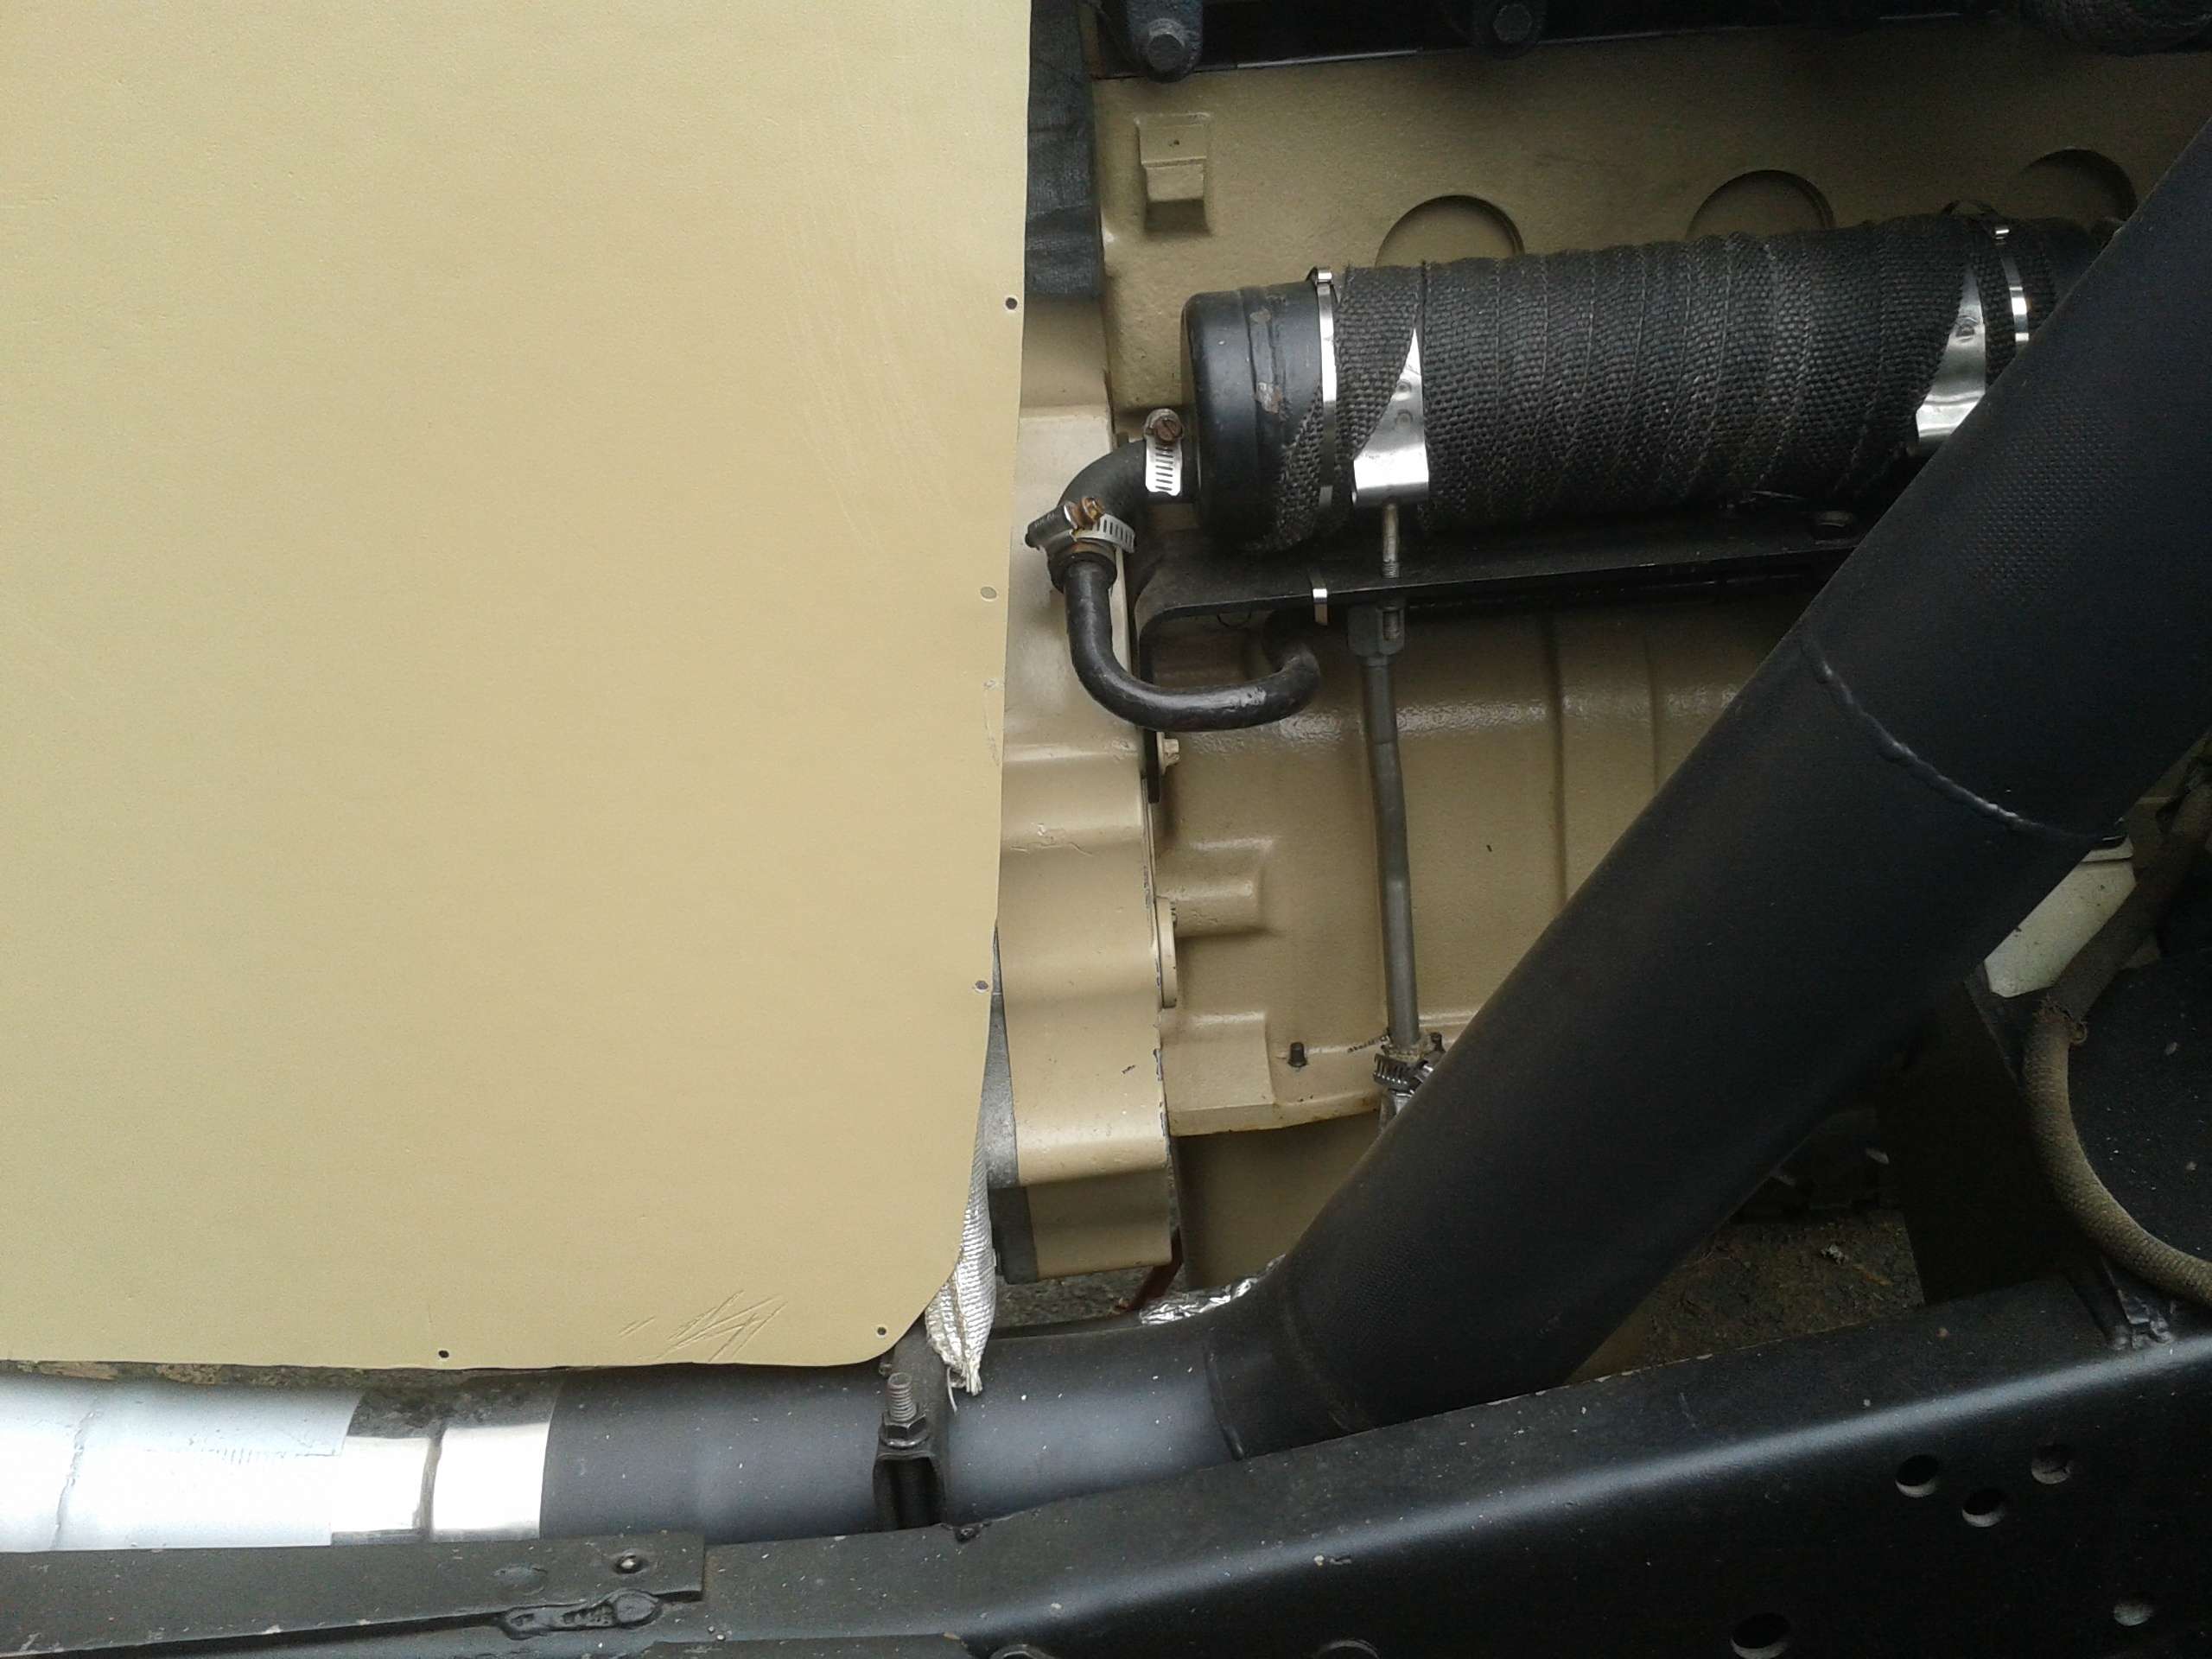
Originally Posted by Resbum
"What year is my truck?... Which part?" Build thread- http://www.fsjnetwork.com/forum/viewtop ... 290#p18290
"What year is my truck?... Which part?" Build thread- http://www.fsjnetwork.com/forum/viewtop ... 290#p18290
-
Resbum
Topic author - Posts: 466
- Joined: Fri Jun 08, 2012 9:45 am
- Location: North East Oregon
Re: 1970 Gladiator 1 Ton 6BT 12V Cummins Build
WOO_HOO!!!! The truck has the first of its color! Too bad my phone camera isn't taking very good pics.

Originally Posted by Resbum
"What year is my truck?... Which part?" Build thread- http://www.fsjnetwork.com/forum/viewtop ... 290#p18290
"What year is my truck?... Which part?" Build thread- http://www.fsjnetwork.com/forum/viewtop ... 290#p18290
-
Resbum
Topic author - Posts: 466
- Joined: Fri Jun 08, 2012 9:45 am
- Location: North East Oregon
Re: 1970 Gladiator 1 Ton 6BT 12V Cummins Build
I've found a major issue I need to address. The air compressor and tank I'm using just isn't up to the task of painting large areas in one go. I was always doing smaller areas when I primered.
The equipment I have really started to struggle to keep up about 80% of the way through doing an area this large at once. I'm going to have to come up with something else before tackling the large visible areas or it won't look uniform. As long as it has integrity I don't really care about the uniformity in texture of the invisible areas.
The equipment I have really started to struggle to keep up about 80% of the way through doing an area this large at once. I'm going to have to come up with something else before tackling the large visible areas or it won't look uniform. As long as it has integrity I don't really care about the uniformity in texture of the invisible areas.
Originally Posted by Resbum
"What year is my truck?... Which part?" Build thread- http://www.fsjnetwork.com/forum/viewtop ... 290#p18290
"What year is my truck?... Which part?" Build thread- http://www.fsjnetwork.com/forum/viewtop ... 290#p18290
-
Resbum
Topic author - Posts: 466
- Joined: Fri Jun 08, 2012 9:45 am
- Location: North East Oregon
Re: 1970 Gladiator 1 Ton 6BT 12V Cummins Build
.
Originally posted by ross80truck 02-21-2013 11:19 AM
________________________________________
Quote:
________________________________________
Originally Posted by Resbum
I've found a major issue I need to address. The air compressor and tank I'm using just isn't up to the task of painting large areas in one go. I was always doing smaller areas when I primered.
The equipment I have really started to struggle to keep up about 80% of the way through doing an area this large at once. I'm going to have to come up with something else before tackling the large visible areas or it won't look uniform. As long as it has integrity I don't really care about the uniformity in texture of the invisible areas.
________________________________________
I had a problem with a sandblaster running out of air once. I found another old compressor with a bad compressor and good tank and just hooked it in line with my air hose. Basically what it did was give me more volume before I started to see a major pressure drop. Now, it will take longer for your compressor to catch back up, but it may be enough to help you get through the bigger panels. Hey, if I remember right you have a tank on your truck you can use. Again, it will not increase your cfm of the compressor, just give you more volume.
ross
Last edited by Resbum on Sat Apr 06, 2013 8:03 pm, edited 2 times in total.
Originally Posted by Resbum
"What year is my truck?... Which part?" Build thread- http://www.fsjnetwork.com/forum/viewtop ... 290#p18290
"What year is my truck?... Which part?" Build thread- http://www.fsjnetwork.com/forum/viewtop ... 290#p18290
-
Resbum
Topic author - Posts: 466
- Joined: Fri Jun 08, 2012 9:45 am
- Location: North East Oregon
Re: 1970 Gladiator 1 Ton 6BT 12V Cummins Build
Thanks ross,
Unfortunately, I've already piggybacked in an 11 gallon tanks. CFM is the issue. I've got some plans in the works so I should have something in place when I get to doing the exterior of the truck.
Unfortunately, I've already piggybacked in an 11 gallon tanks. CFM is the issue. I've got some plans in the works so I should have something in place when I get to doing the exterior of the truck.
Originally Posted by Resbum
"What year is my truck?... Which part?" Build thread- http://www.fsjnetwork.com/forum/viewtop ... 290#p18290
"What year is my truck?... Which part?" Build thread- http://www.fsjnetwork.com/forum/viewtop ... 290#p18290