1970 Gladiator 1 Ton 6BT 12V Cummins Build

For everything related to converting and up keeping diesel engines in an FSJ
Post Reply
User avatar

Topic author
Resbum
Posts: 466
Joined: Fri Jun 08, 2012 9:45 am
Location: North East Oregon

Re: 1970 Gladiator 1 Ton 6BT 12V Cummins Build

Post by Resbum »

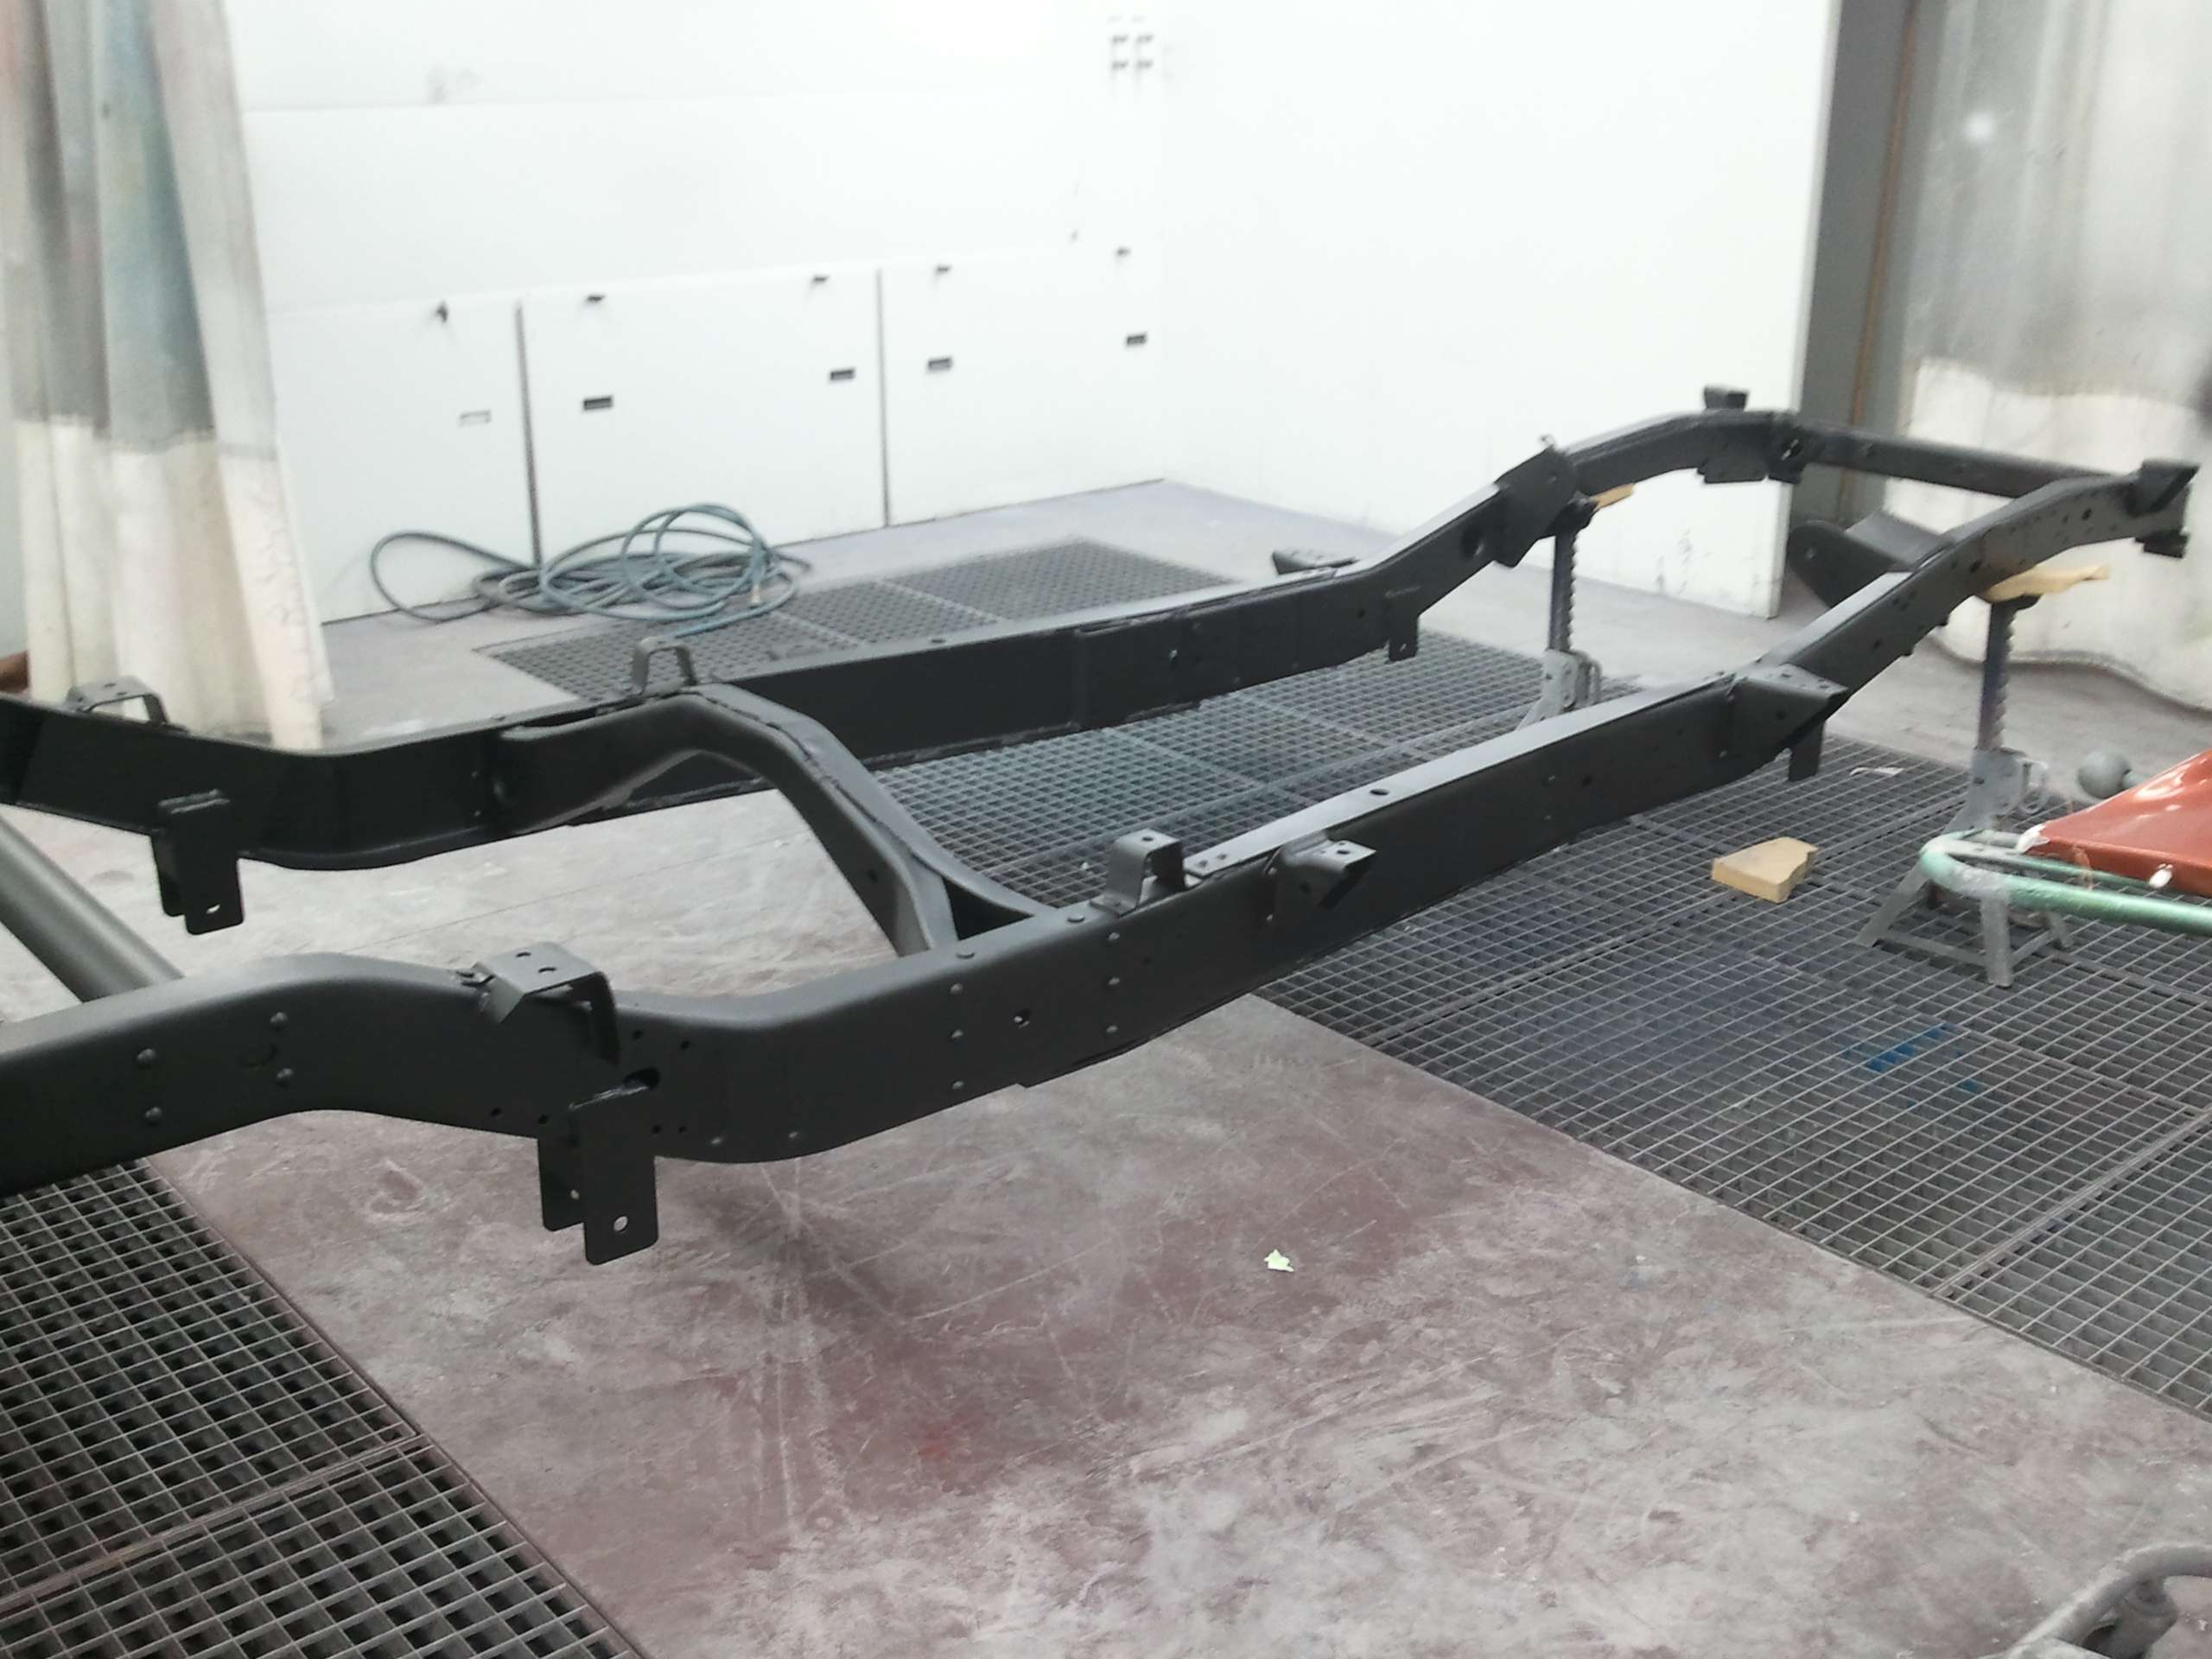
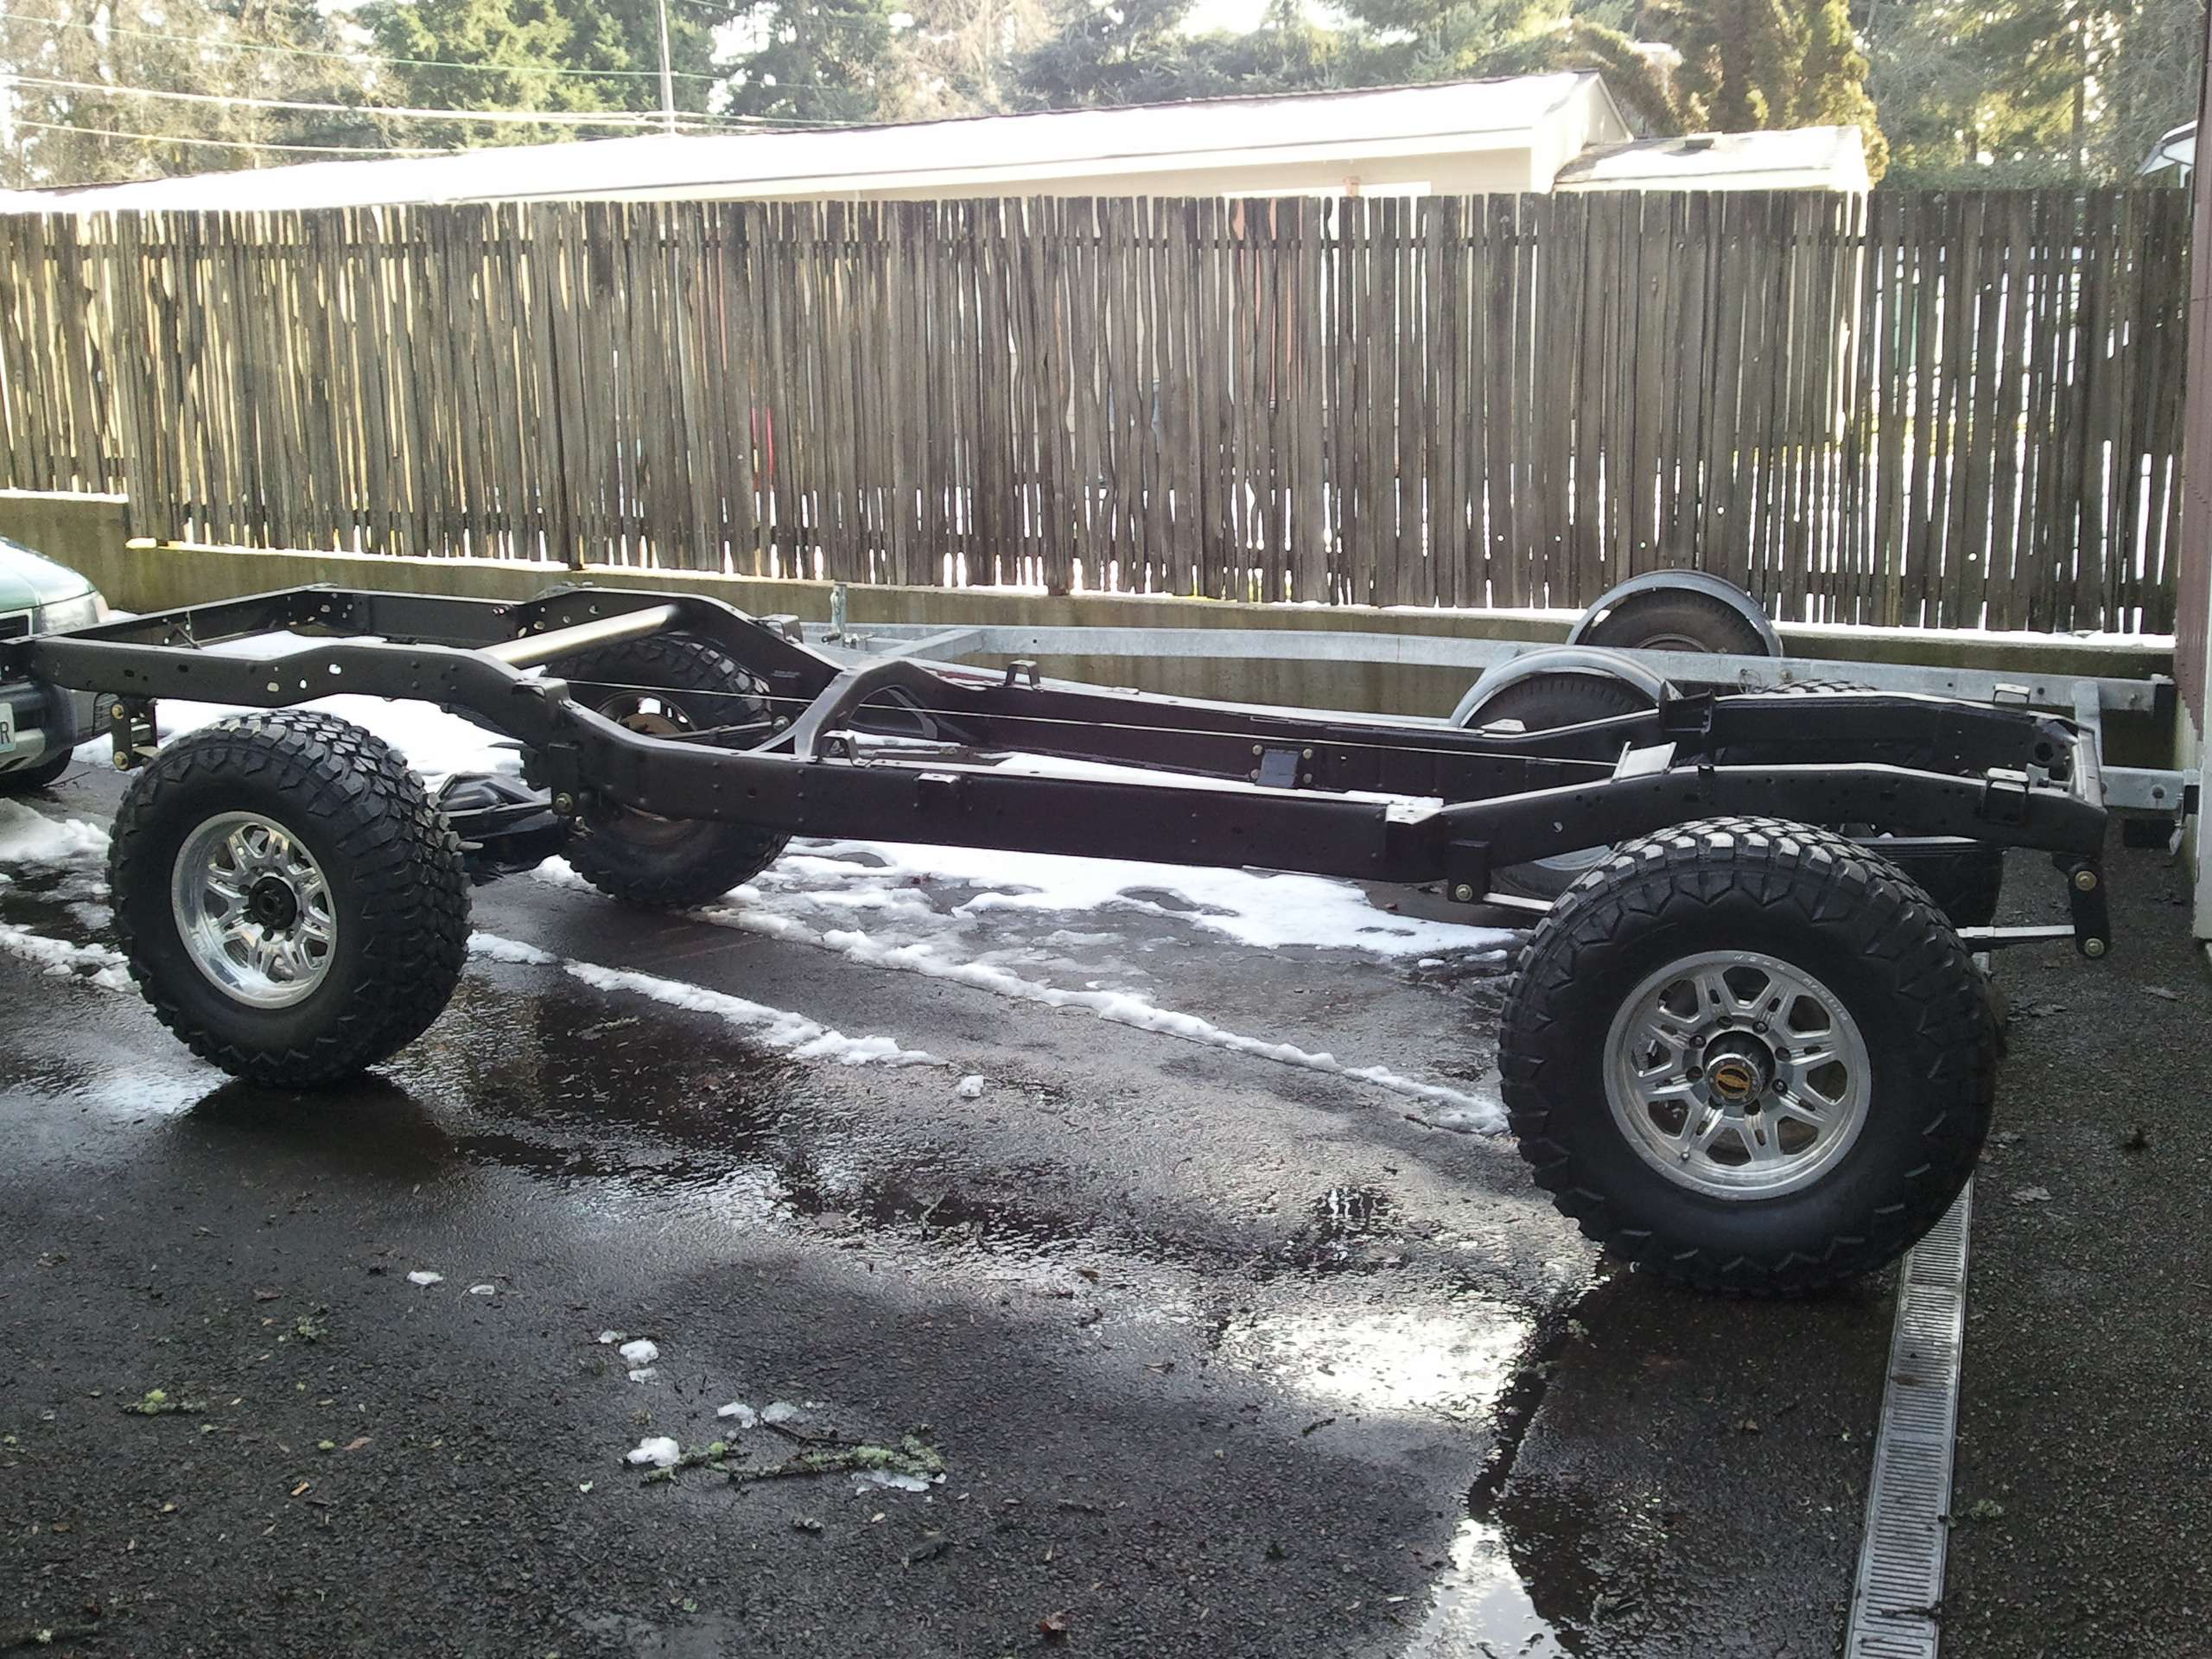
The finished product.
Image

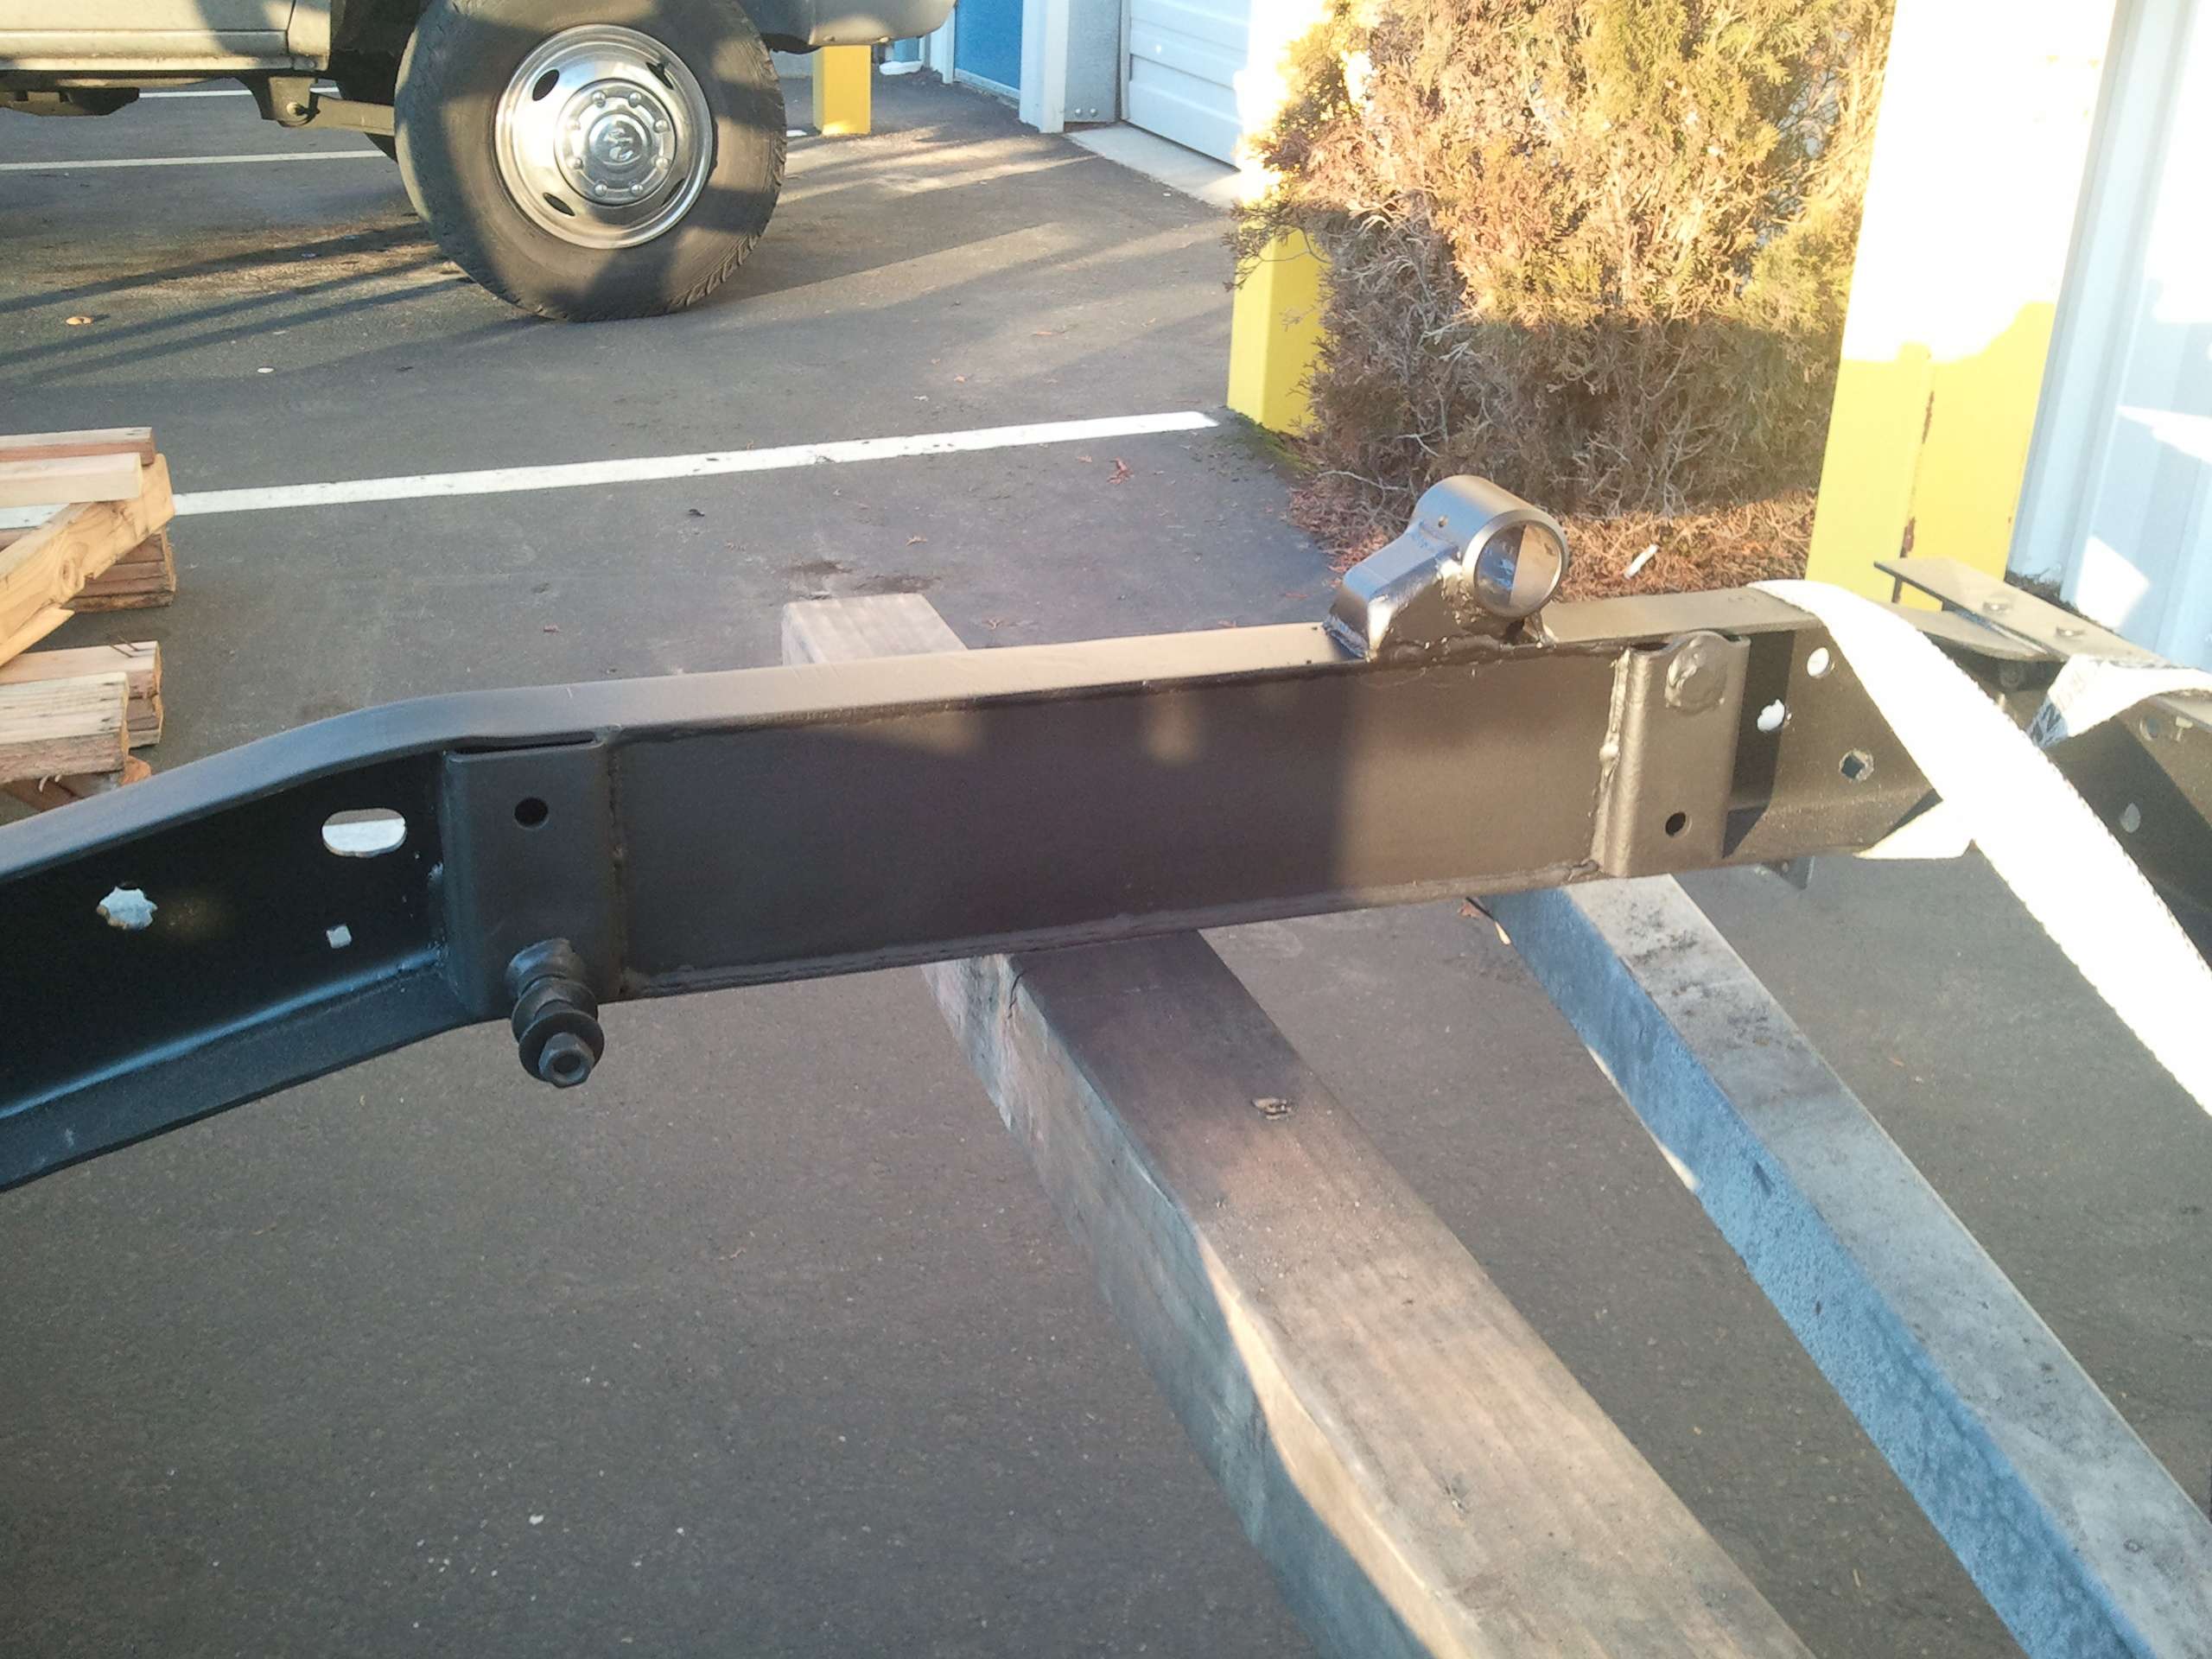
Both the welder and I didn't like the number of holes Jeep had in the frame between the motor mounts and the front end, so plates were added along the inside of the rails
Image

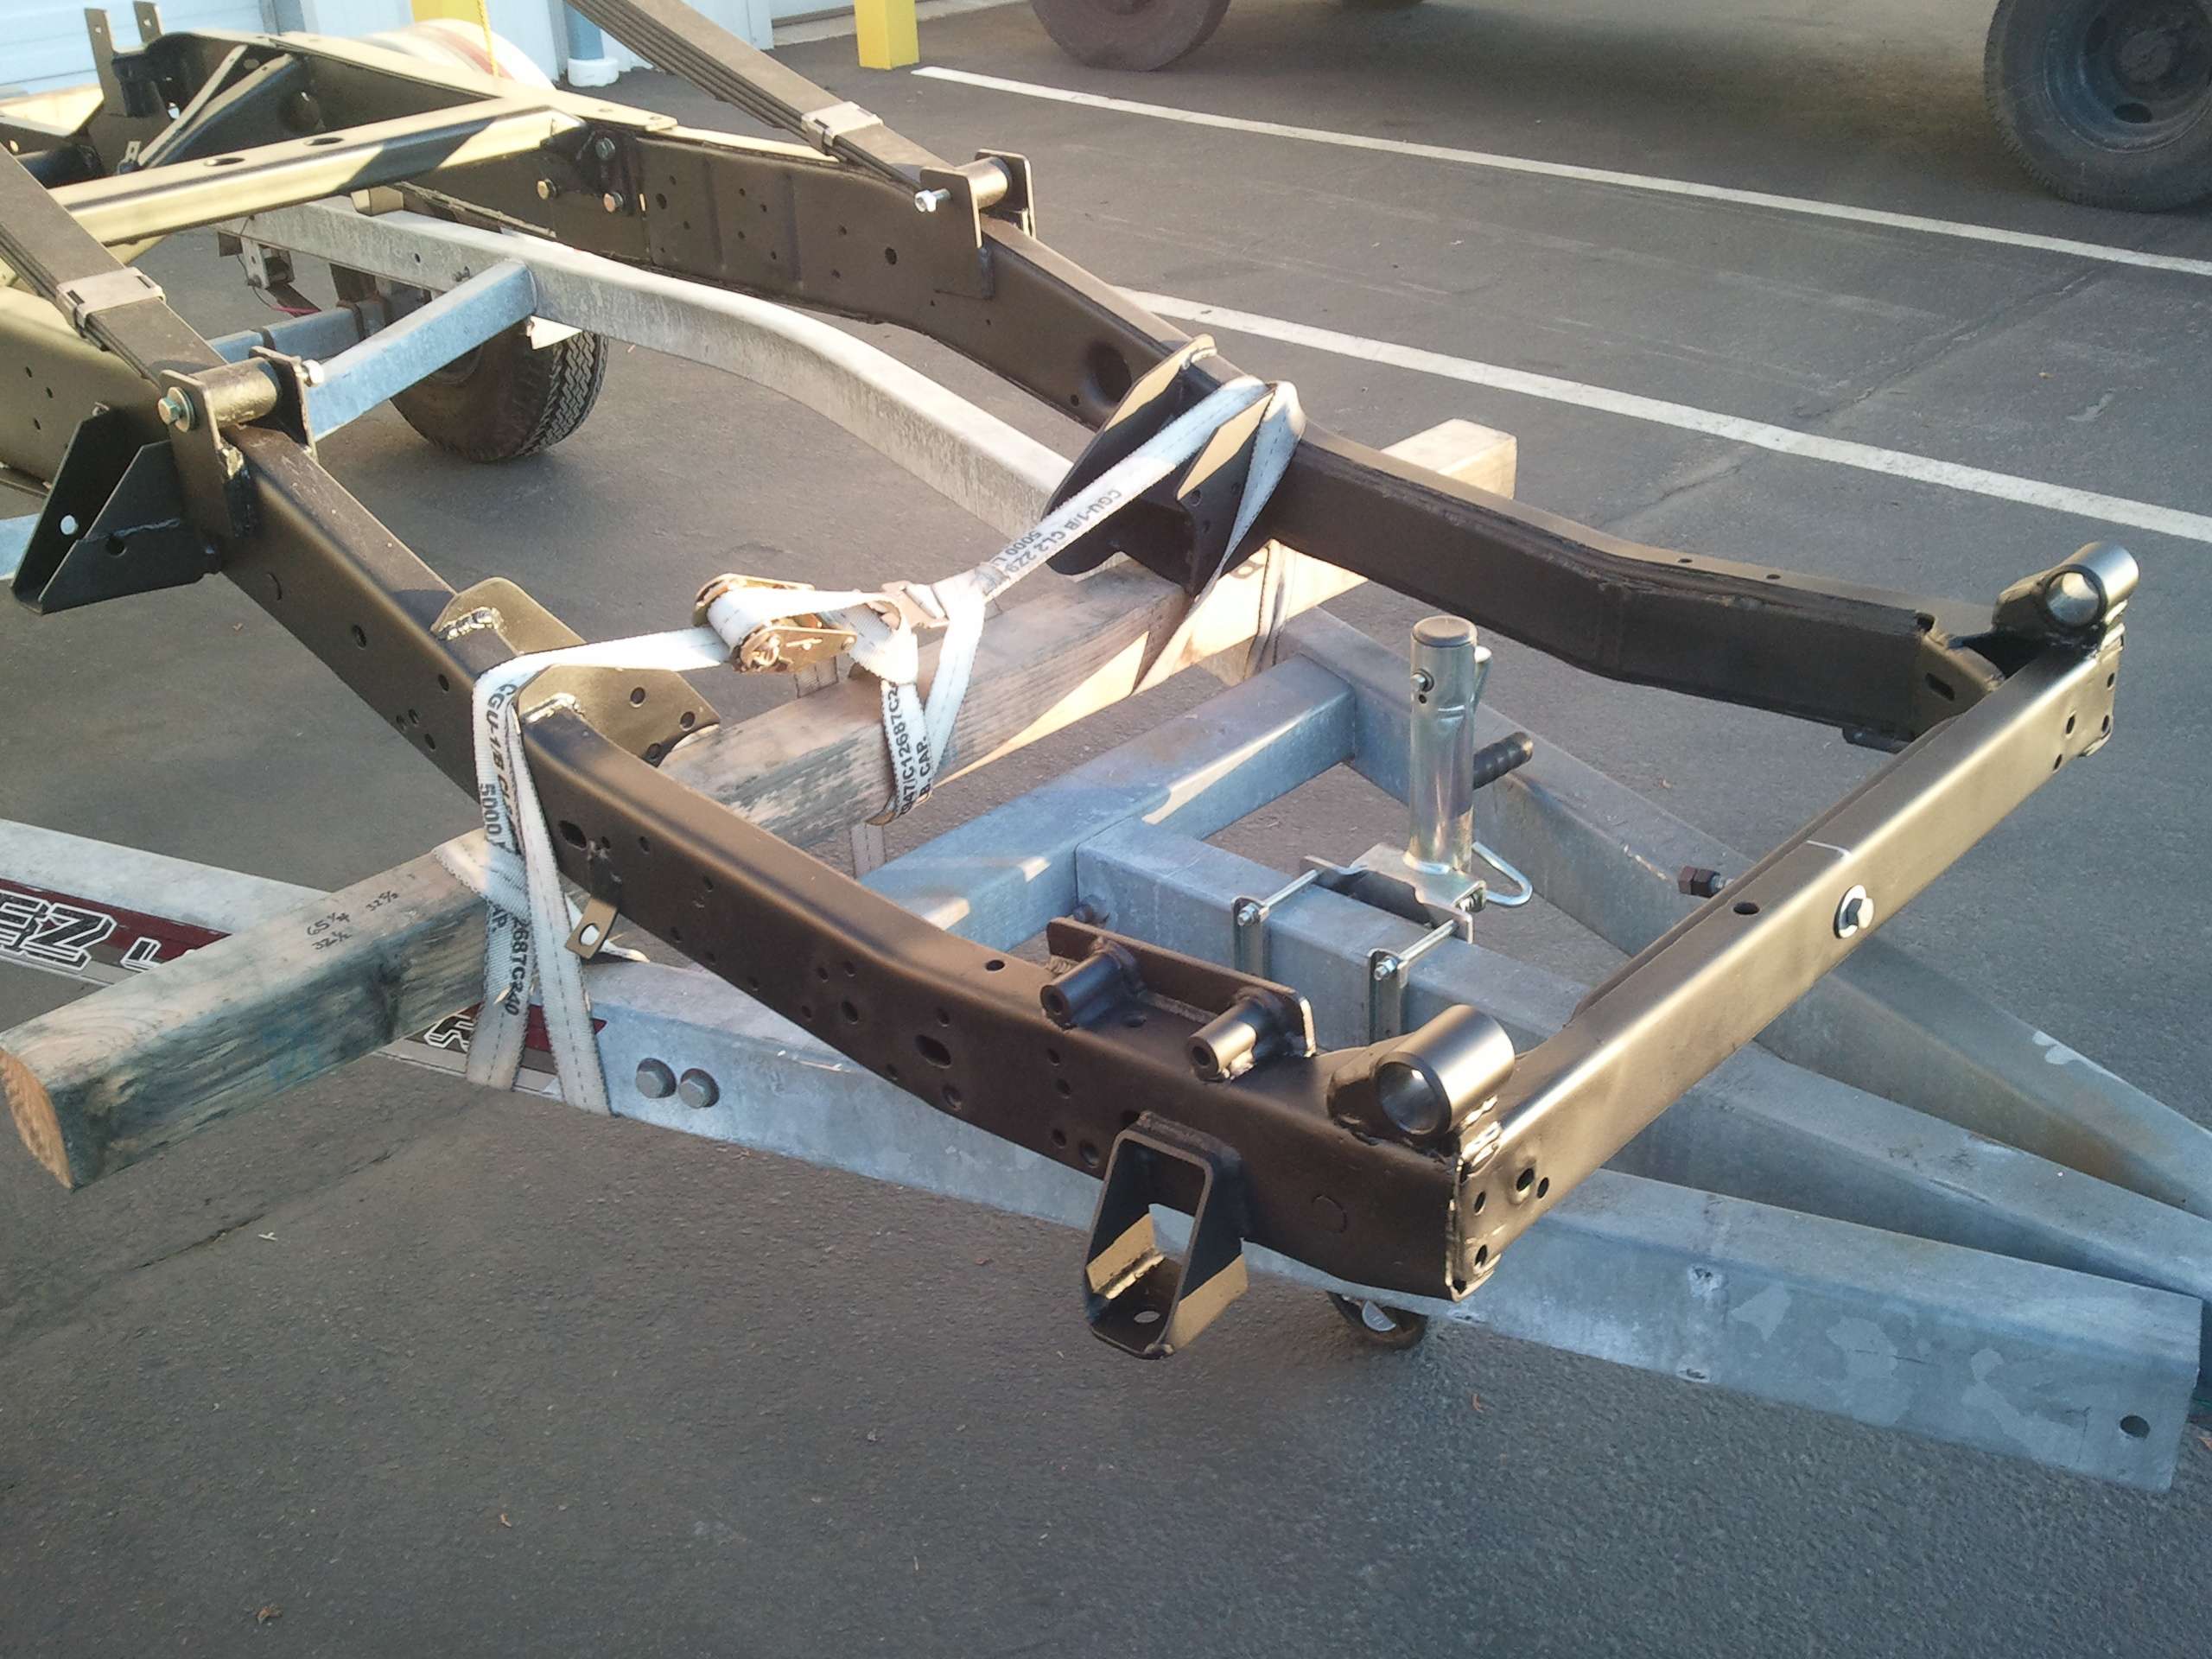
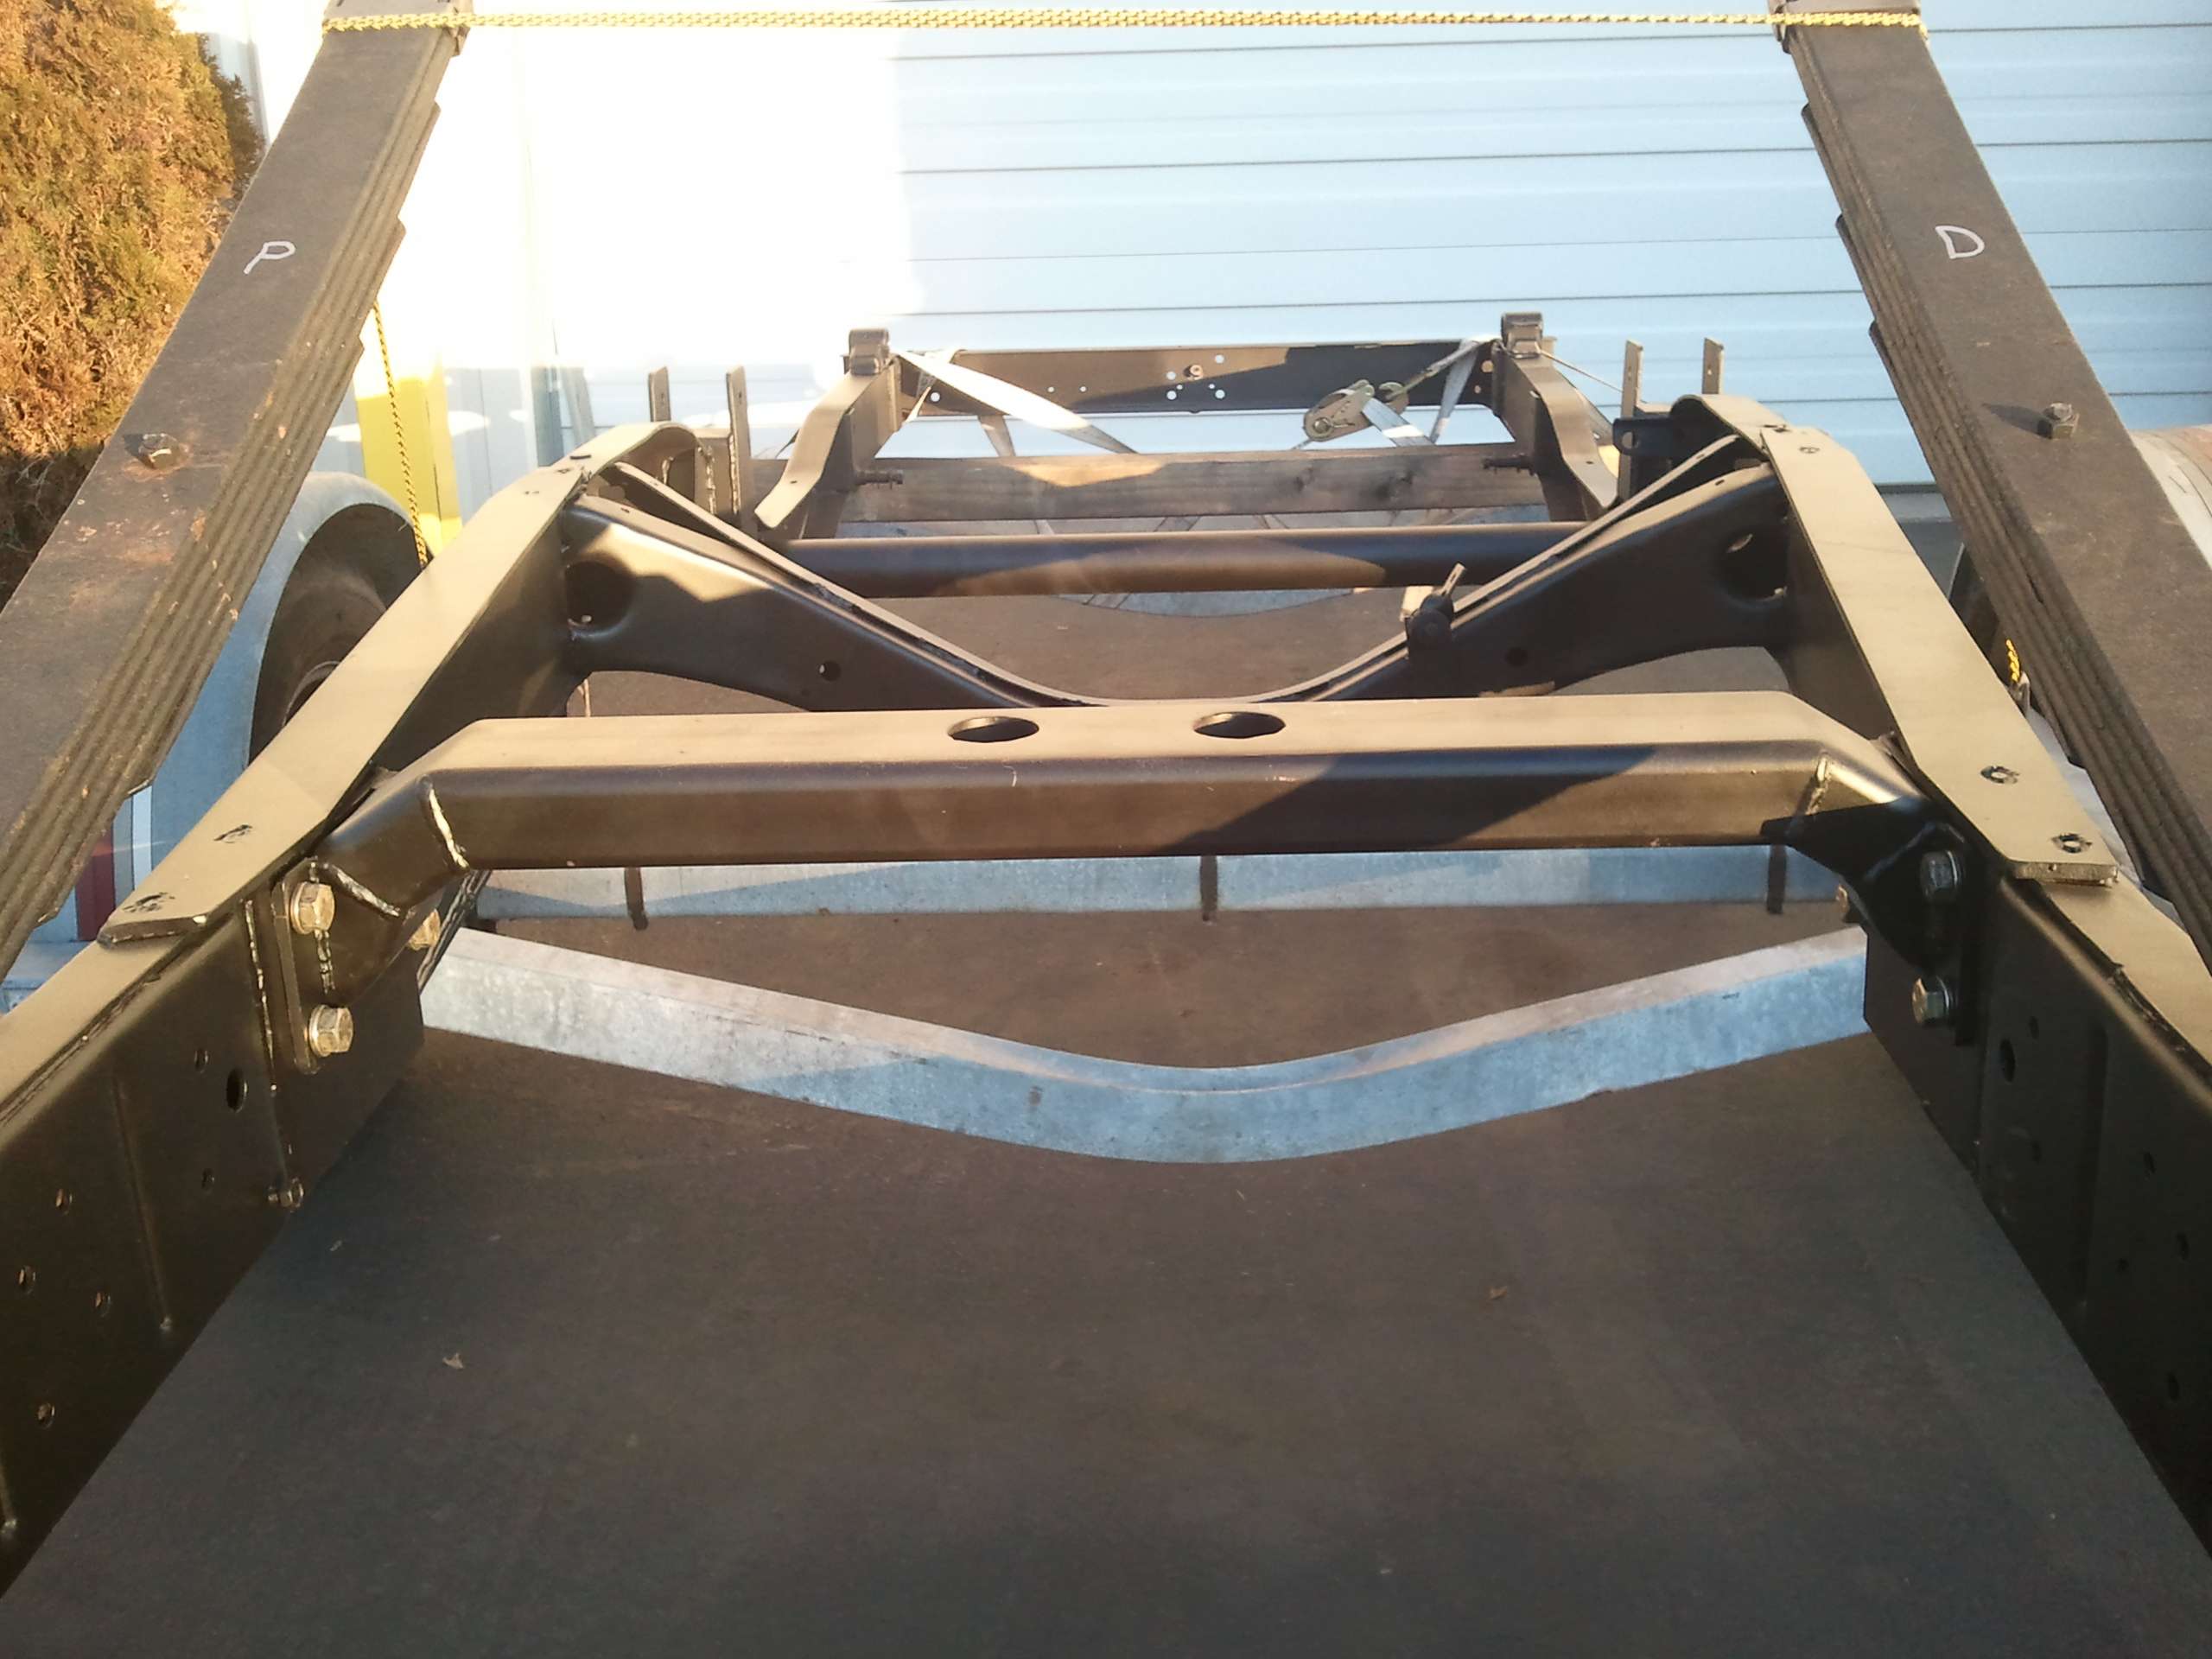
Boxed from the trans cross member back to the next cross member
Image

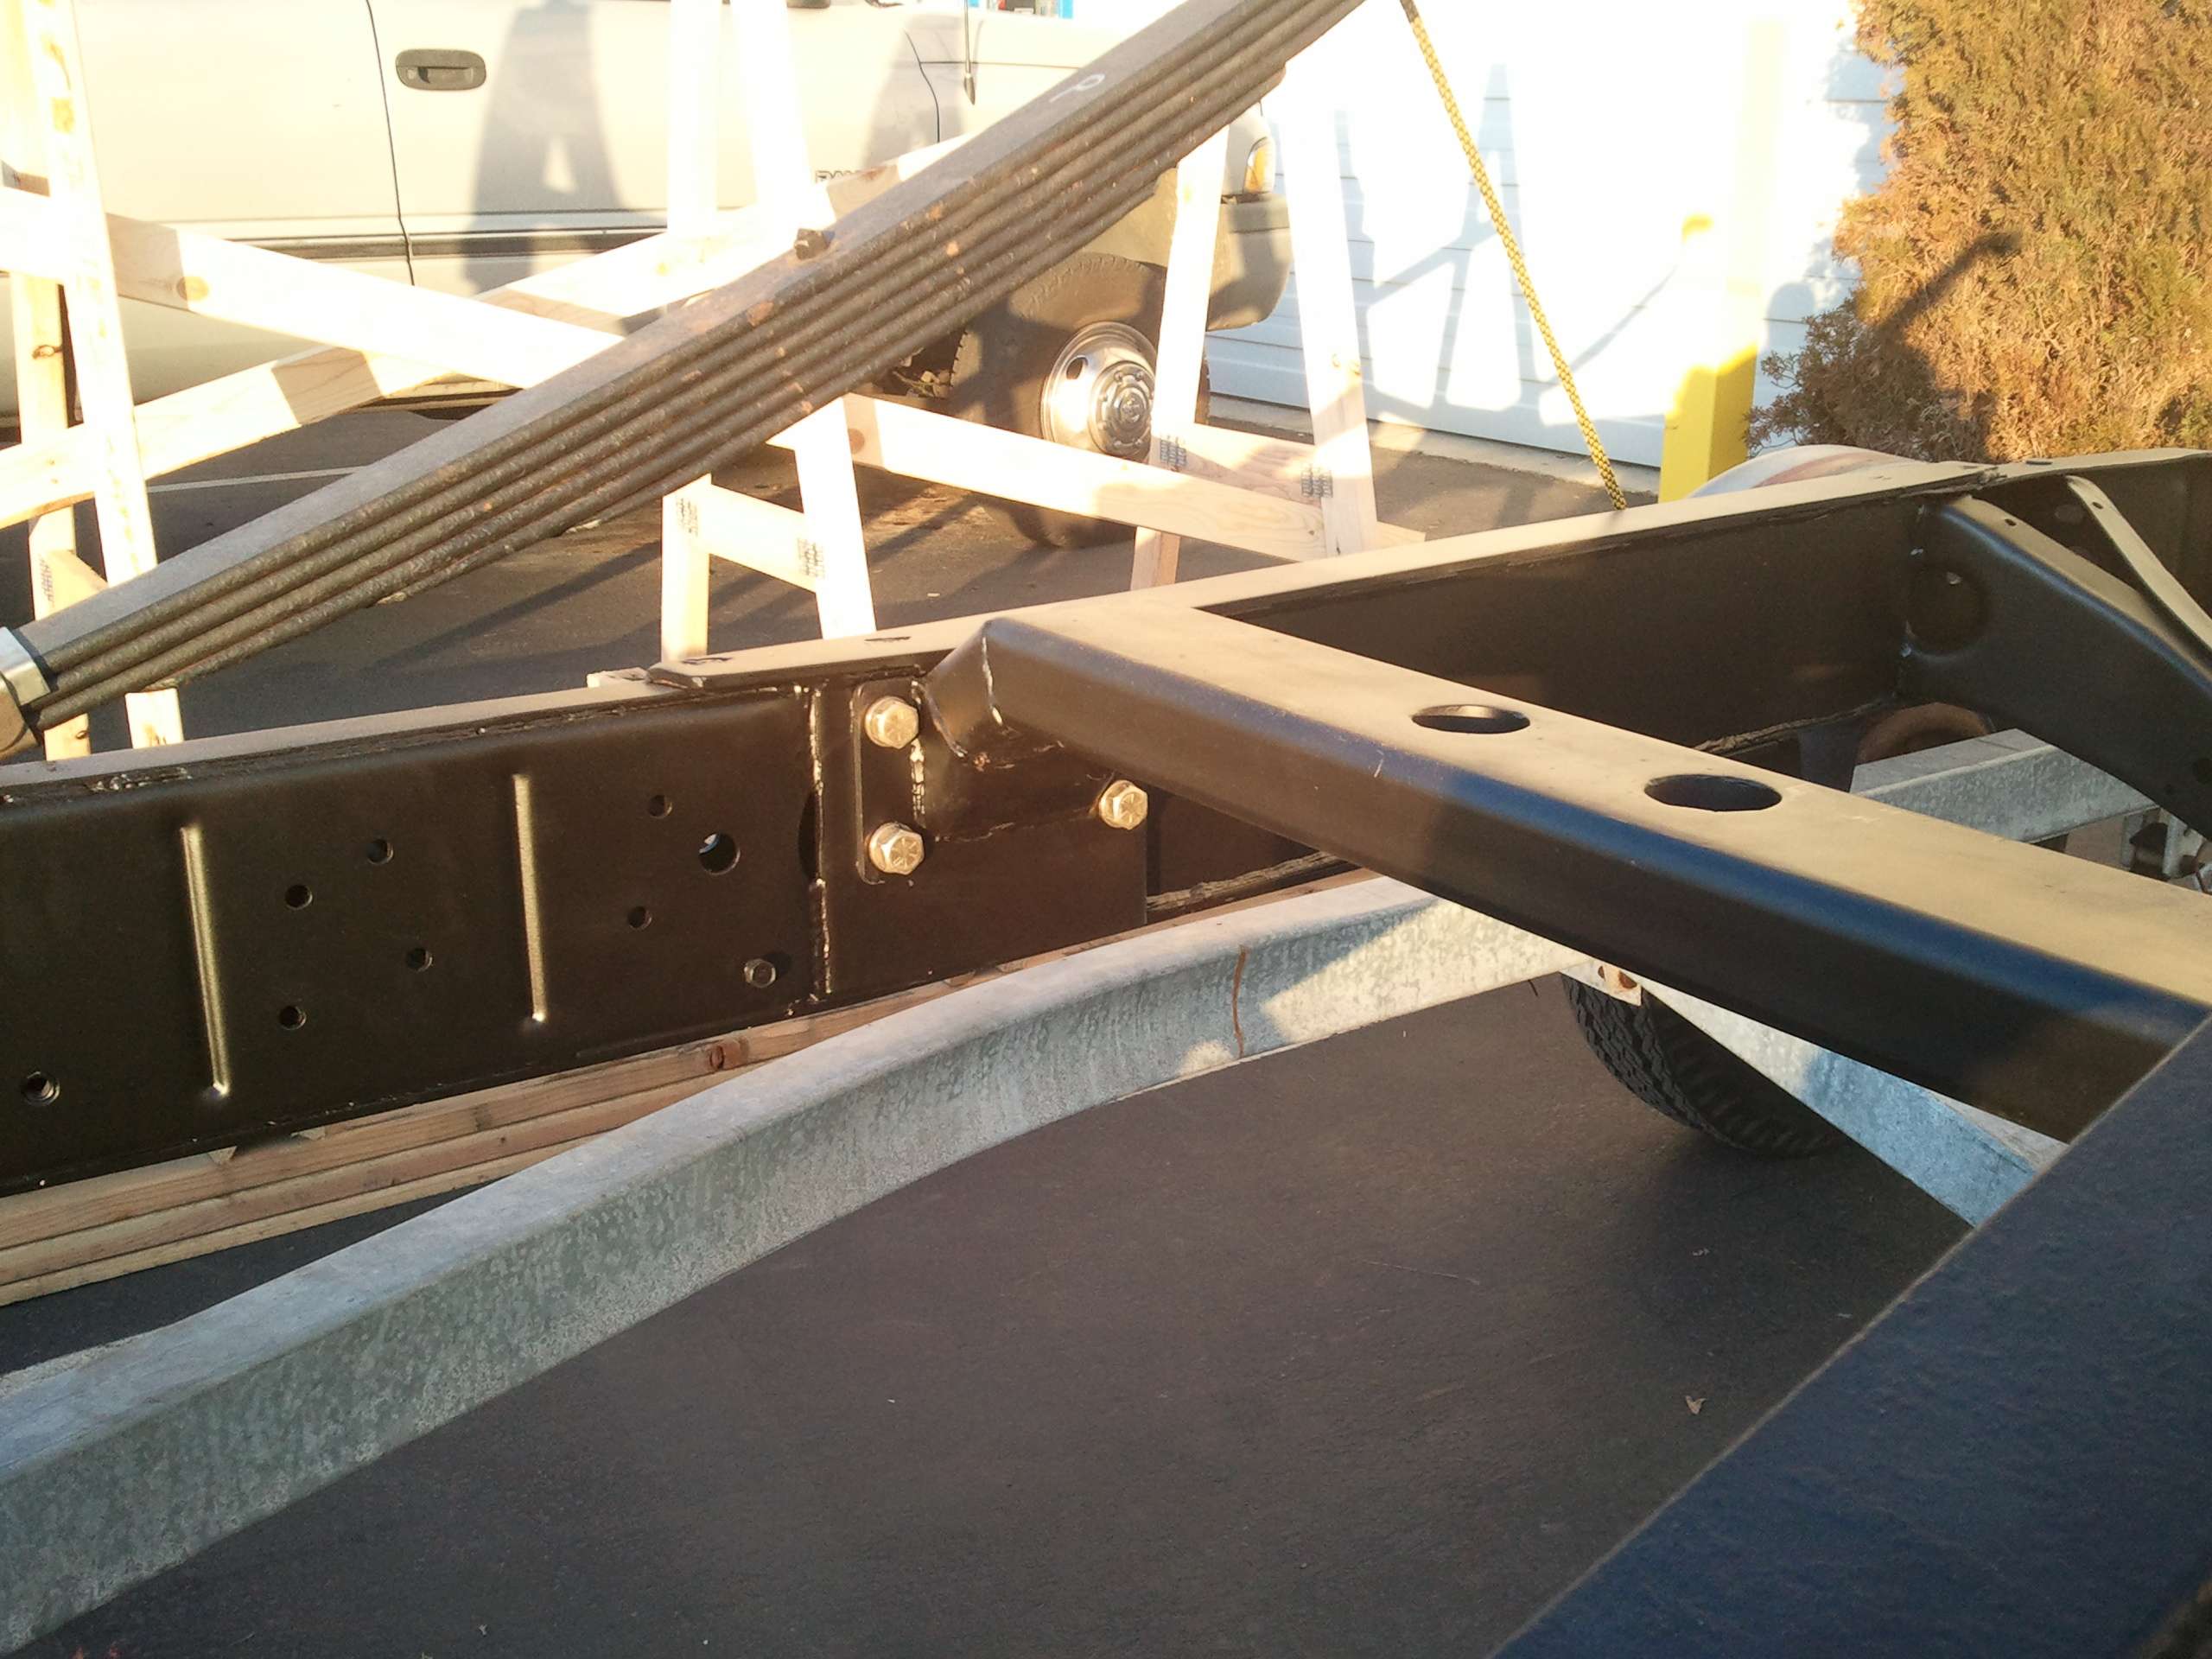
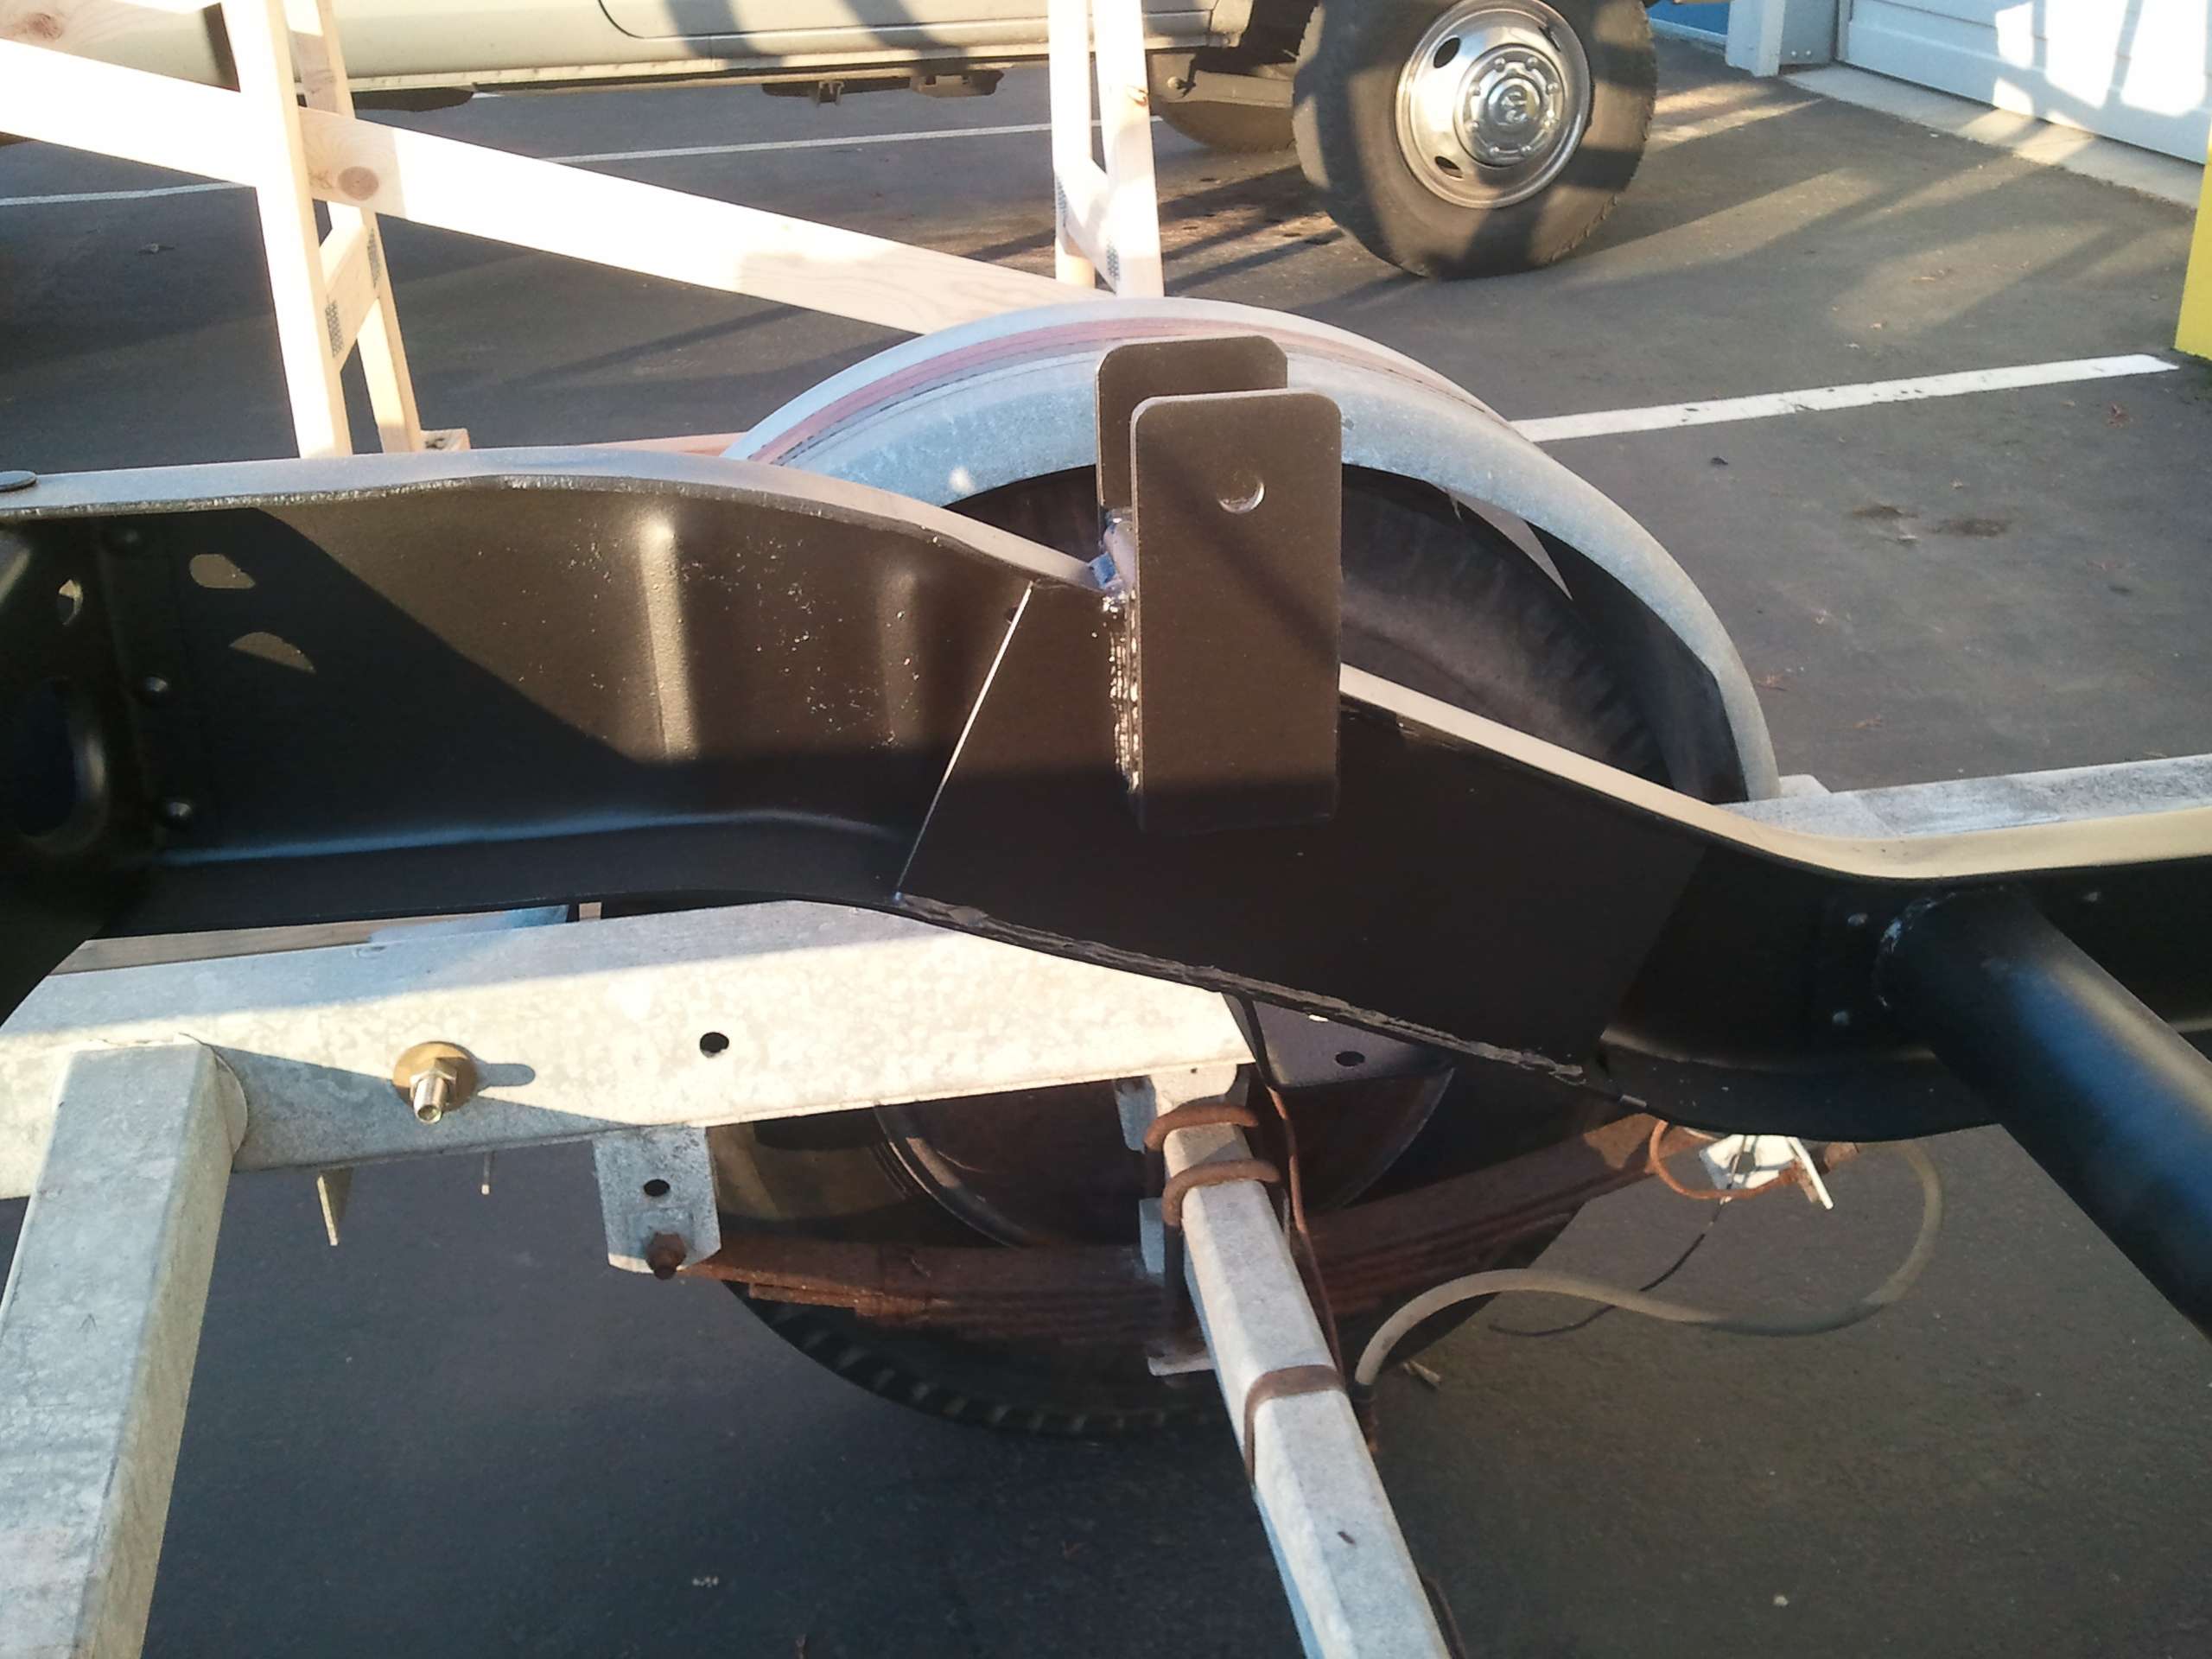
It also got boxing between the rear spring mounts and the bed attachment mounts
Image

Image

Image
Originally Posted by Resbum
"What year is my truck?... Which part?" Build thread- http://www.fsjnetwork.com/forum/viewtop ... 290#p18290
User avatar

Topic author
Resbum
Posts: 466
Joined: Fri Jun 08, 2012 9:45 am
Location: North East Oregon

Re: 1970 Gladiator 1 Ton 6BT 12V Cummins Build

Post by Resbum »

.
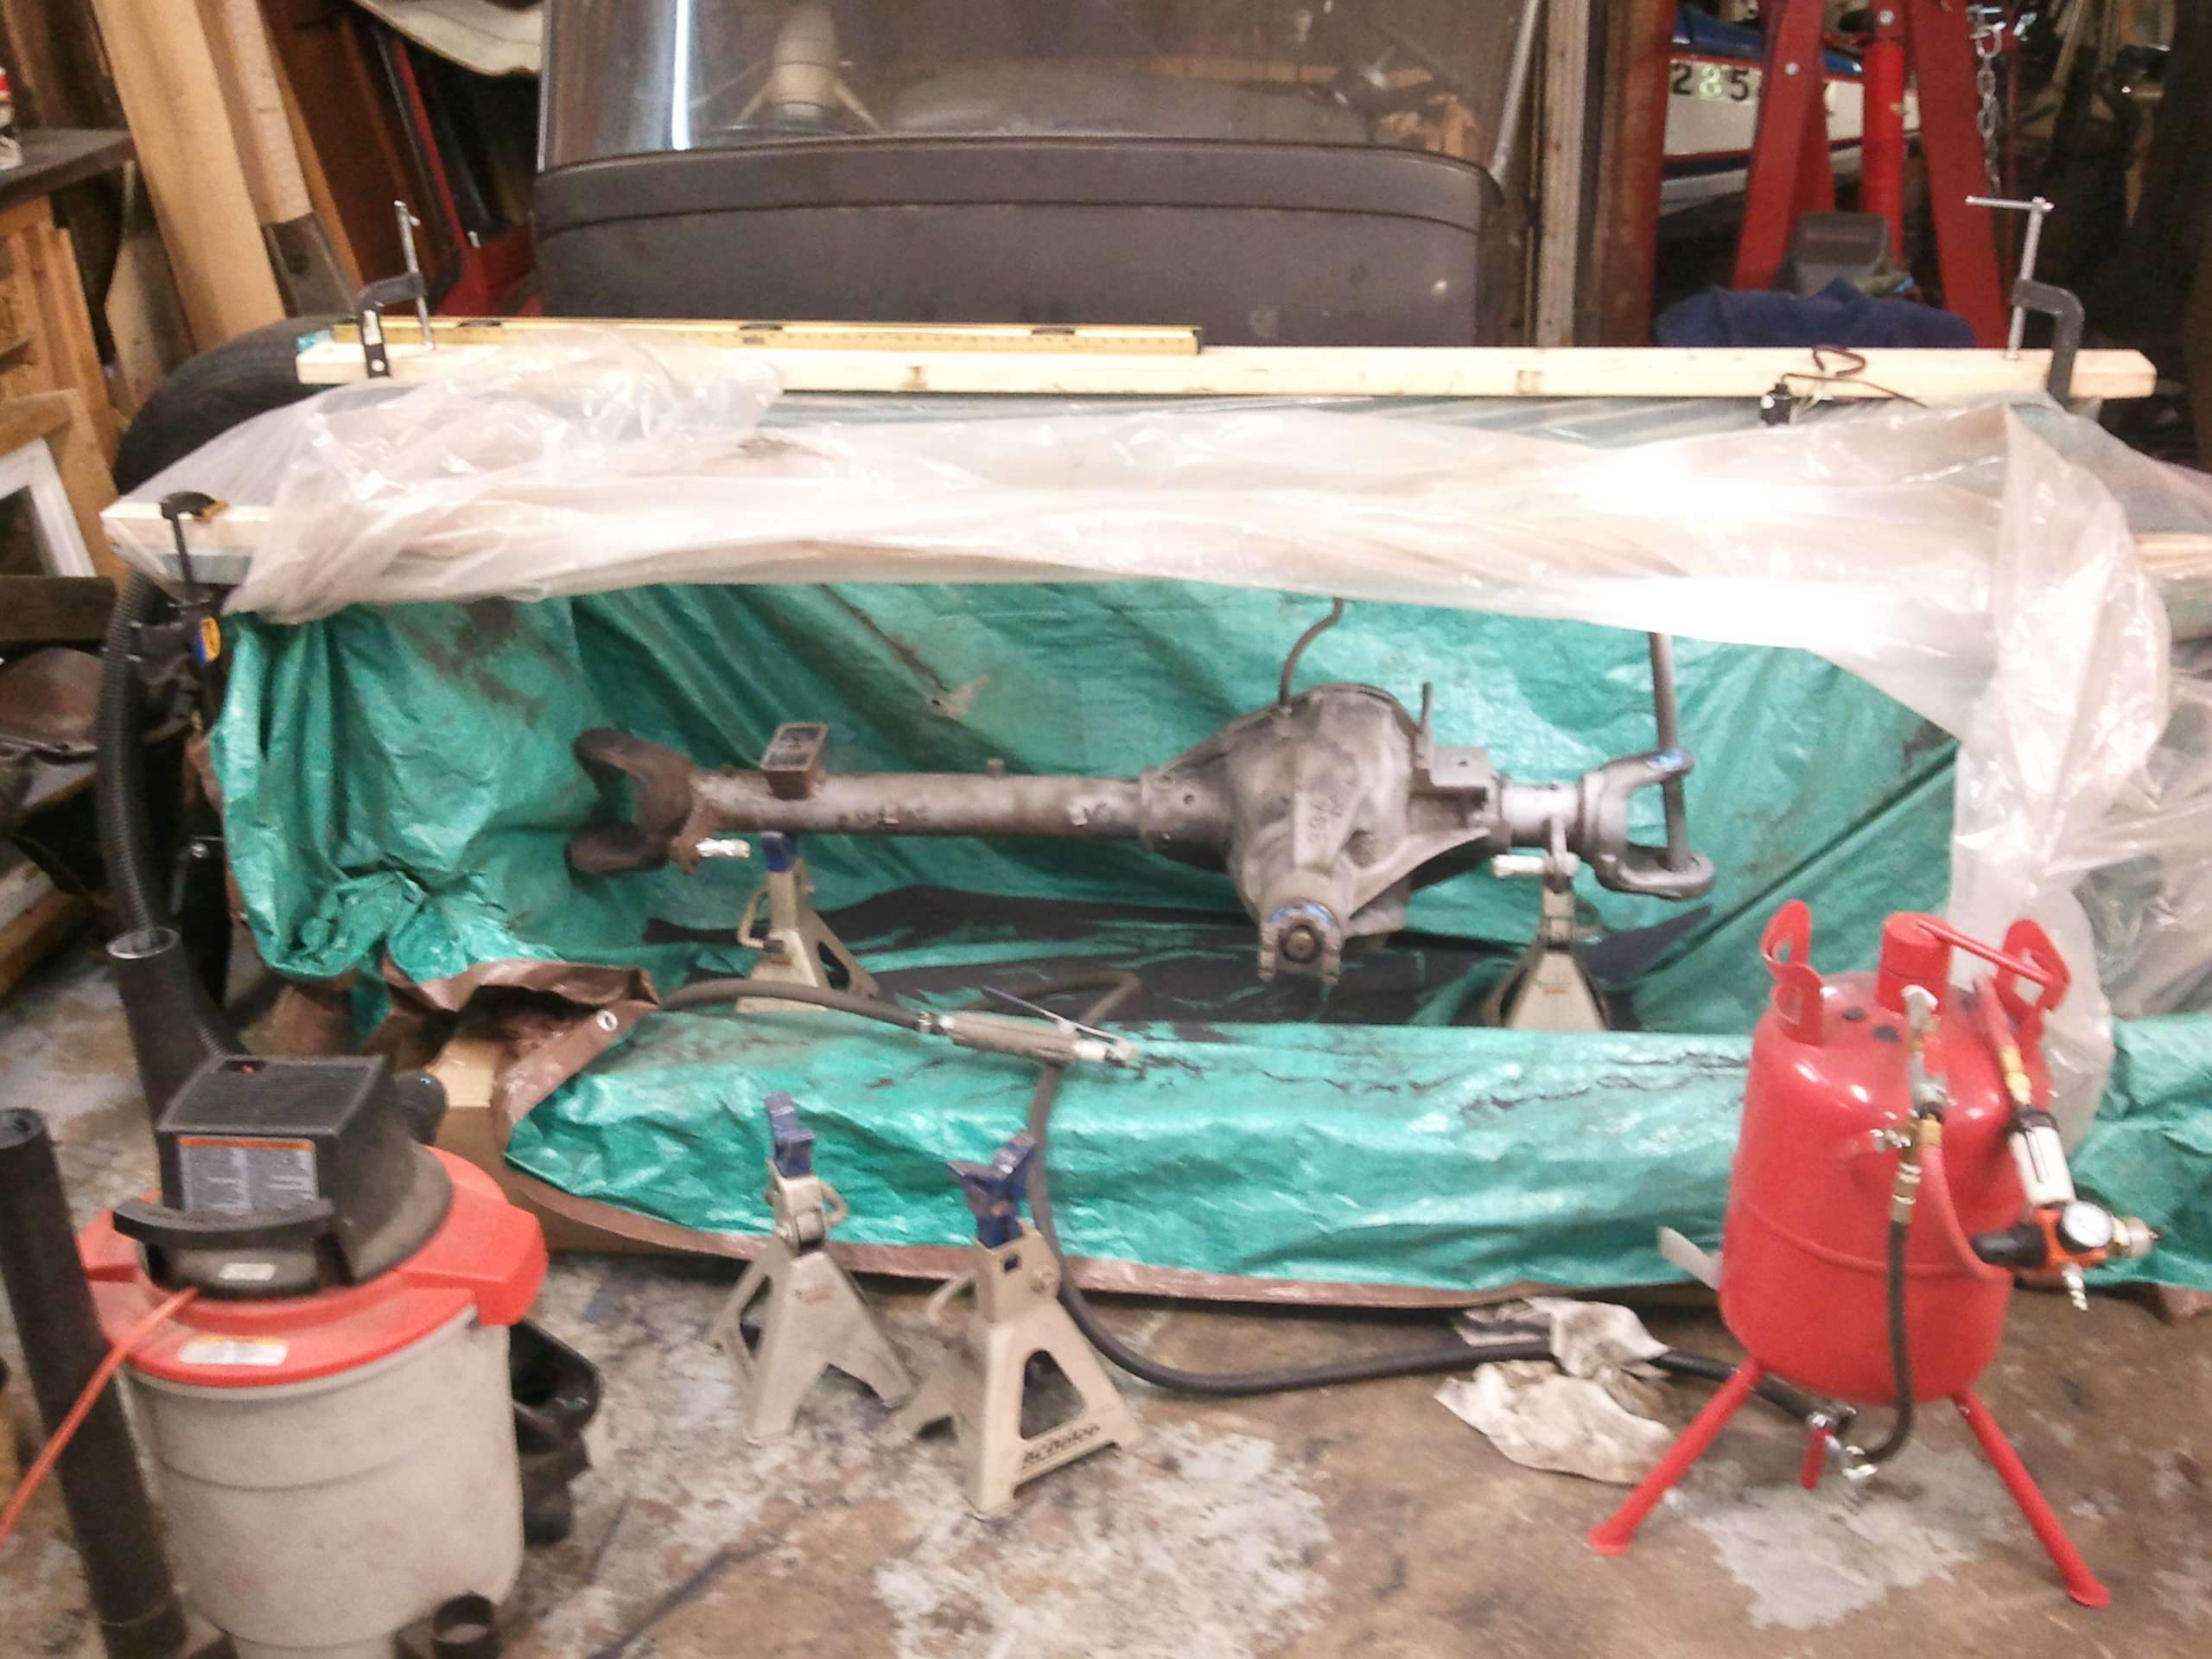
My homemade media blasting booth. After 3 days of media blasting parts I now rank media blasting right up there with fiberglass work. IT HAS A HUGE SUCK FACTOR!!! No matter how careful you are you end up with media in every nook, crevice, and cranny in your body.
Image

Image

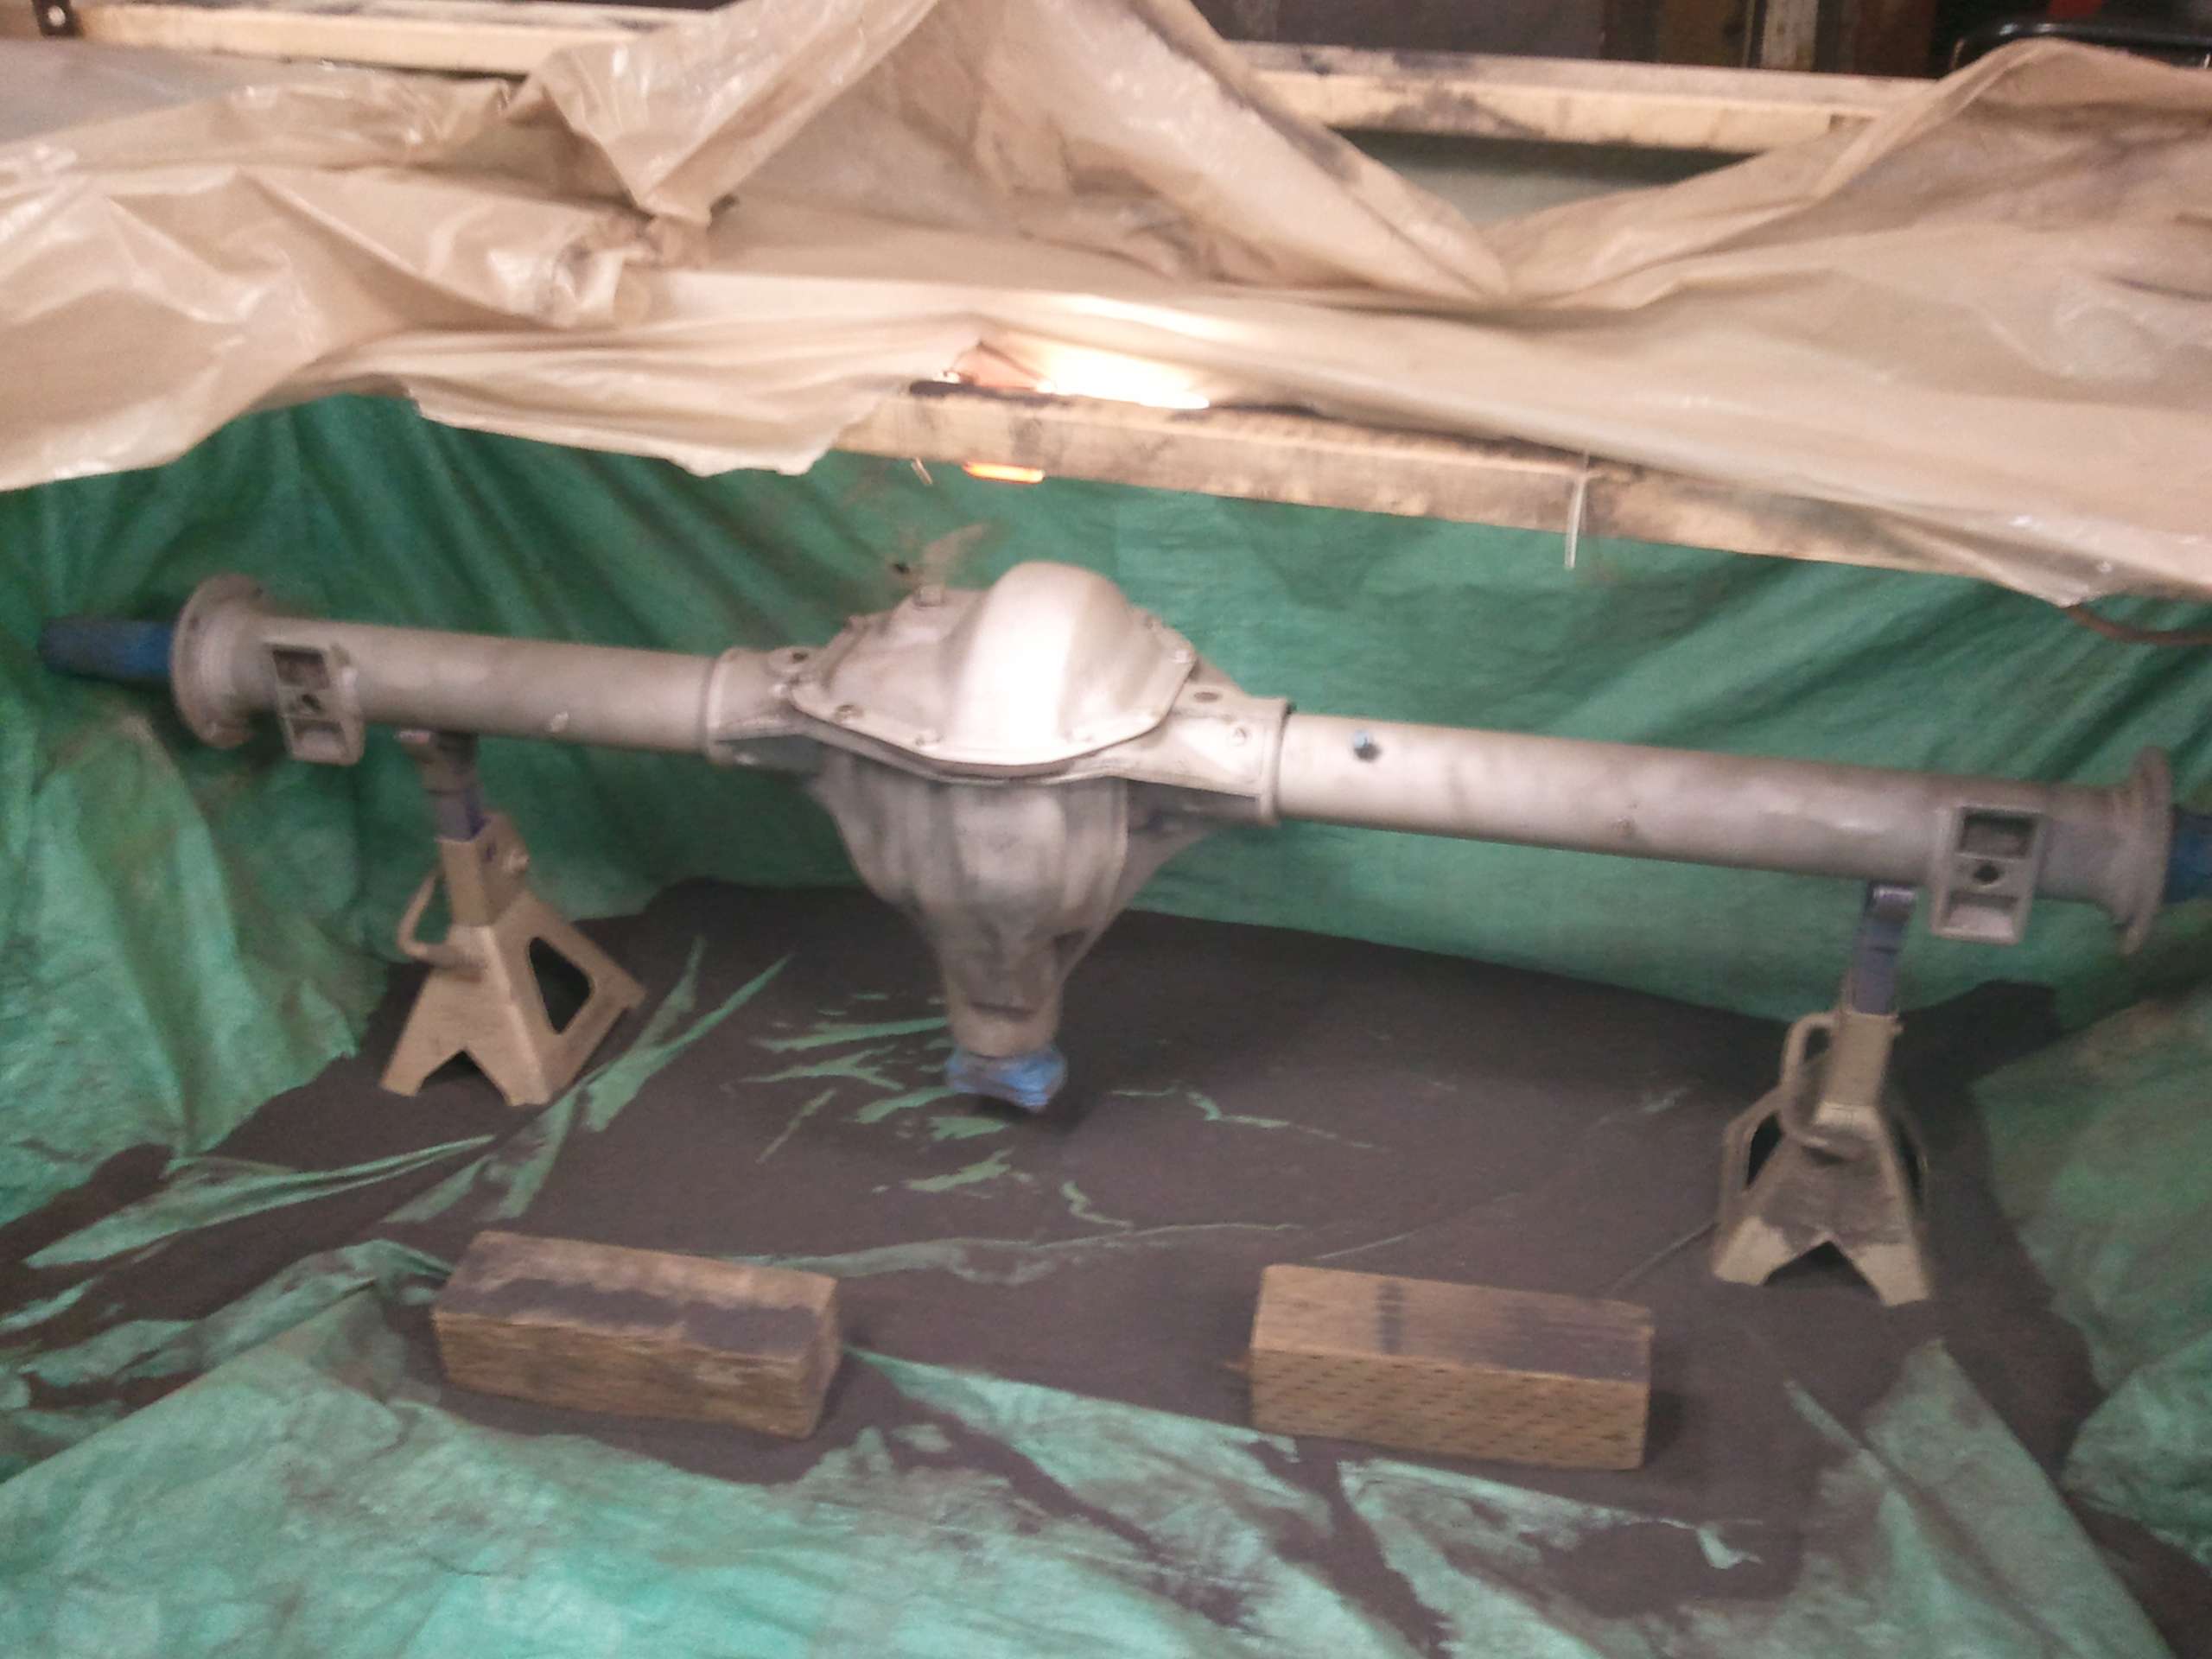
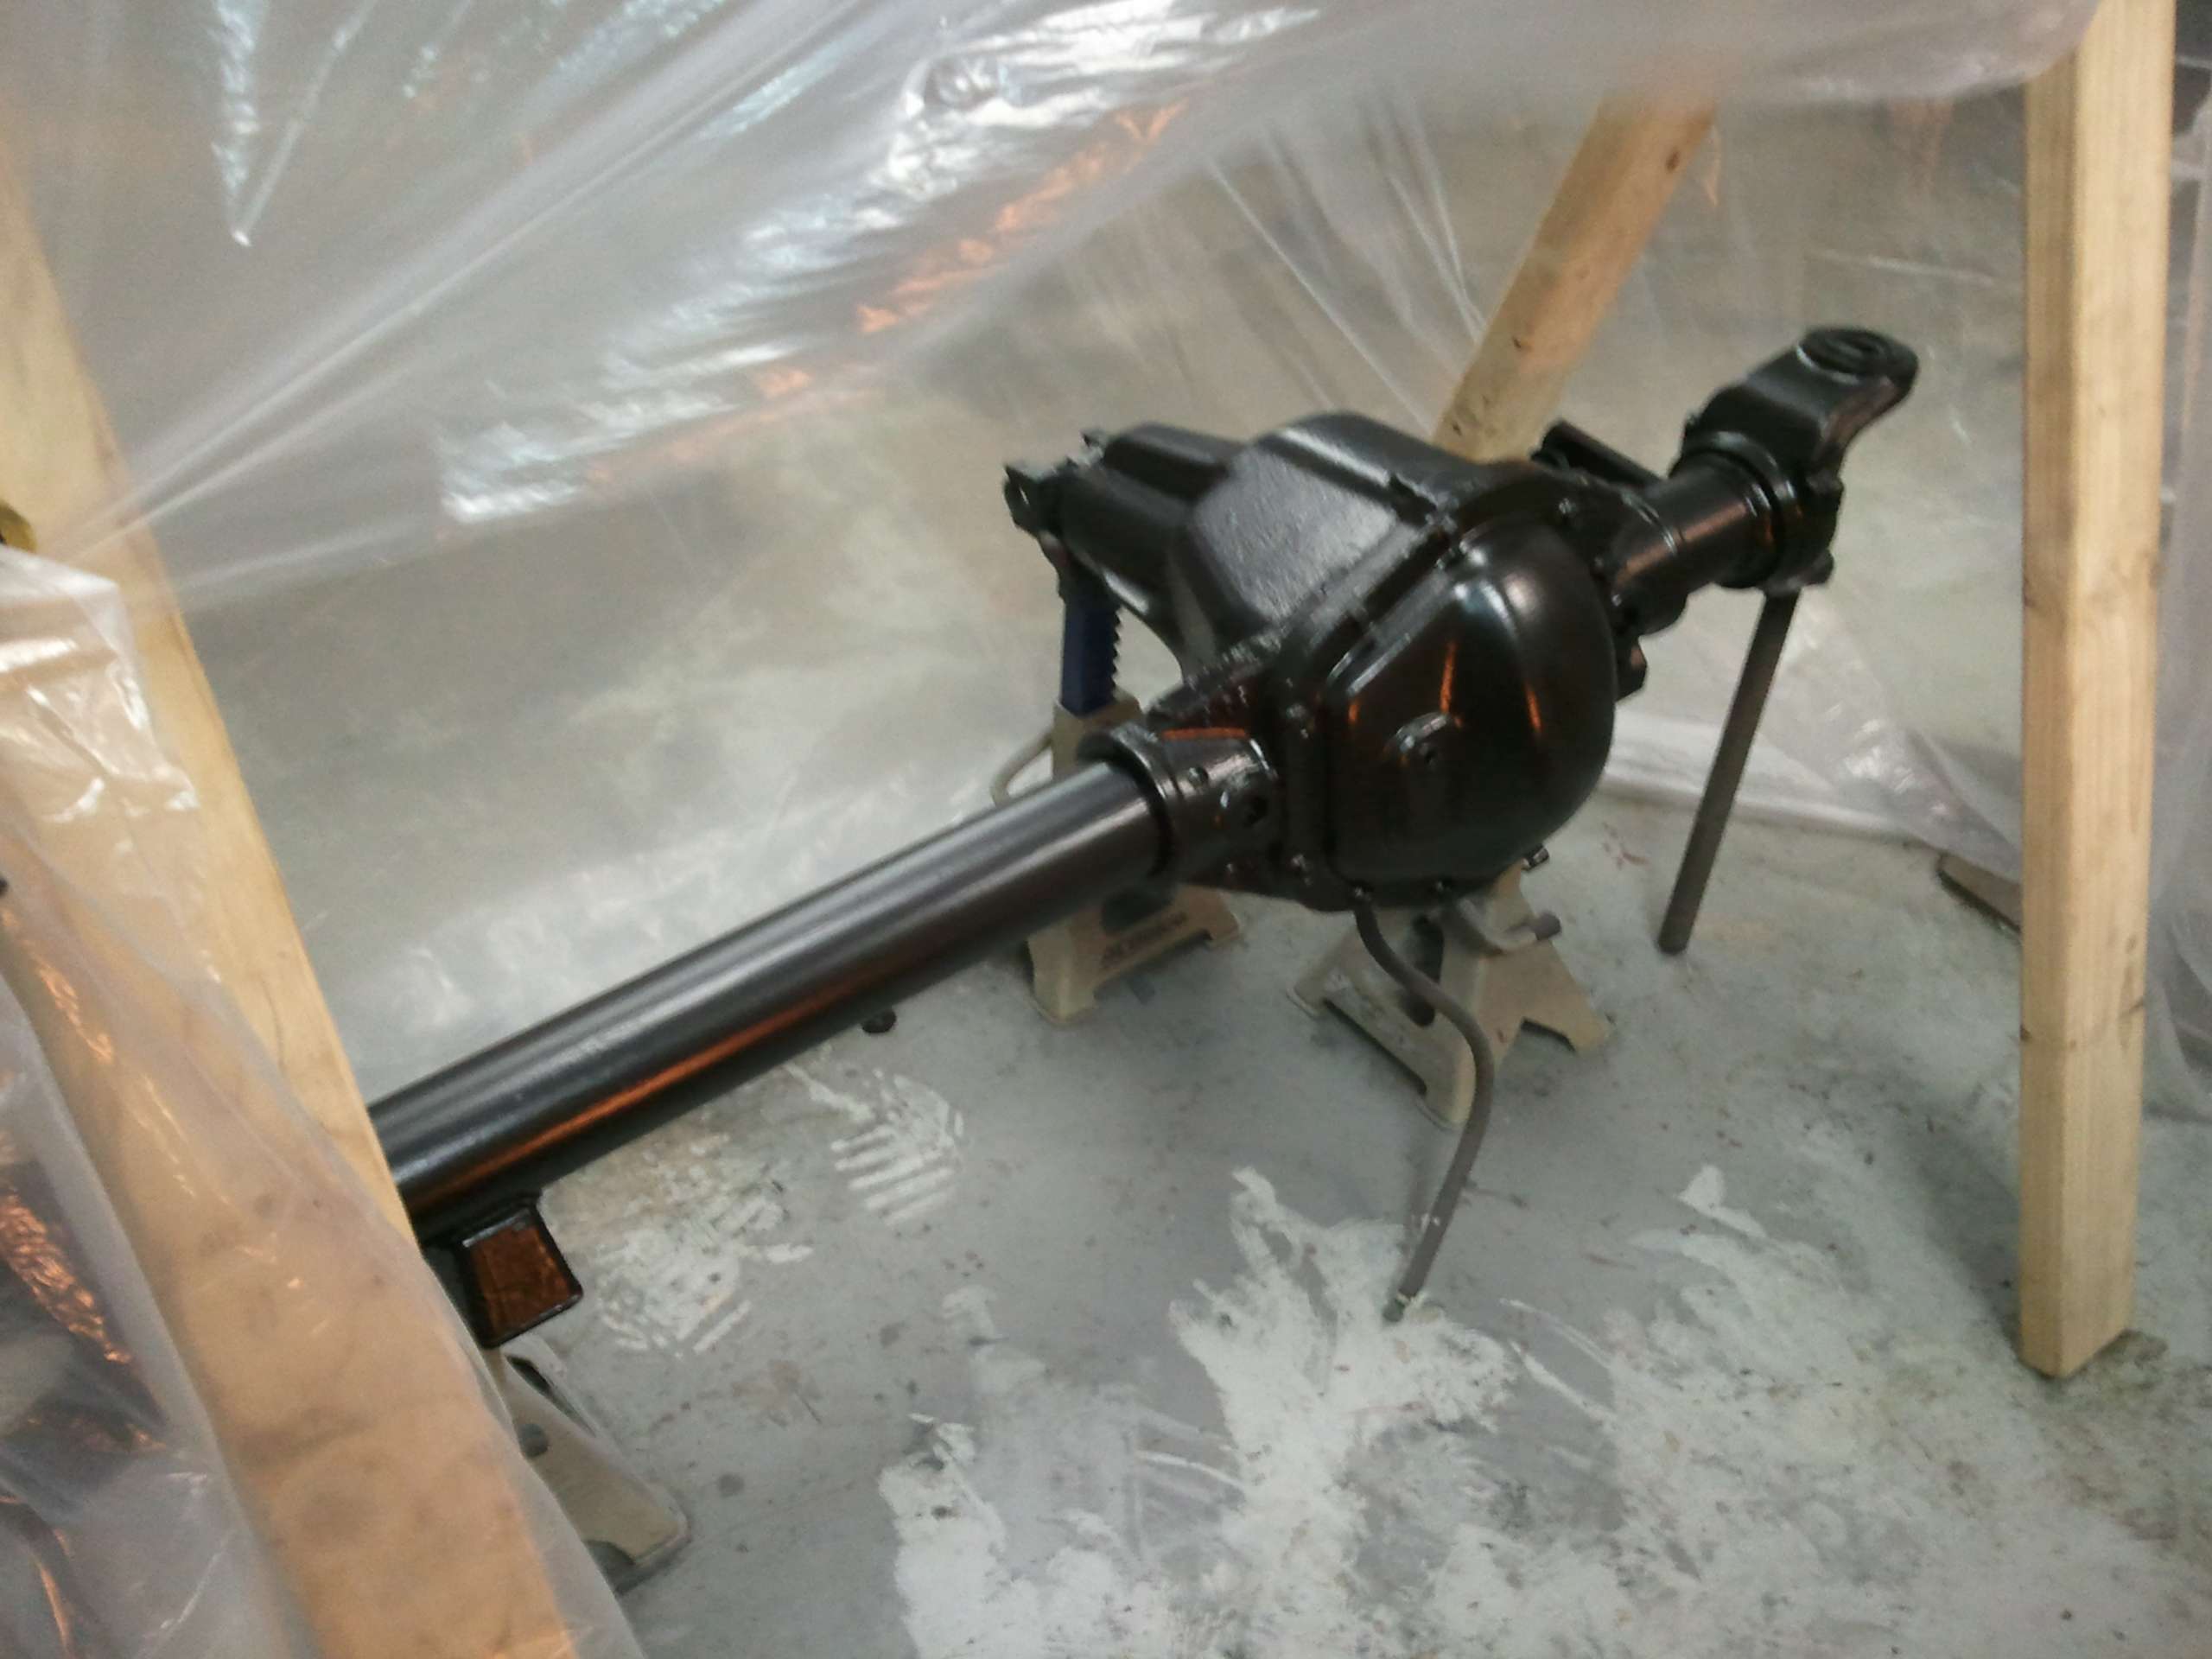
Front axle blasted and painted. Ready for final assembly.
Image

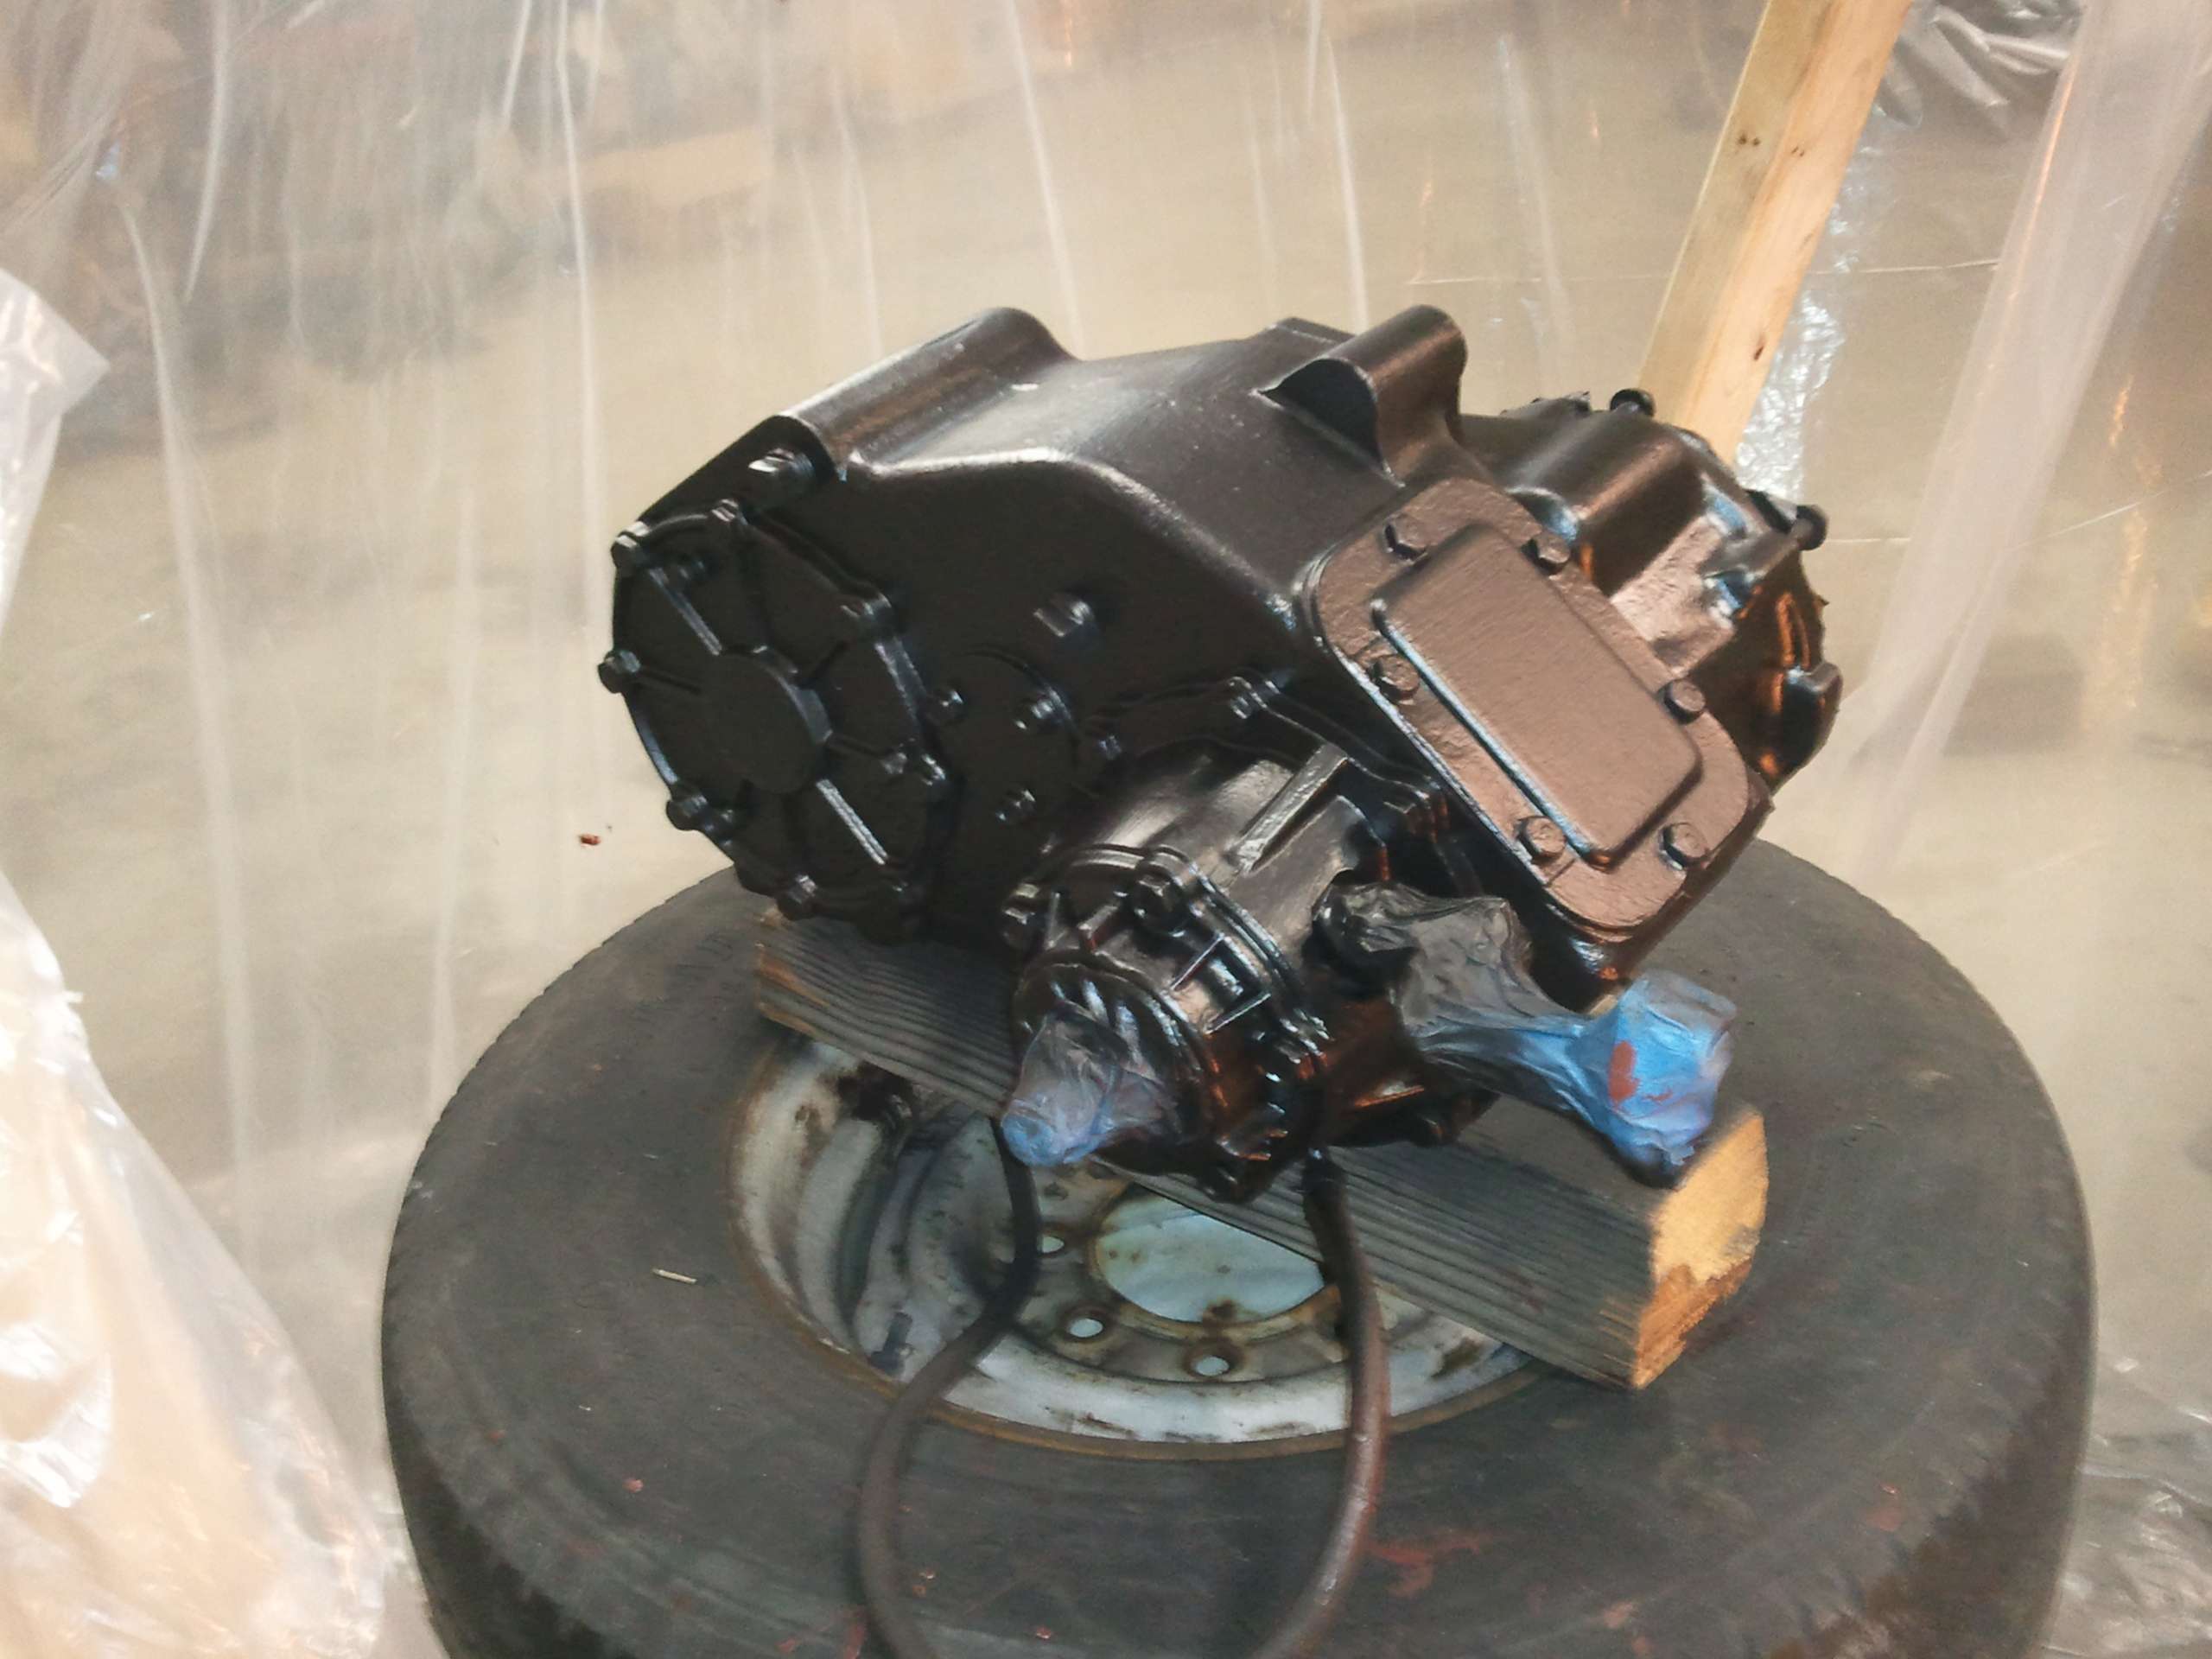
The NP205 rebuilt, converted to twin-stick and ready for install
Image

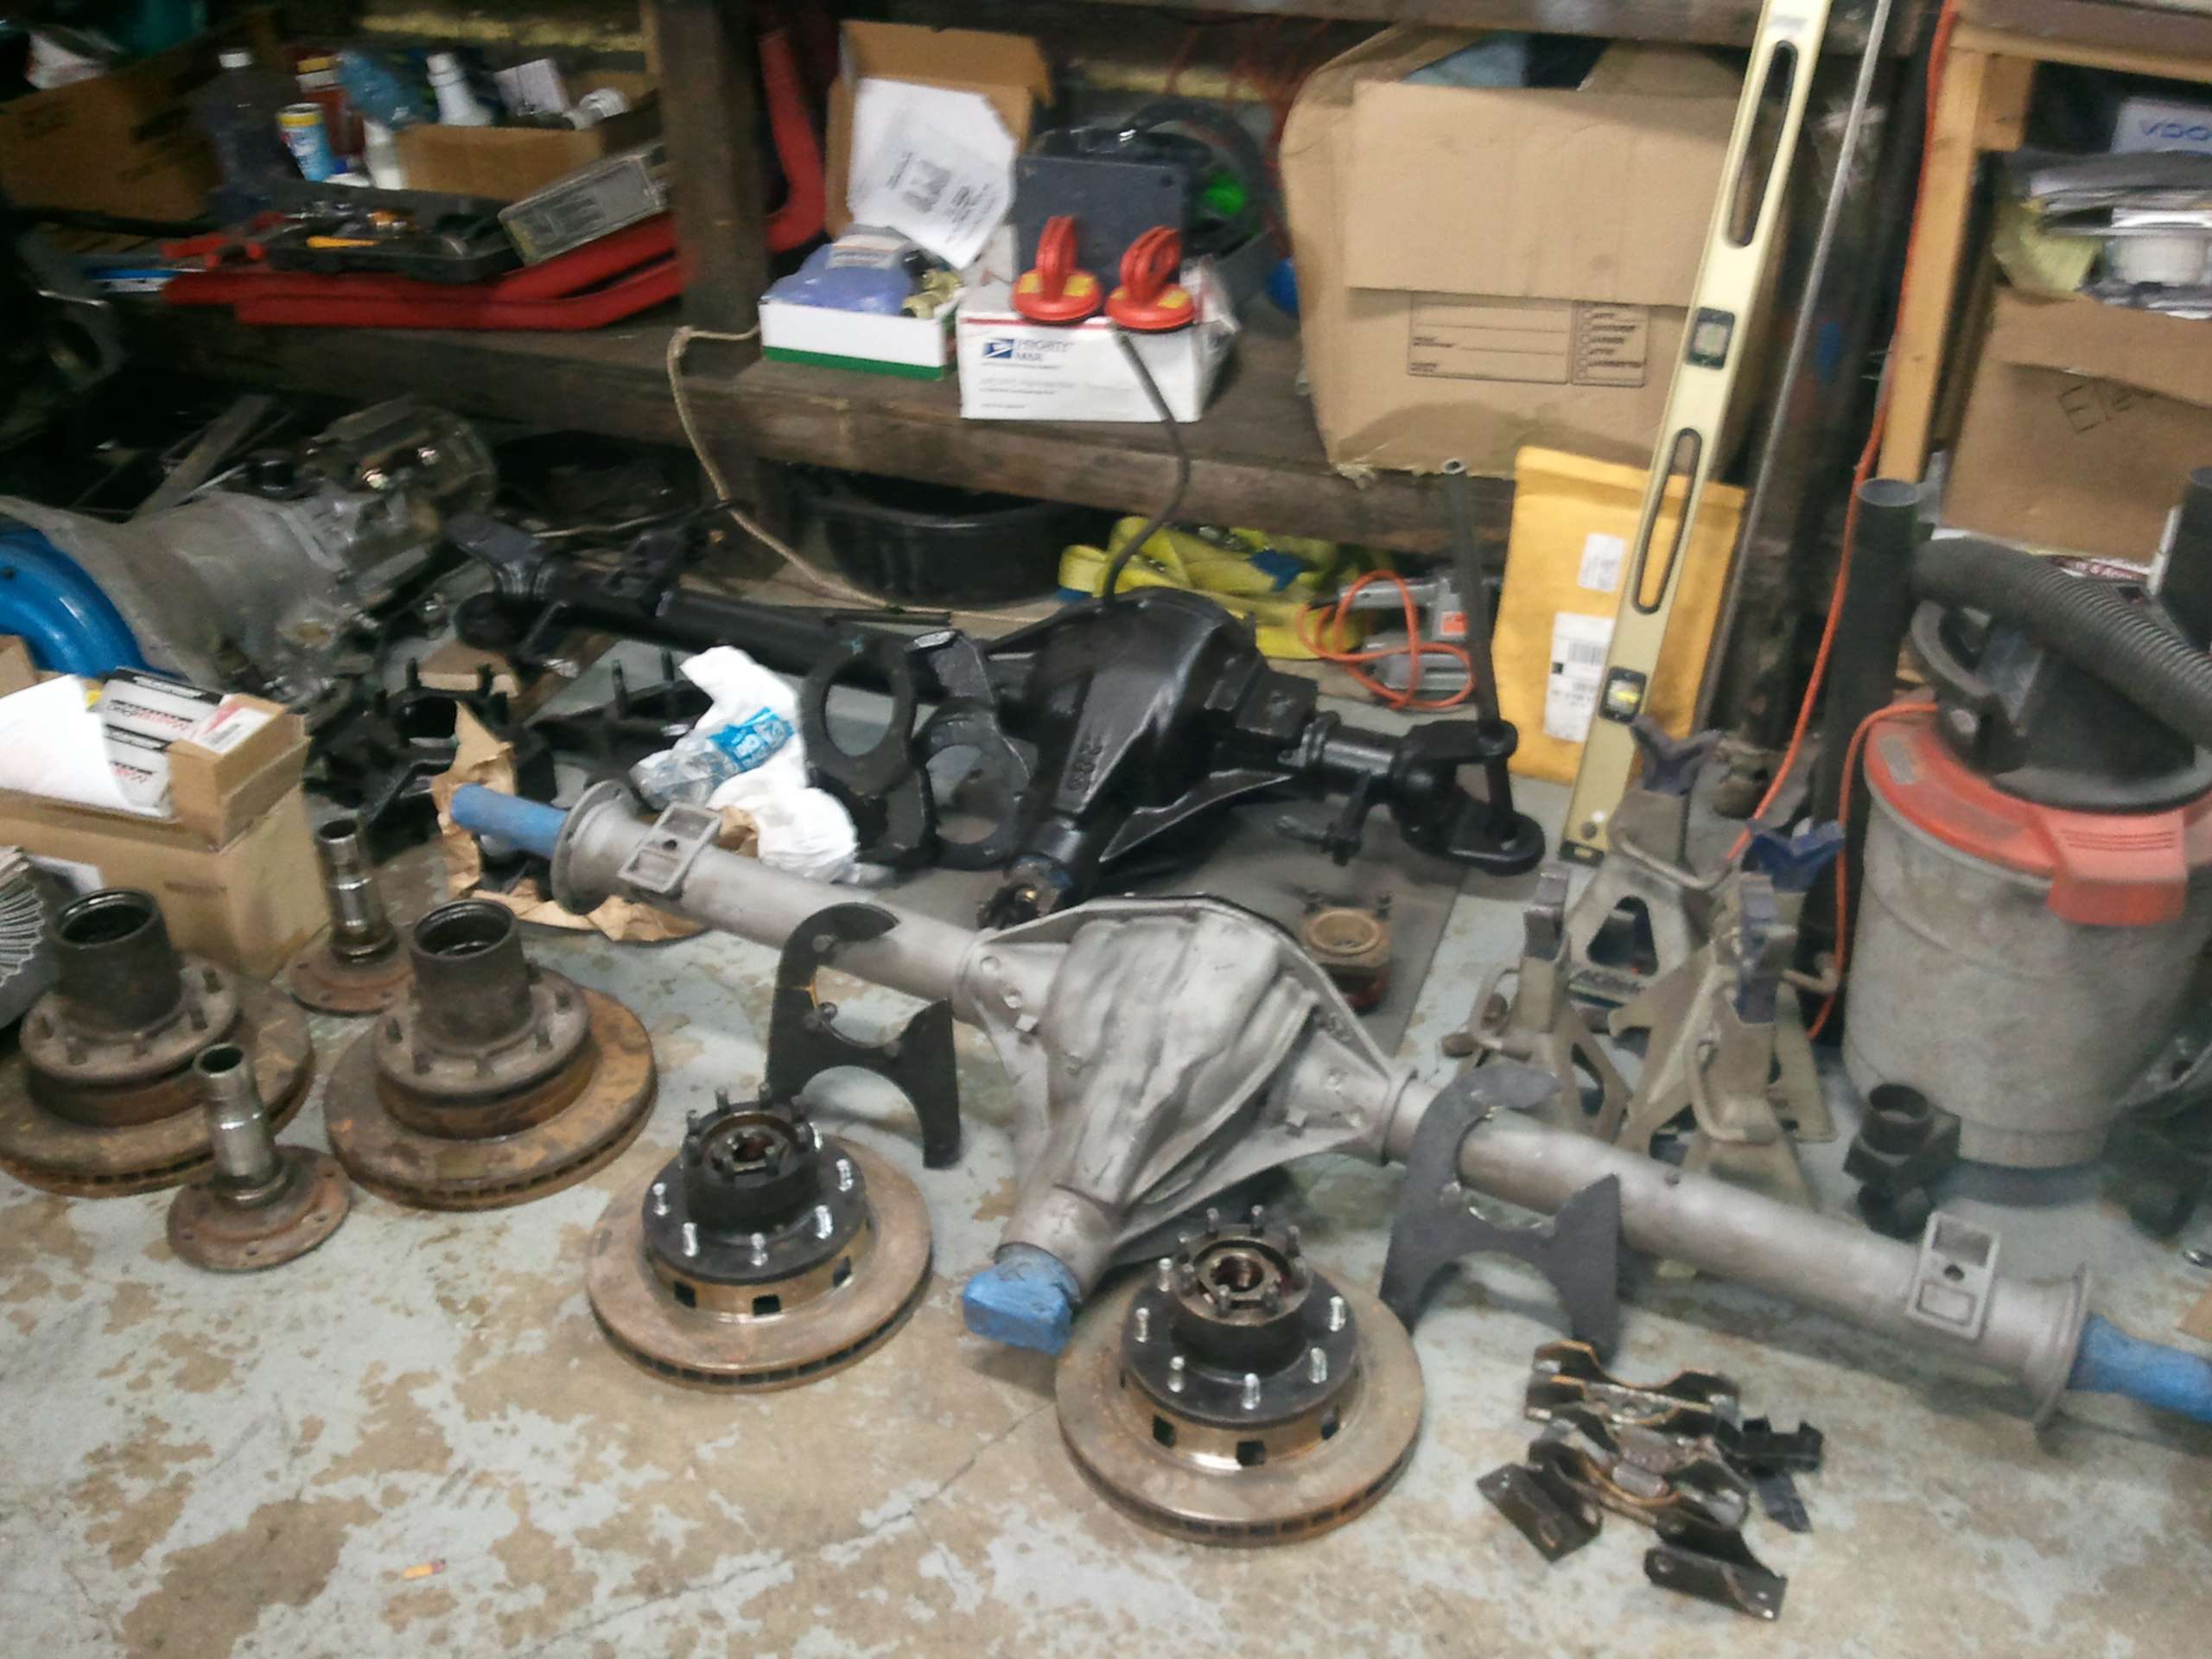
The axles and all their parts. In this pic the rear axle still needs to have some tabs welded on. Notice all four hubs are disc brakes.
Image
Last edited by Resbum on Tue Apr 09, 2013 6:16 am, edited 1 time in total.
Originally Posted by Resbum
"What year is my truck?... Which part?" Build thread- http://www.fsjnetwork.com/forum/viewtop ... 290#p18290
User avatar

Topic author
Resbum
Posts: 466
Joined: Fri Jun 08, 2012 9:45 am
Location: North East Oregon

Re: 1970 Gladiator 1 Ton 6BT 12V Cummins Build

Post by Resbum »

________________________________________
Originally Posted by 1975_jeep_j10
i would like to know what sandblaster you were using and what your thoughts on it are? what media did you use?

________________________________________

It's one of the Harbor Freight Cheapo's. It took a fair amount of modifying of the air lines and plumbing and a different nozzle to get it to work somewhat well. The biggest trouble it really had was being extremely touchy to humidity in the compressed air.

The media was the black media from harbor freight.

Any time I buy anything from Harbor Freight I don't hold high hopes in it performing well. Once in awhile you buy a jewel from there that works great. Harbor Freight is cheap. You get what you pay for.

For the types of projects I plan on ever using it for in the future it will do the job, now that I debugged it. Would I do the semi-major kinds of projects like I did on the truck again? Probably not.

My final verdict. I got what I paid for. I'm satisfied, but not overwhelmed.
Last edited by Resbum on Tue Jul 02, 2013 7:13 am, edited 3 times in total.
Originally Posted by Resbum
"What year is my truck?... Which part?" Build thread- http://www.fsjnetwork.com/forum/viewtop ... 290#p18290
User avatar

Topic author
Resbum
Posts: 466
Joined: Fri Jun 08, 2012 9:45 am
Location: North East Oregon

Re: 1970 Gladiator 1 Ton 6BT 12V Cummins Build

Post by Resbum »

.
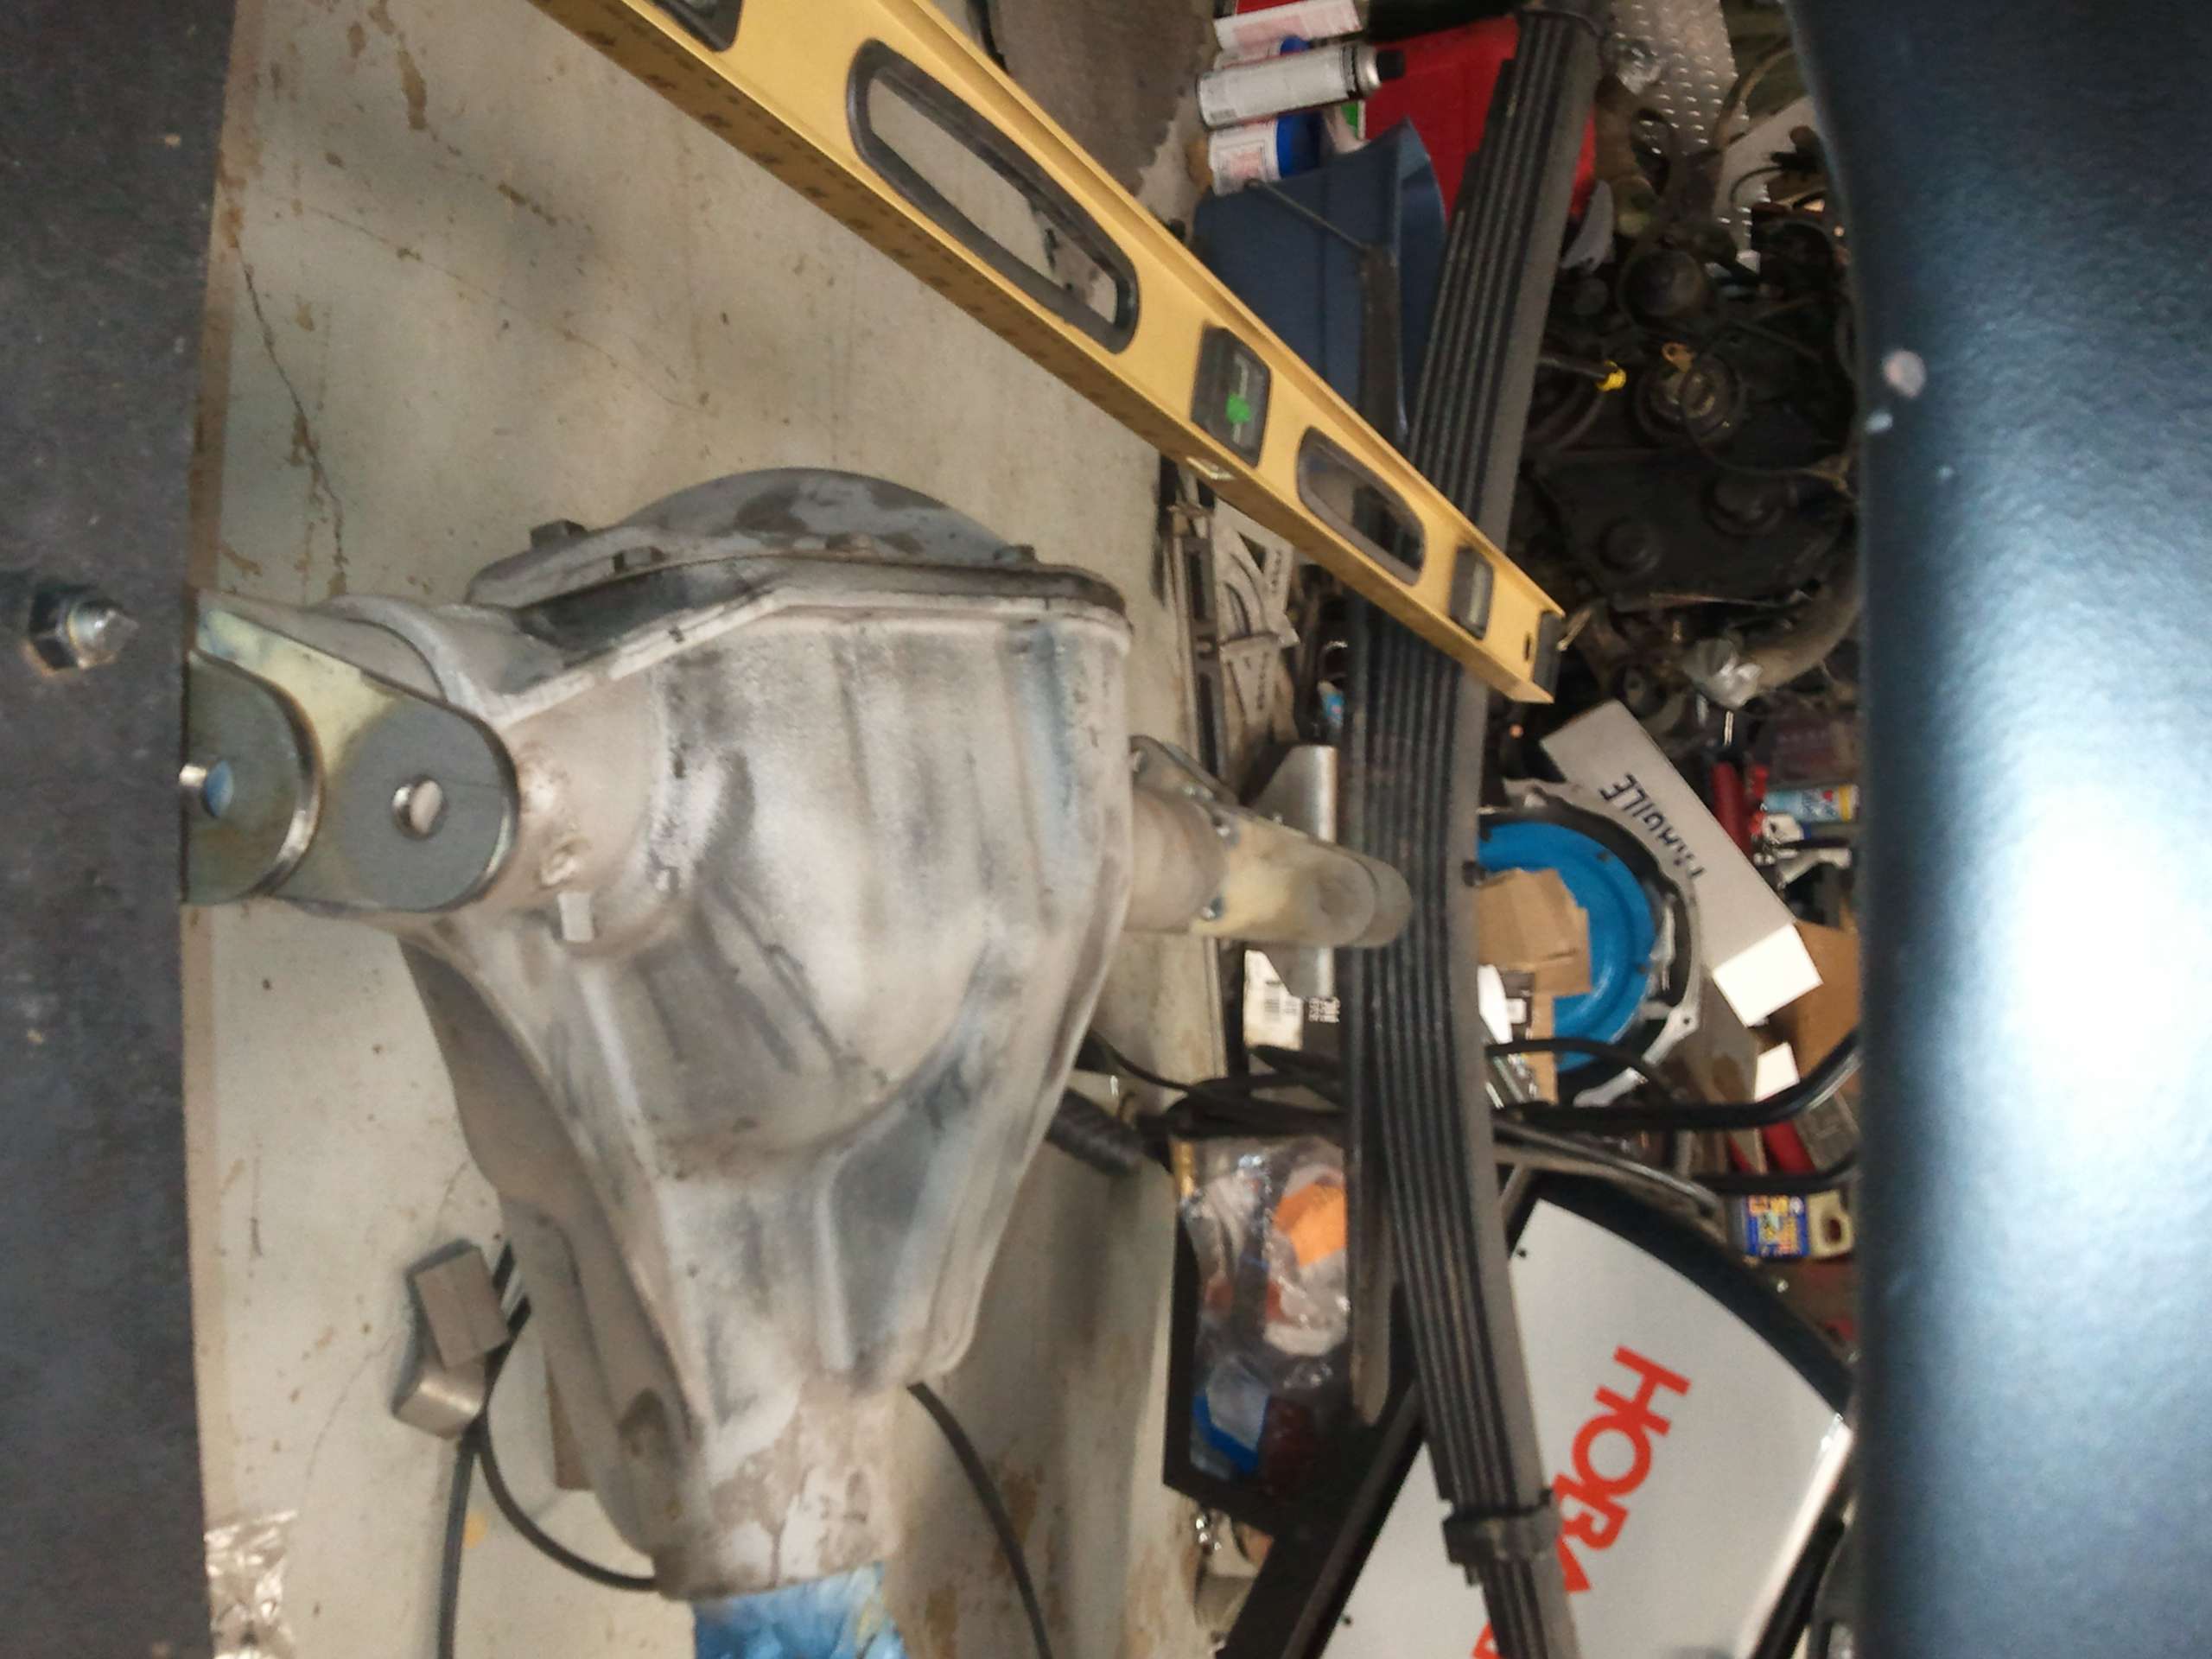
Edit-Note- During this part is when I calculated and incorporated the tilt of the rear differential. The rear diff should point about 2 degrees below the output of the transfer case. From what I learned, they say you can tilt an axle up about 12 degrees before you have to worry about the oiling inside the differential not lubing properly.

Next I placed the rear axle under the frame and finalized the locations for the spring perches, shock tabs, and track bar tabs. Then it was time for paint.
Image

Image

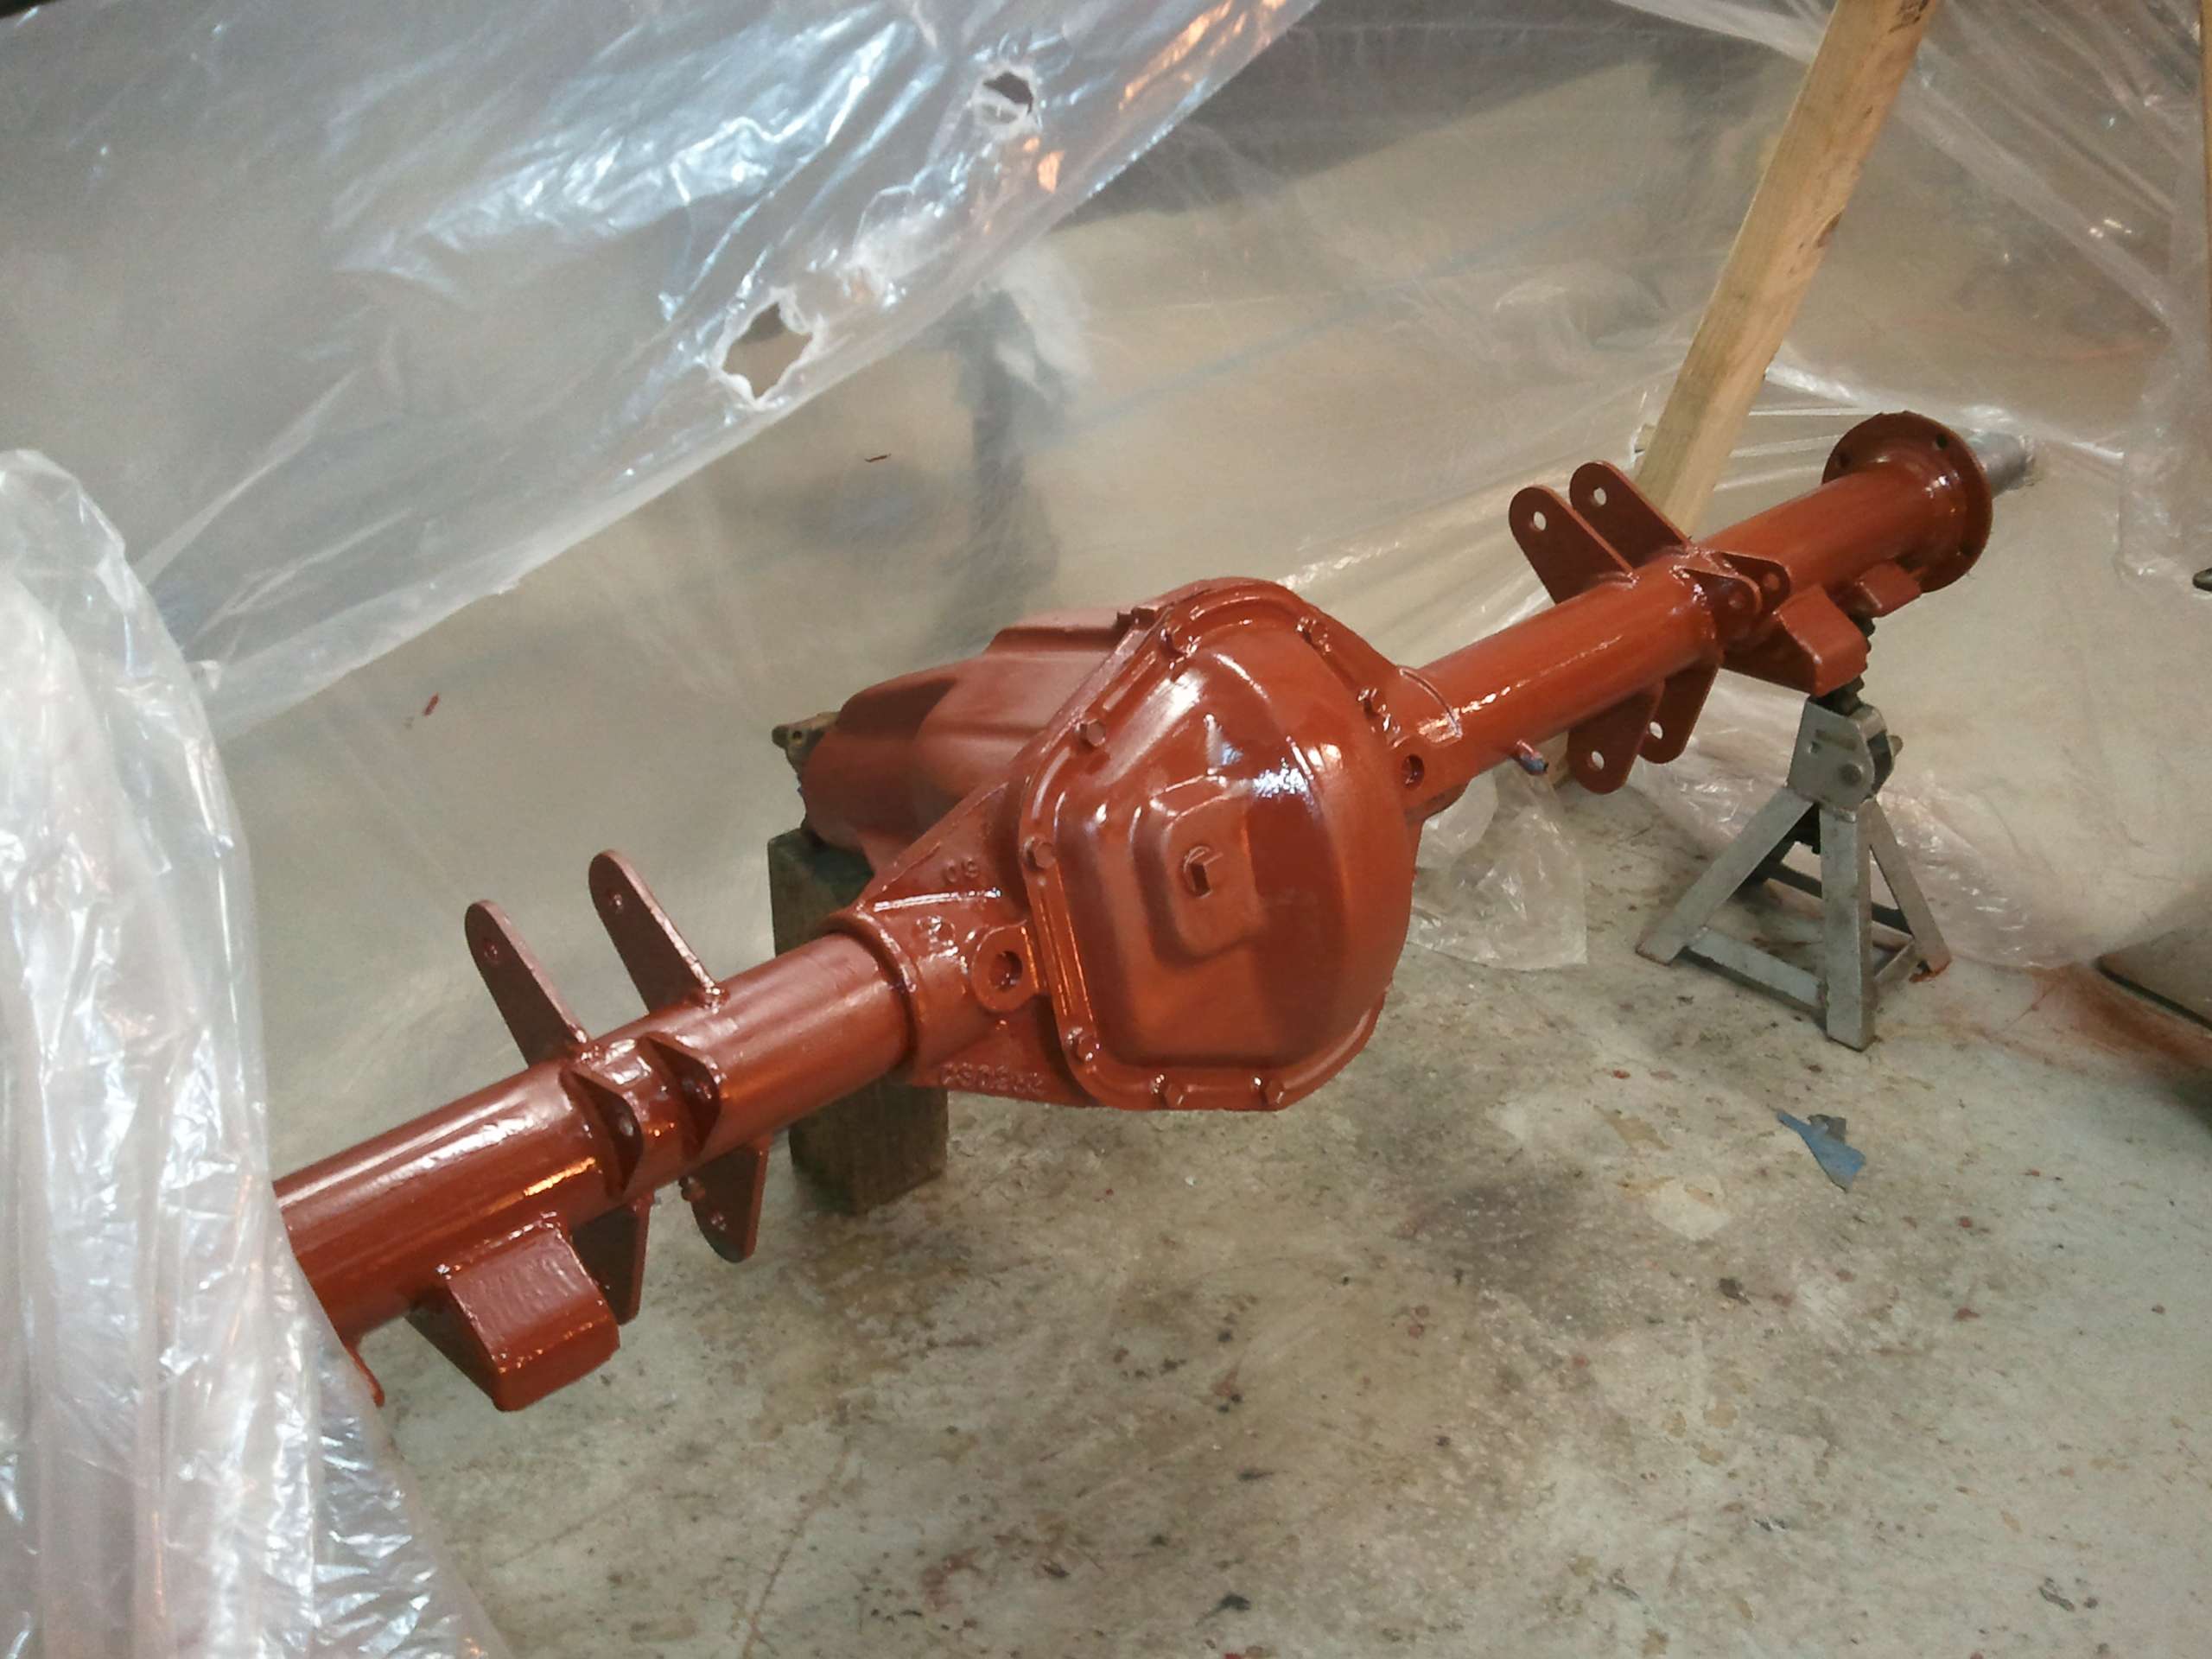
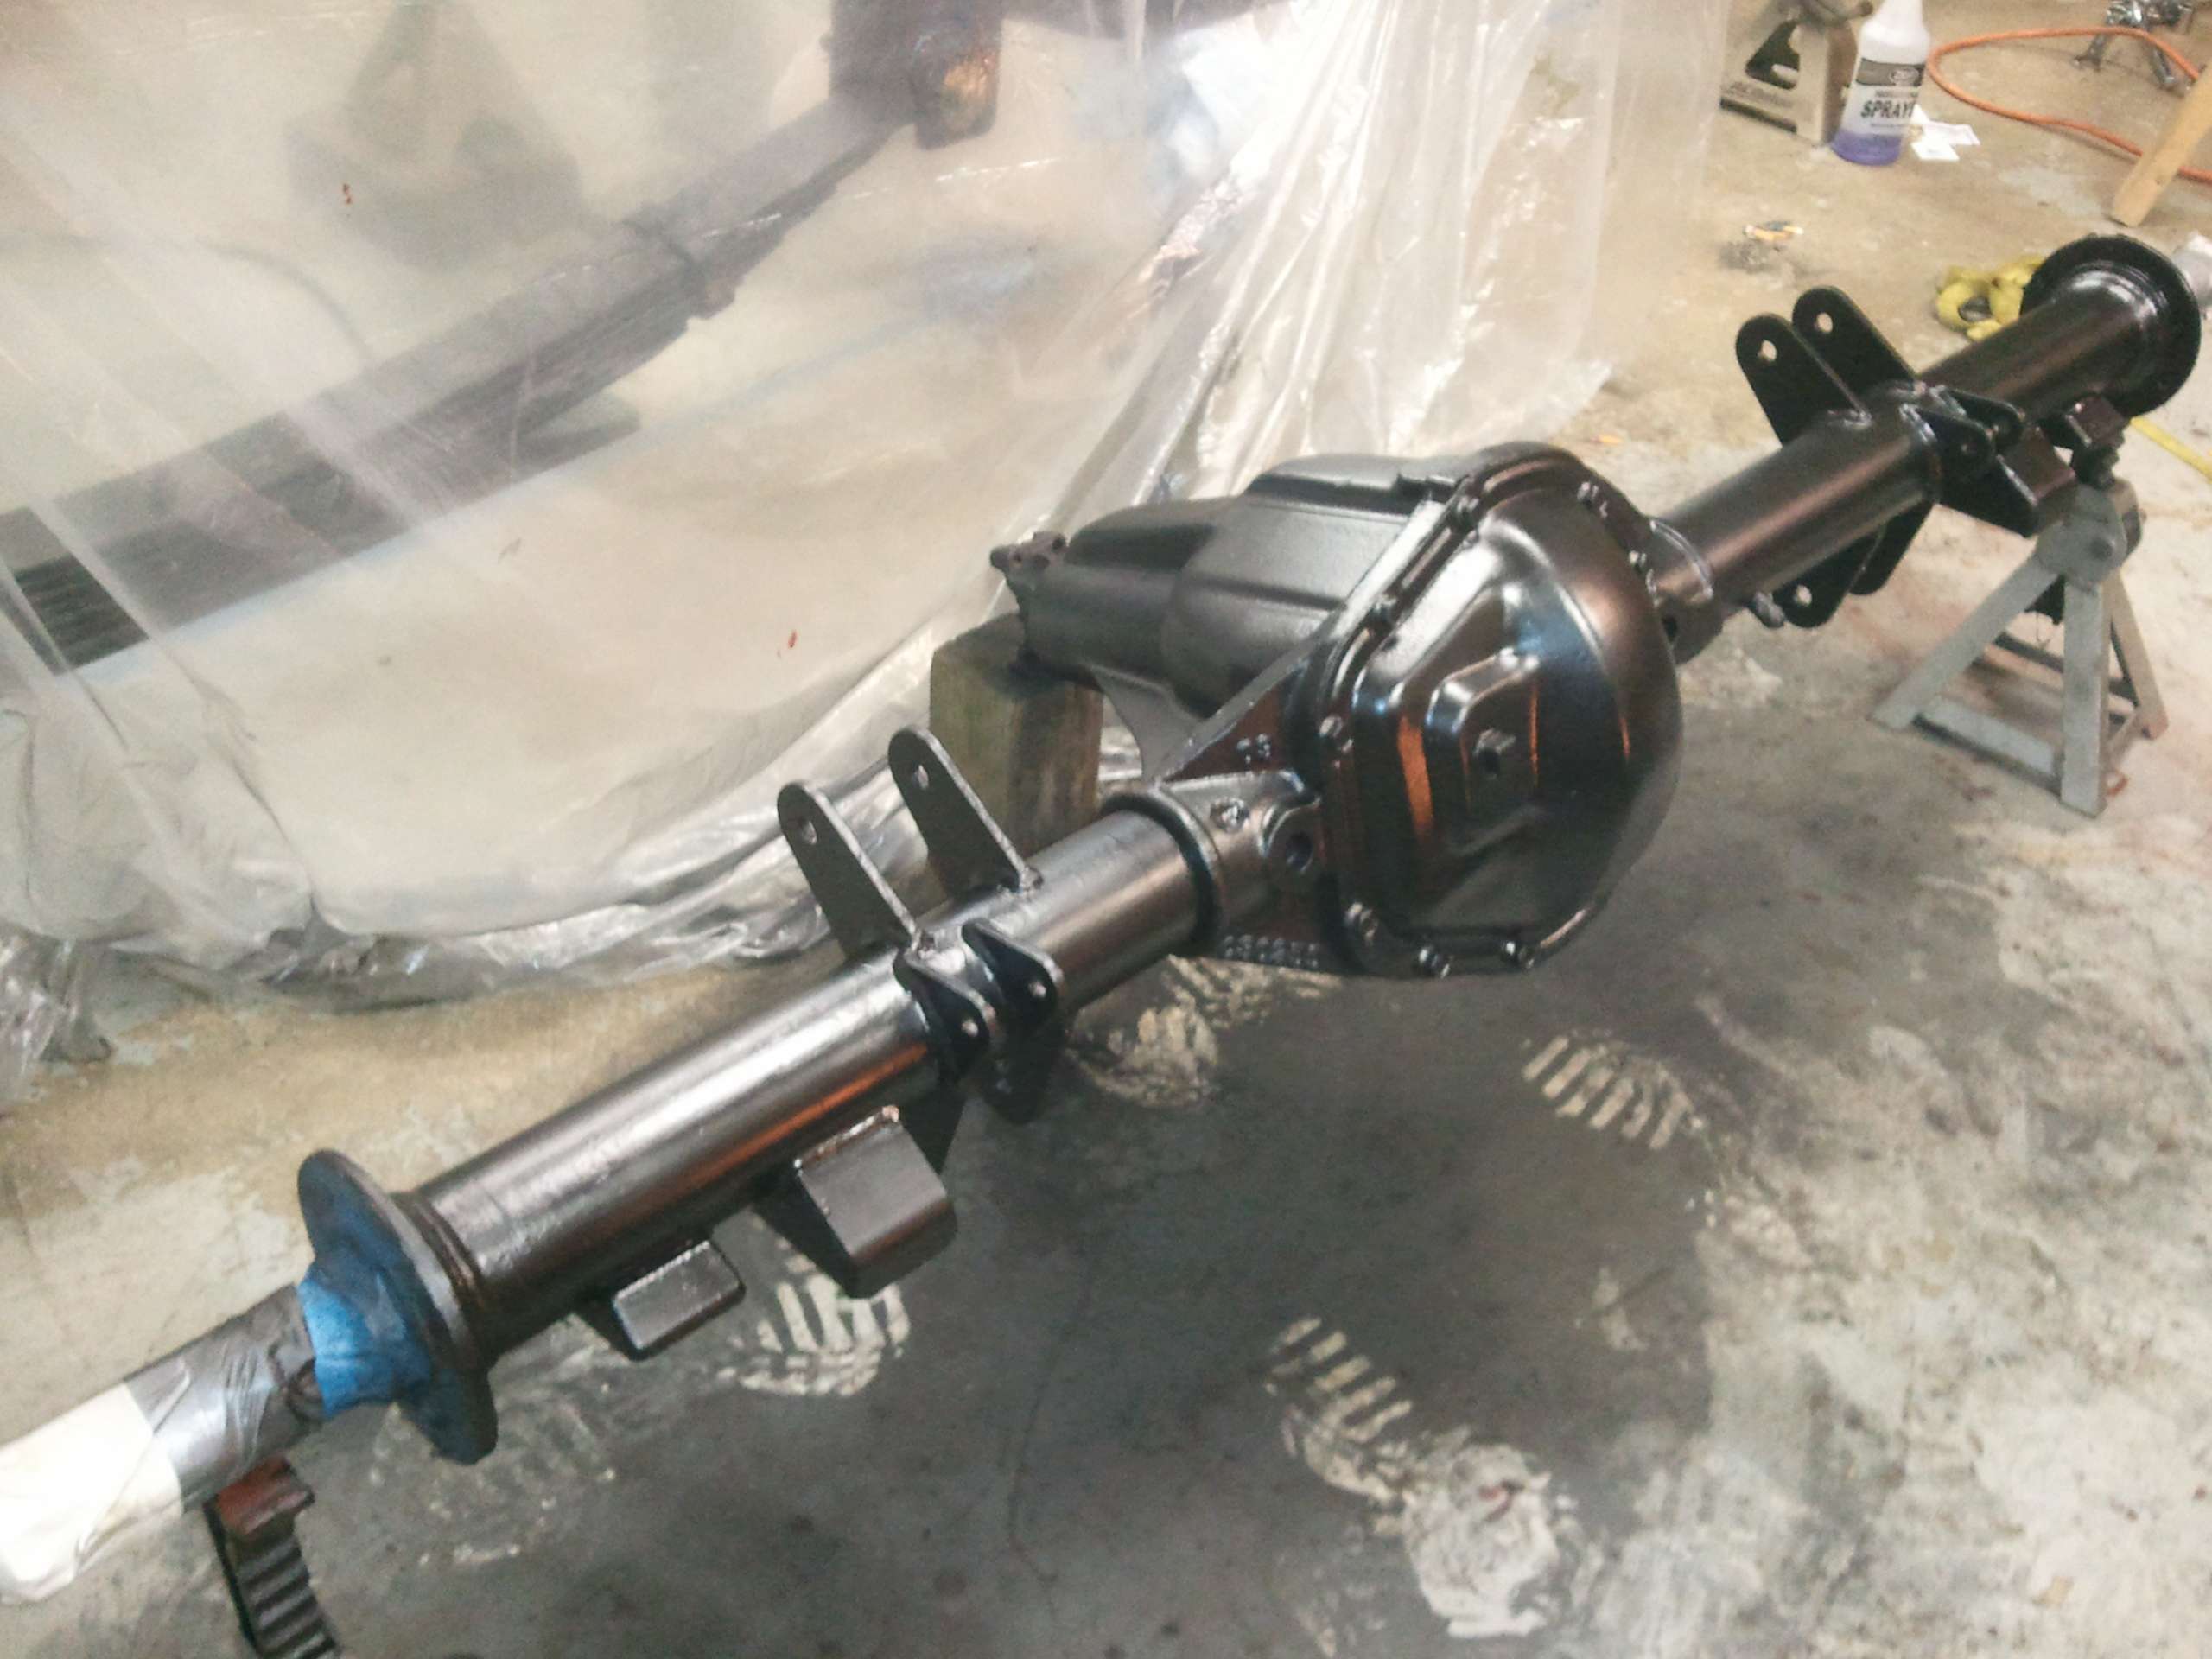
This is the base coat I used on everything. It's the same ZeroRust as the top coat, only red so you could see good coverage between coats. On the axles and TC I brushed on the first coat.
Image

Image
Last edited by Resbum on Tue Apr 09, 2013 6:28 am, edited 1 time in total.
Originally Posted by Resbum
"What year is my truck?... Which part?" Build thread- http://www.fsjnetwork.com/forum/viewtop ... 290#p18290
User avatar

Topic author
Resbum
Posts: 466
Joined: Fri Jun 08, 2012 9:45 am
Location: North East Oregon

Re: 1970 Gladiator 1 Ton 6BT 12V Cummins Build

Post by Resbum »

It's finally time to start putting things back on the truck. First came the rear axle.
Image

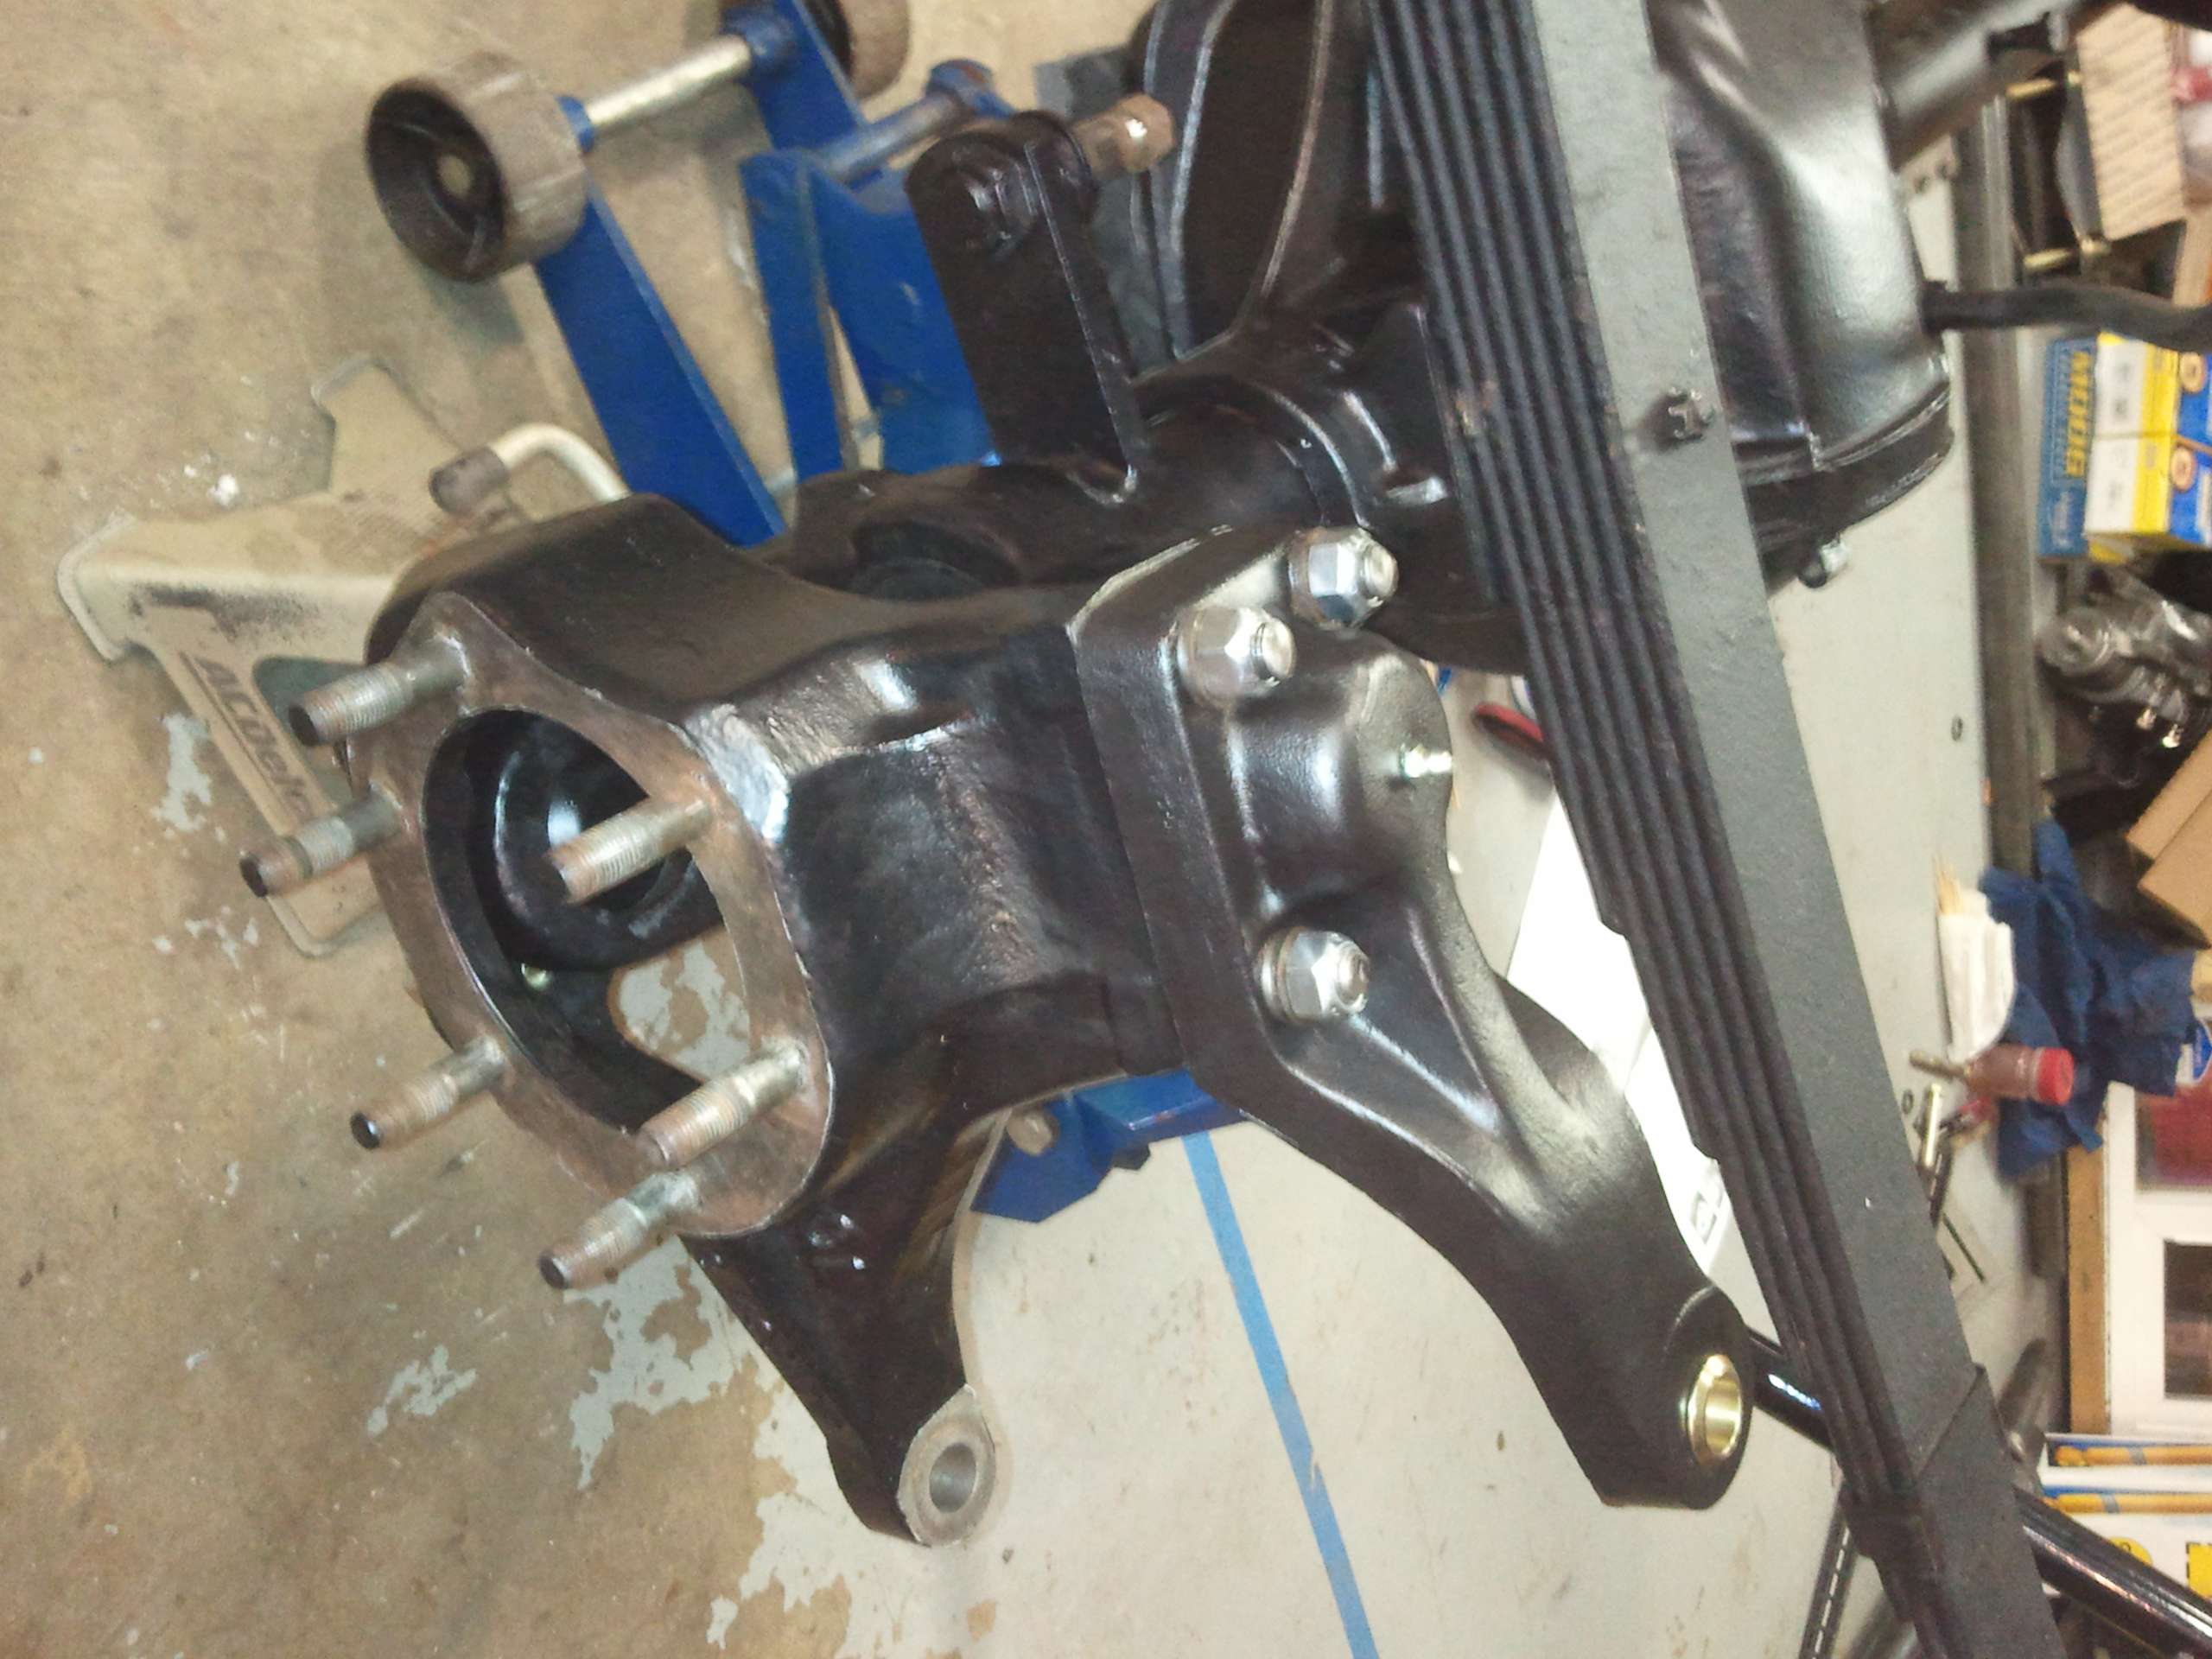
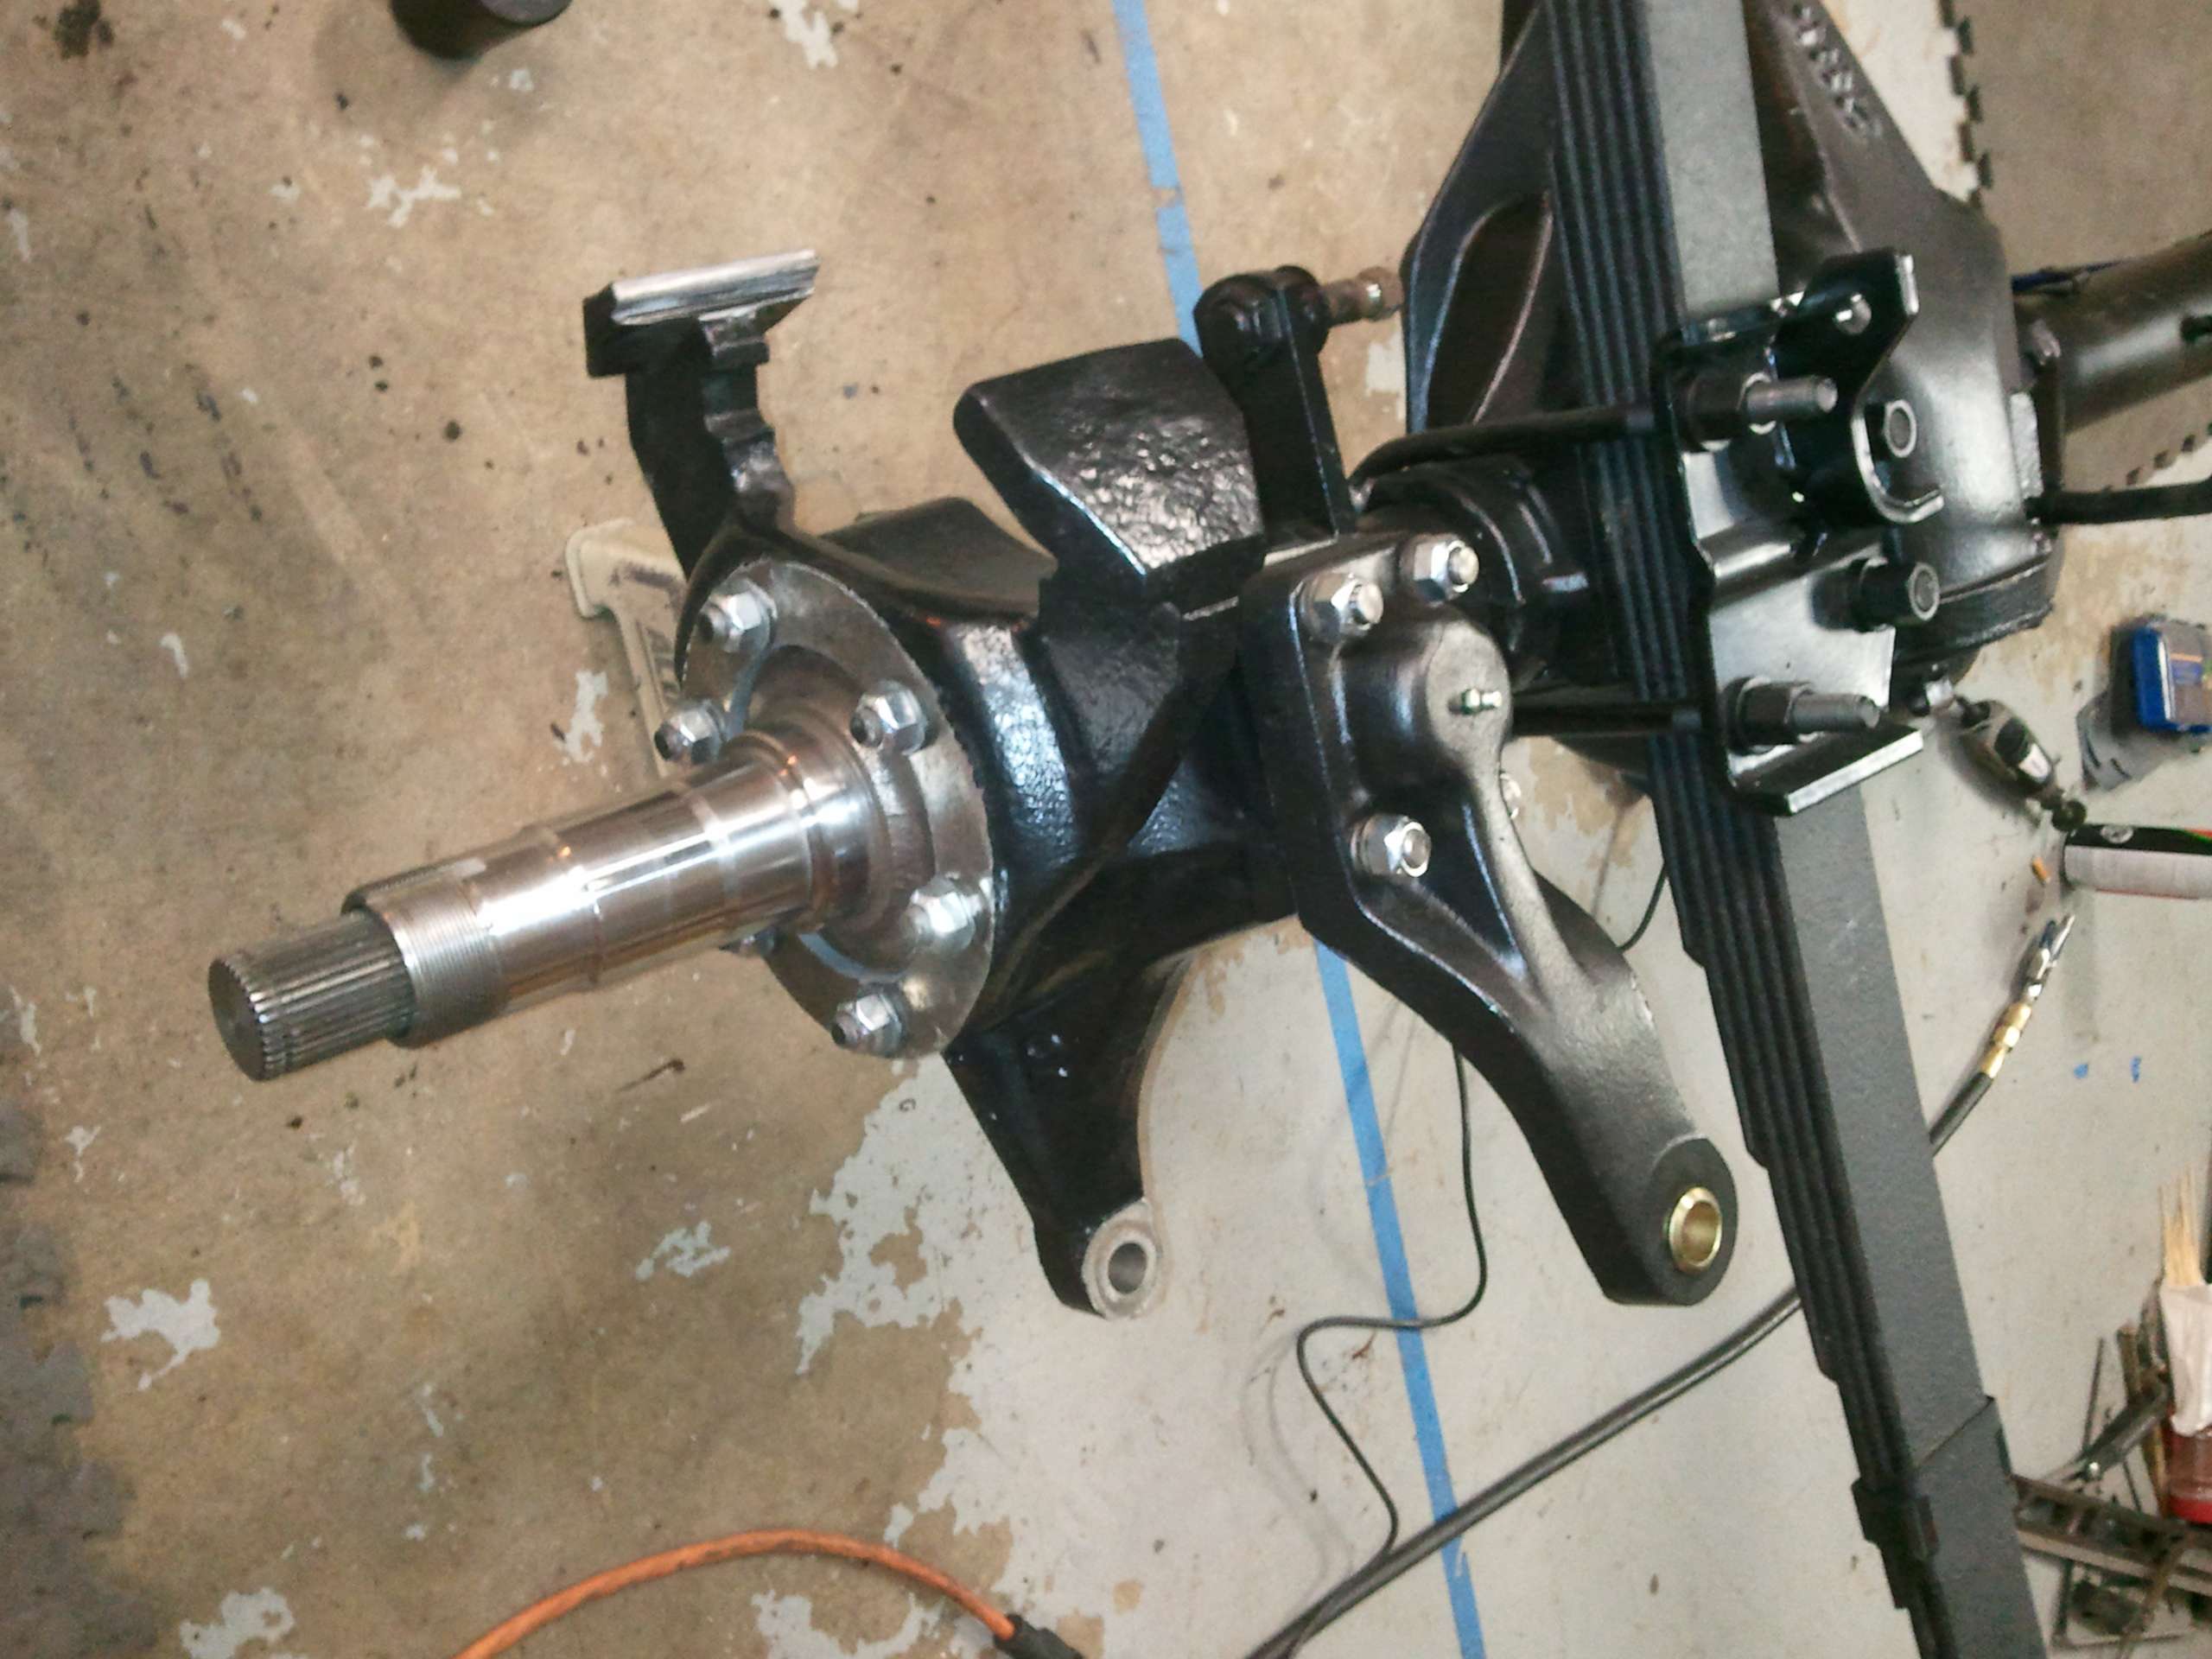
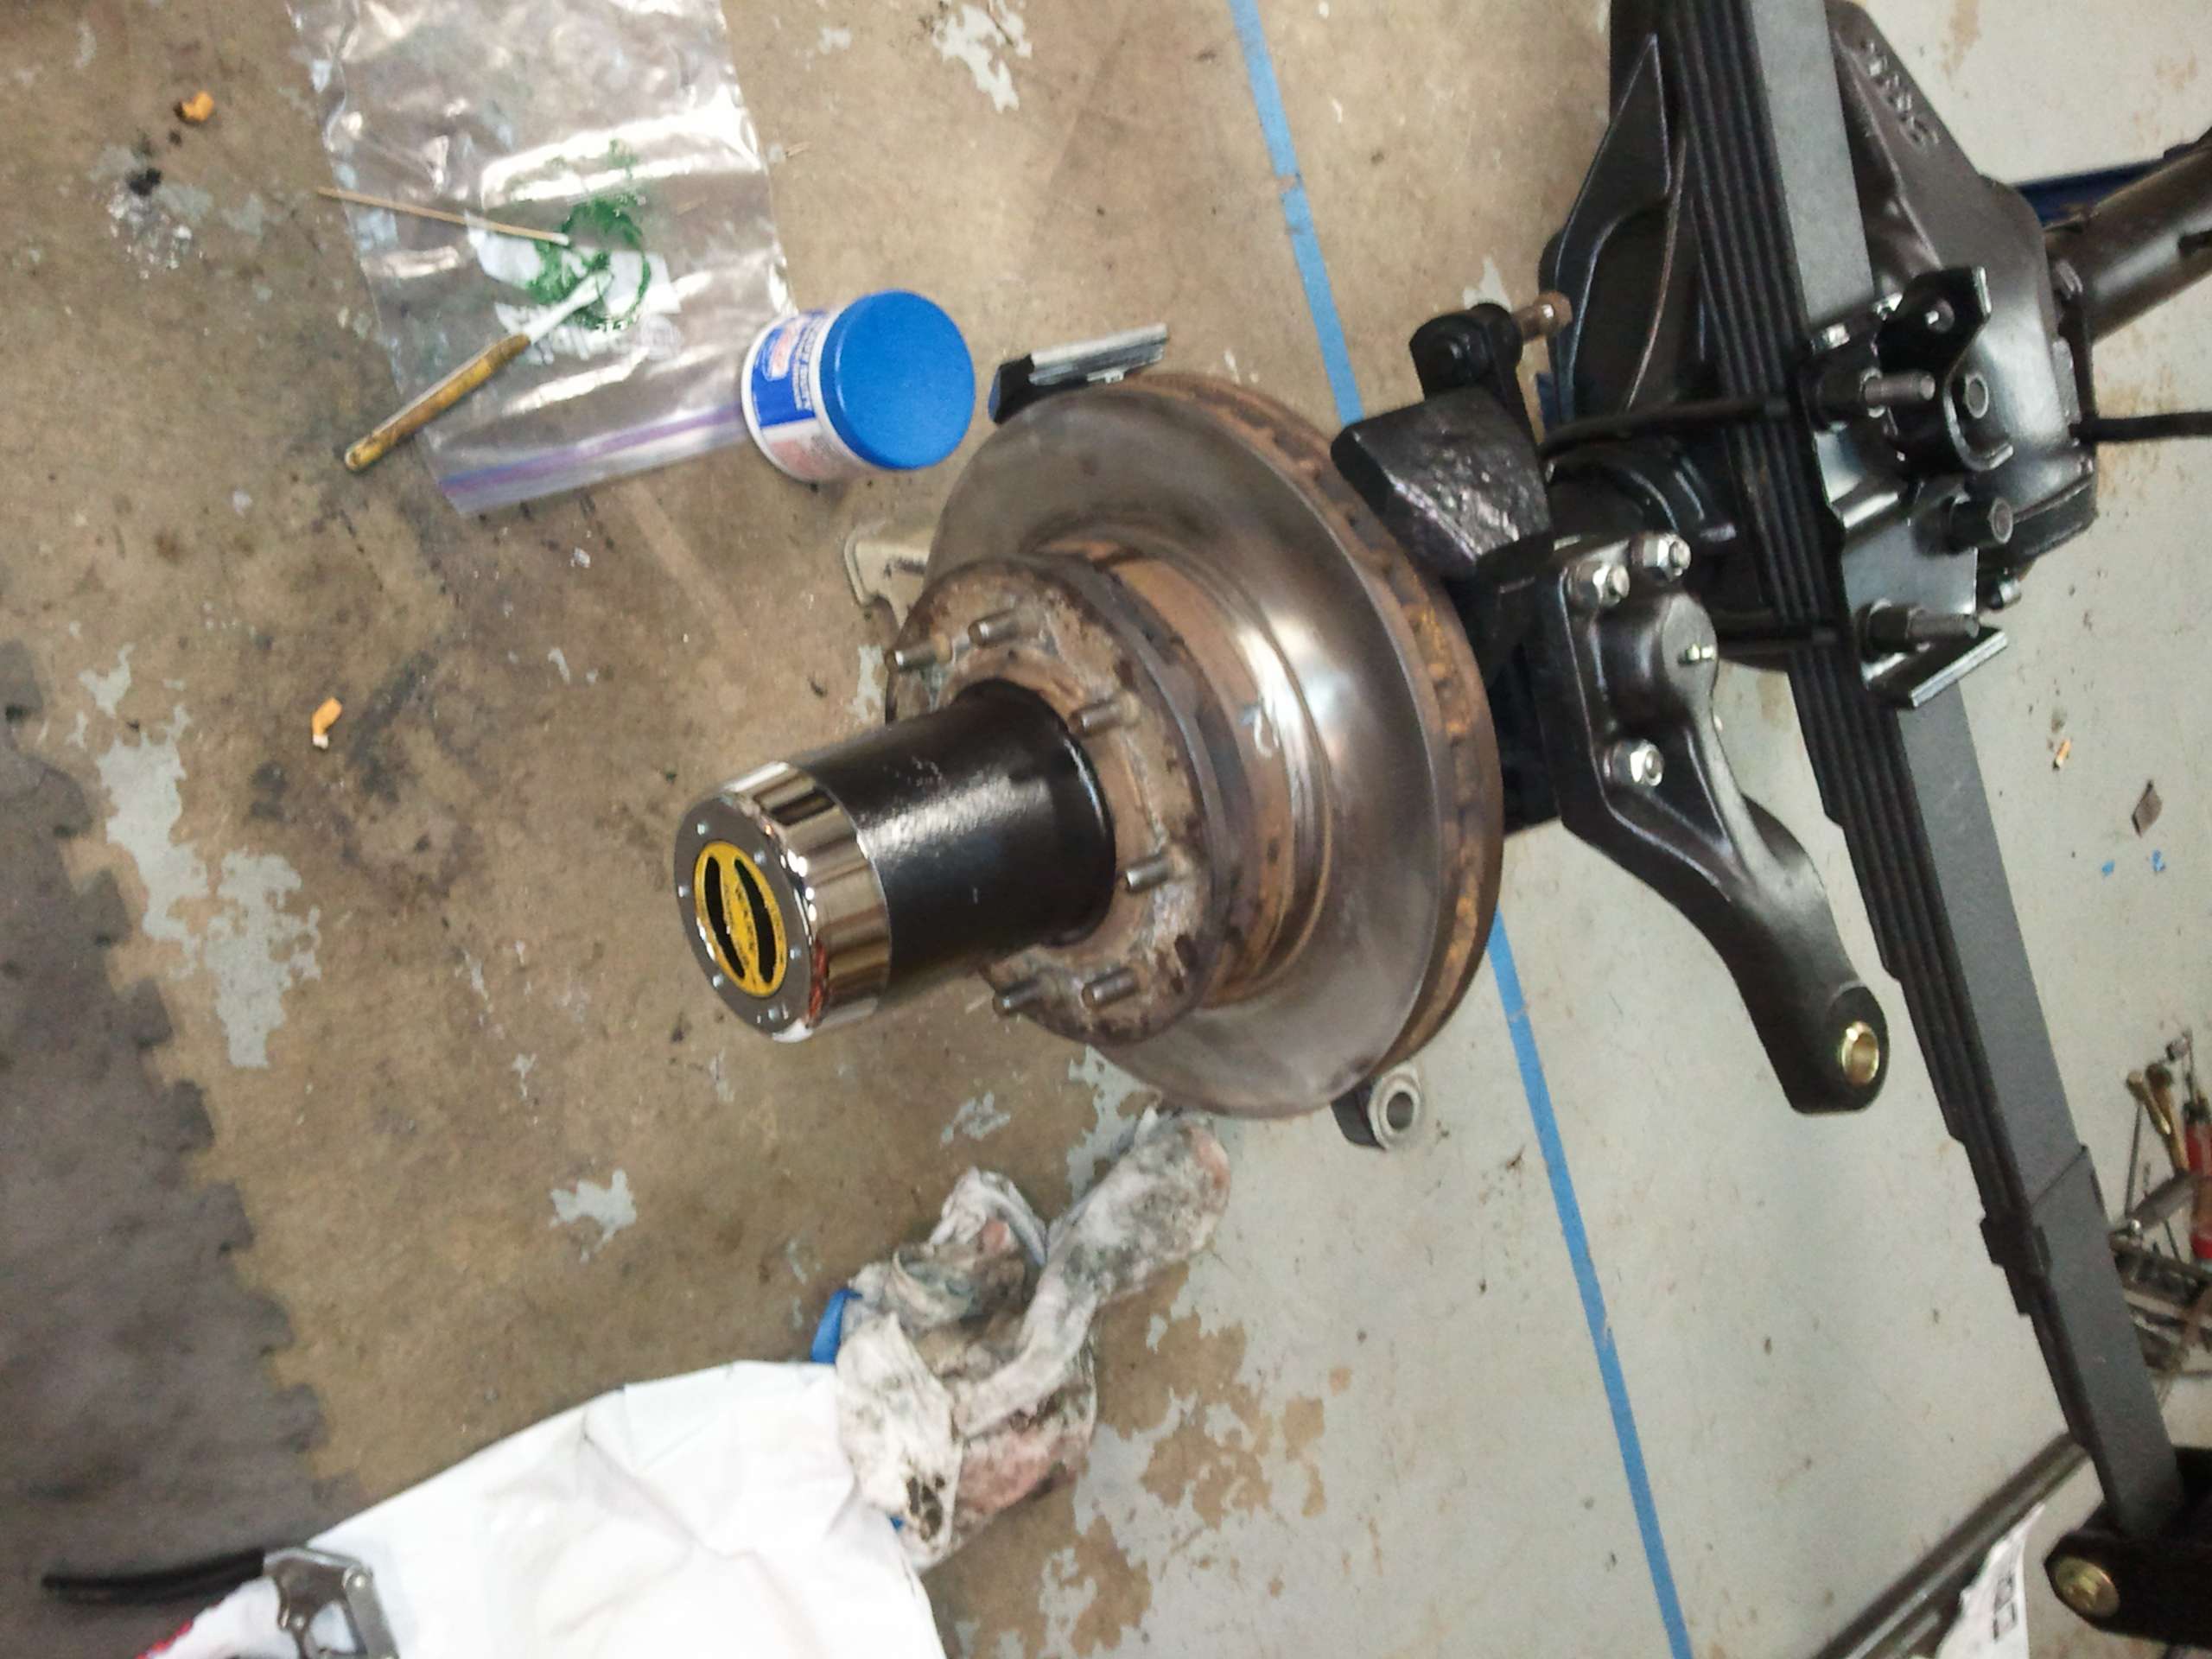
Then the front axle. This is when I also installed the new king pins, knuckles and spindles hardware, and 35 spline axles. The cross over steering arm is from Offroad Unlimited and is one beefy unit.
Image

Image

Image

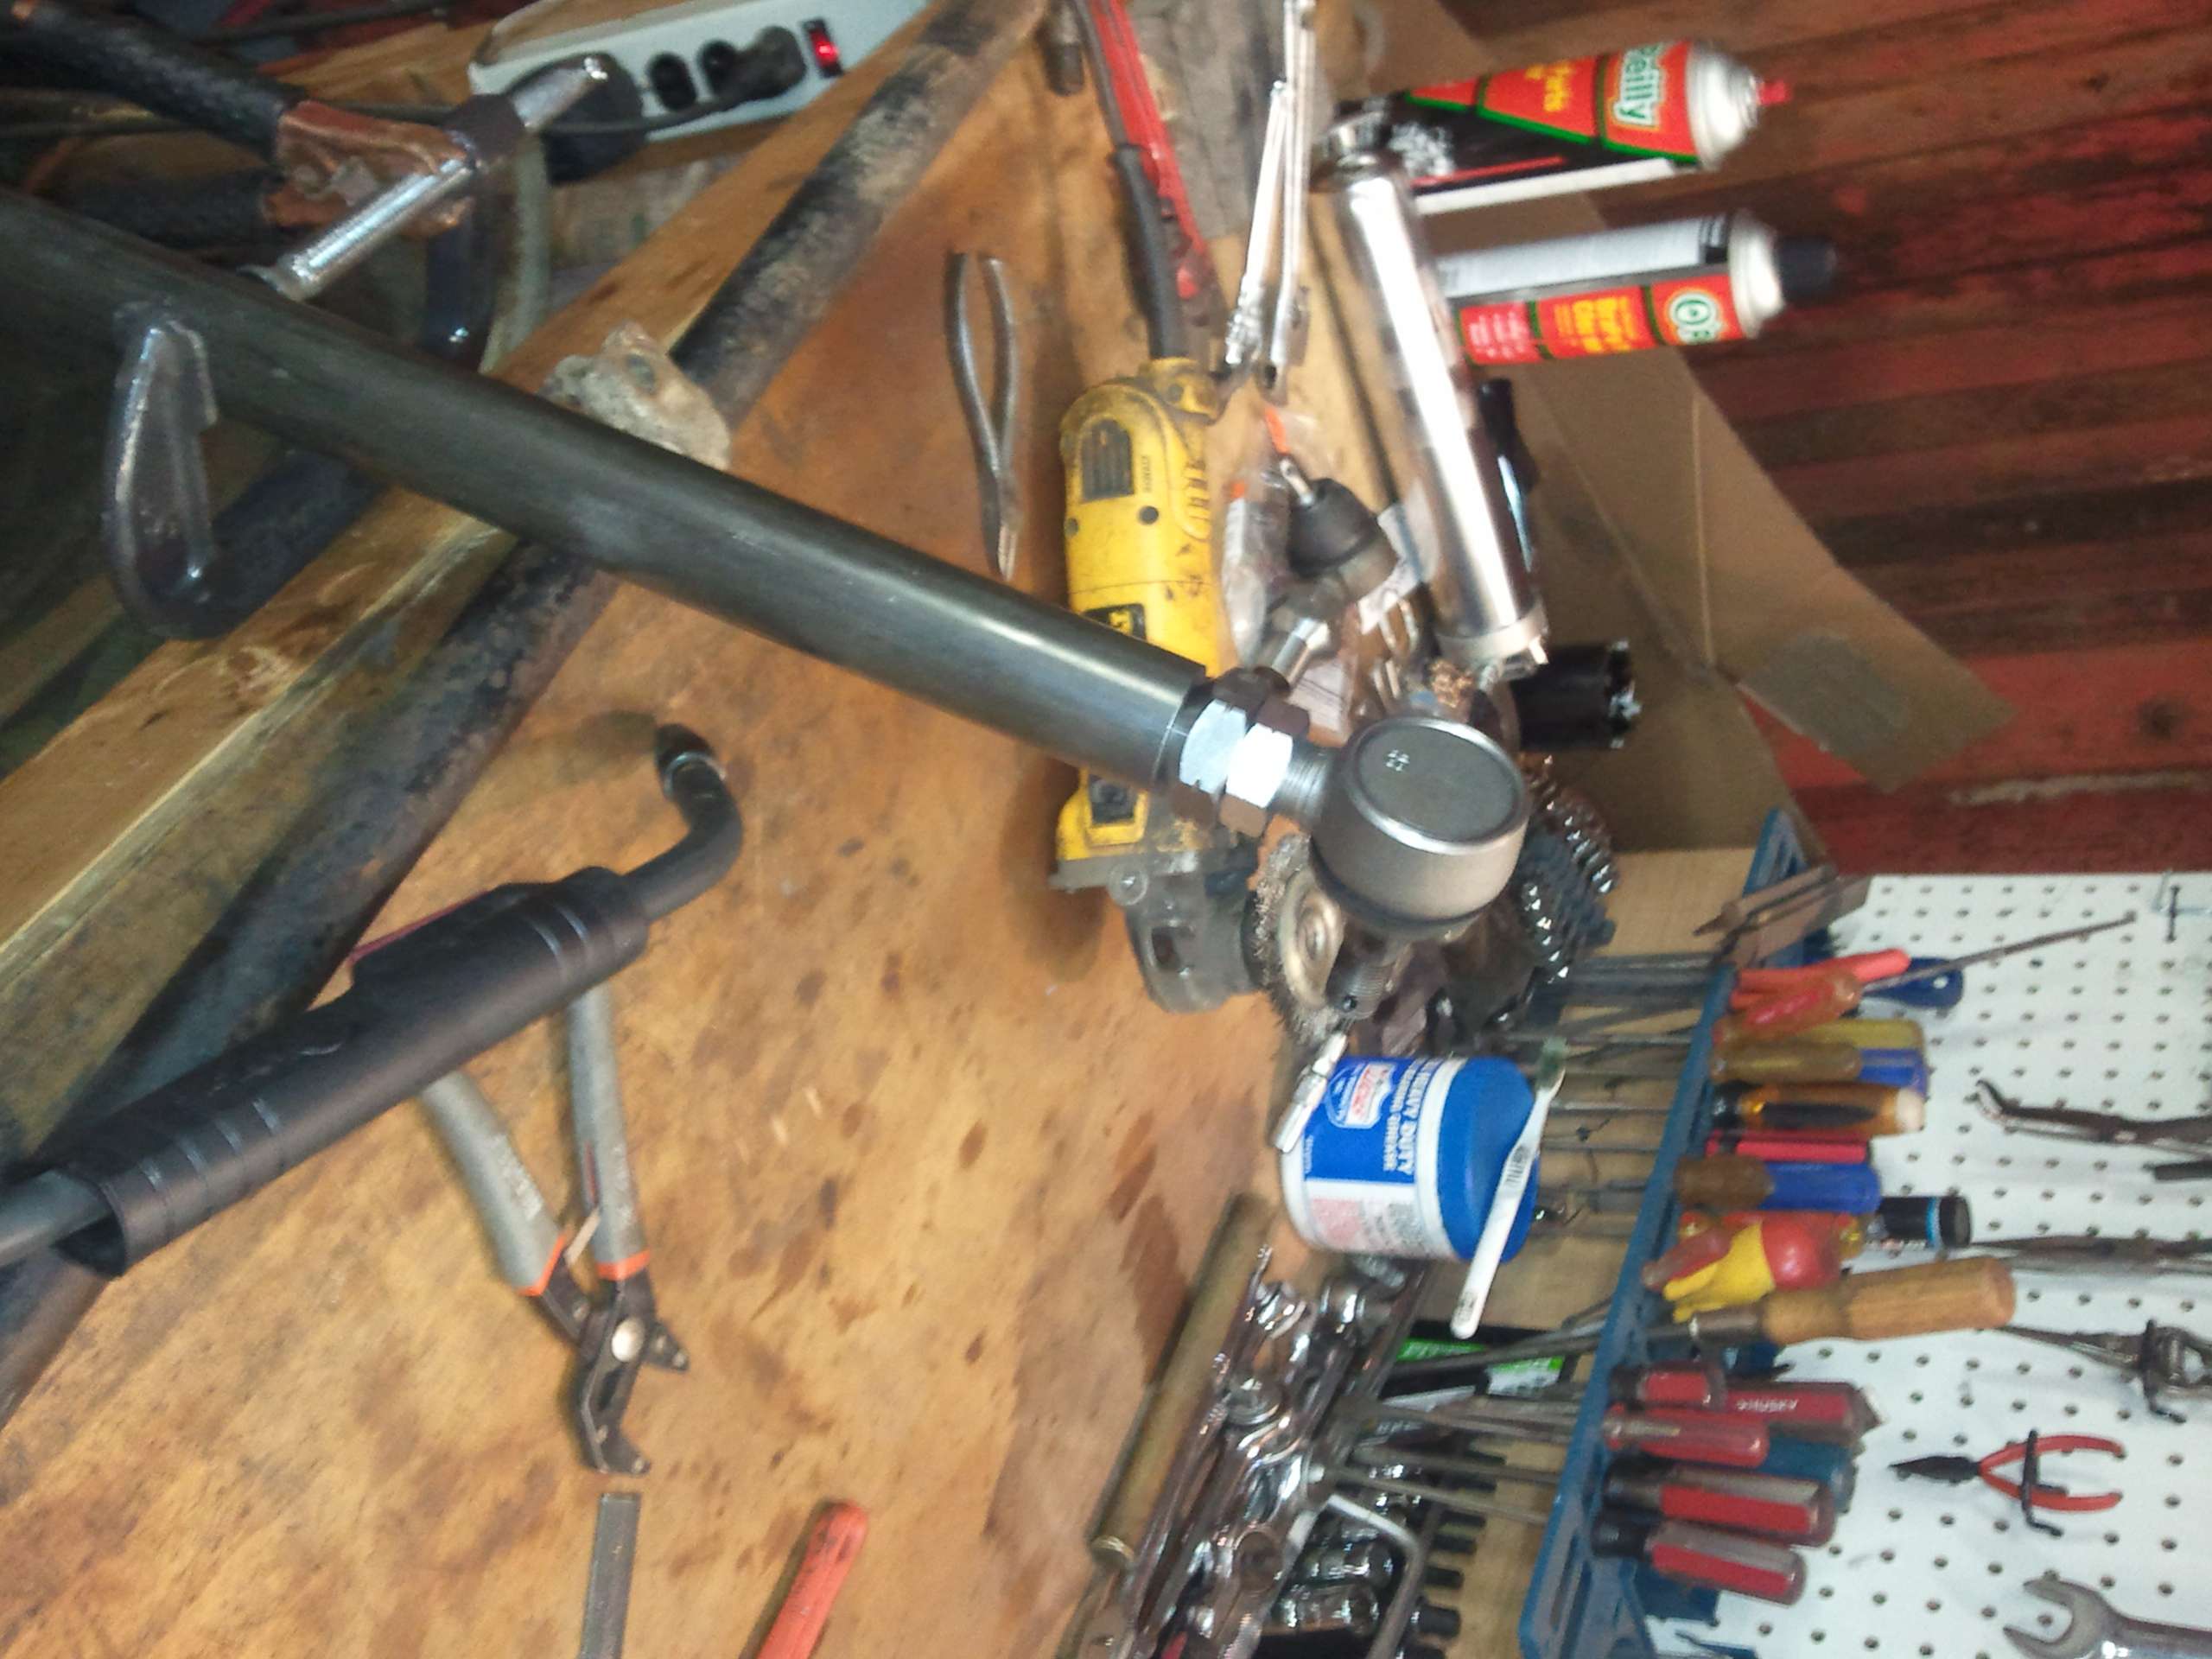
Time for the tie rod. Made from 1 1/2" 1/4"wall DOM.
Image

Image
Originally Posted by Resbum
"What year is my truck?... Which part?" Build thread- http://www.fsjnetwork.com/forum/viewtop ... 290#p18290
User avatar

Topic author
Resbum
Posts: 466
Joined: Fri Jun 08, 2012 9:45 am
Location: North East Oregon

Re: 1970 Gladiator 1 Ton 6BT 12V Cummins Build

Post by Resbum »

Warn 35 Spline Hub Dana 60 Tech Info and Install

I just posted a thread over in the Off-Road FSJ Tech area because it seemed more appropriate over there then in this build thread. I originally posted it at Pirate4X4 about a month ago.

It has to do with a problem I came across while installing the 35 spline 1.5" outer axles and WARN hubs in the front Dana 60. Apparently it's been a known problem that I wasn't aware of.

Here's a link to the thread:
http://www.ifsja.org/forums/vb/showthread.php?t=152219

Resbum
Last edited by Resbum on Sat Apr 06, 2013 9:00 am, edited 1 time in total.
Originally Posted by Resbum
"What year is my truck?... Which part?" Build thread- http://www.fsjnetwork.com/forum/viewtop ... 290#p18290
User avatar

Topic author
Resbum
Posts: 466
Joined: Fri Jun 08, 2012 9:45 am
Location: North East Oregon

Re: 1970 Gladiator 1 Ton 6BT 12V Cummins Build

Post by Resbum »

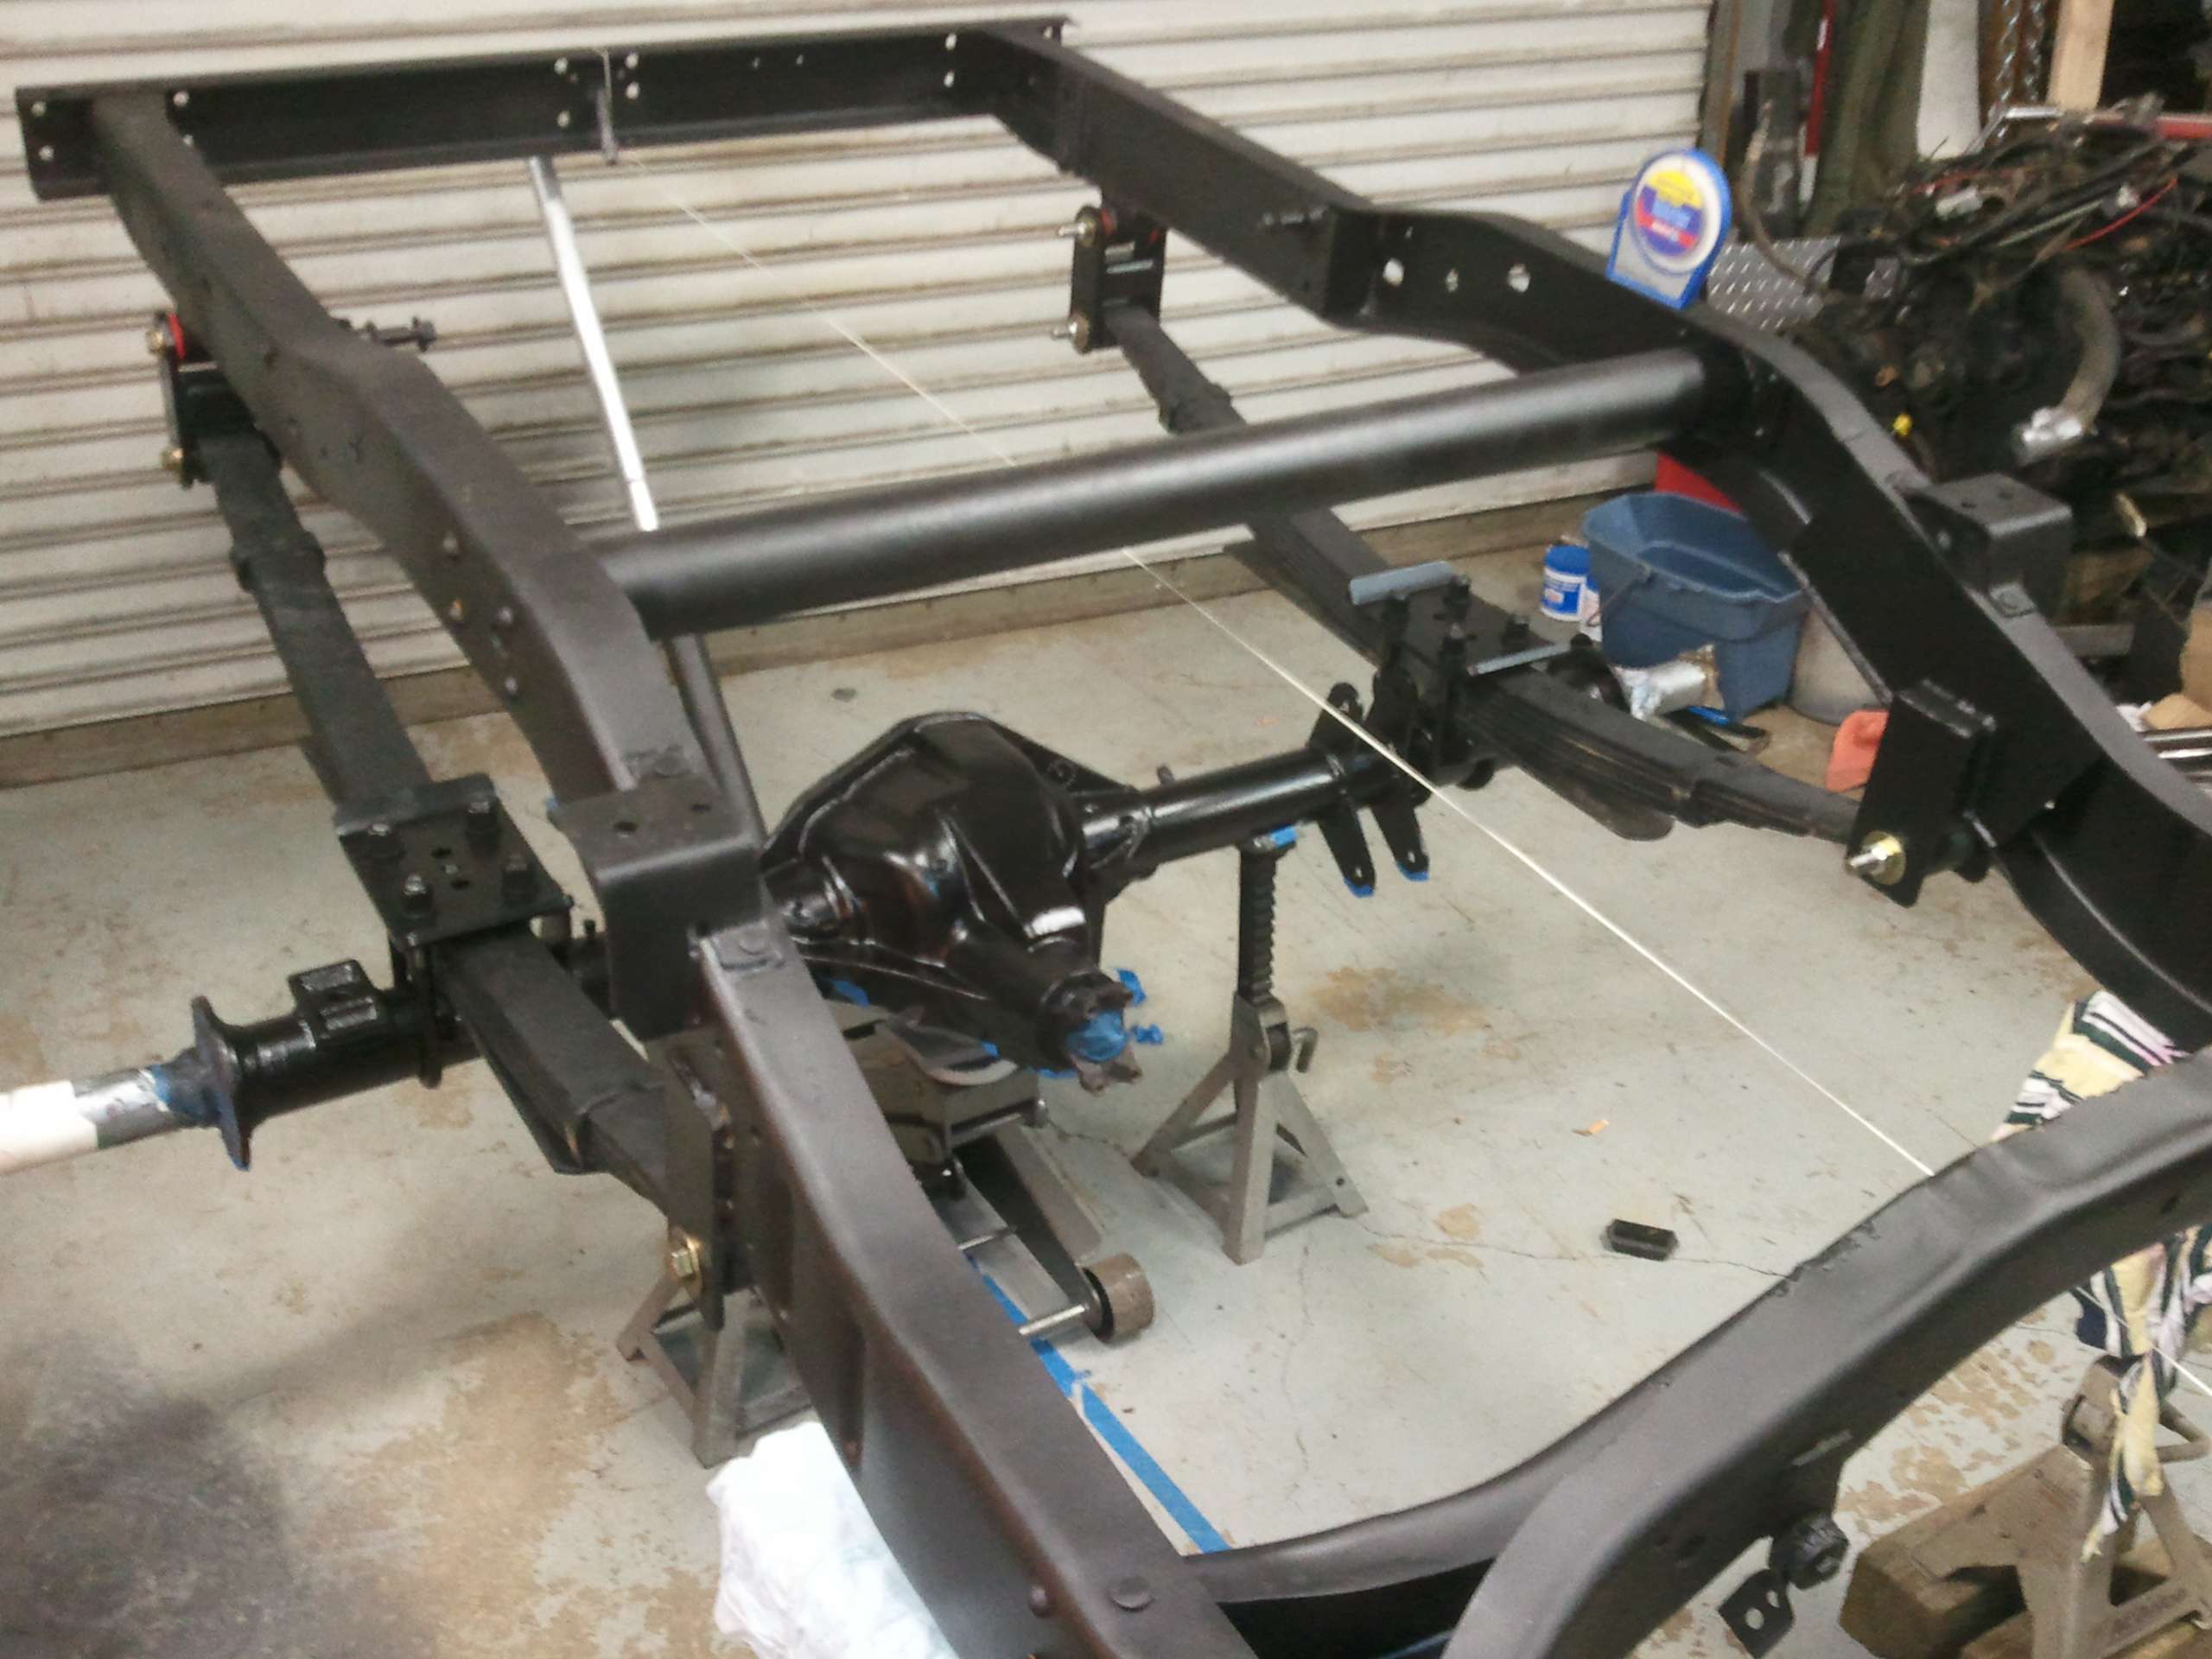
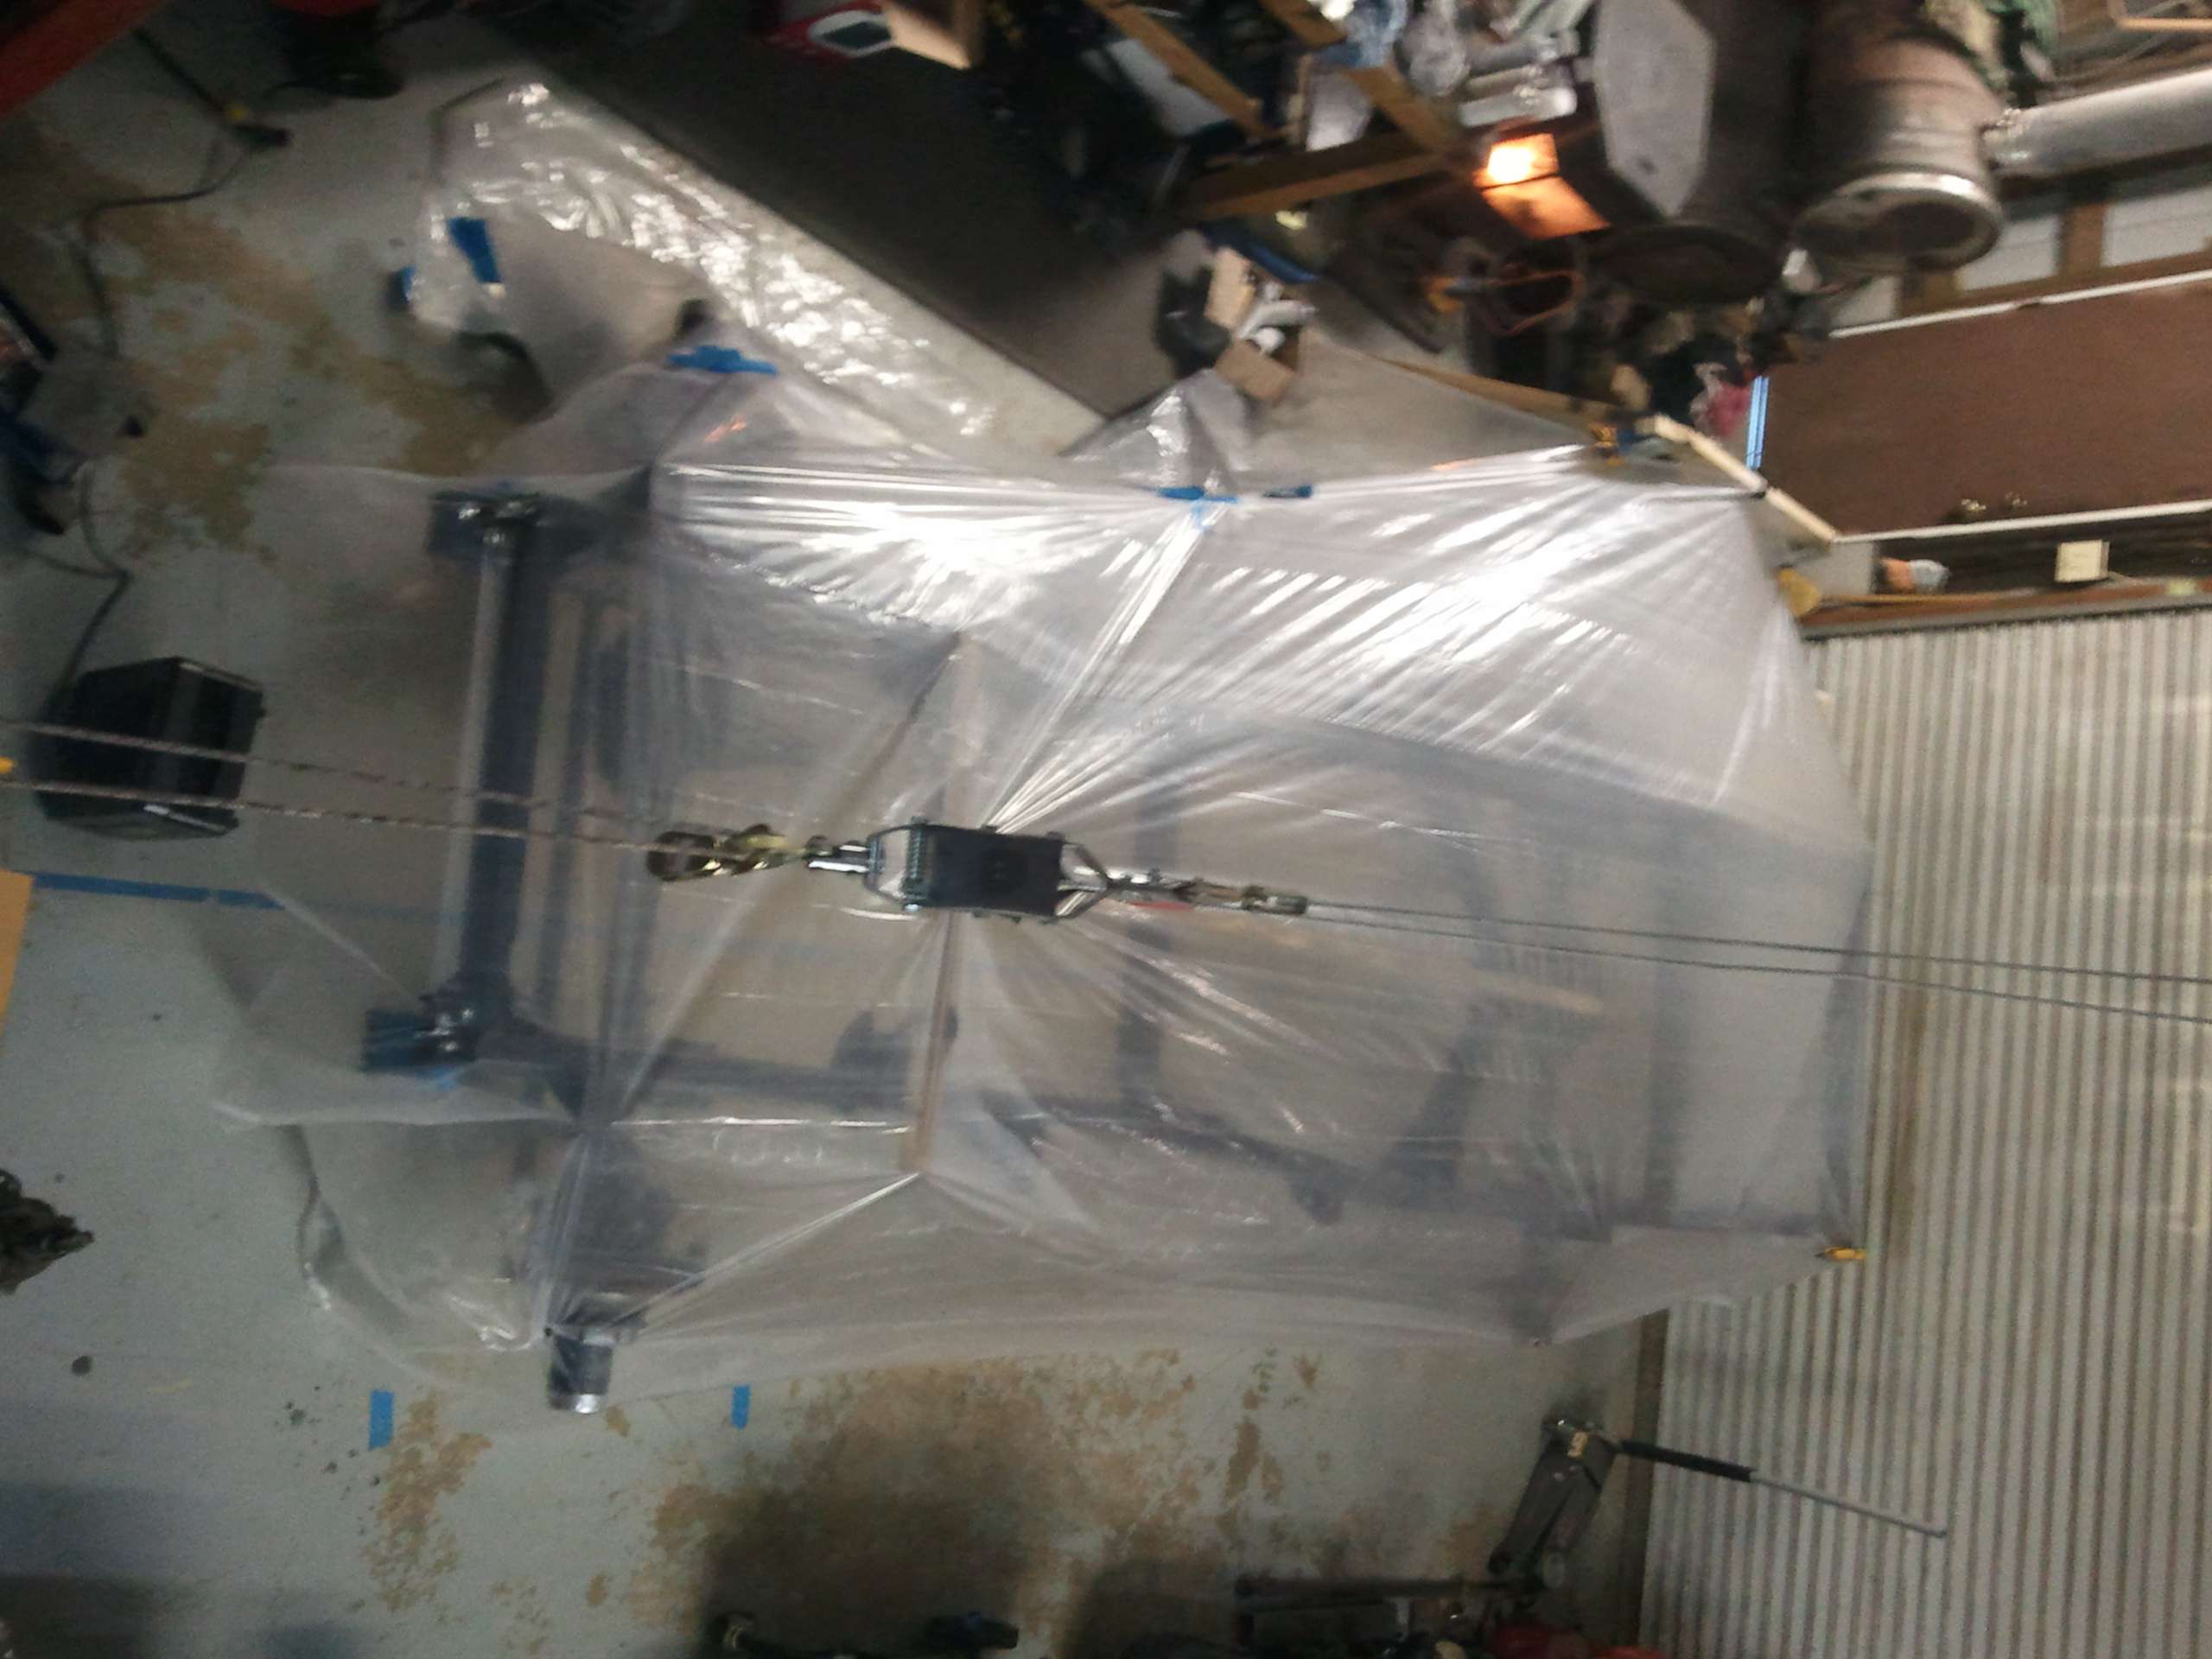
After I got the track bar frame mounts finished I hit them with paint(ZeroRust). Until now I hadn’t put the clearcoat on the frame. Now that major fabrication is done on the frame I finally applied it. I just used rattle cans(4) because this is going to be a work truck. It still turned out pretty good. I was mostly after the UV protection and an extra layer of toughness over the ZeroRust, although ZeroRust is pretty freakin' tough by itself once it's cured.

The pellet stove was never meant to “heat” the shop so all it does is keep the humidity down and the temp 10 to 15 degrees above the outside temp. However, by building enclosures over things I’ve painted I’ve used it to cure parts. After the frame was dry to the touch I covered it with an opening made with the saw horse to direct air under the plastic. The temp rose to 87 degrees. I then let it sit for 24 hours. After that I finished installing the track bars, rear brakes, and shocks.
Image

Image
Last edited by Resbum on Sat Apr 06, 2013 6:44 am, edited 1 time in total.
Originally Posted by Resbum
"What year is my truck?... Which part?" Build thread- http://www.fsjnetwork.com/forum/viewtop ... 290#p18290
User avatar

Topic author
Resbum
Posts: 466
Joined: Fri Jun 08, 2012 9:45 am
Location: North East Oregon

Re: 1970 Gladiator 1 Ton 6BT 12V Cummins Build

Post by Resbum »

.
I was asked where I get my ZeroRust

I get the ZeroRust from one of the local stores here. One day I was in there getting some other things and they had this sample sitting on the counter. It was a piece of diamond plate coated with it. When no one was looking I pulled out my keys and tried to scratch a corner of it. Didn't even leave a mark. That impressed me enough I went home a looked it up on the net. I'll let people come to their own conclusions, but I'm very pleased and impressed with the stuff.
Last edited by Resbum on Sat Apr 06, 2013 6:45 am, edited 1 time in total.
Originally Posted by Resbum
"What year is my truck?... Which part?" Build thread- http://www.fsjnetwork.com/forum/viewtop ... 290#p18290
User avatar

Topic author
Resbum
Posts: 466
Joined: Fri Jun 08, 2012 9:45 am
Location: North East Oregon

Re: 1970 Gladiator 1 Ton 6BT 12V Cummins Build

Post by Resbum »

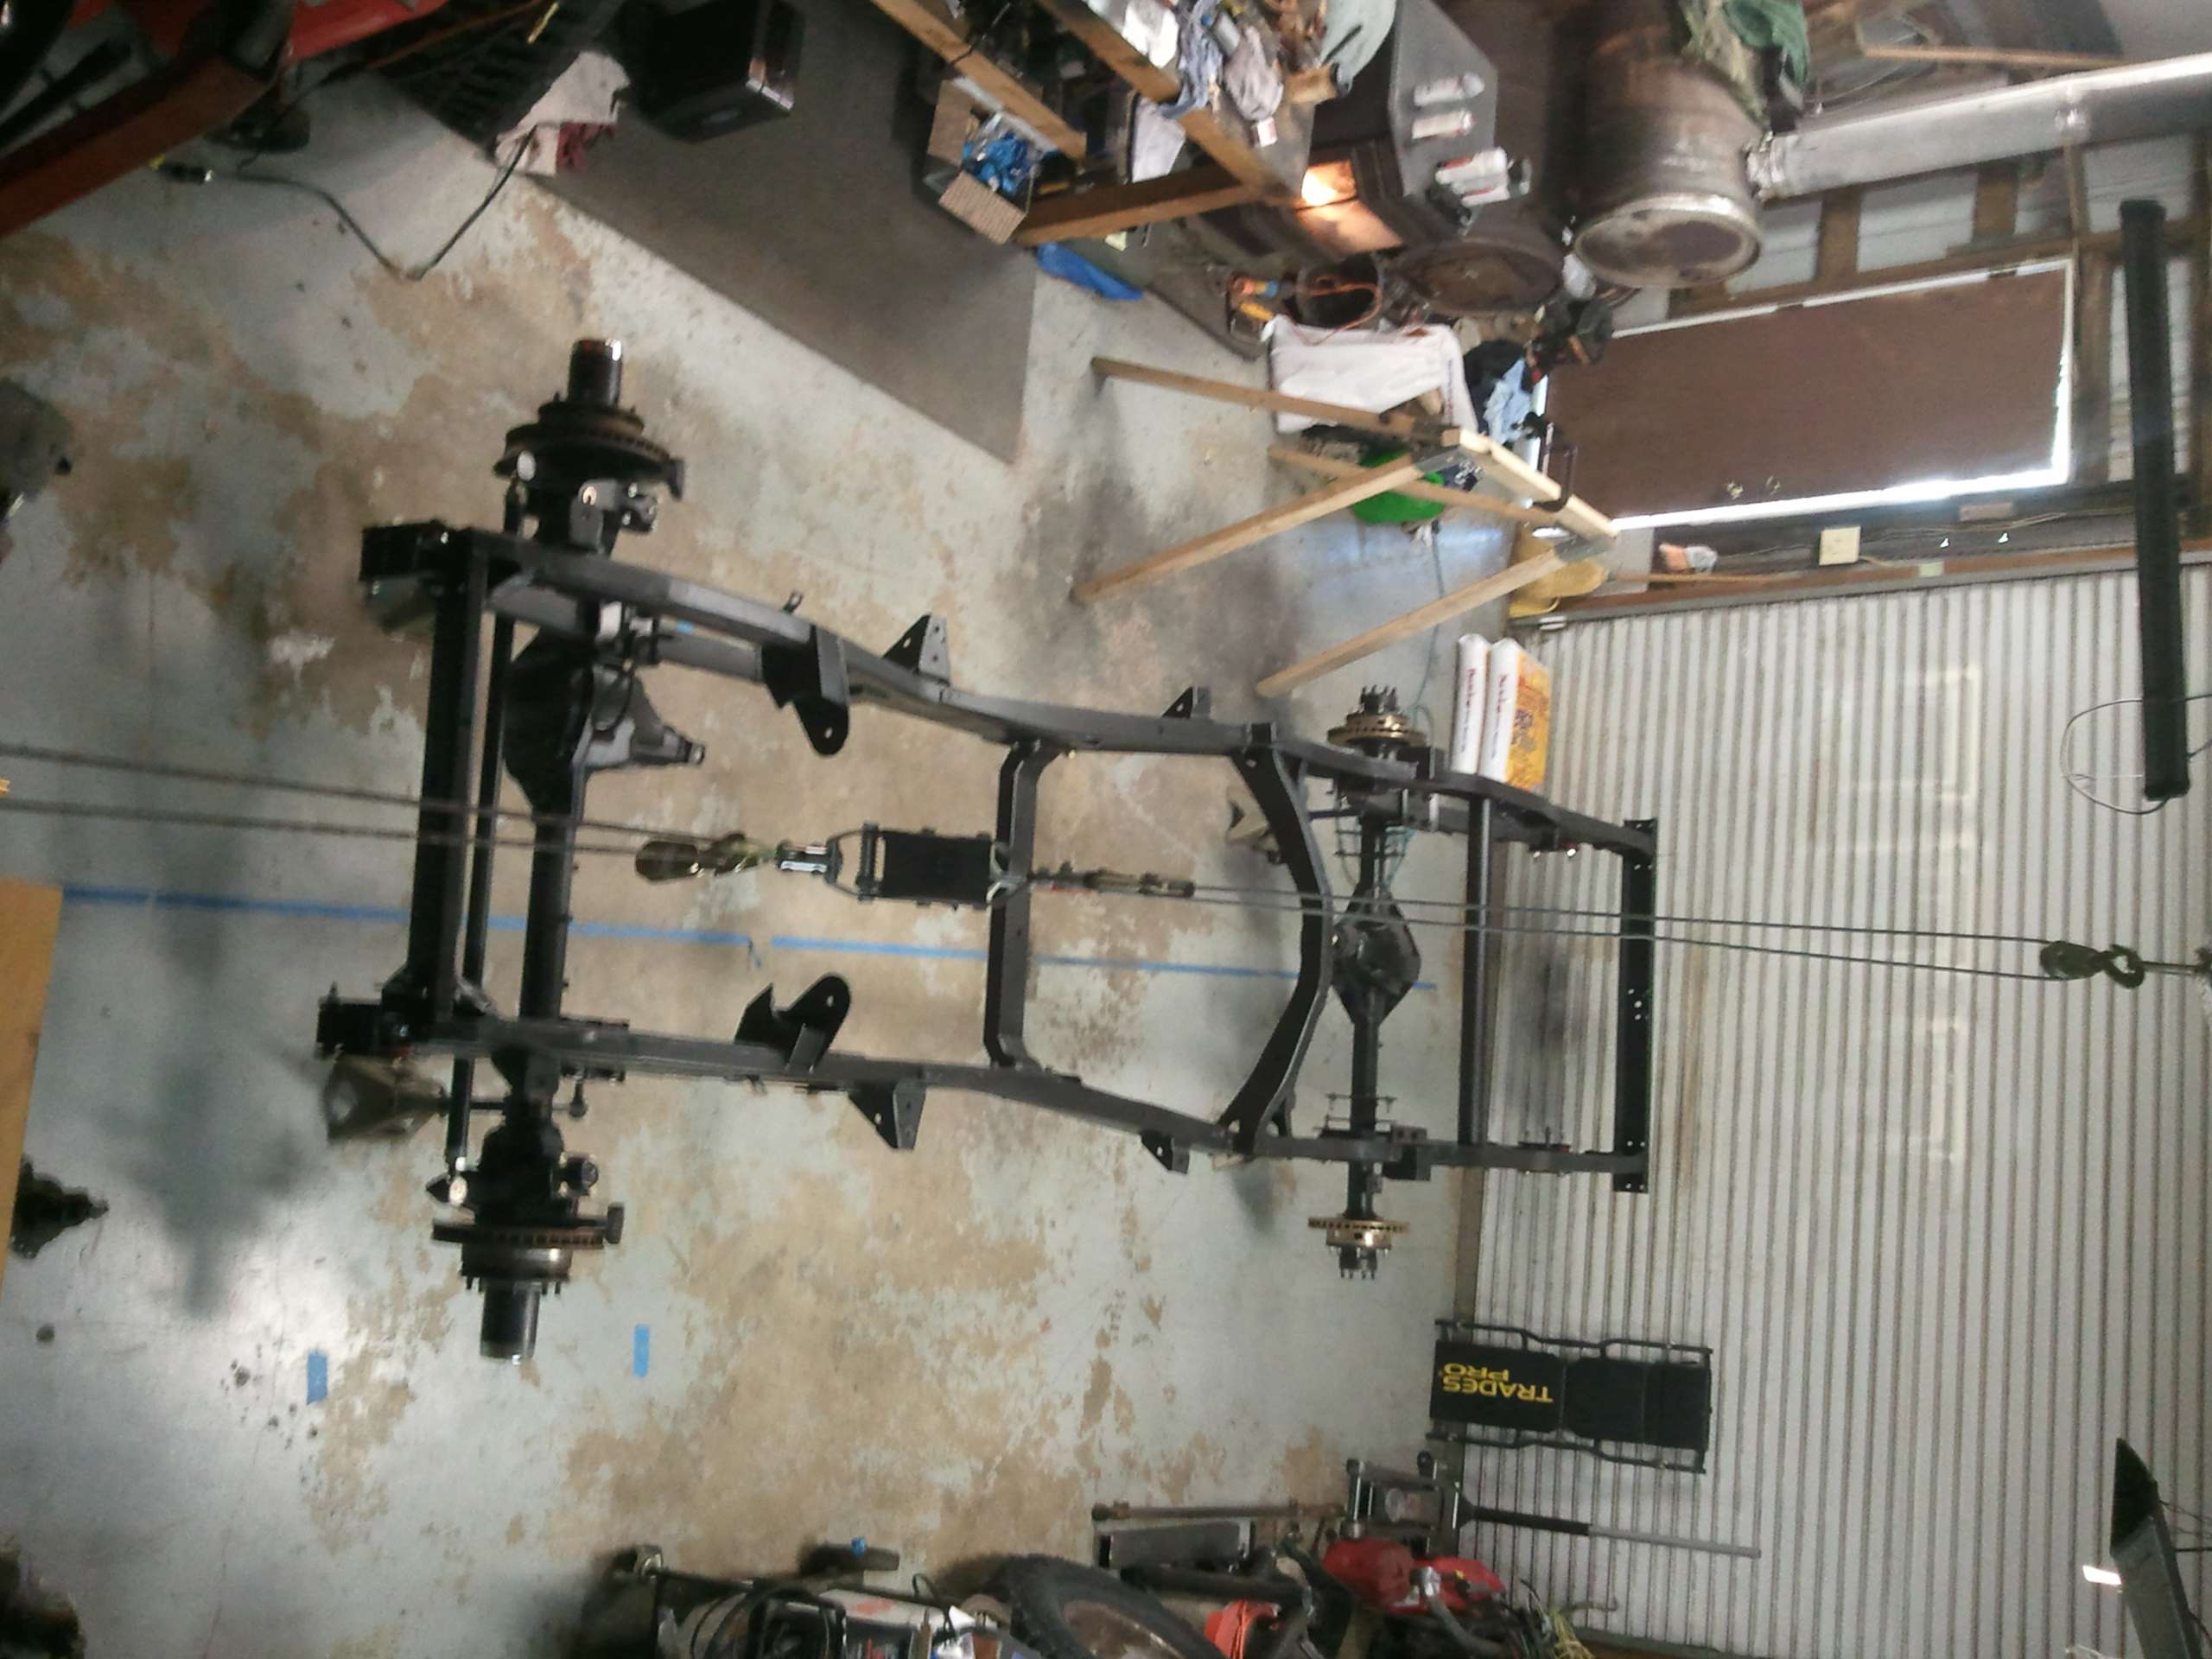
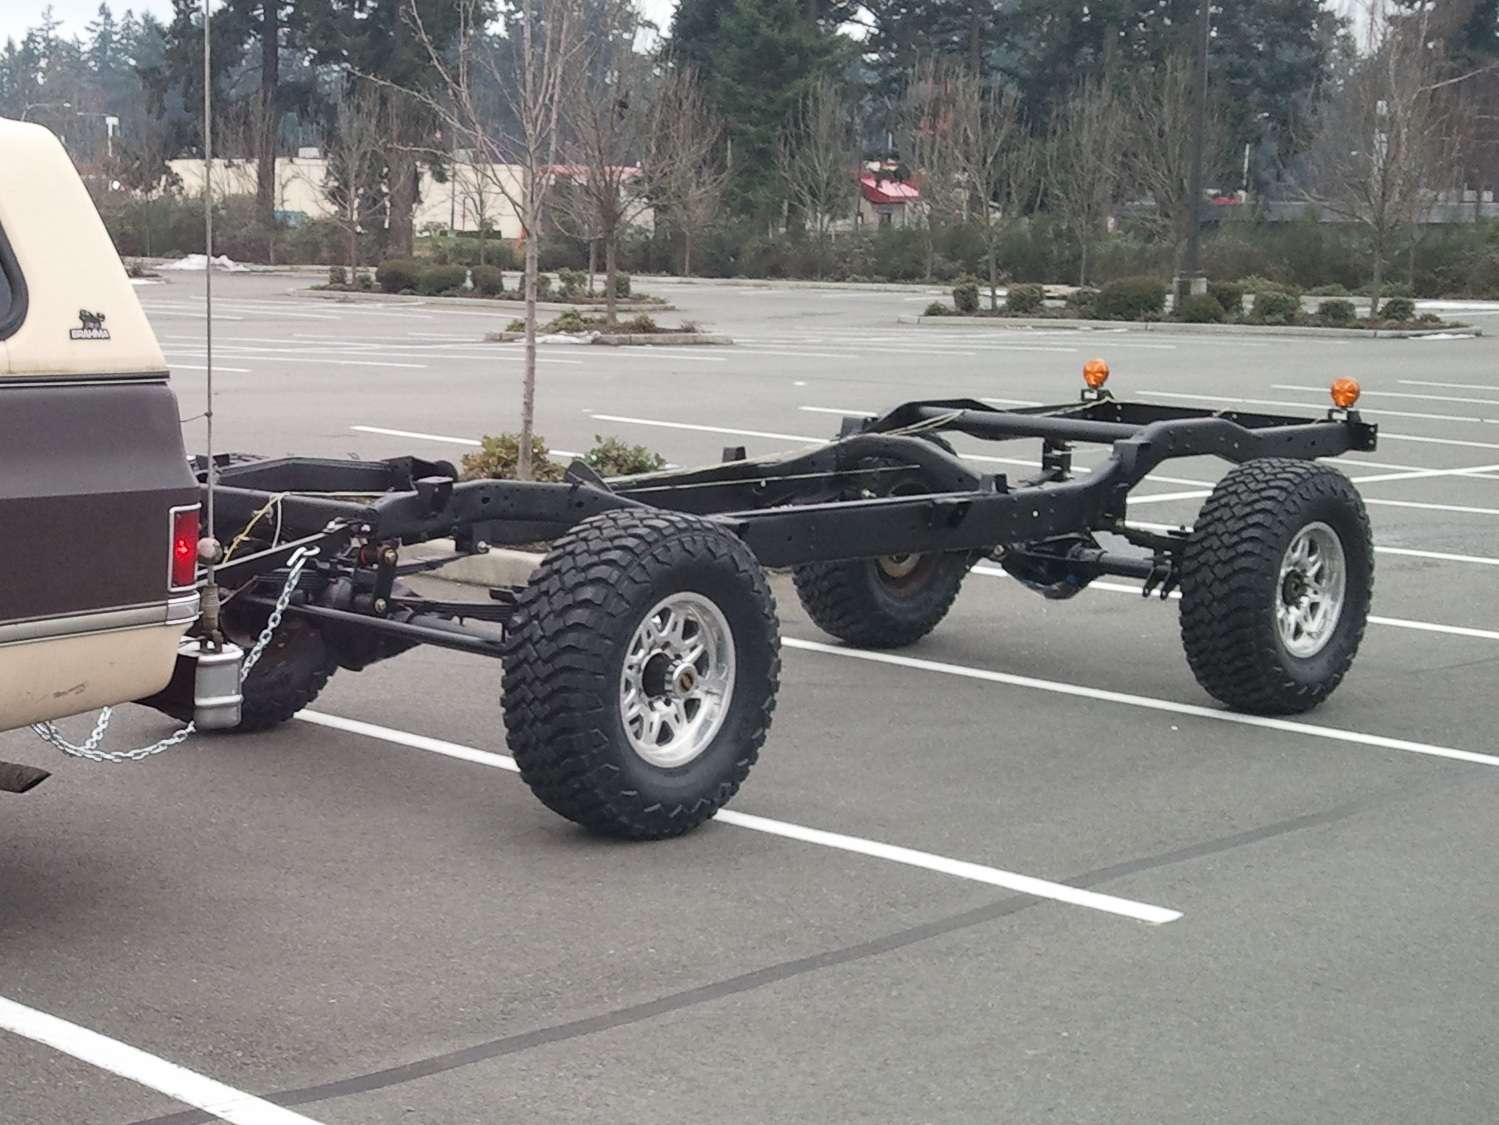
After seven months I finally have it back to a rolling chassis. Early one Saturday morning I towed in down to the local Firestone a friend manages and his guys did a thorough alignment check on everything they could possibly measure. Everything came out perfect!!! The thrust angle between the front and rear axles was only out by .06 degrees, the axles are off centerline of the frame by less than an 1/8 of an inch, and the caster was exactly where I calculated it. Not bad for nothing more than a homemade jig, a homemade plumb bob, a water level, tape marks on the floor, and being anal compulsive about measuring on the diagonals for square while hanging the new axle/spring mounts. Man, my ego was so swelled up that day I was probably sickening to be around. I figure the results were worth one day of gloating.
Image

Image
Last edited by Resbum on Thu Dec 29, 2016 2:45 pm, edited 1 time in total.
Originally Posted by Resbum
"What year is my truck?... Which part?" Build thread- http://www.fsjnetwork.com/forum/viewtop ... 290#p18290
User avatar

Topic author
Resbum
Posts: 466
Joined: Fri Jun 08, 2012 9:45 am
Location: North East Oregon

Re: 1970 Gladiator 1 Ton 6BT 12V Cummins Build

Post by Resbum »

.
Next, make the track bars. The cab is out getting the sheetmetal work done. I'll post more when I have something to update.

Resbum

P.S.- I've documented the build with over 1500 pictures, so far. As time permits, I could do detailed write-ups of certain parts of the build if anyone wants more info.
Last edited by Resbum on Tue Apr 09, 2013 6:37 am, edited 3 times in total.
Originally Posted by Resbum
"What year is my truck?... Which part?" Build thread- http://www.fsjnetwork.com/forum/viewtop ... 290#p18290
User avatar

Topic author
Resbum
Posts: 466
Joined: Fri Jun 08, 2012 9:45 am
Location: North East Oregon

Re: 1970 Gladiator 1 Ton 6BT 12V Cummins Build

Post by Resbum »

Quote:
________________________________________
Originally Posted by tgreening
It nice to see someone doing a buildup like this who is actually doing it, instead of paying to have the bulk of the work done and passing it off as their own. I can only wish I was making the kind of progress you're making. Mine tends to run in spurts, and tiny little spurts at that. :)

________________________________________

tgreening actually kind of hit on it. 36 years ago I got my first project. It was a motorcycle that came to me as a frame and 3 boxes of parts. I was 14 and my dad bought me some basic tools and helped me get through it. For the next 33 years I was never able to do a project the way I really wanted to. Life, time, work, and finances always had to come first. Every motorcycle, autoXing, and 4X4 project always had to be a compromise.

I'm 49 now, divorced, and retired from the military back in March 2011. I decided after 30 years of working nobody but God was going to tell me what to do for a year or two. This project has been the first use of that time. I wander to the shop every day. Sometimes I work on it 3 hours, other times, like yesterday, I work on it 13 hours. Now that I've committed to going to the Ouray KOA Jeep Meet in July I see more of the 13 hour days in my near future. :rolleyes:

Edit- The above referred to Ouray 2012, now I’m on a mission to make Ouray 2013. haha

I originally was just going to rebuild the Buick 350 and Turbo 400 that came in the truck, but the trans was a basket case and it's kinda morf'ed into what you see now. If I'd been married when I started this I'd be divorced now.:lol: I count myself extremely lucky that all the pieces fell into place that's allowed me to do this. With all my hobbies over the years I've taken a lot of knowledge from forums because others made the effort to post info. If anyone can learn things from this thread it's just my way of paying that effort forward.

Resbum
Last edited by Resbum on Tue Apr 09, 2013 6:48 am, edited 2 times in total.
Originally Posted by Resbum
"What year is my truck?... Which part?" Build thread- http://www.fsjnetwork.com/forum/viewtop ... 290#p18290
User avatar

Topic author
Resbum
Posts: 466
Joined: Fri Jun 08, 2012 9:45 am
Location: North East Oregon

Re: 1970 Gladiator 1 Ton 6BT 12V Cummins Build

Post by Resbum »

Quote:
________________________________________
Originally Posted by budojeepr
... Mind sharing the source for that lovely radiator?

________________________________________

It's a Flex-a-lite: Model http://www.flex-a-lite.com/auto/html/58295.html
Here's the ebay store I got it at.
http://stores.ebay.com/cascadesalescompany
I got it for about half price. I am extremely wary of ebay purchases, but the seller described it as a Flex-a-lite that passed all functional quality checks for performance, but was blemished in the manufacturing process. I noticed they were in Milton, WA, about 15 miles from me, so I asked the seller if I could pick it up to save shipping and they agreed. I drove over there and it turns out to be the Flex-a-lite manufacturing plant. They use that ebay store front to sell their blemished goods. My blemishes turned out to be 20 slightly bent cooling fins (While fabricating I also noticed it's about 1/4" out of square). Not bad for 1/2 price. While I was there I picked up a remote filter kit, trans cooler, oil cooler, and power steering/hydraboost cooler.

Quote:
________________________________________
Originally Posted by The PIG Smith
Tell us more about those wheels.
What brand, model and size those are?
What size tire is mounted on those wheels?

________________________________________
The wheels are 17X10 Weld Racing forged aluminum wheels I bought from a craigslister who wanted to step up to 18" rims. I got them for $200. He also turned out to be the guy who told me of an excellent Cummins mechanic who will help me do the engine when I get to that point of the build. God bless craigslist. :thumbsup:

The tires are 35X12.5-17 Hankook Dynapro M/T's that I had siped. I never realized how limited the selection is for Load Range E M/T's until I went looking for them. My 5th wheel has a gross weight of 18,000lbs and a max tongue weight of 2,800lbs. Although my truck will only haul it for maybe 2% of its life it still needs to be able to do it. I read hundreds of customer reviews online before commiting to these tires. They get great reviews from people who haul heavy. Luckily, they get good reviews for also being quiet and how they wear.

I've mentioned craigslist a few times. I'm barely able to afford this project. My ego does not require that I have the latest high dollar brand new bling items on my truck. Function comes first, form comes second. If I can get it on craigslist and it's in good shape and doesn't appear stolen I have no trouble buying it used. I also do a lot of price checking for new parts. I have no issue with getting vendors to price match against each other to drive the price down. Brent, at BJ's Offroad, has been great at helping me out with price matching. He has also been understanding when I can buy something cheaper somewhere else.

Resbum
Last edited by Resbum on Sat Apr 06, 2013 6:47 am, edited 1 time in total.
Originally Posted by Resbum
"What year is my truck?... Which part?" Build thread- http://www.fsjnetwork.com/forum/viewtop ... 290#p18290
User avatar

Topic author
Resbum
Posts: 466
Joined: Fri Jun 08, 2012 9:45 am
Location: North East Oregon

Re: 1970 Gladiator 1 Ton 6BT 12V Cummins Build

Post by Resbum »

.
I want to thank you all for the positive feedback so far. I'm also open to suggestions and negative feedback, as long as it comes in a constructive manner.

Quote:_______________________________________
Originally Posted by budojeepr
You got me thinking again about putting in an intercooler...:thumbsup: ...although the location might be in the way of my (as yet nonexistent) A/C evaporator.

________________________________________

budojeepr- Everyone has AC, but onboard compressed air is a little less common.:D There's about 2" between the radiator and the intercooler for the AC evaporator, if you really want it. Me, ...? I'm going with onboard compressed air. I'm going to turn the AC compressor that came on the engine into my air compressor. I have an old LP tank for my storage tank. I'm planning on mounting my trans, oil, and power steering coolers between the radiator and intercooler.

I will say this. Doing the radiator mod was relatively straight forward. The intercooler mod took a lot more thinking, mod'ing, fabricating to finally work.

Resbum
Last edited by Resbum on Sat Apr 06, 2013 6:49 am, edited 2 times in total.
Originally Posted by Resbum
"What year is my truck?... Which part?" Build thread- http://www.fsjnetwork.com/forum/viewtop ... 290#p18290
User avatar

Topic author
Resbum
Posts: 466
Joined: Fri Jun 08, 2012 9:45 am
Location: North East Oregon

Re: 1970 Gladiator 1 Ton 6BT 12V Cummins Build

Post by Resbum »

Track Bar Build

Note- The materials cost as much as some of the really nice track bar kits offered by vendors. I had pretty specific ideas of what I wanted and none of the kits met all those needs. If you find a set you’re relatively happy with you might just buy them and make them fit your needs. Making them from scratch took A LOT MORE than I expected. Six days, instead of three.

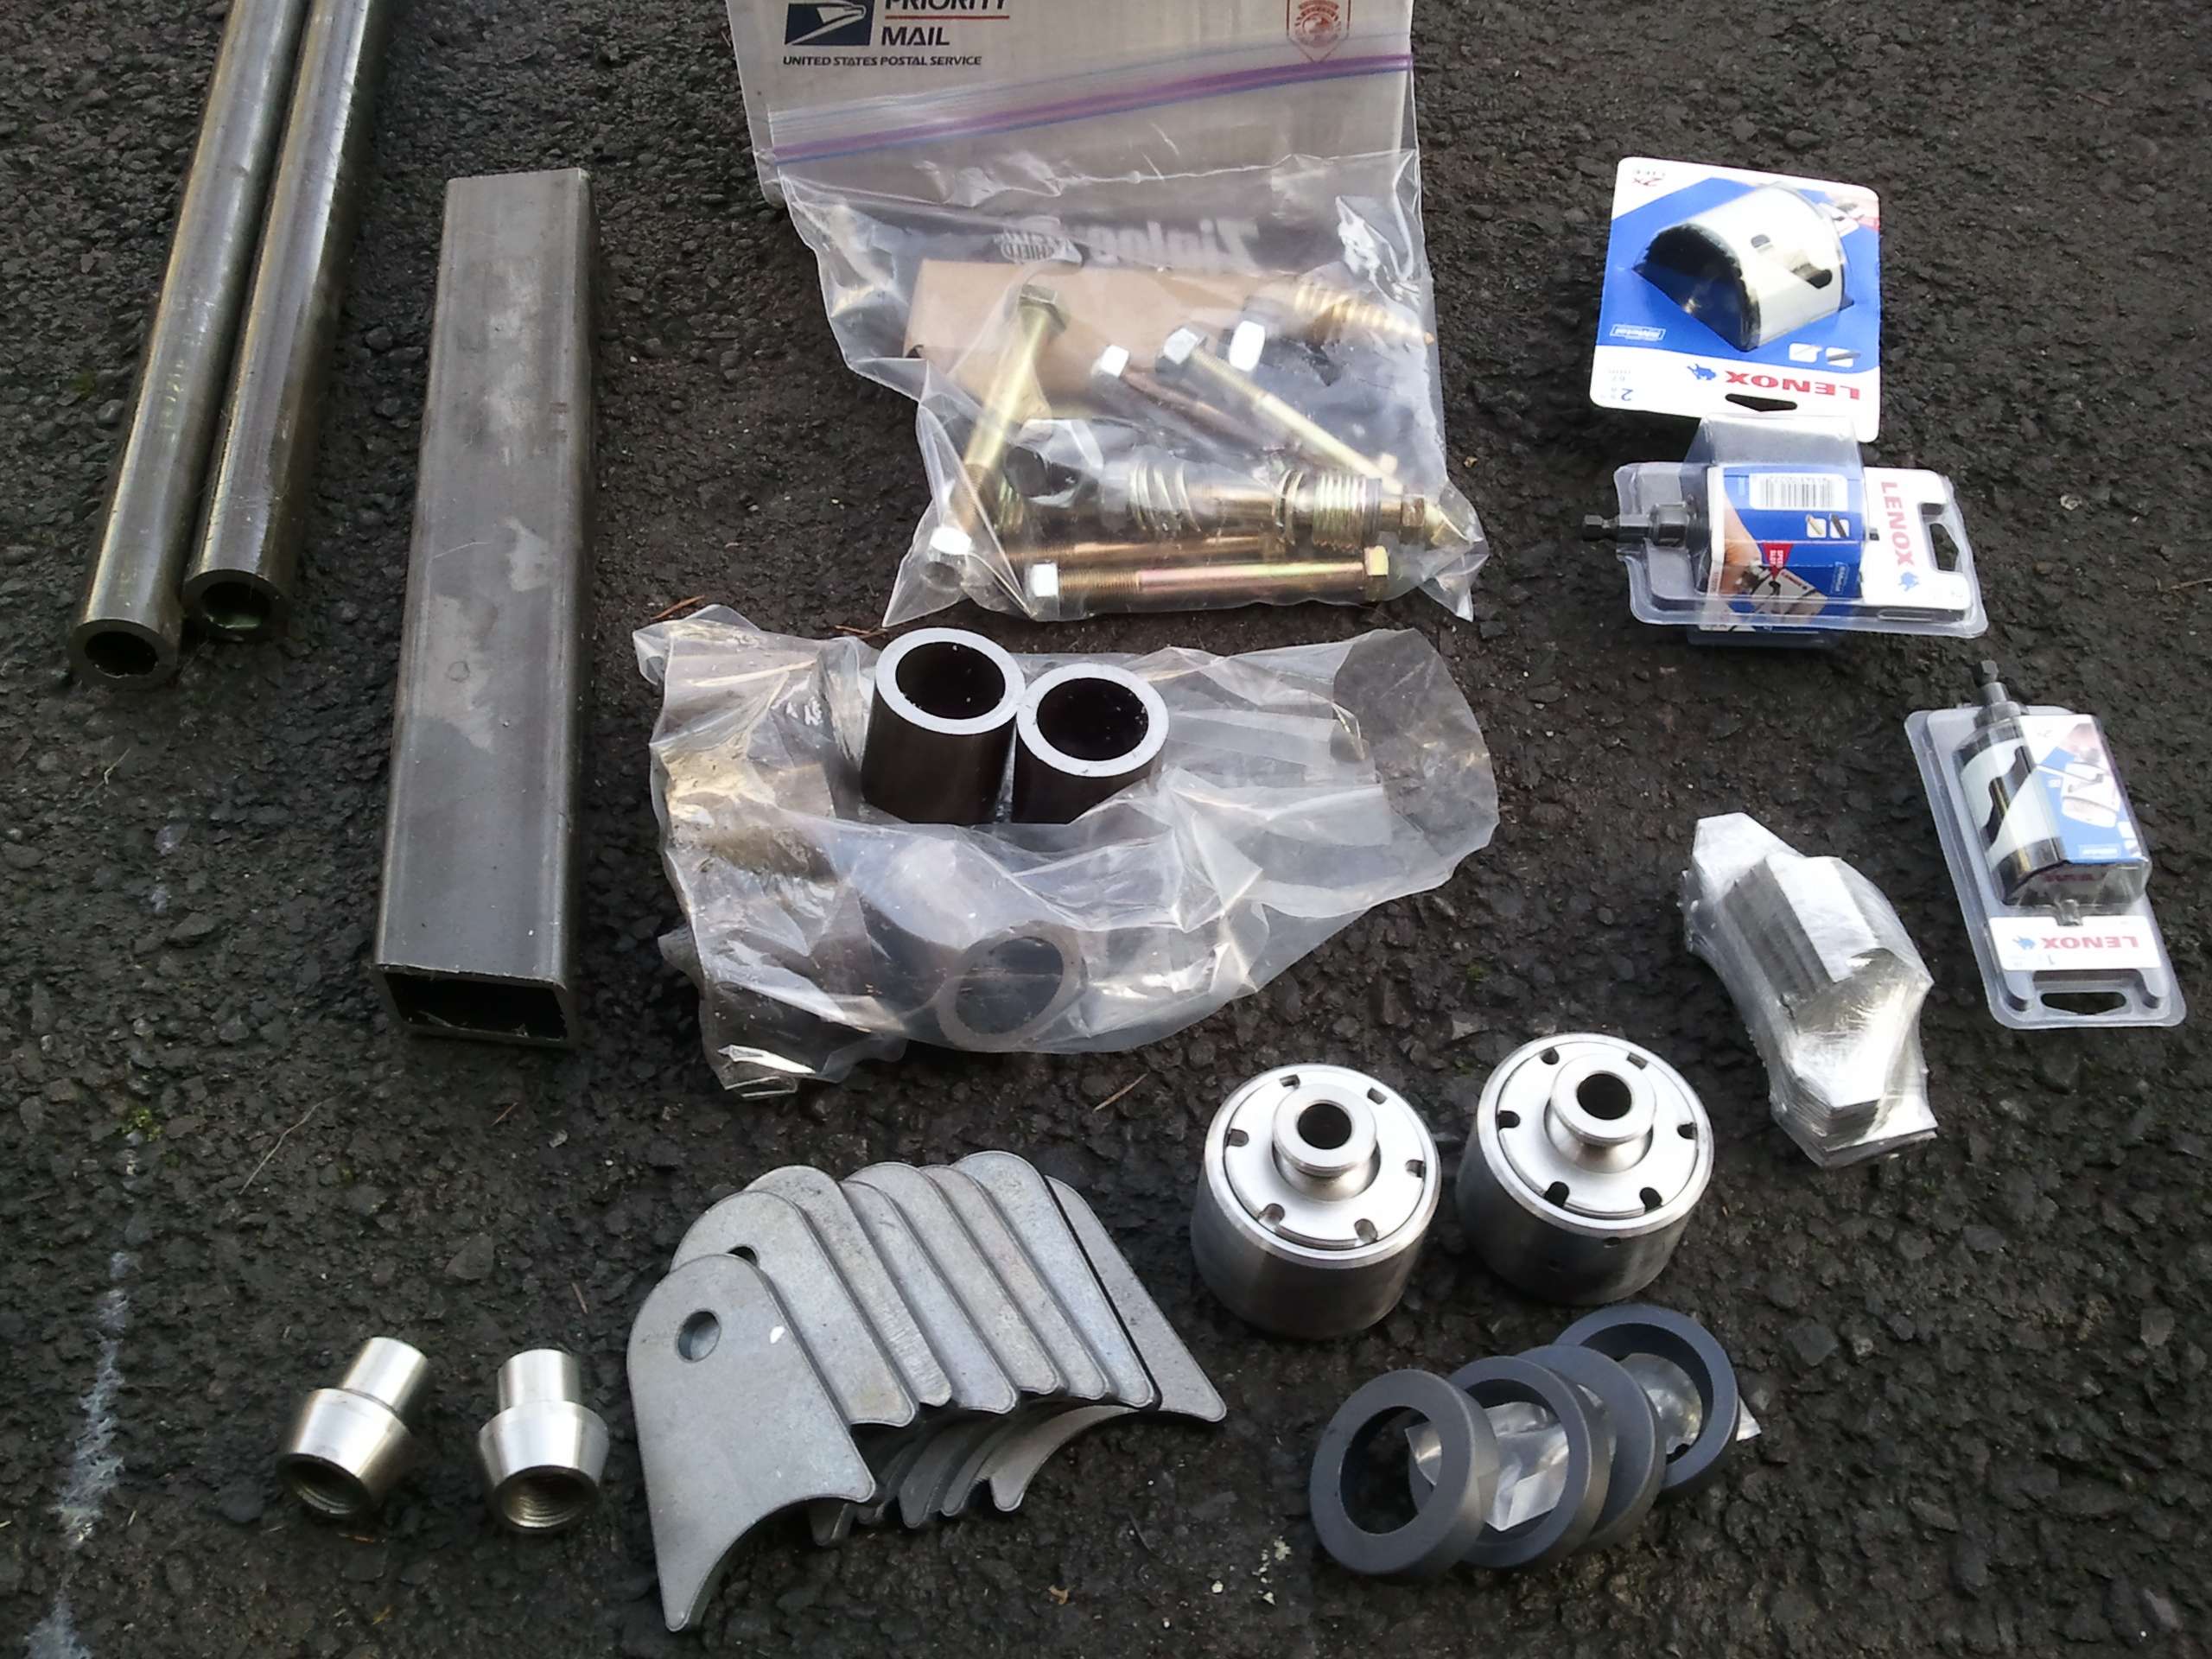
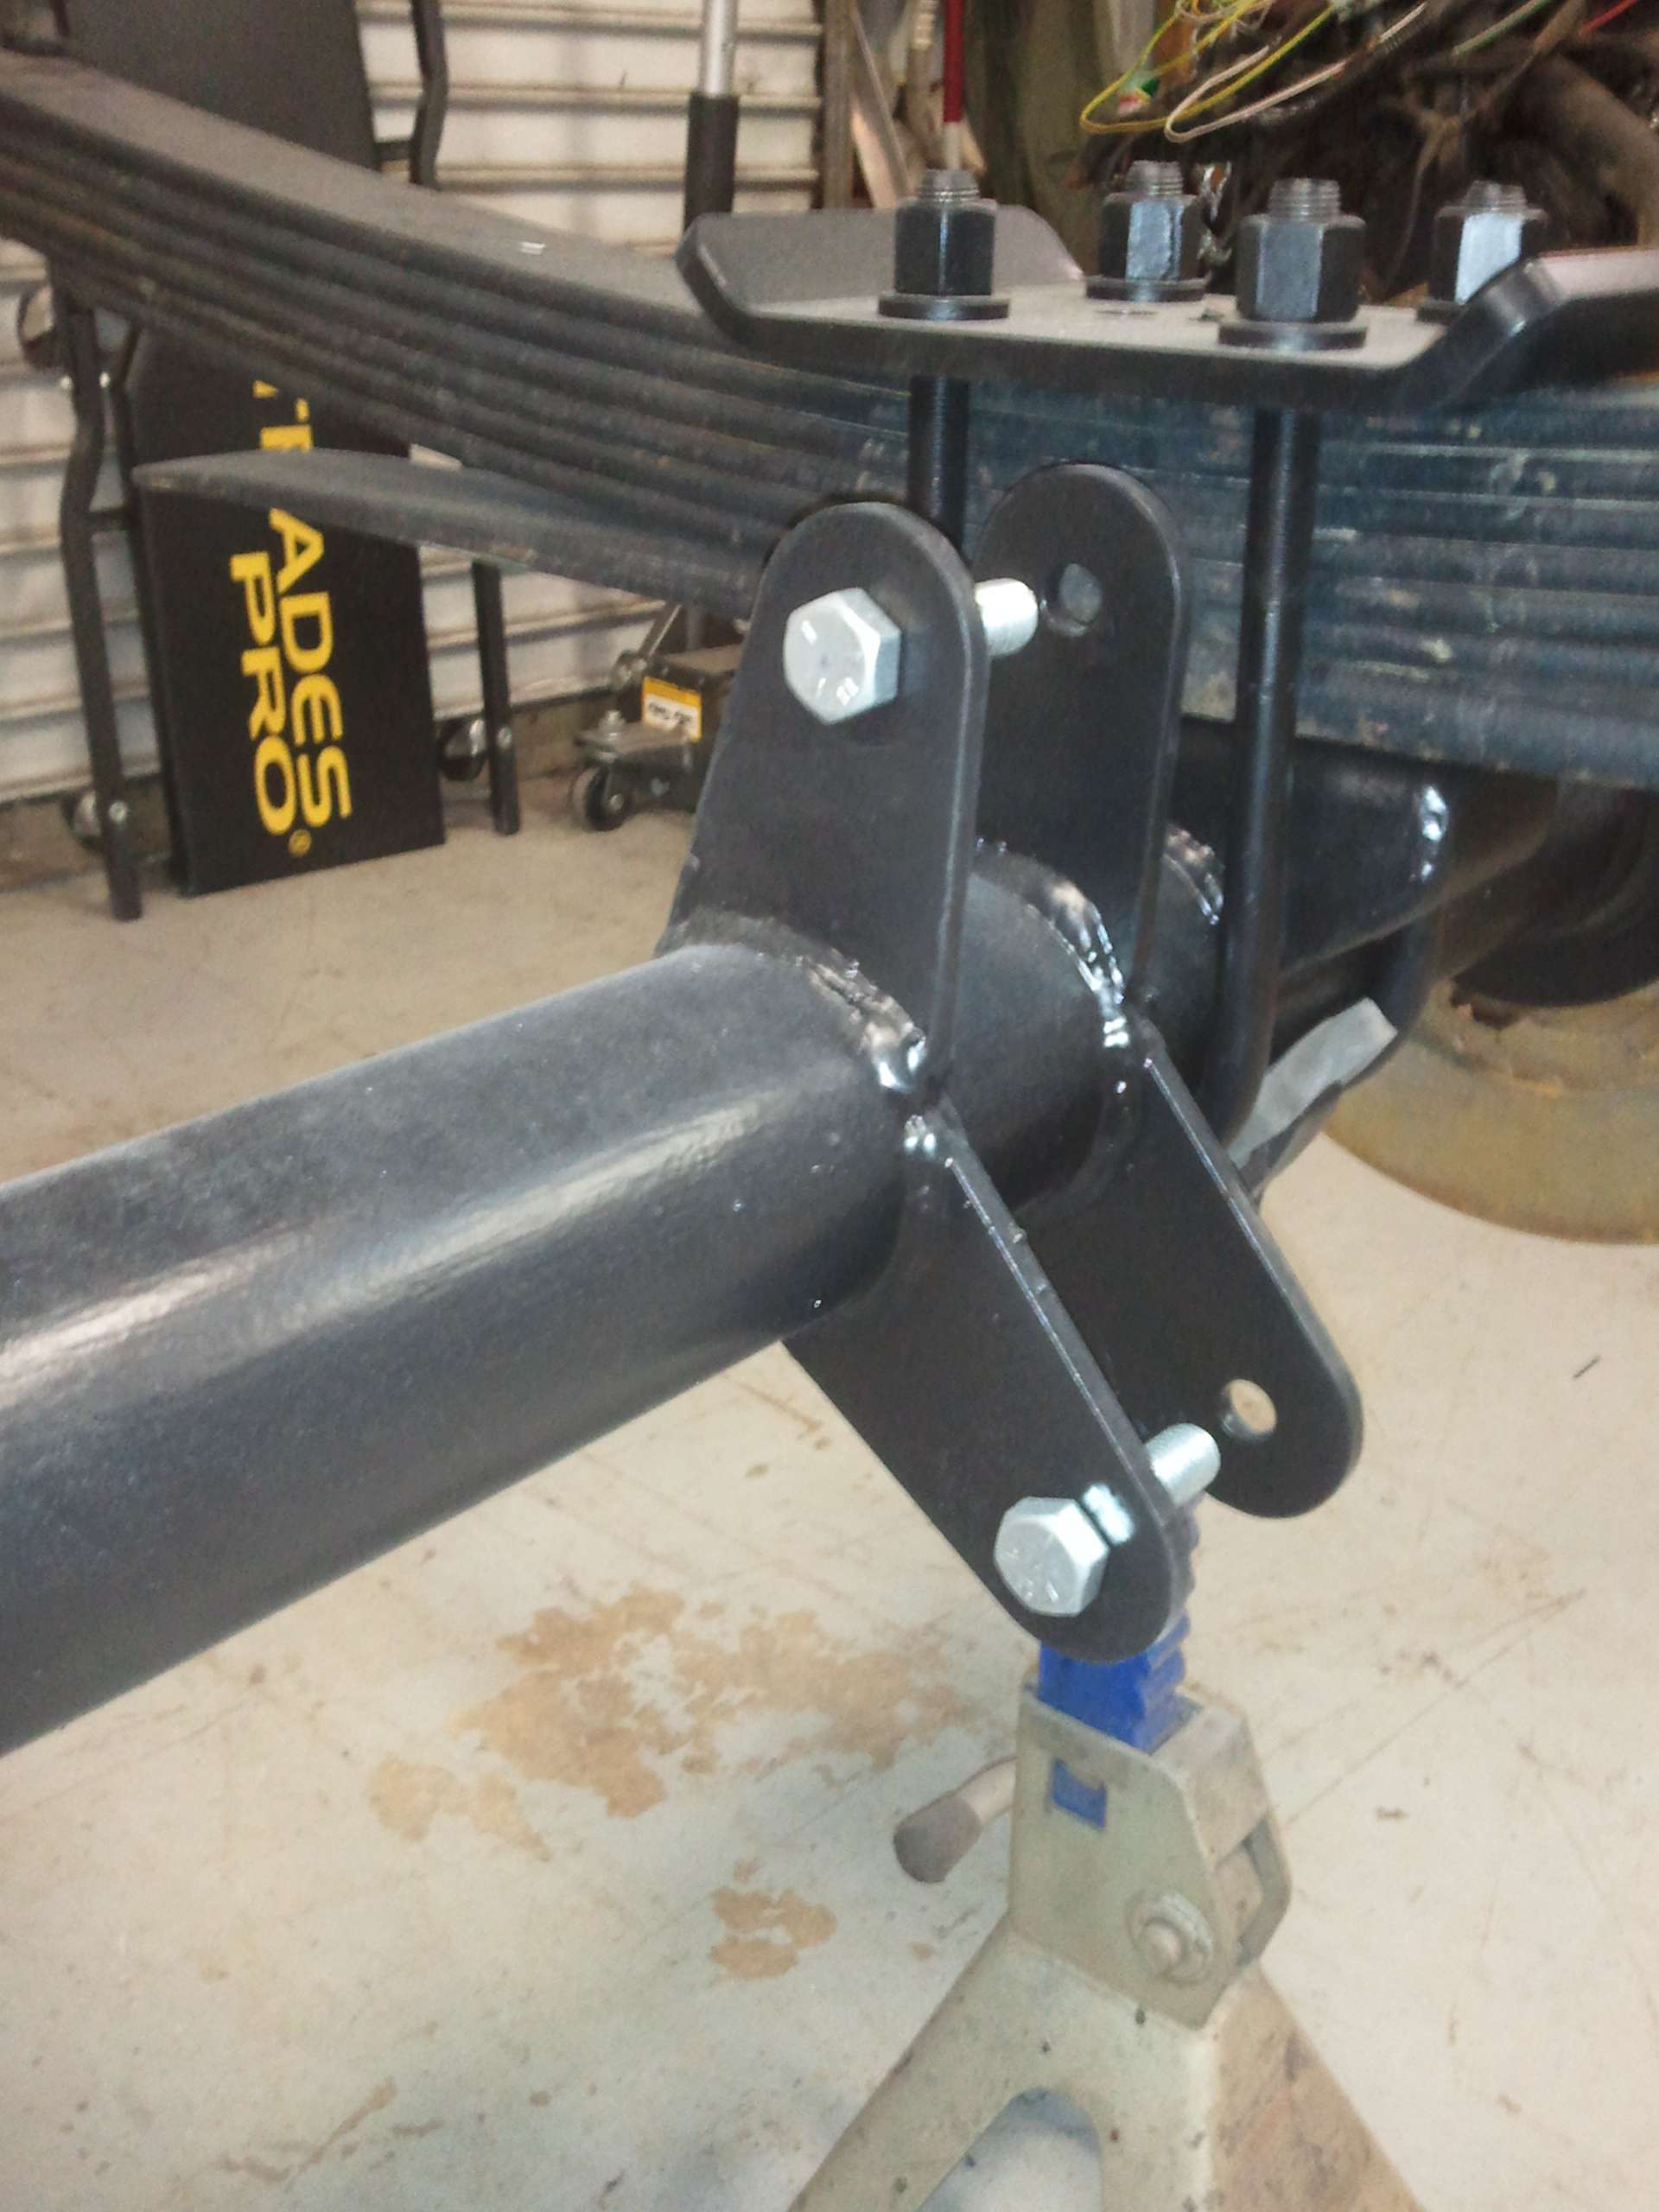
All the parts and pieces, except the Prothane polyurethane bushings. The joints, bar ends, mounts, and tabs are from Ballistic Fabrication. The tubing is 1 ½” & 2”, ¼” wall, DOM.
Image

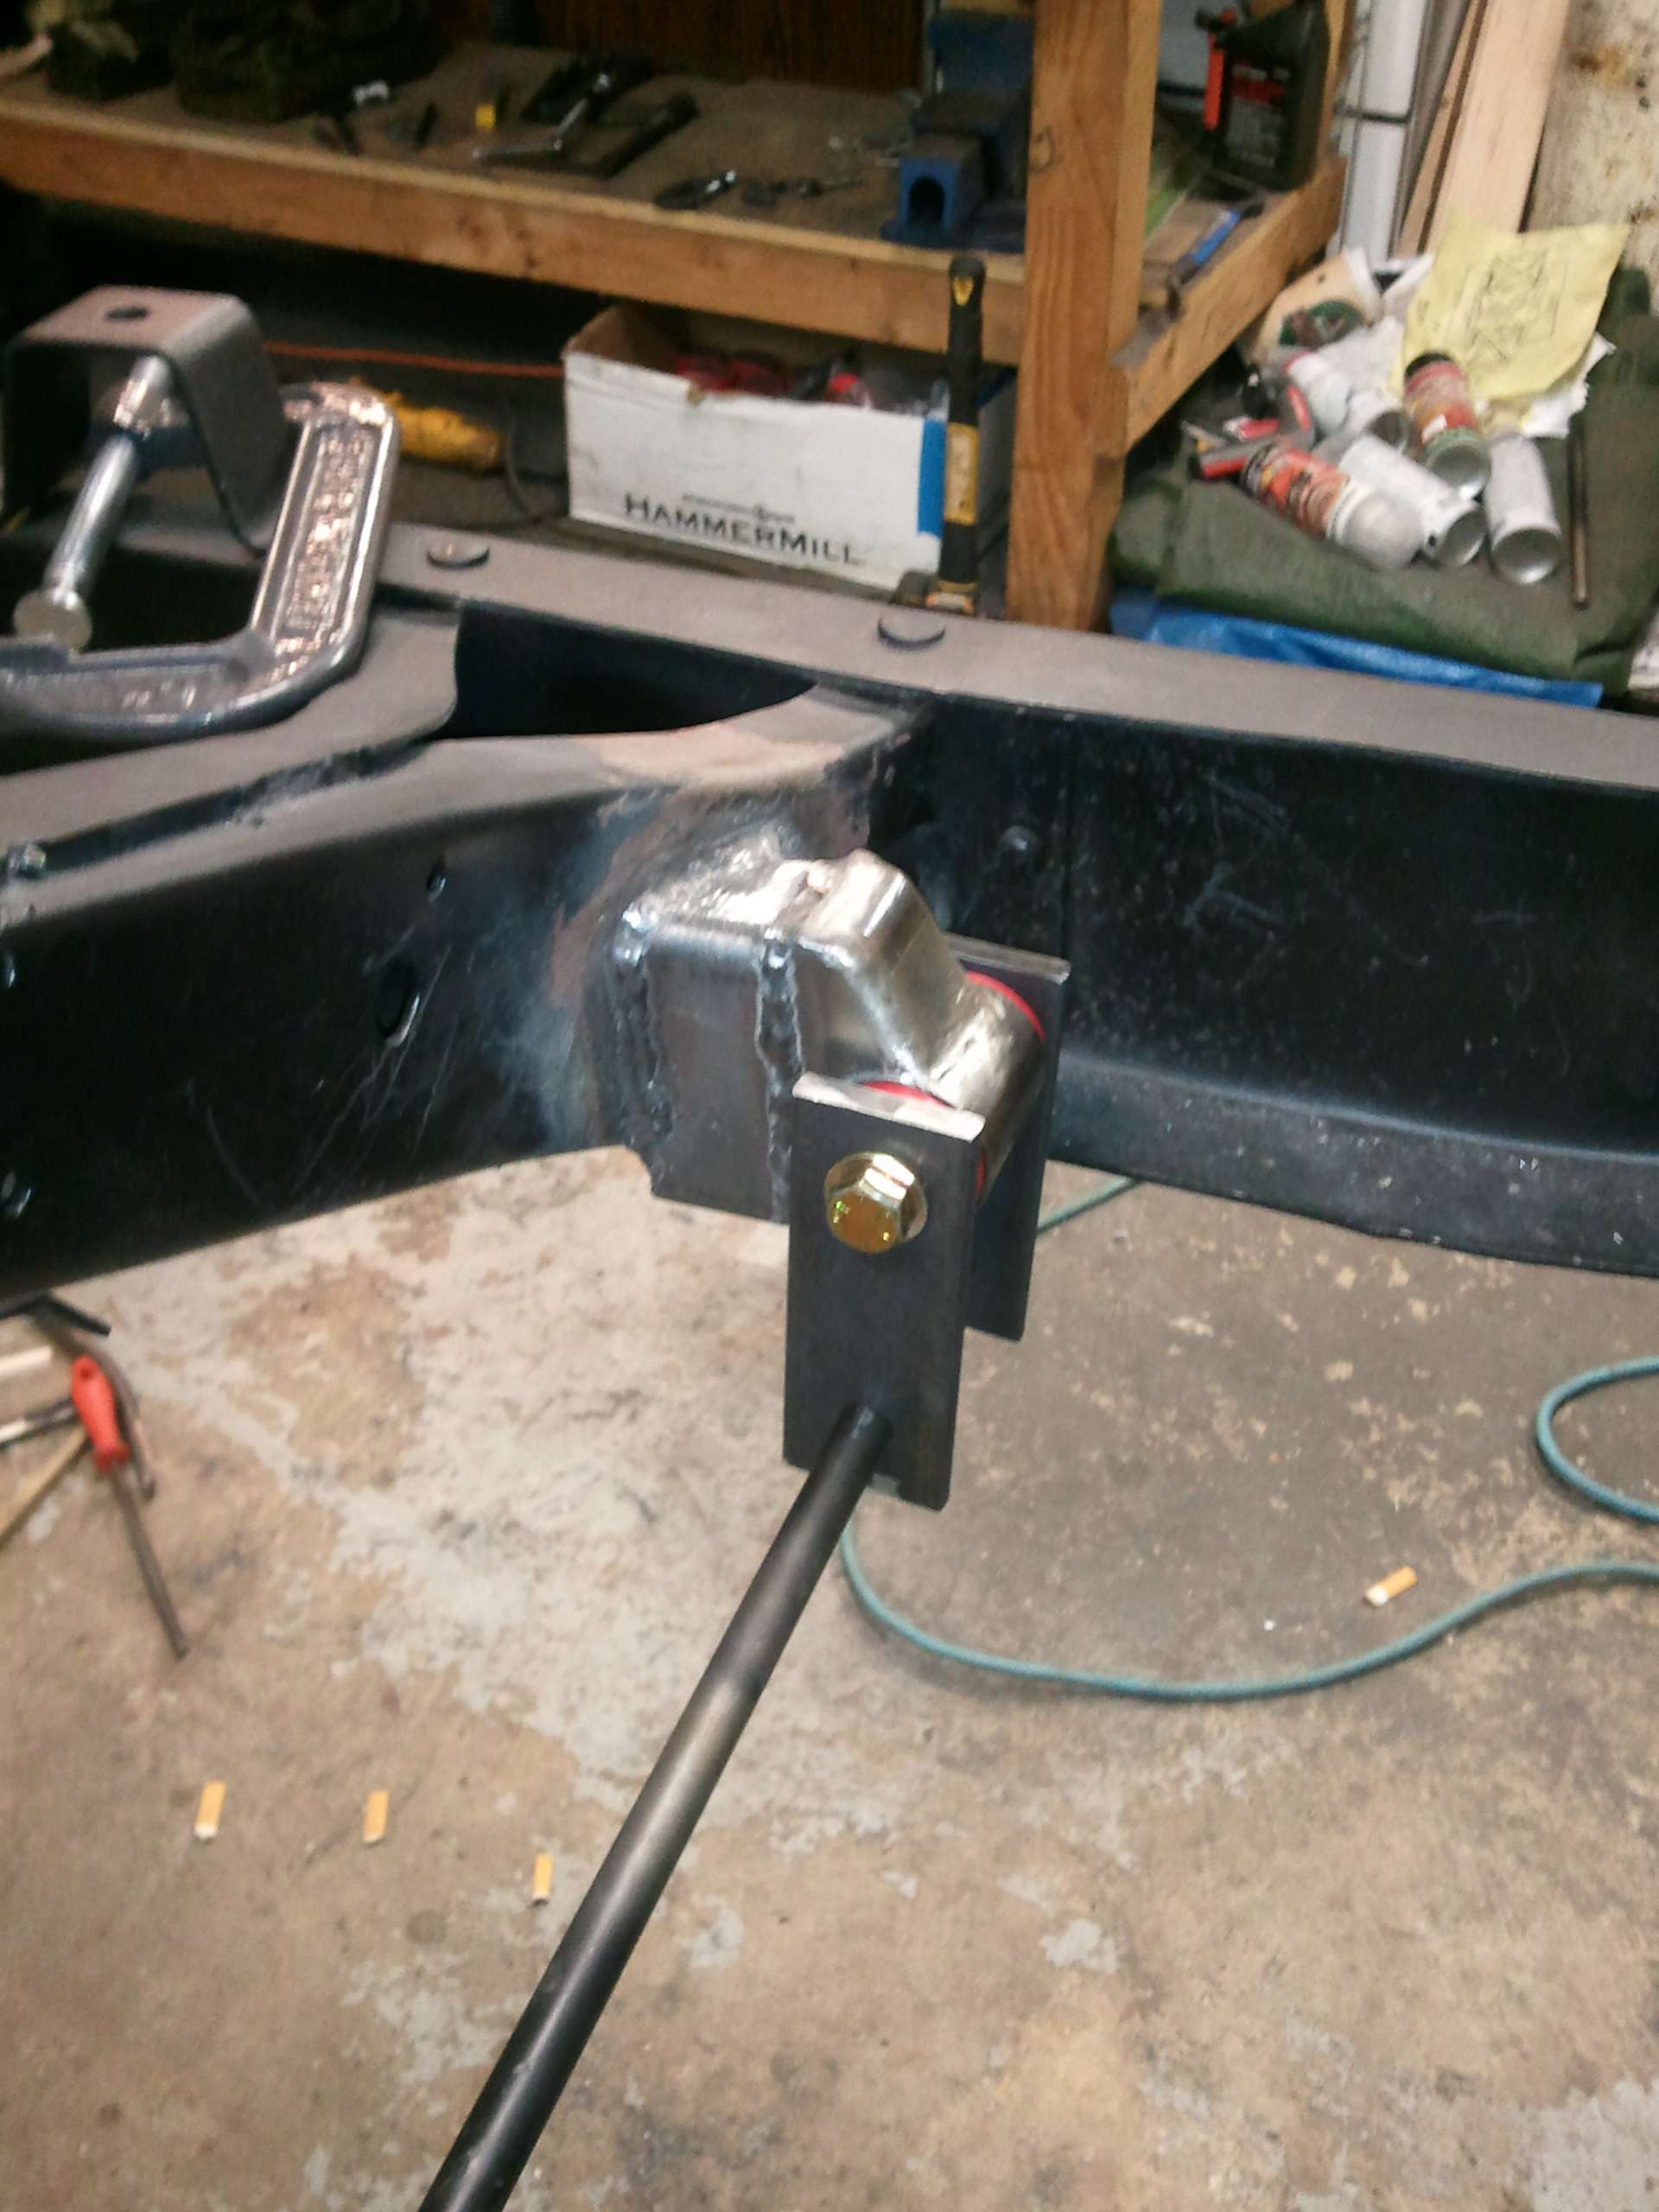
Attach two pieces of rectangle stock cut at 24 degrees, and lined up with the axle tabs, to the cross member so that the shackle mounts will be oriented correctly with the axle. Then attach the shackle mounts and shackle plates. So that everything is lined up the same place a long piece of 5/8th's stock through and across all the lower shackle holes. Tilt the shackles so that the lower ends are facing towards the front 5 degrees from vertical and take accurate measurements between the three track bar mounting points. There was actually about an 1/8th inch difference between the two sides so the difference was split.
Image

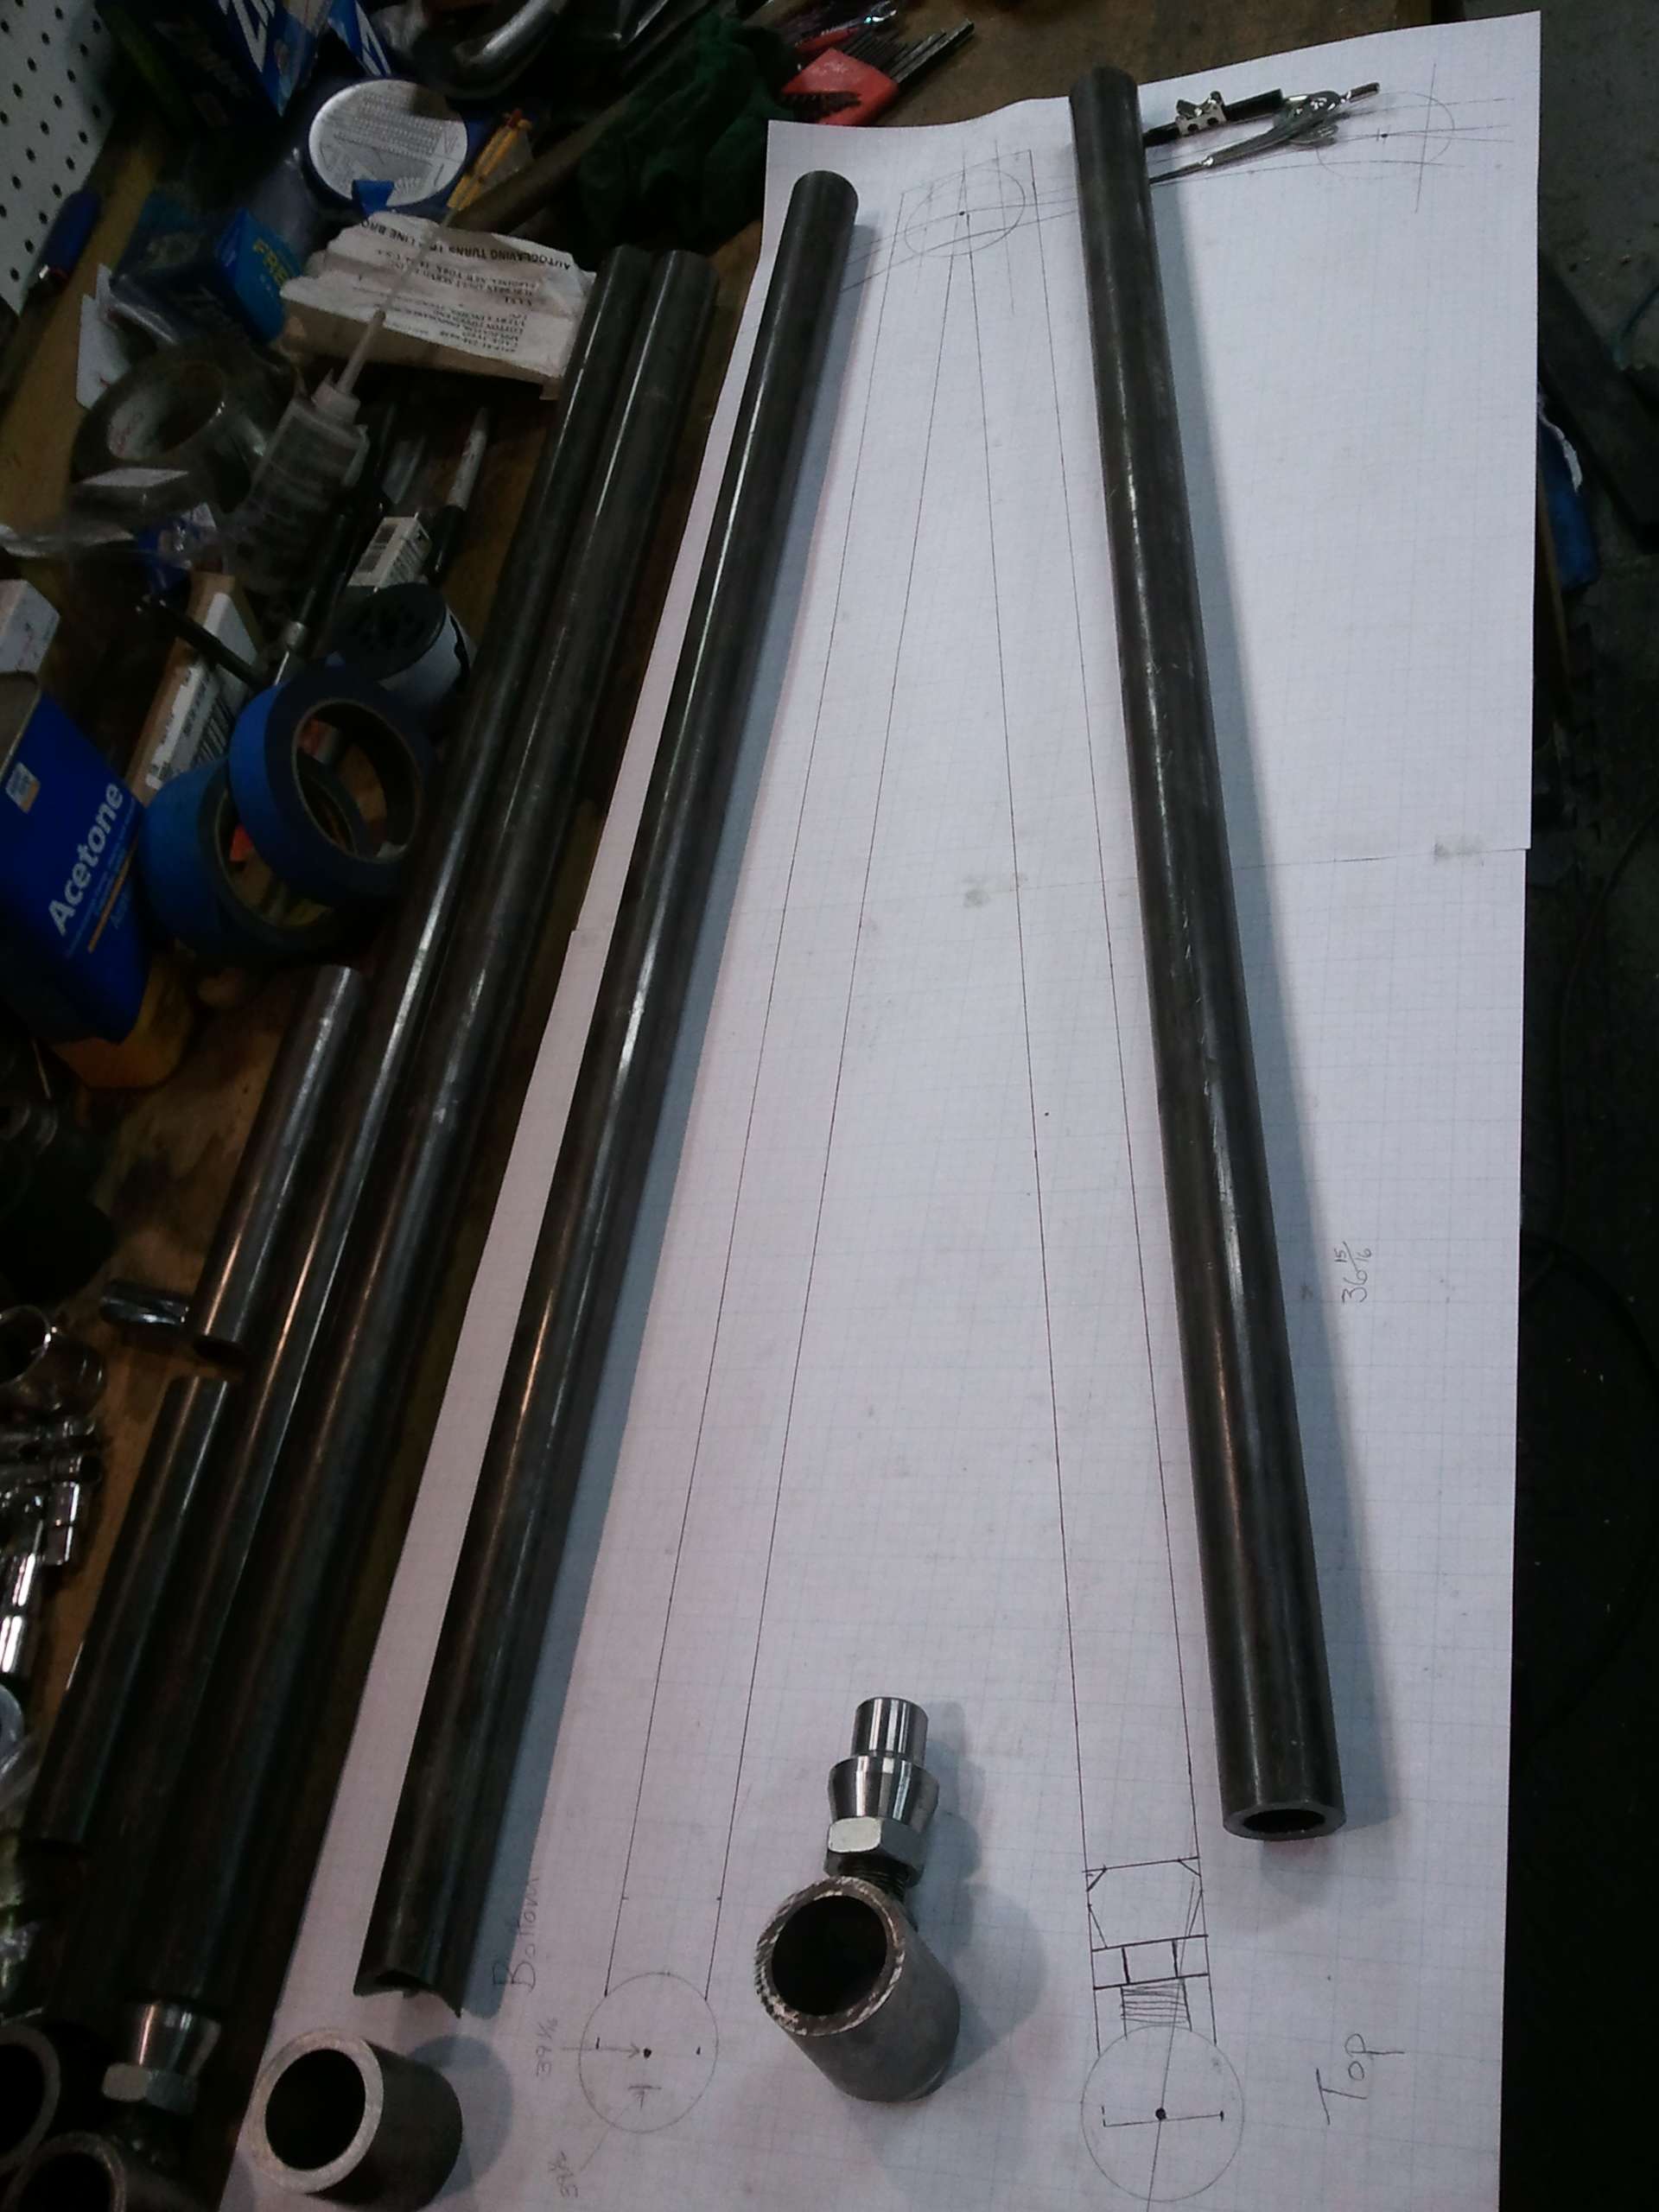
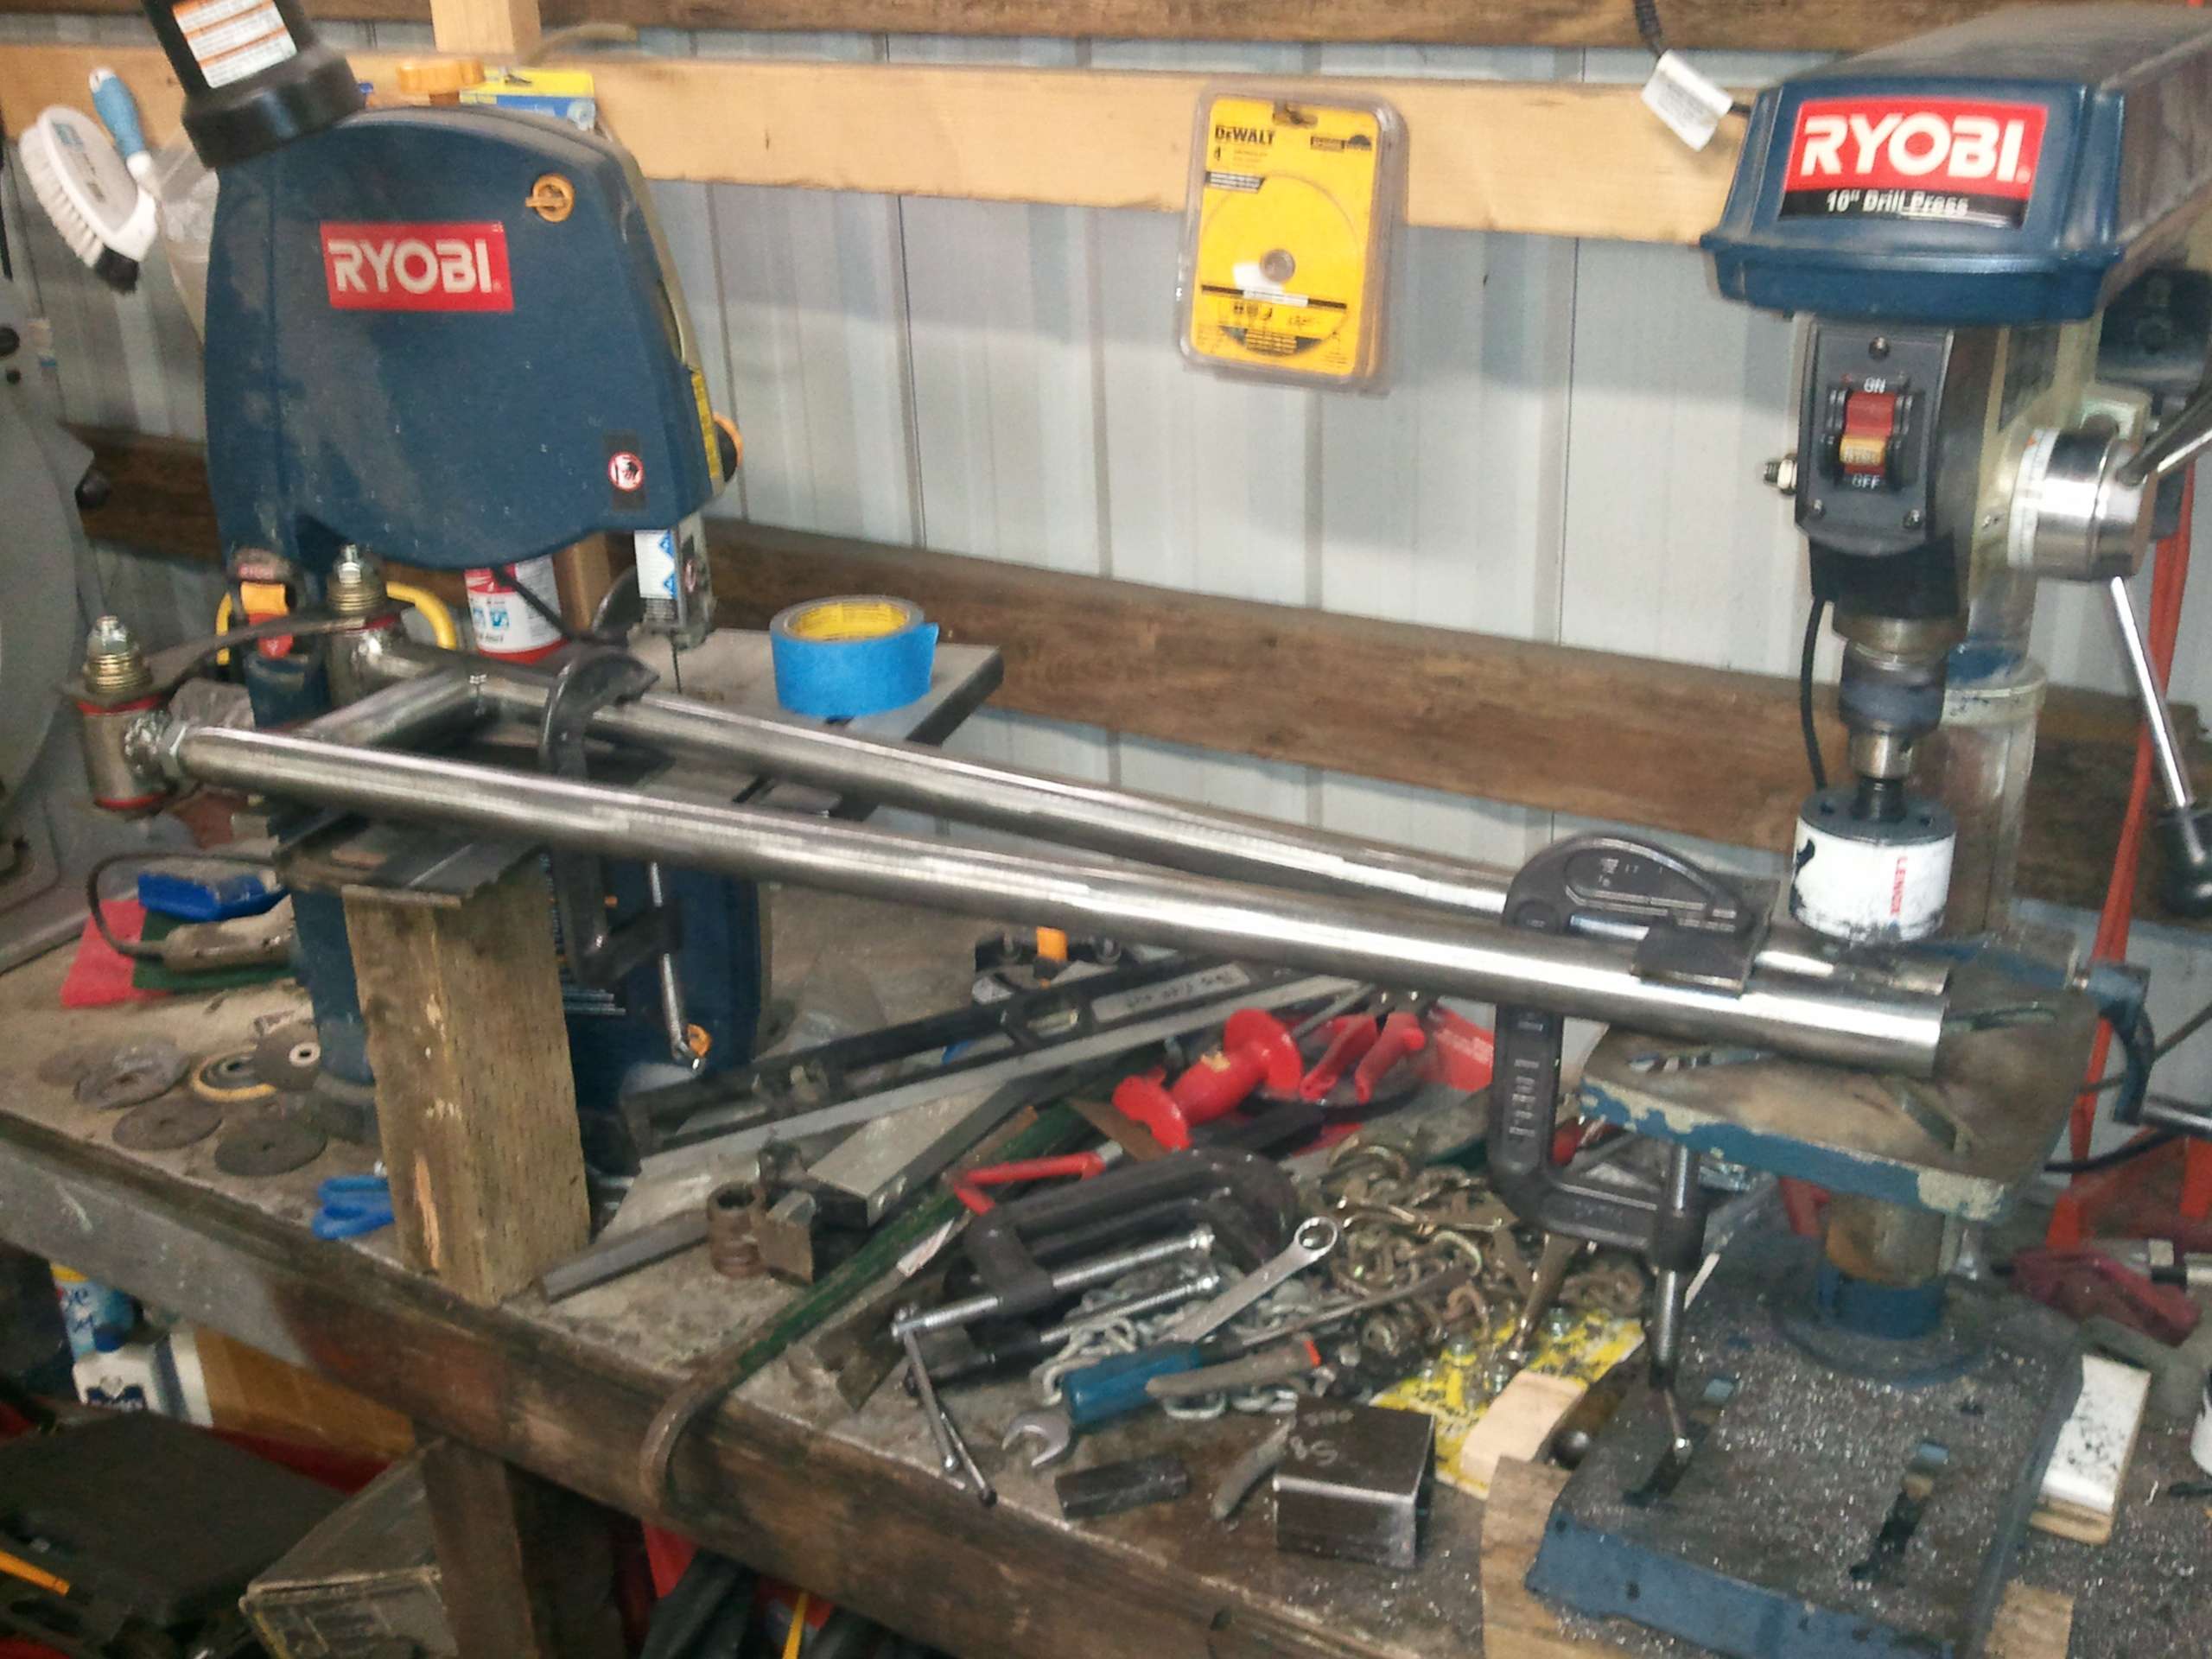
With those measurements create a full size drawing to build off of. Make the two adjustable track bar ends out of 3” long 7/8ths” bolts with the heads cut off and tapped(threaded) into pieces of the 2” D.O.M., and welded up. After that notch the fixed end of one bar and cut the bars to length.
Image

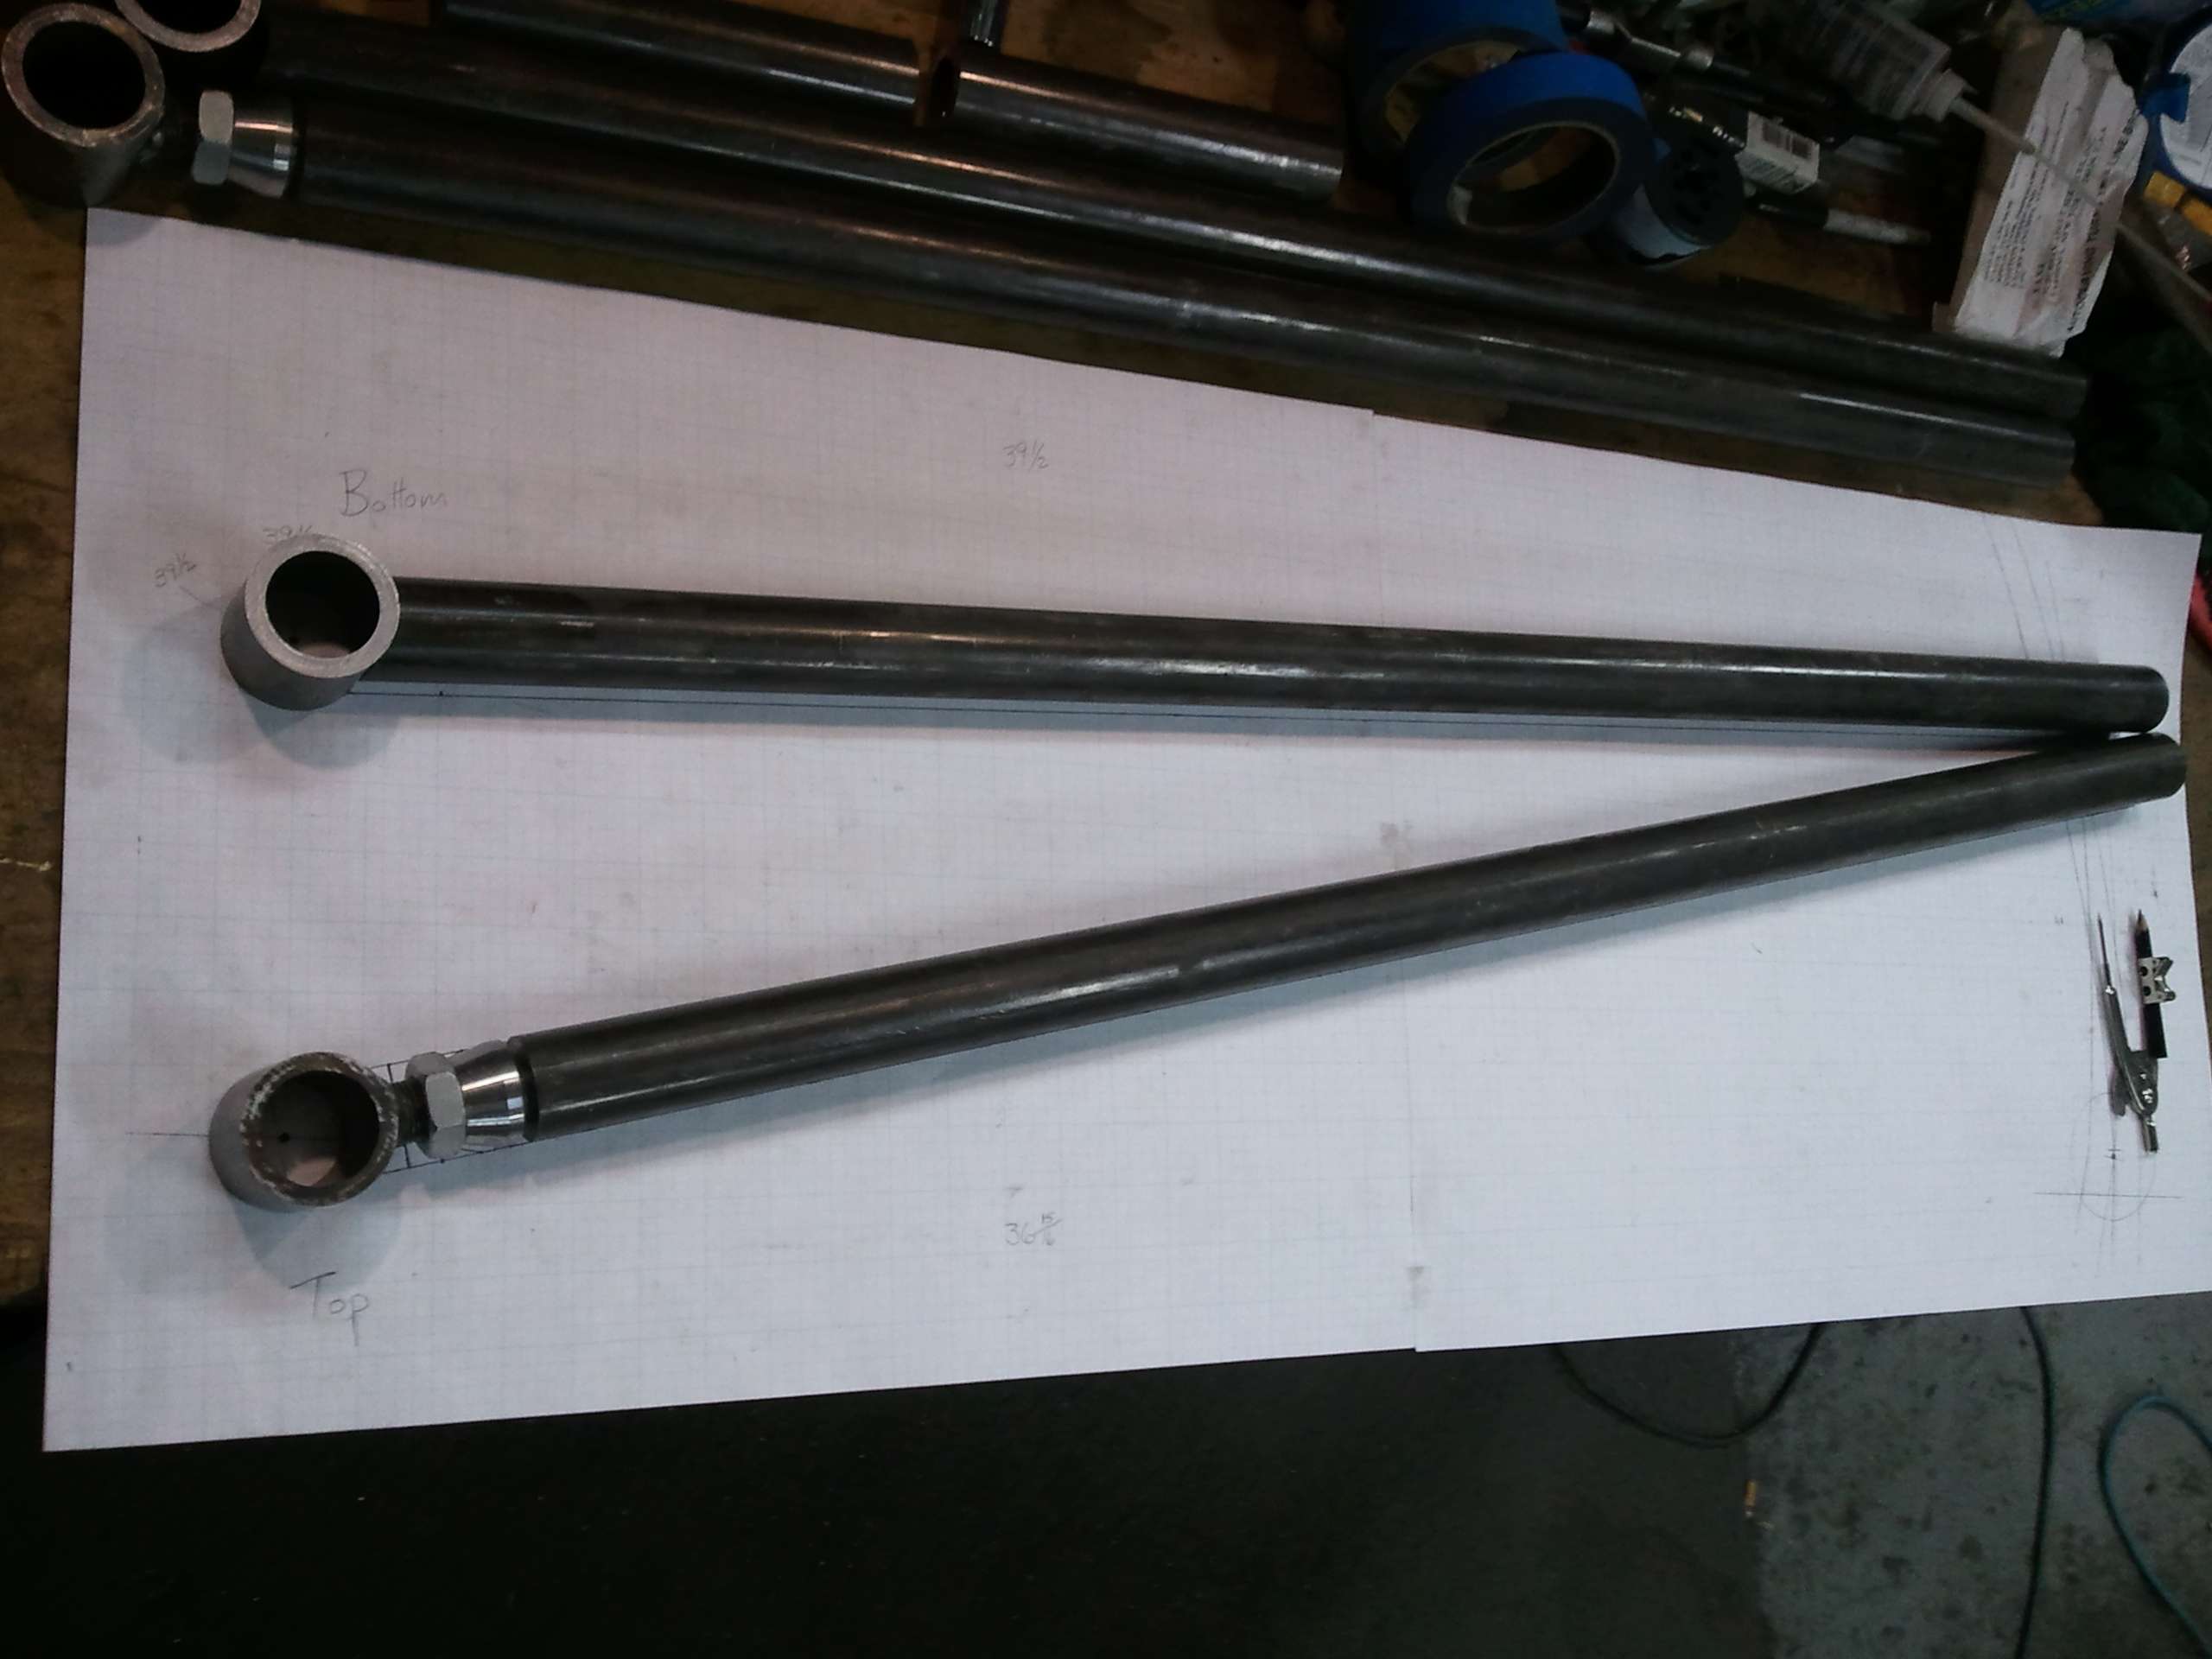
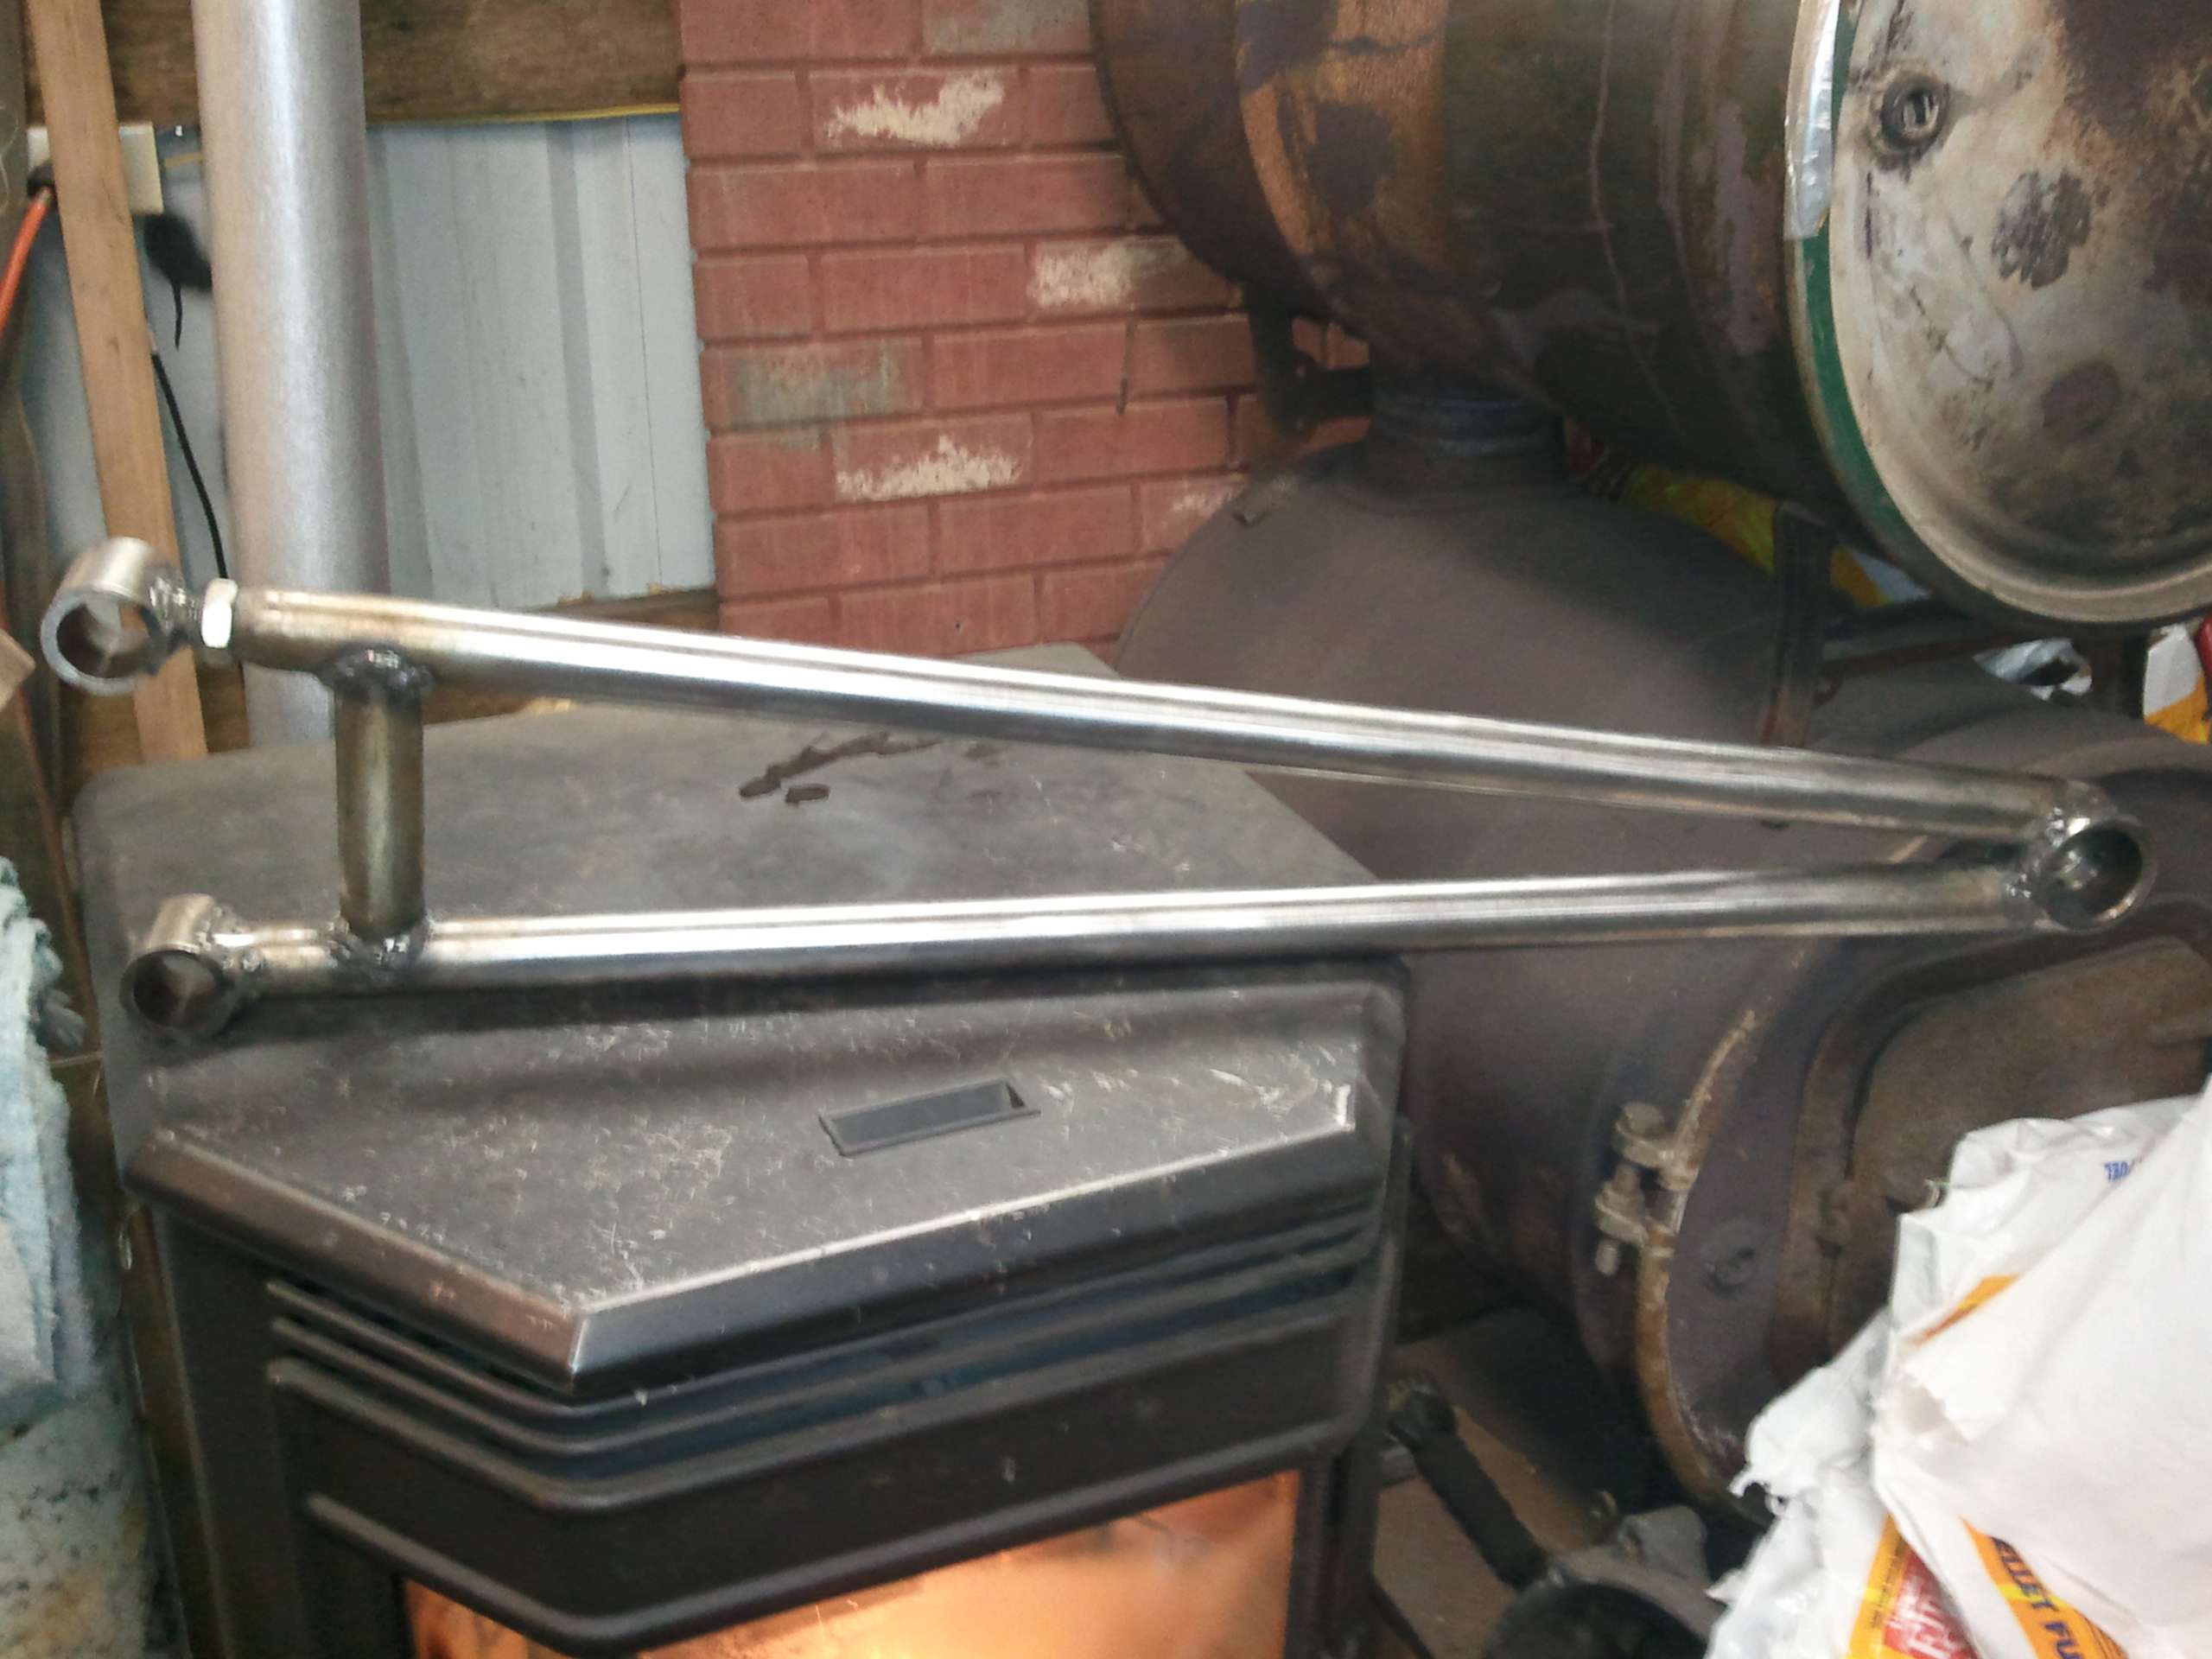
Completely weld the axle ends(one adjustable, one fixed) onto the bars and accurately lay them onto the drawing. Tack weld the two pieces of DOM together at the shackle end.
Image

This plate between the axle ends of the bars is the same plate that was used to position the tabs on the axle. By using it there is no doubt the spacing is correct for the axle ends of the track bar.
This picture disappeared. I need to repost it. If I forget drop me a note.

I used the plate to weld the axle tabs on, that's why it's notched.
If you look closely you may see punch marks centered on the bolt heads. I put these bolts in when I took the measurements for the drawing.
Image
Last edited by Resbum on Tue Apr 09, 2013 7:05 am, edited 4 times in total.
Originally Posted by Resbum
"What year is my truck?... Which part?" Build thread- http://www.fsjnetwork.com/forum/viewtop ... 290#p18290
User avatar

Topic author
Resbum
Posts: 466
Joined: Fri Jun 08, 2012 9:45 am
Location: North East Oregon

Re: 1970 Gladiator 1 Ton 6BT 12V Cummins Build

Post by Resbum »

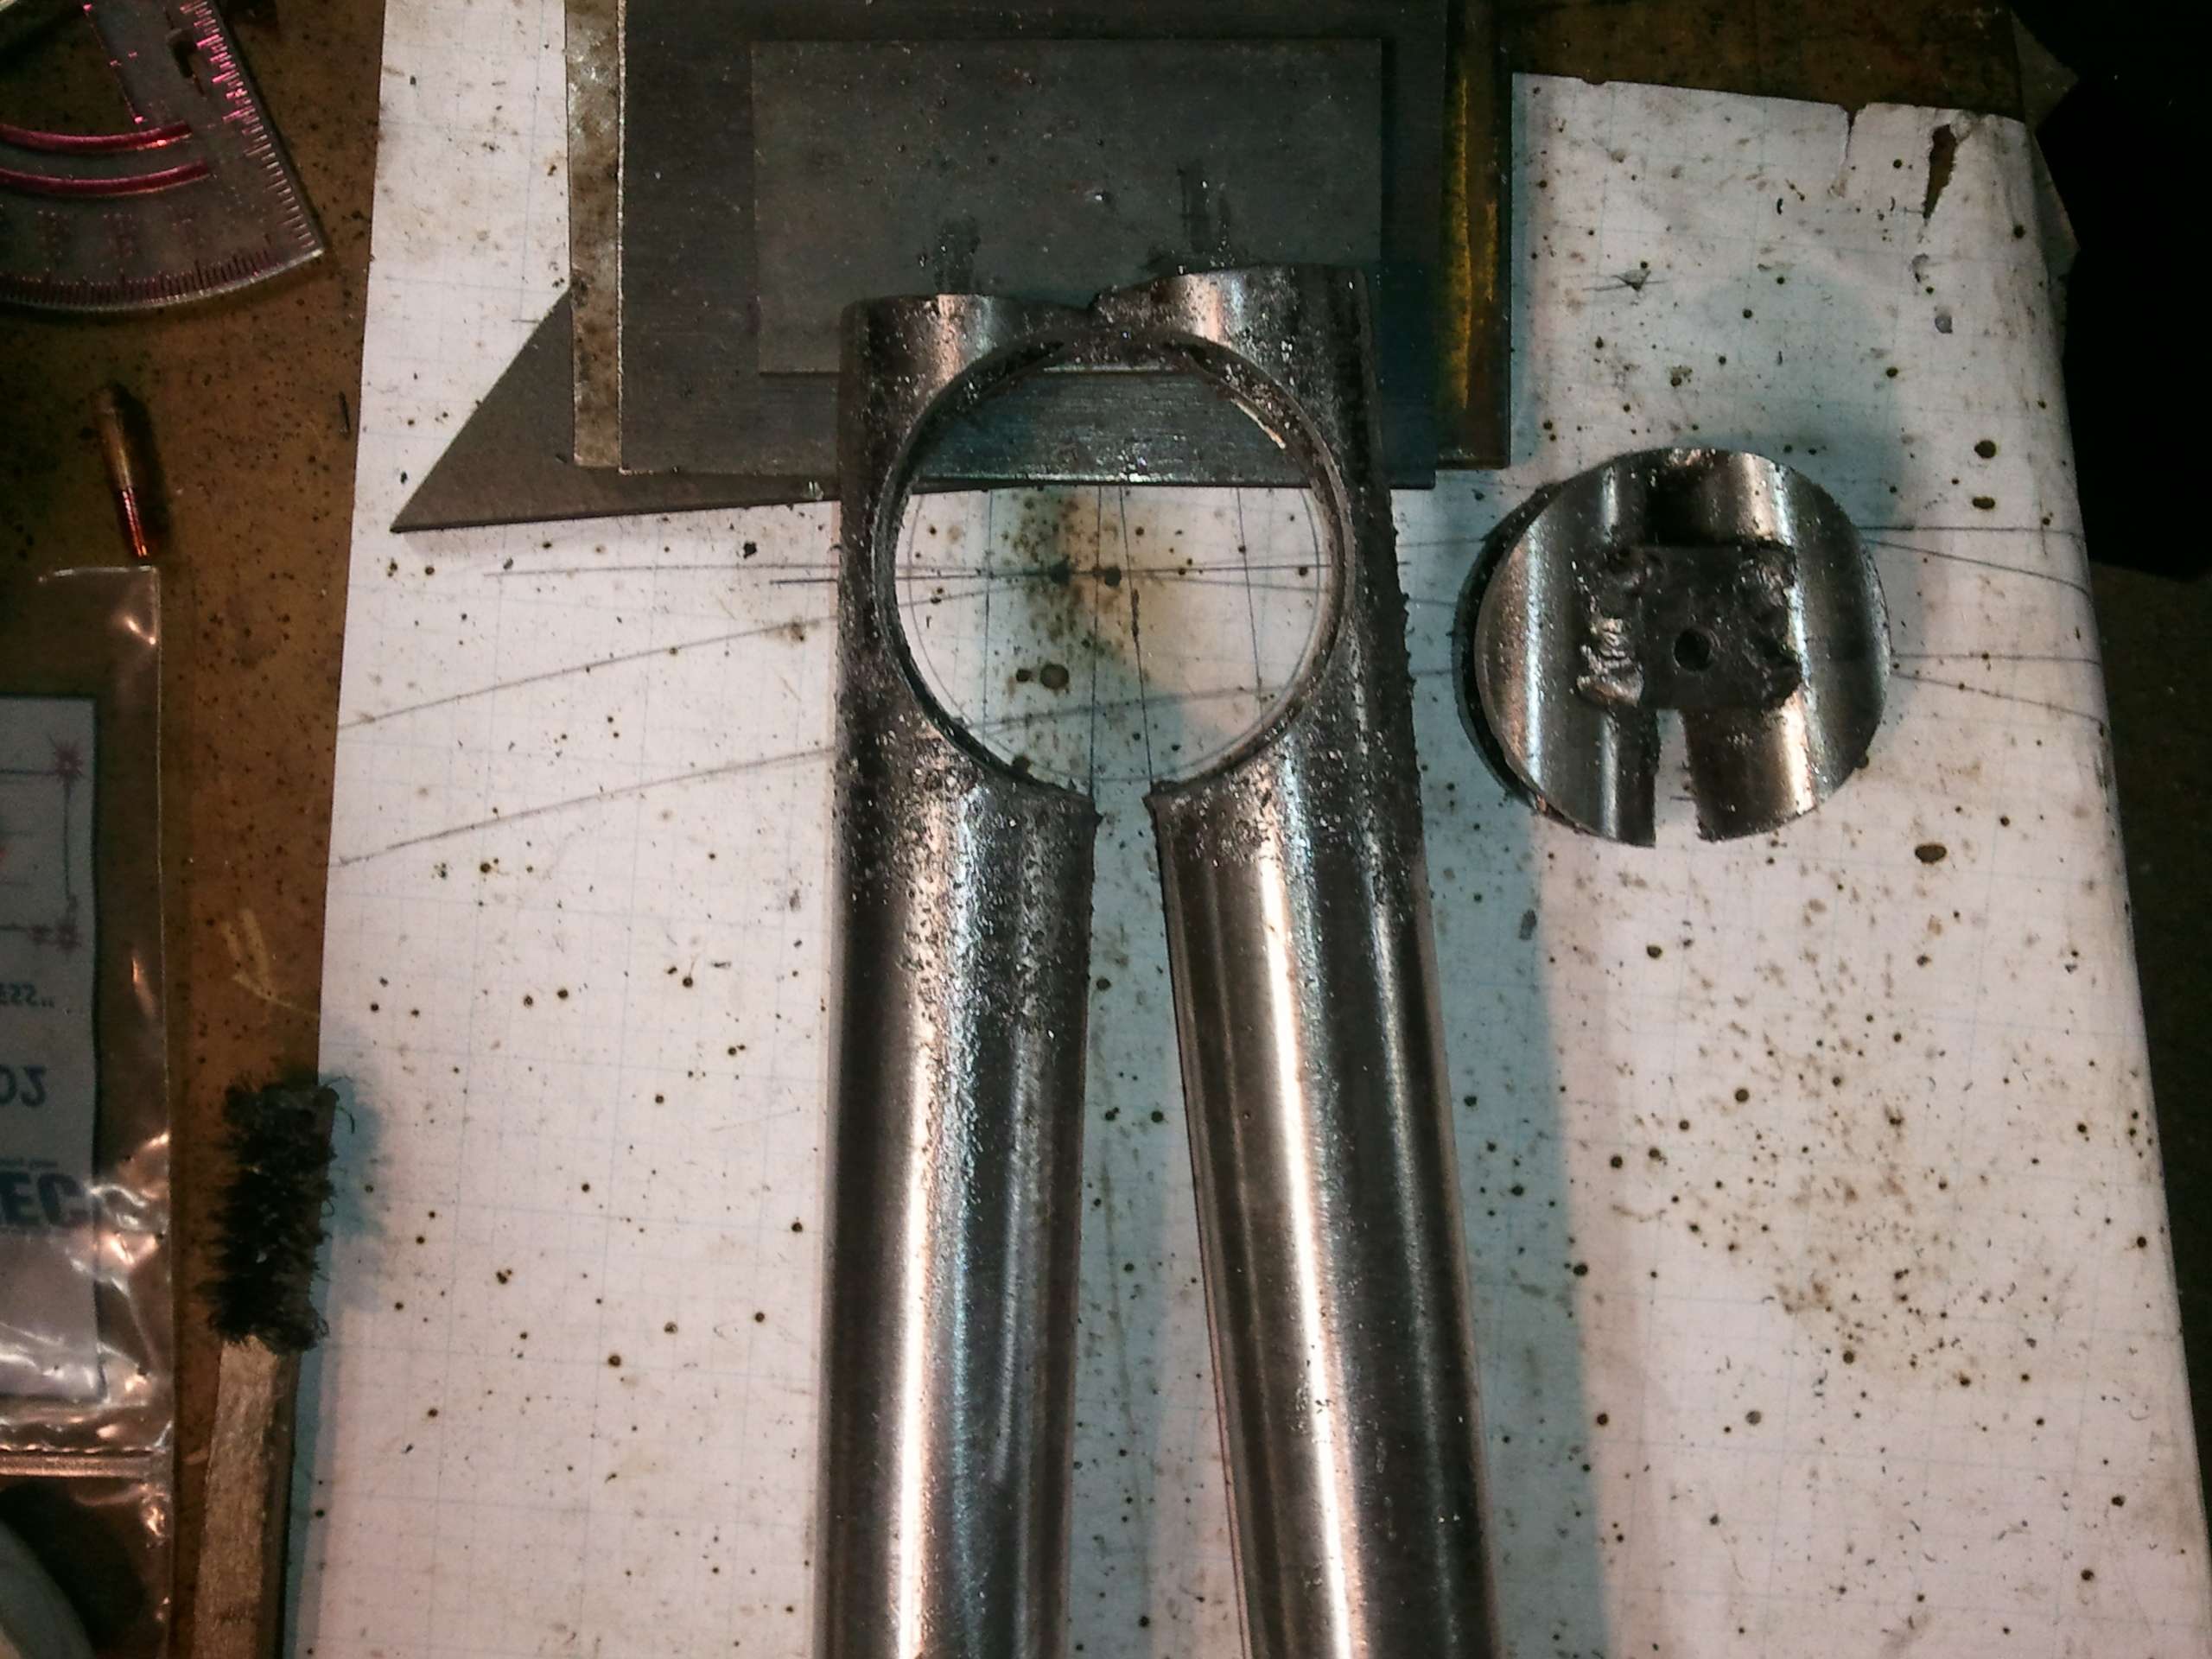
Tack weld a 1” square piece on for the center bit of the cutter to drill through.
Image

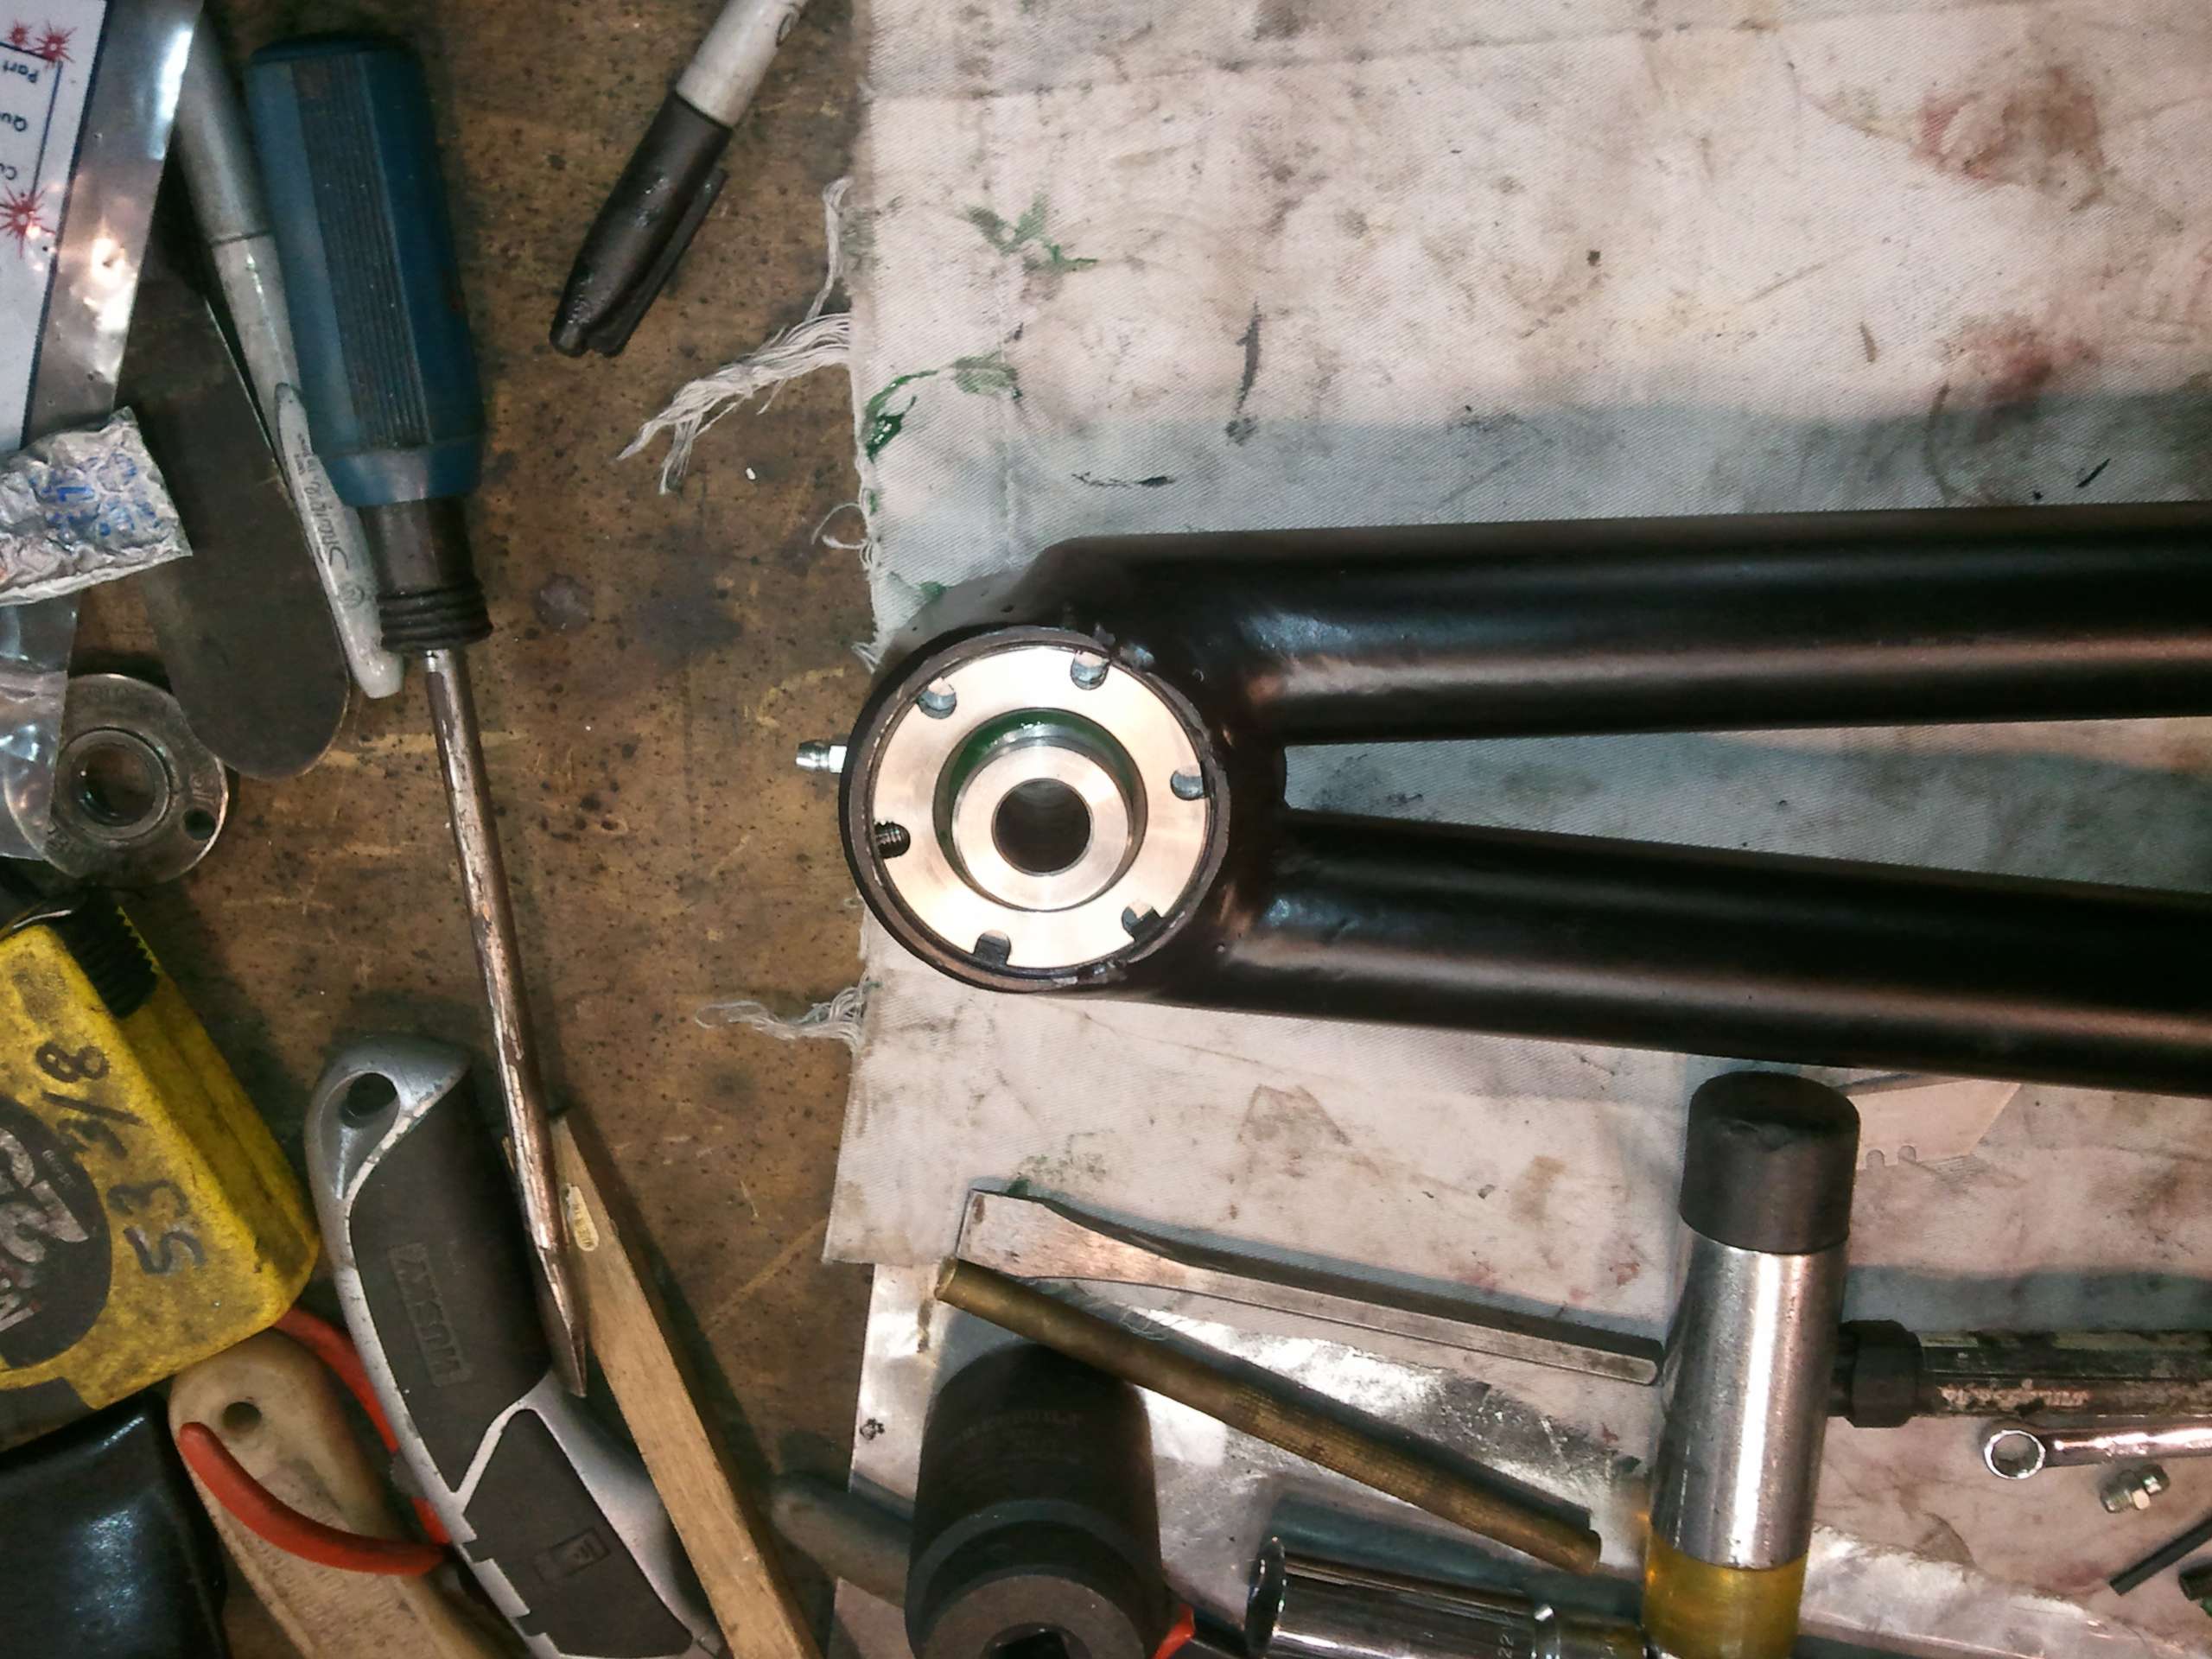
This little Ryobi was never meant to tackle a job like this. Approach it as if you’re doing a “Dremel Tool” job. Slow and let the drill press do it at its own pace. Get a beverage, turn up the music, put on ear muffs, and spend 15 minutes occasionally adding cutting oil. Refer back to the last picture. Cut the tack weld at the end of the bars, thoroughly clean everything, and insert the joint. Use a clamp to pull the bars tightly onto the joint, then weld. When the joint is about half way welded onto the bars trim off the ends and finish welding.
Image

Fabricate the crossmember and weld it in.
Image

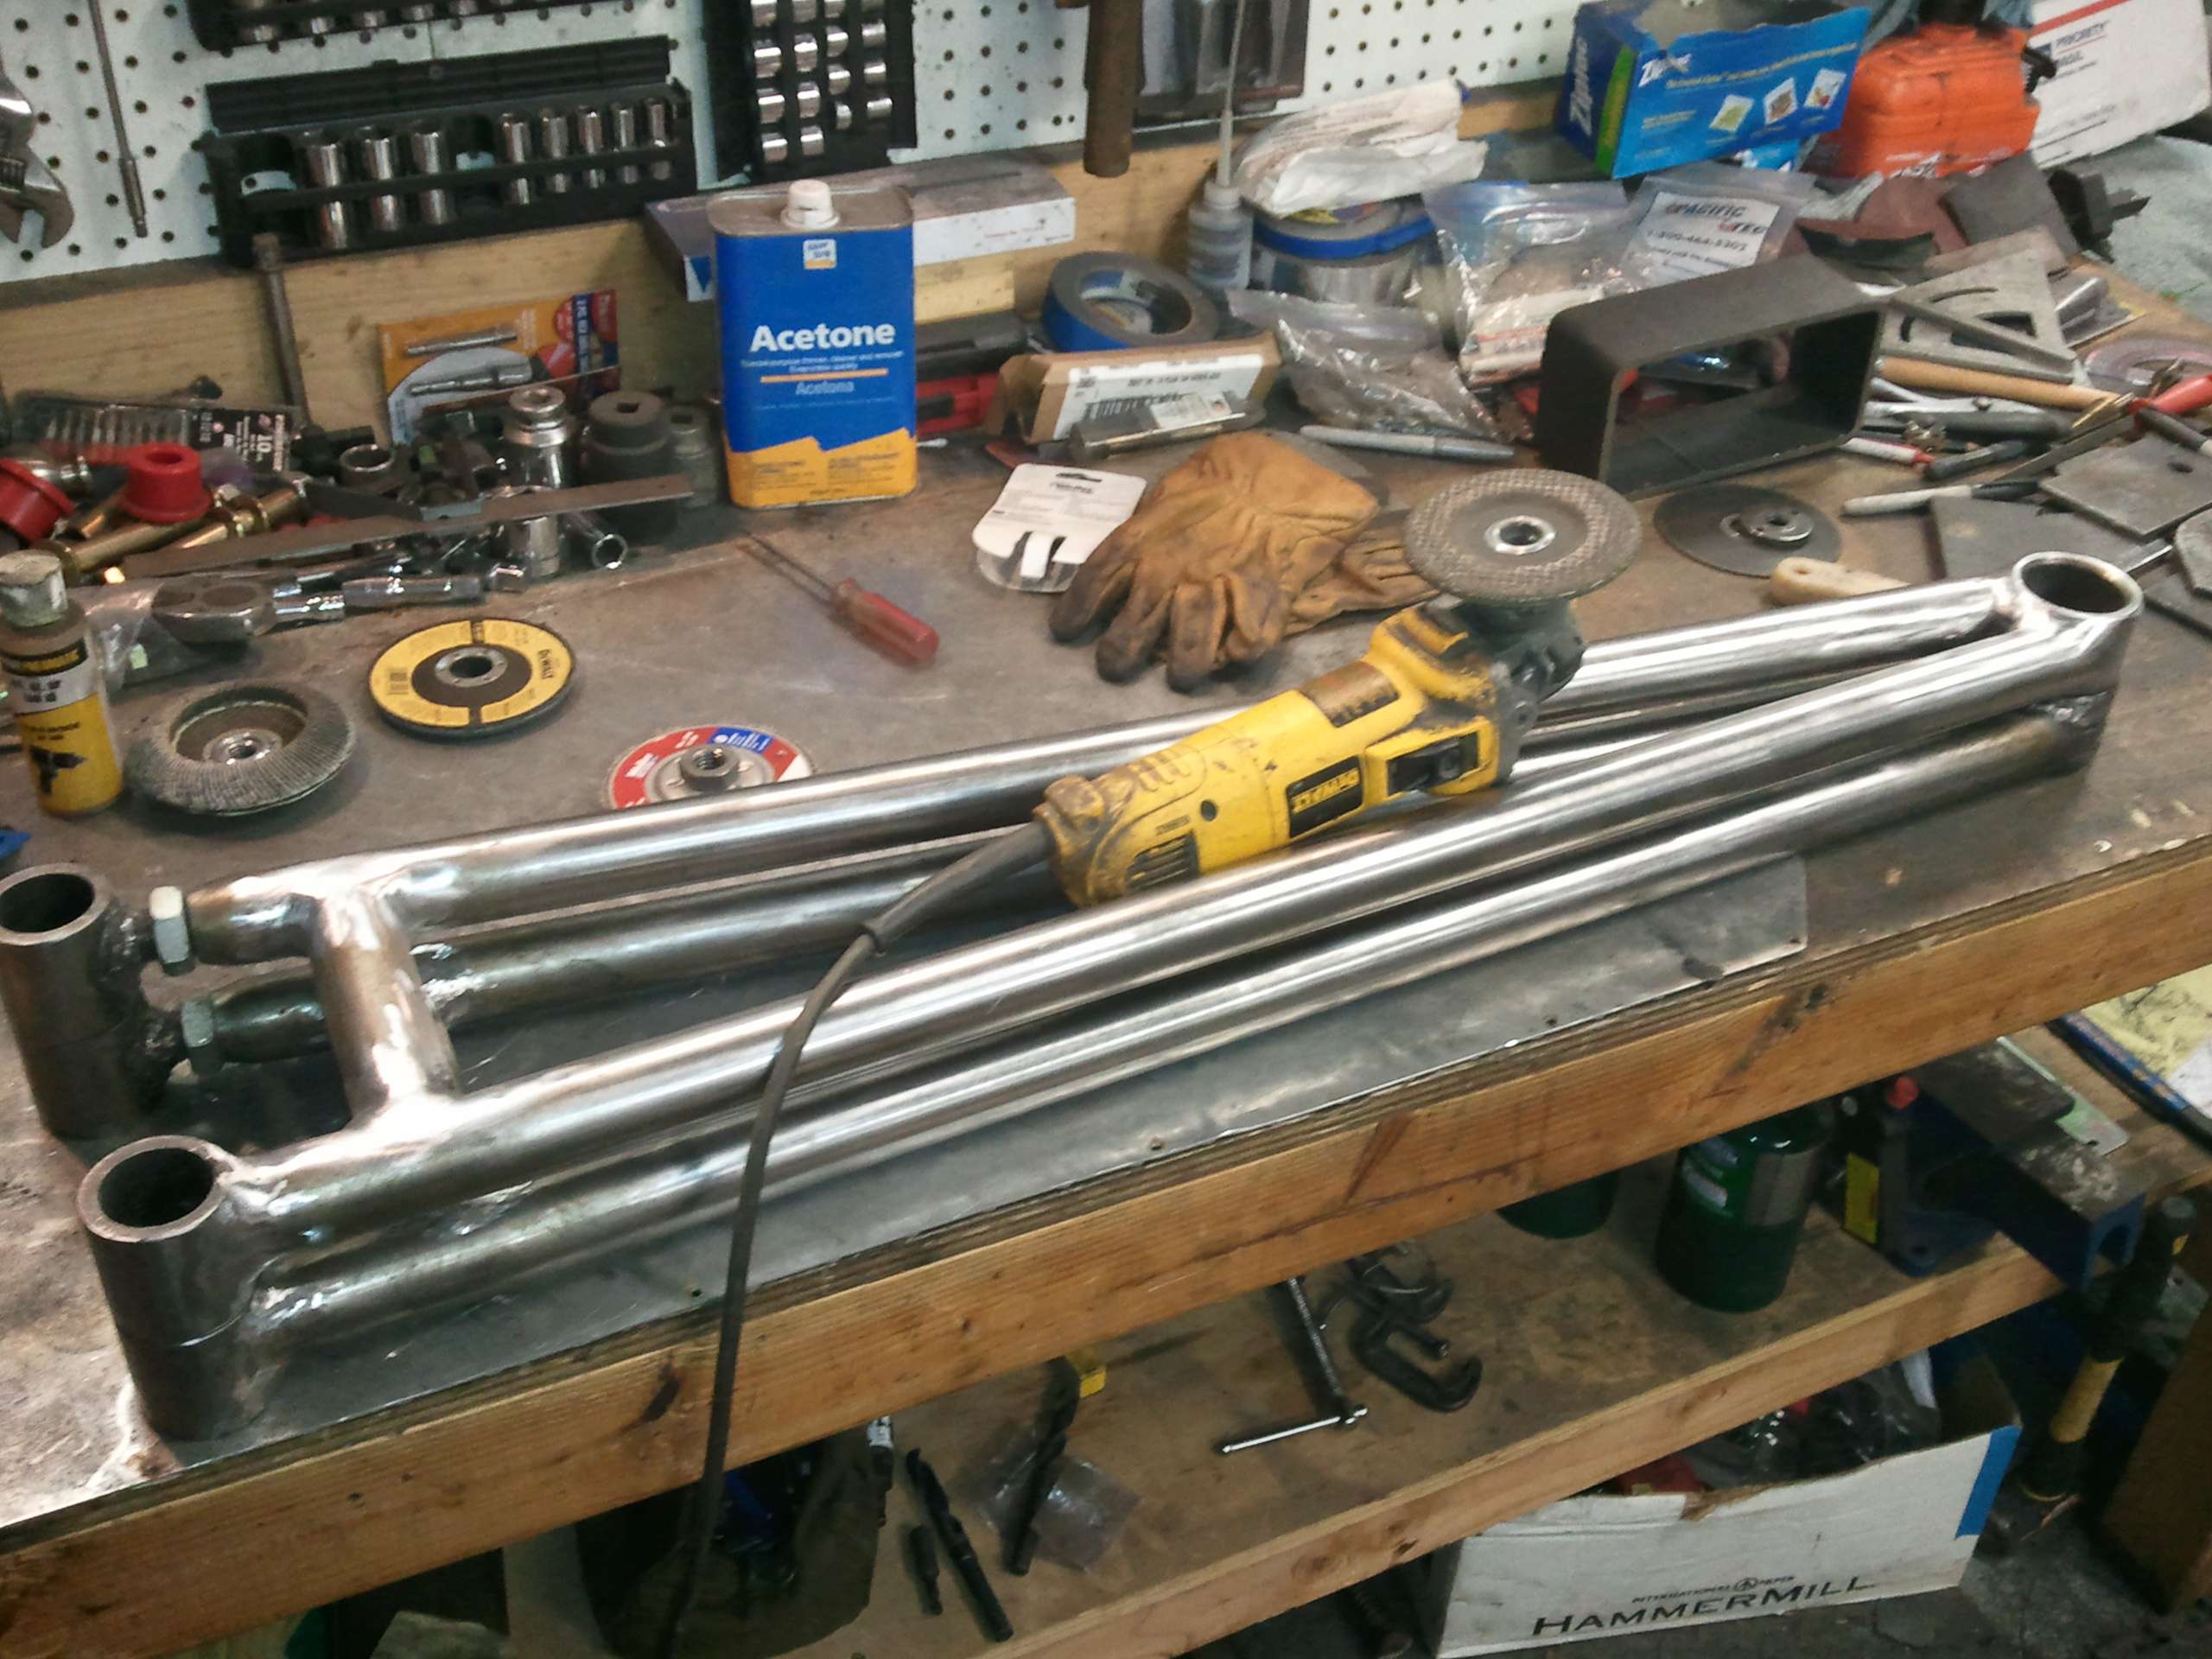
I’m an amateur welder. Between that and using a welder barely able to do the job my welds were uglier than sin after running triple fillets. However, the professional I hired for other critical areas, assured me the welds are sound. I chose to grind and cleanup my welds, so that I didn’t have to look at them.

R.I.P.- One dead soldier. After seven months of abuse and a box full of used up cutoff discs, grinding wheels, and sanding wheels my $15 craigslist DeWalt grinder died while finishing the second bar. It took everything I threw at it and deserved to be put out of its misery.
Image

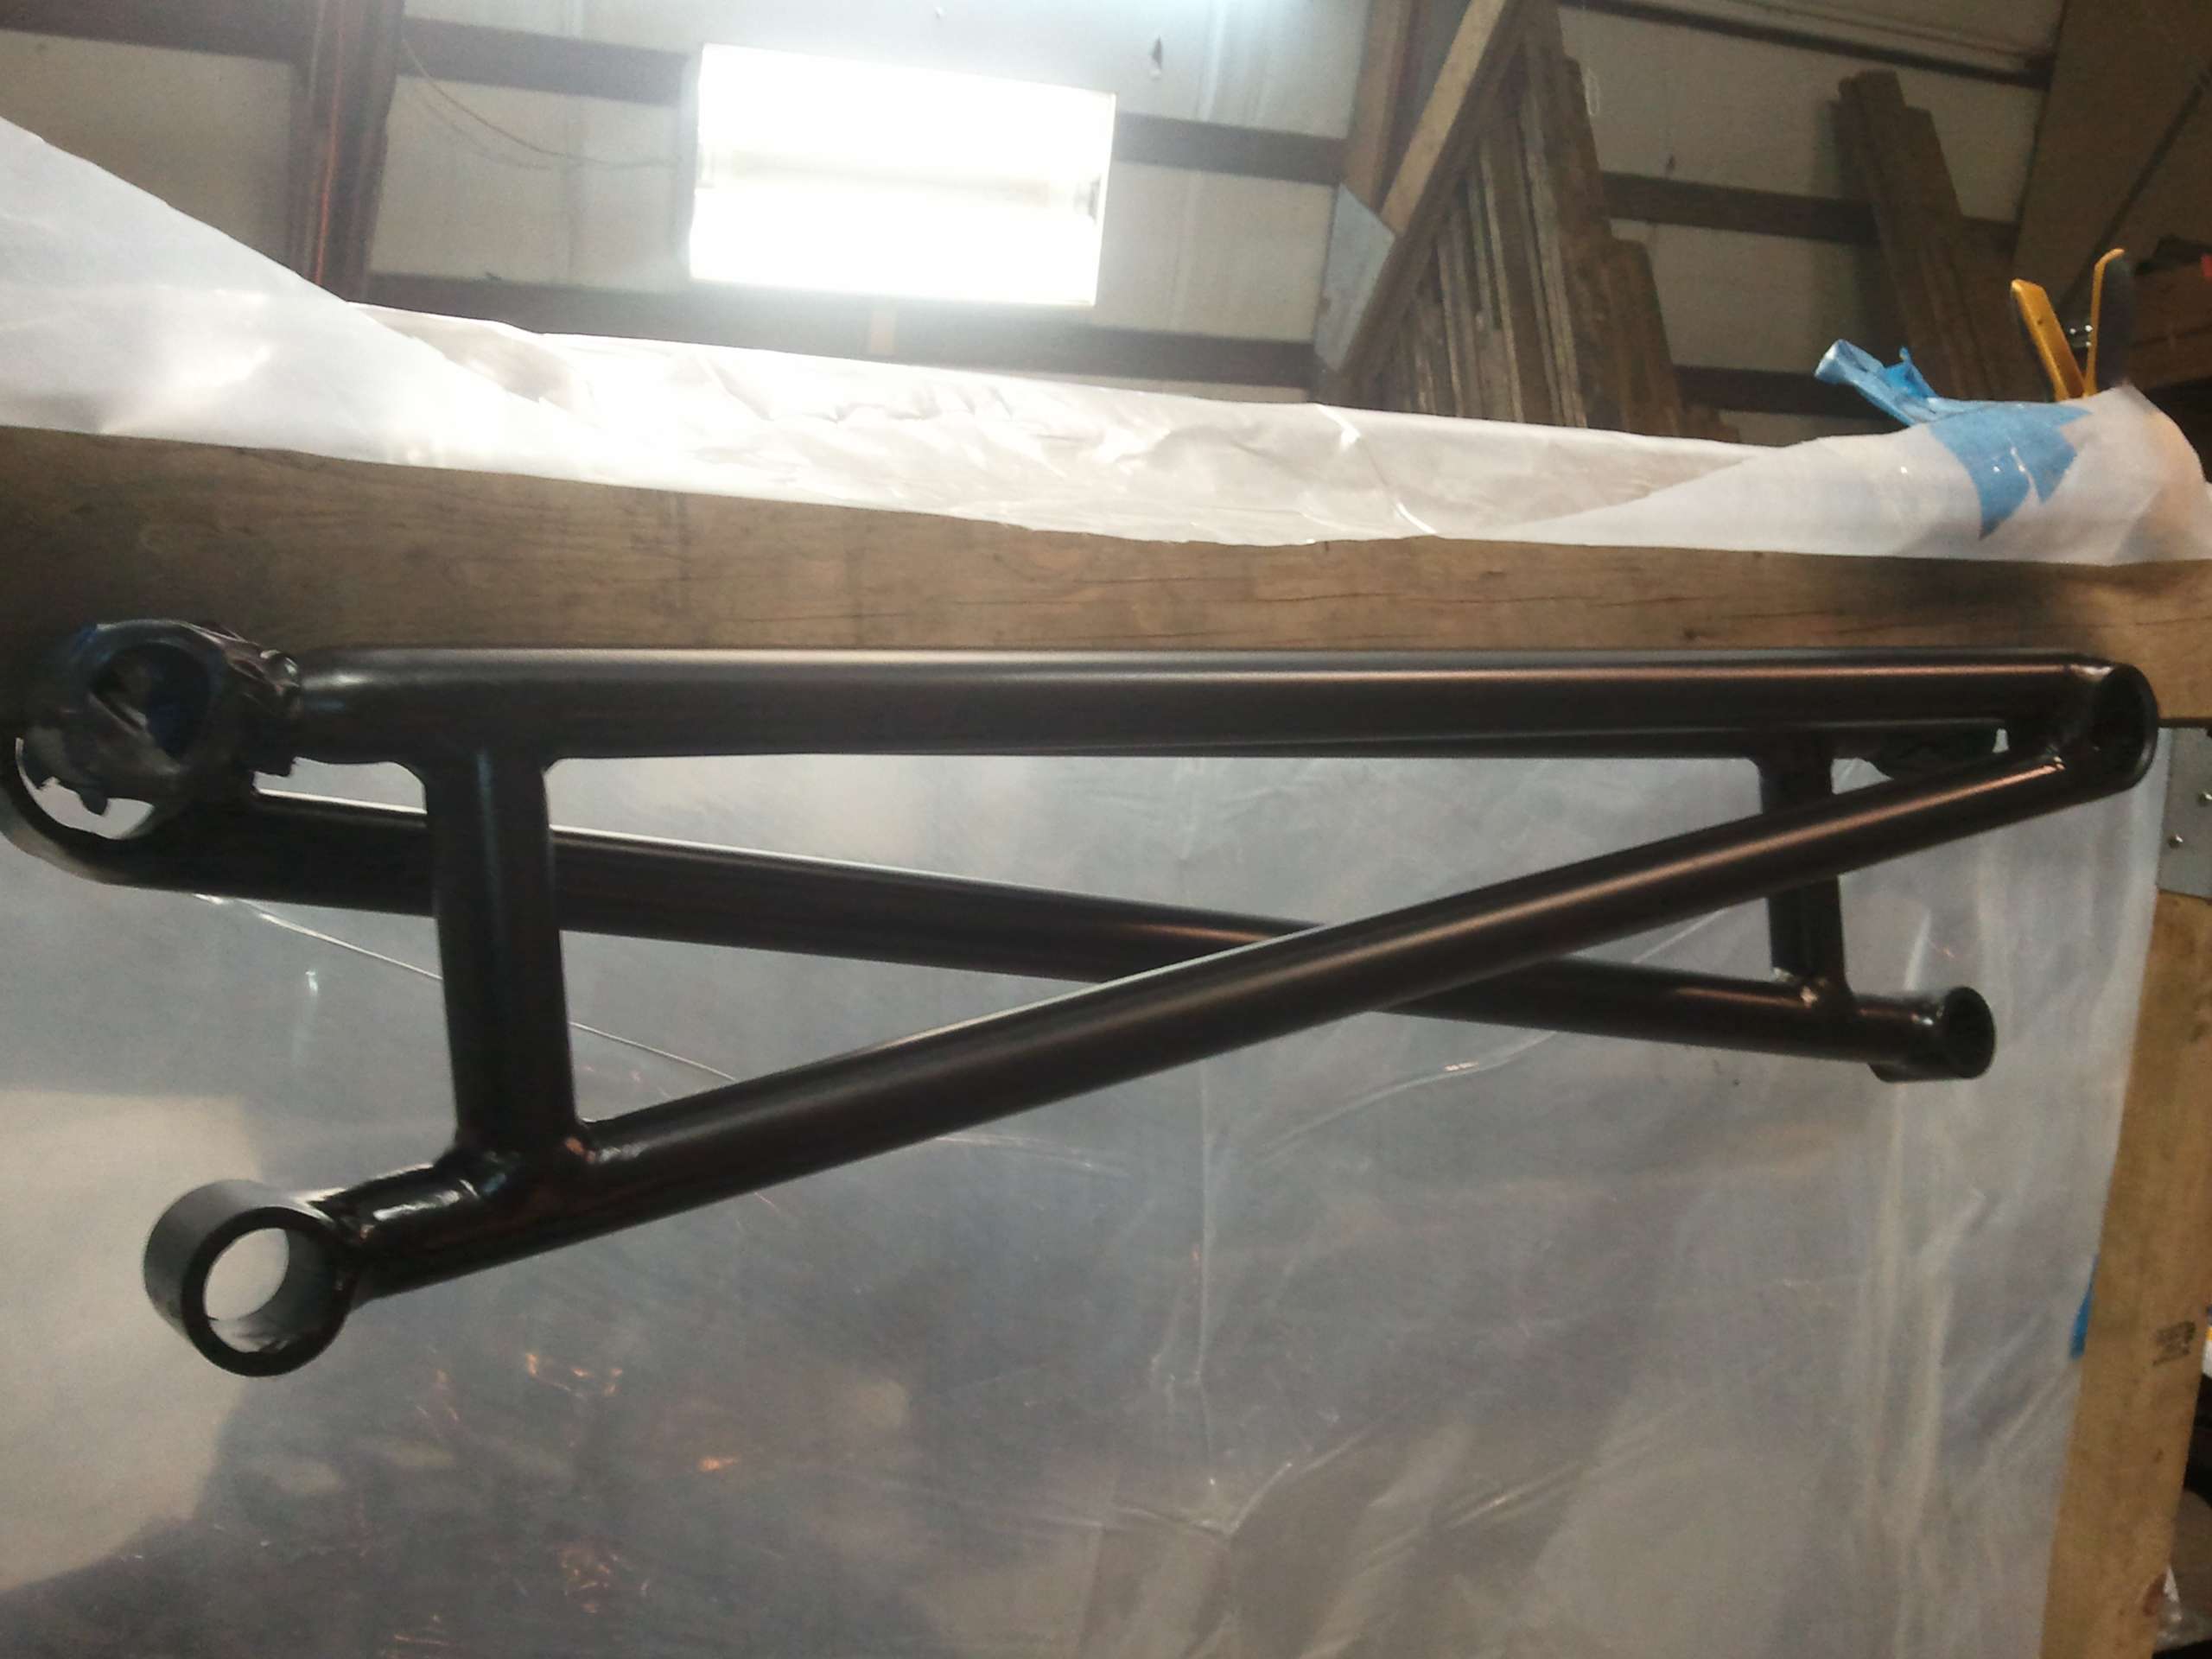
Finally paint the bars and hang to cure in front of the pellet stove overnight.
Image
Last edited by Resbum on Tue Apr 09, 2013 7:11 am, edited 1 time in total.
Originally Posted by Resbum
"What year is my truck?... Which part?" Build thread- http://www.fsjnetwork.com/forum/viewtop ... 290#p18290
User avatar

Topic author
Resbum
Posts: 466
Joined: Fri Jun 08, 2012 9:45 am
Location: North East Oregon

Re: 1970 Gladiator 1 Ton 6BT 12V Cummins Build

Post by Resbum »

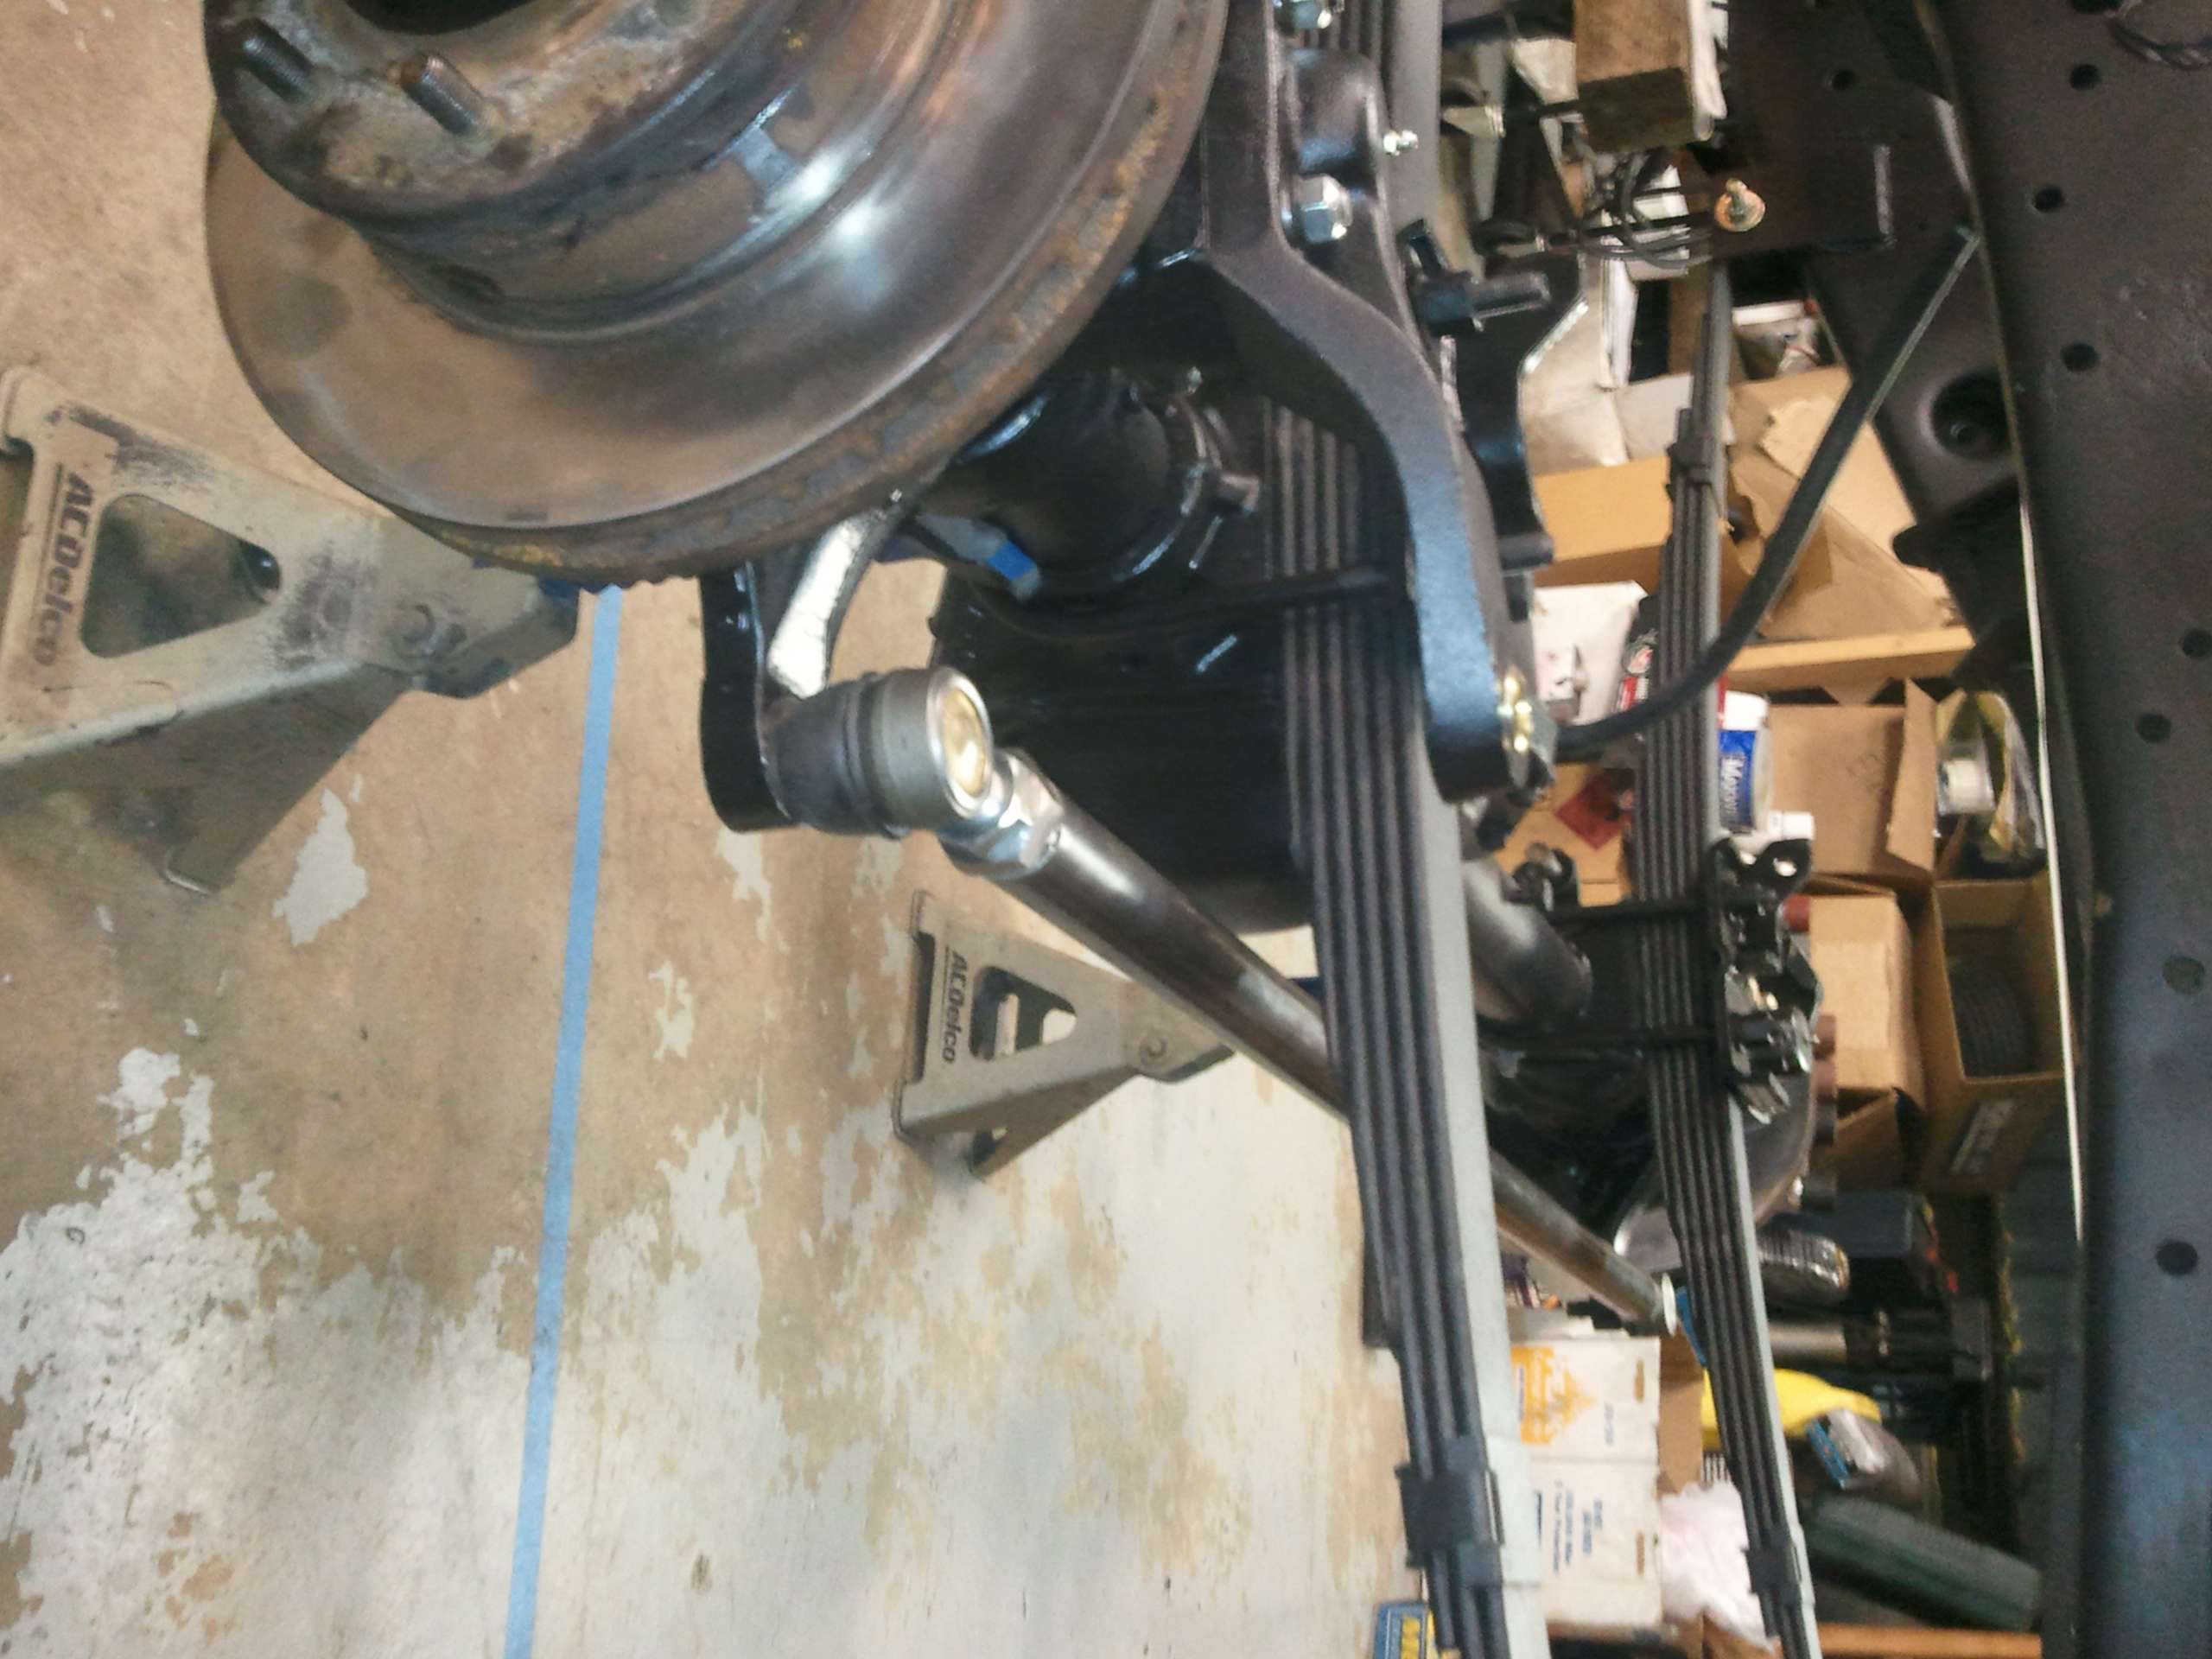
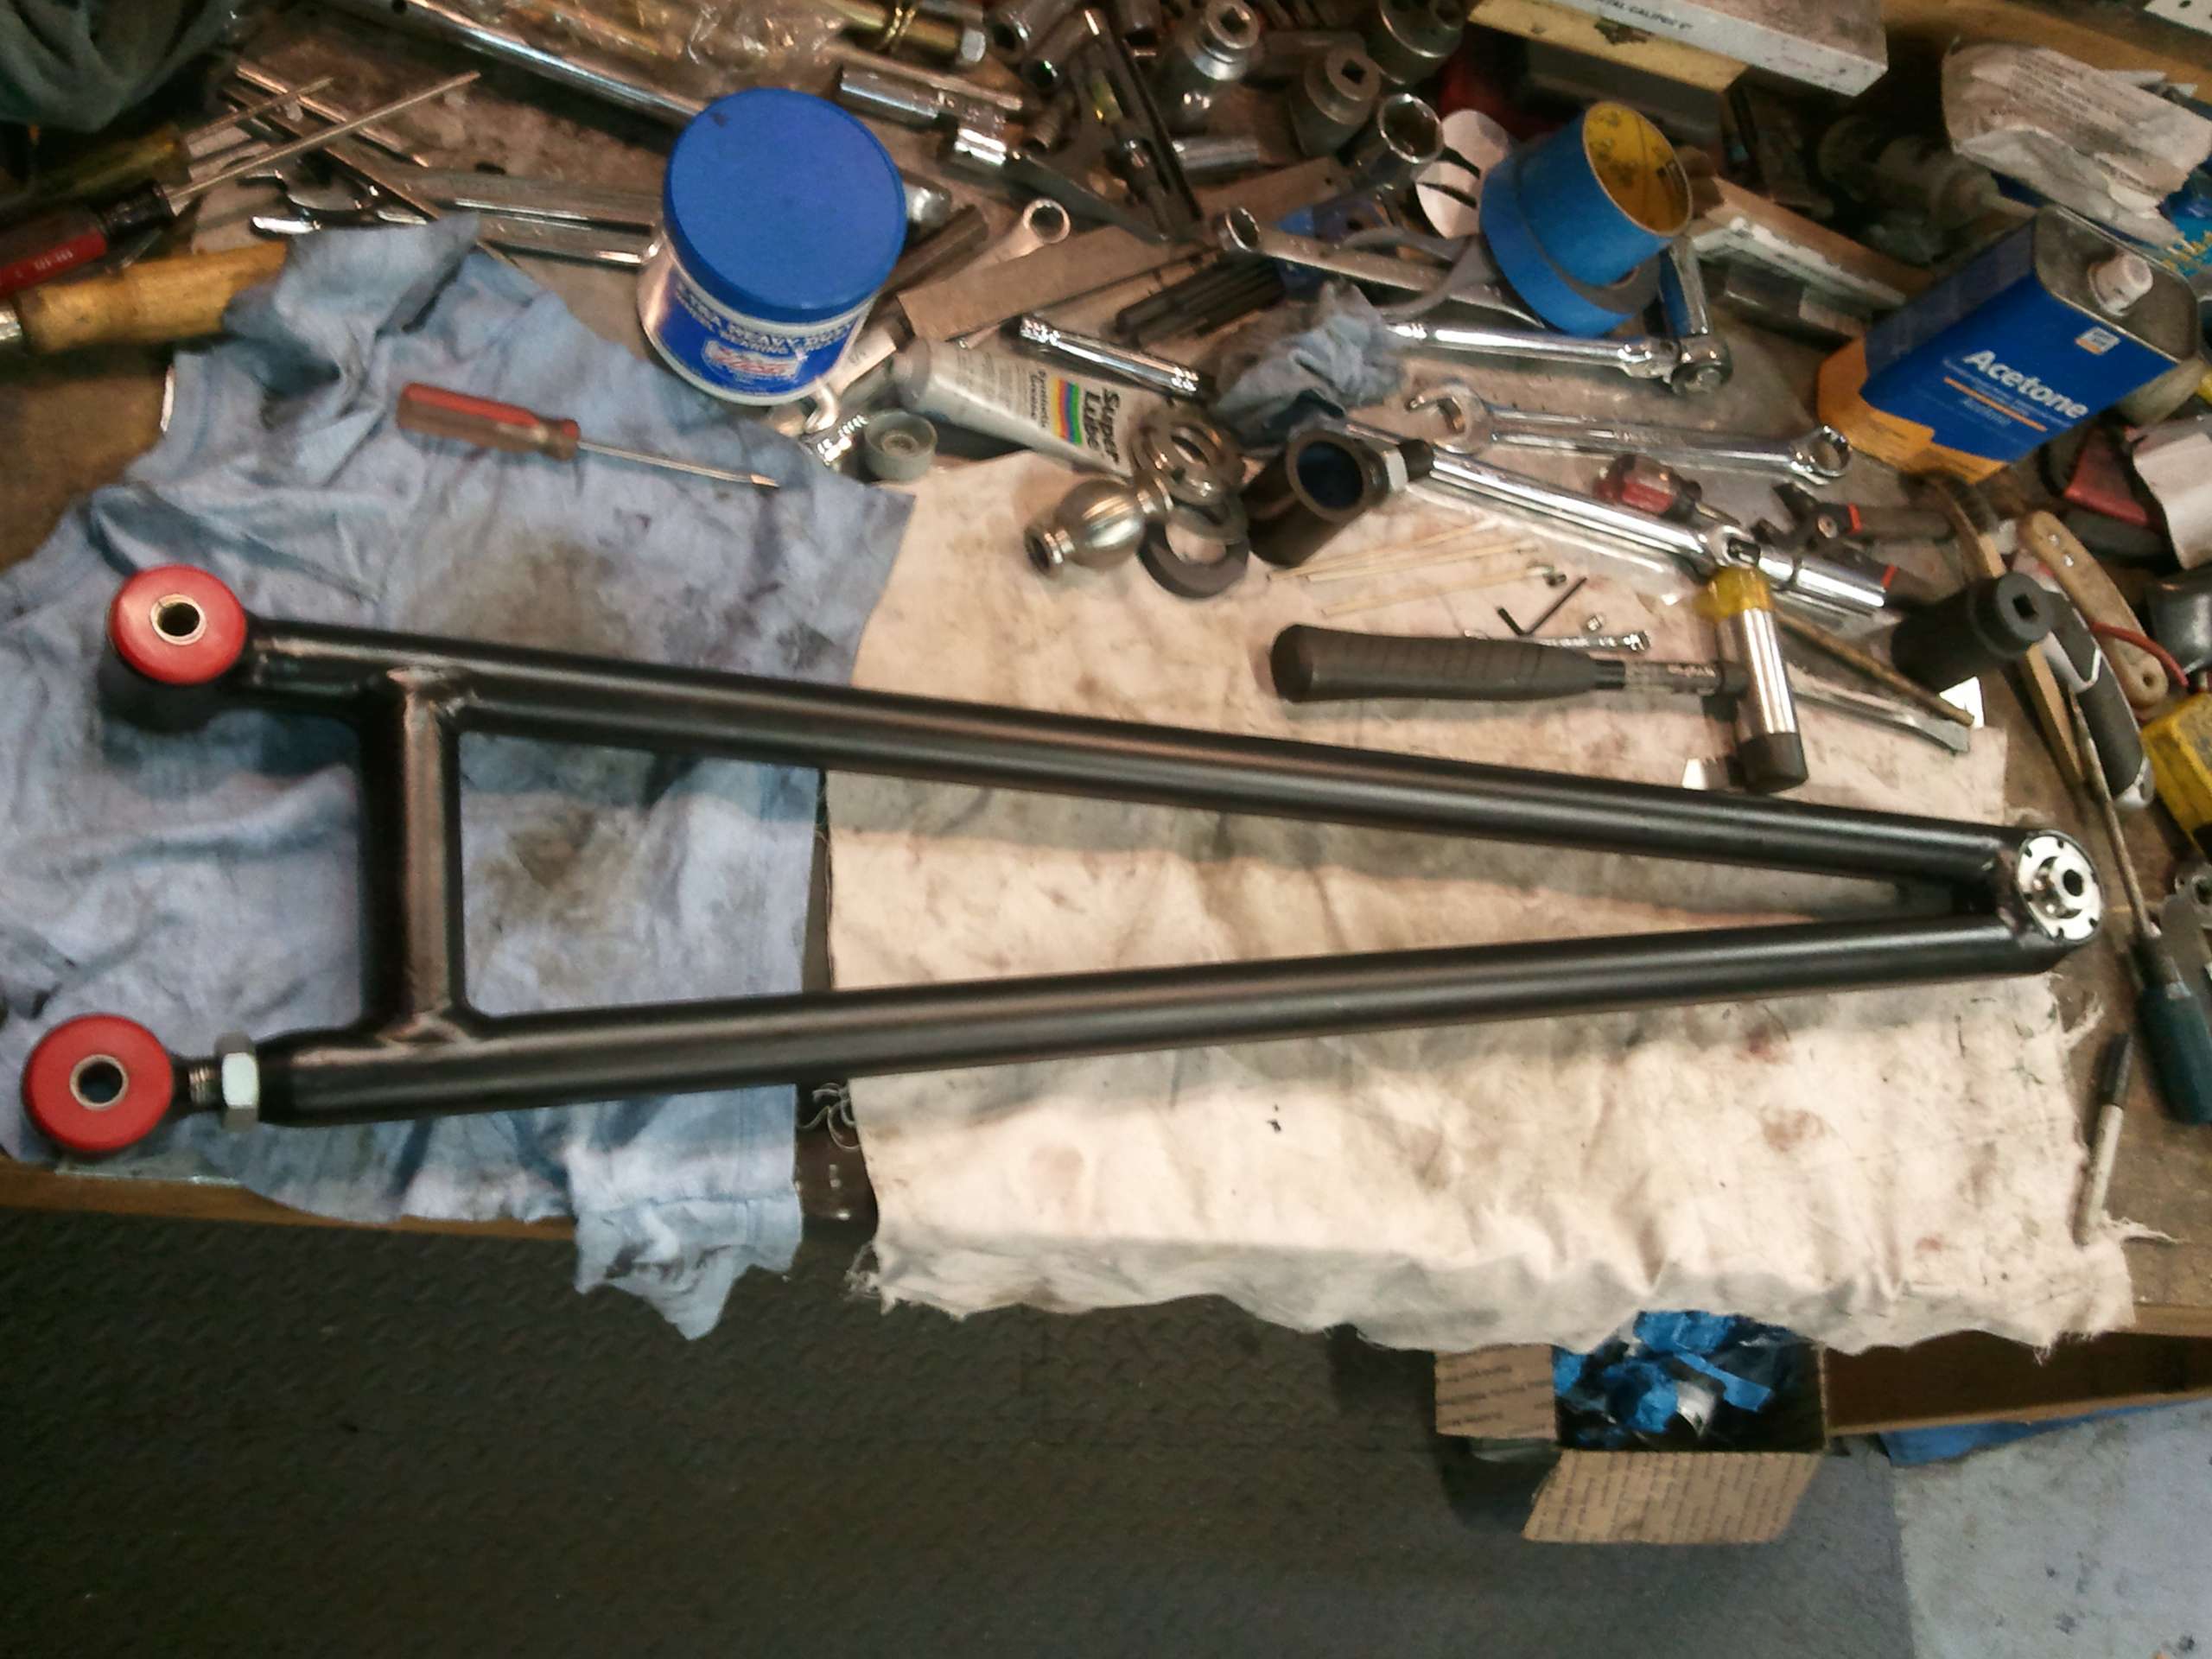
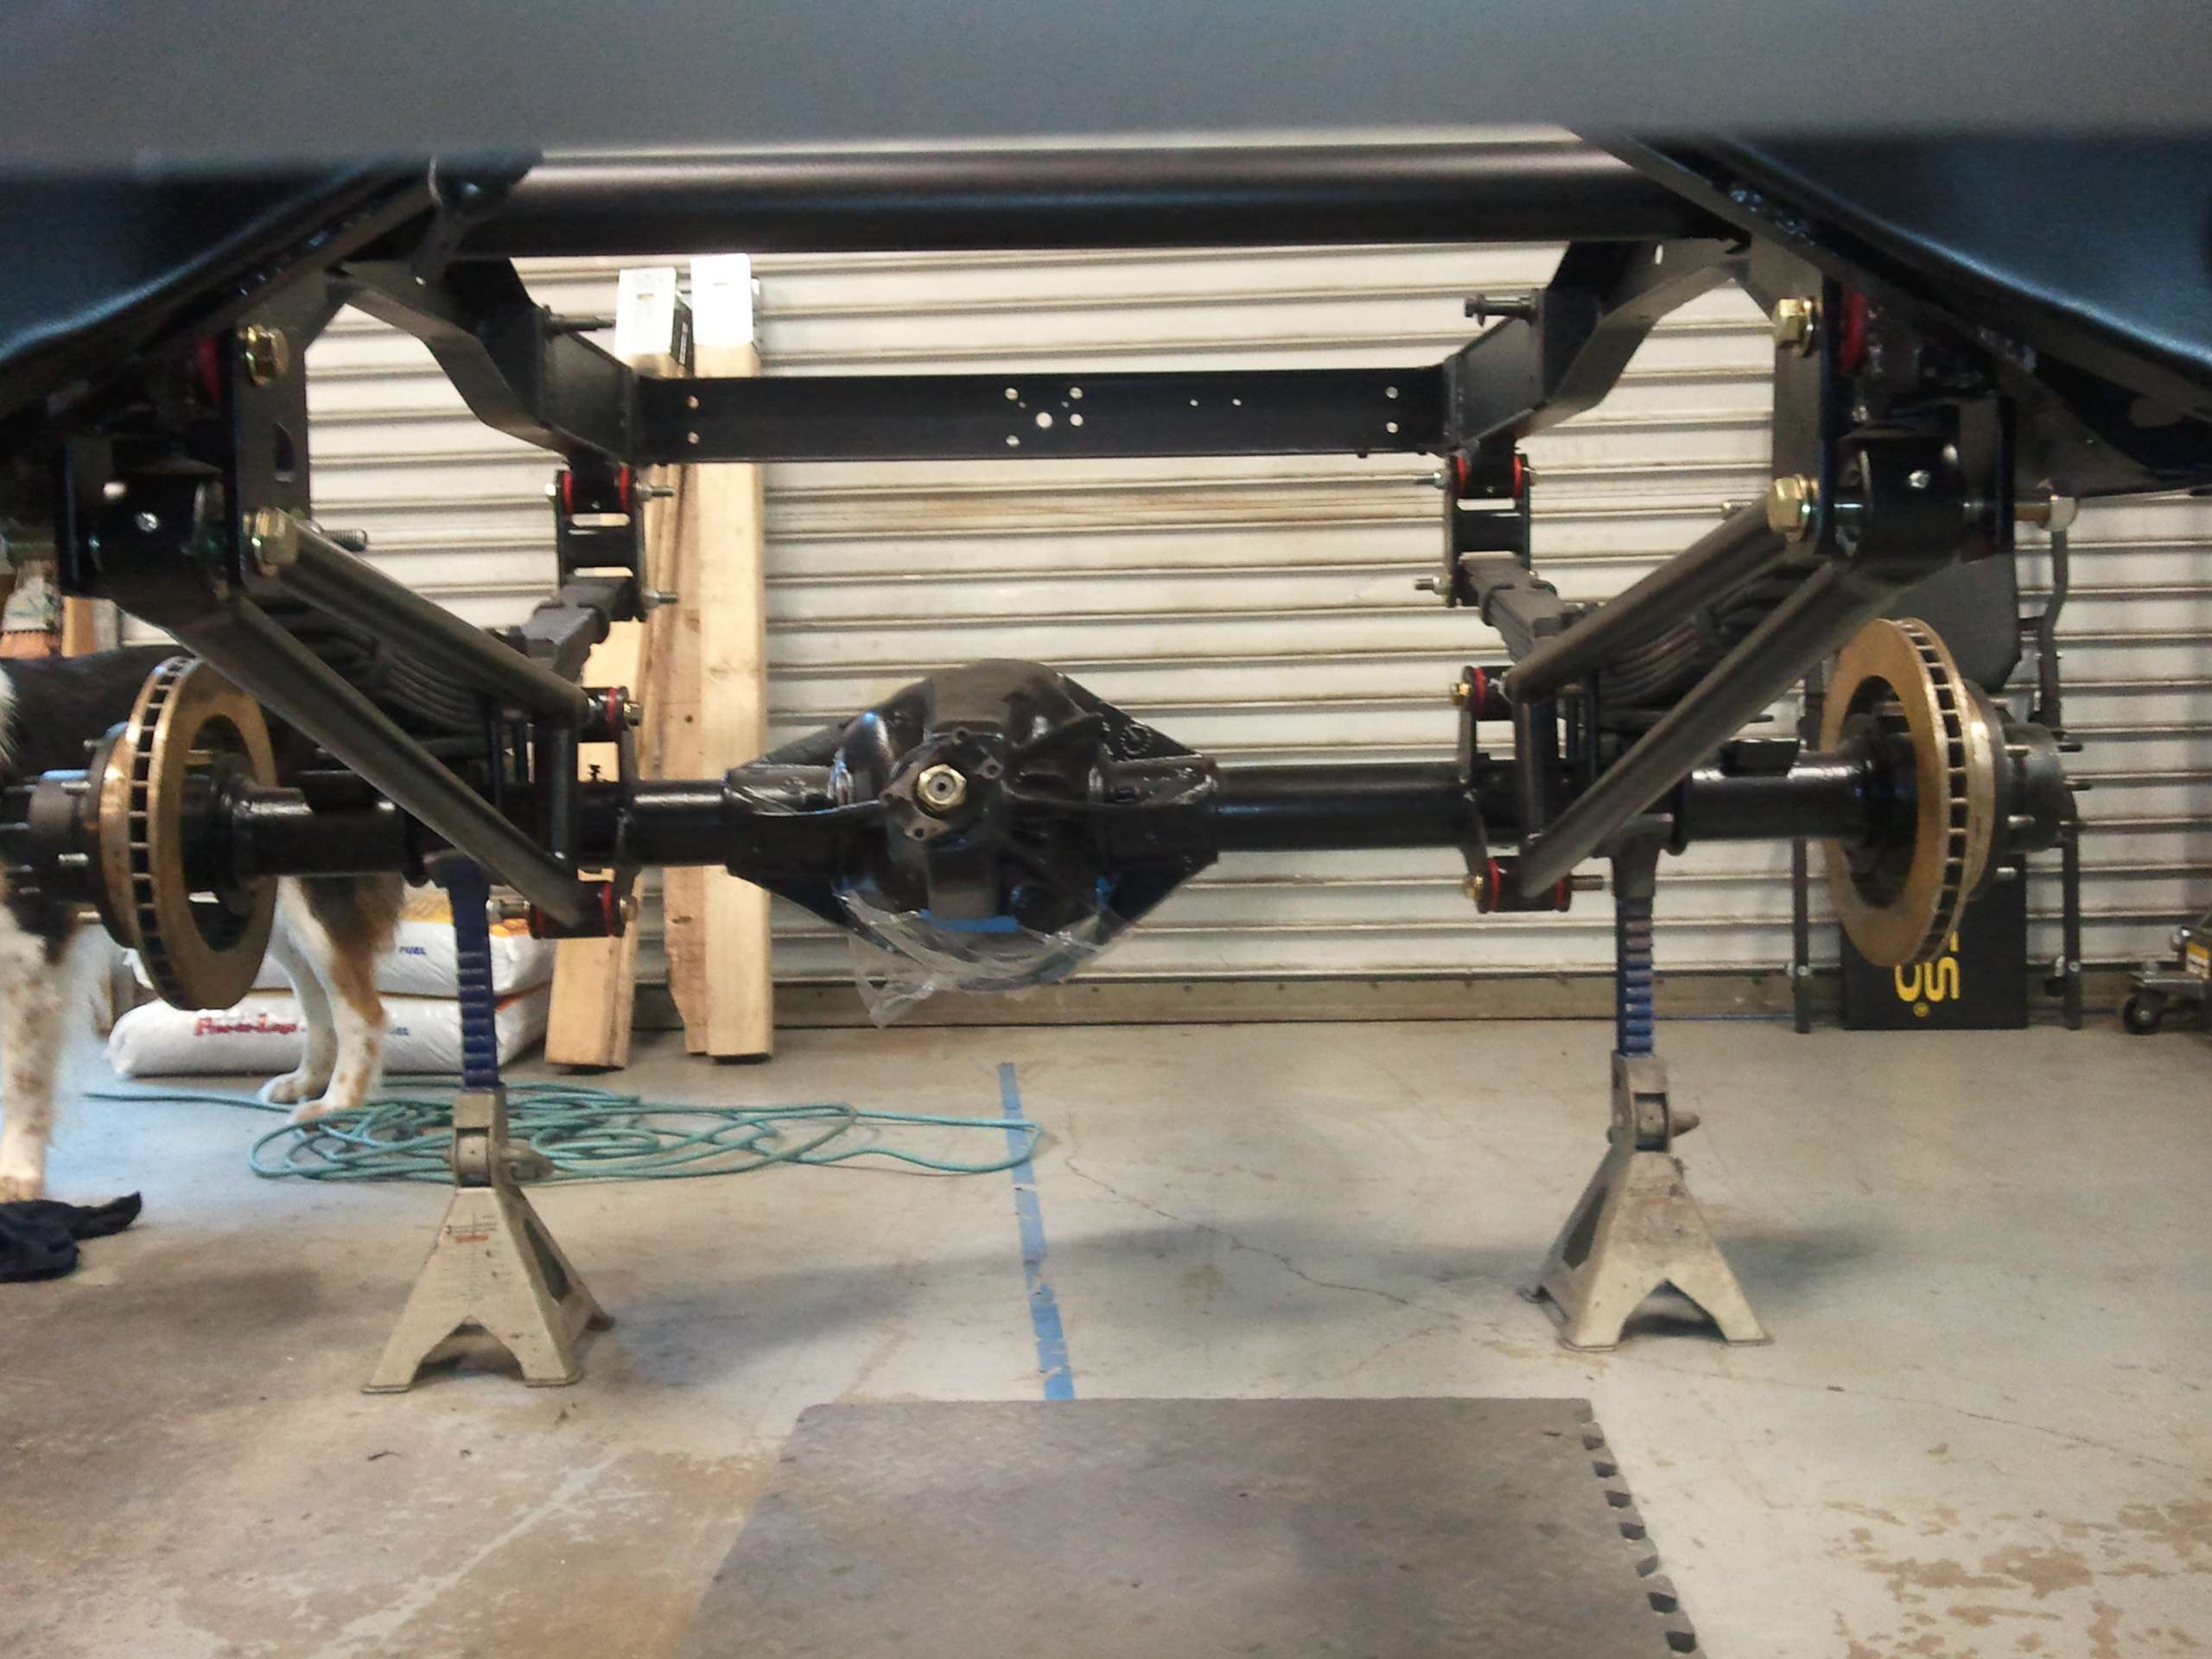
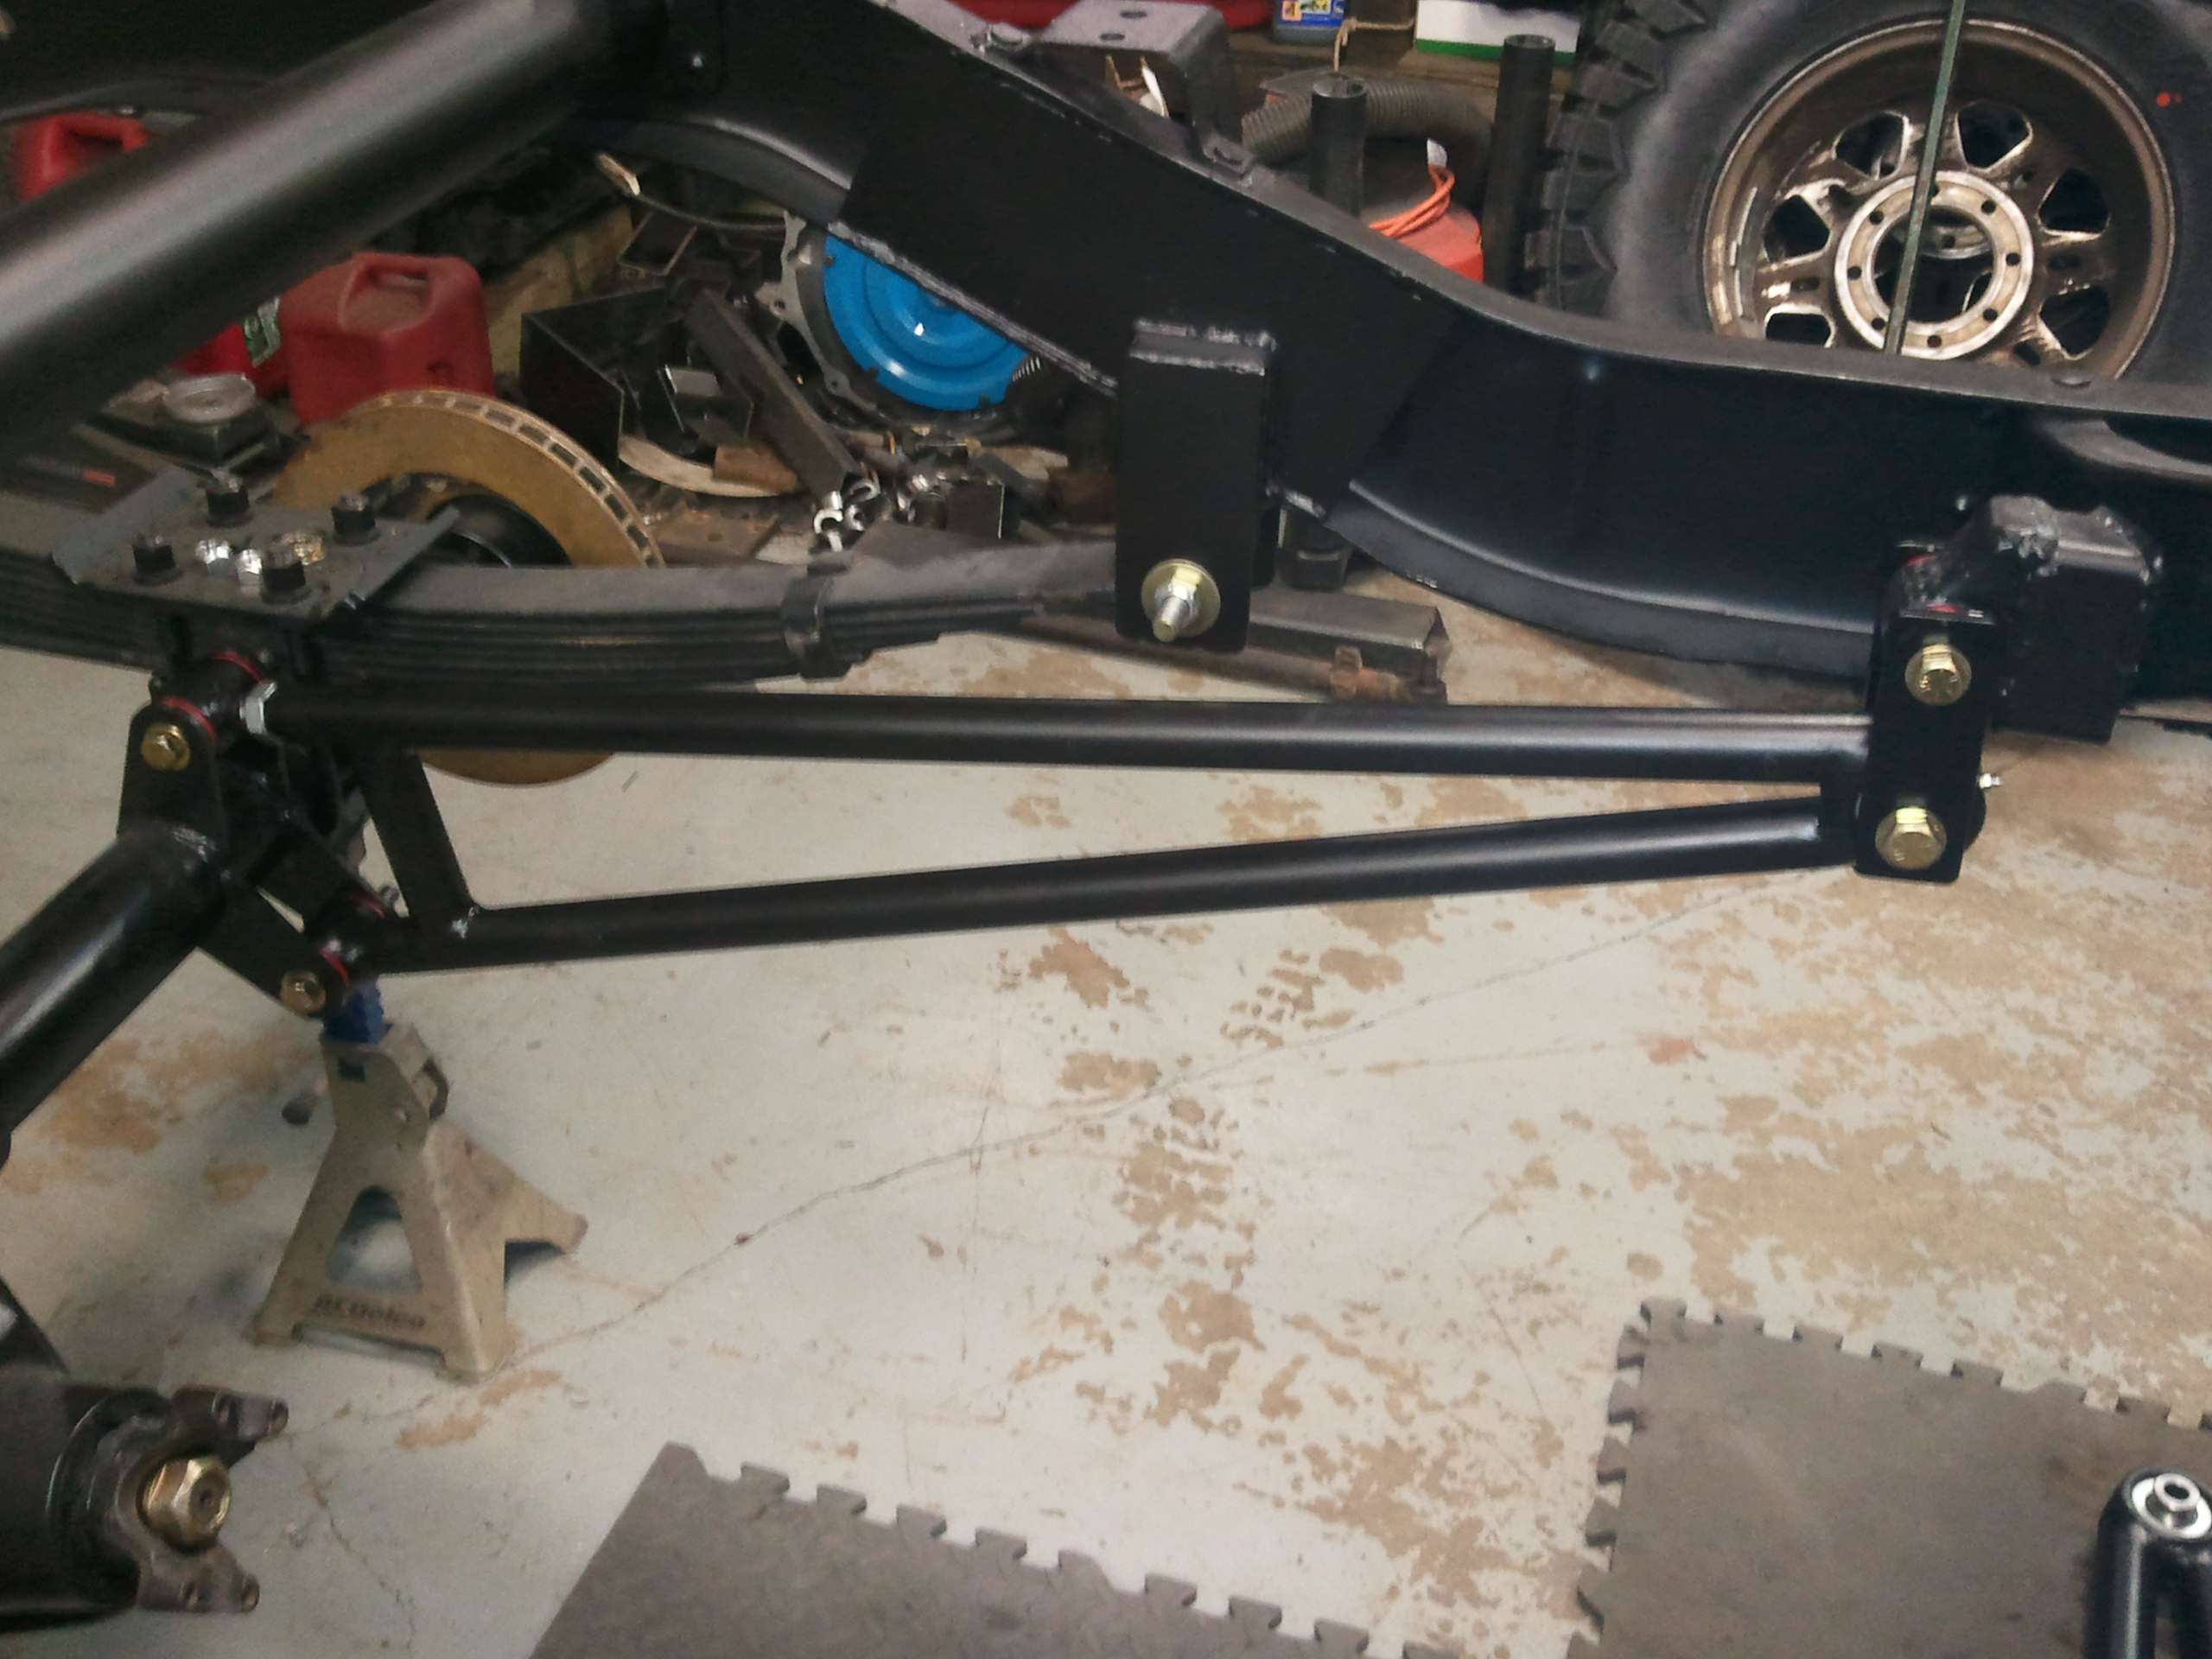
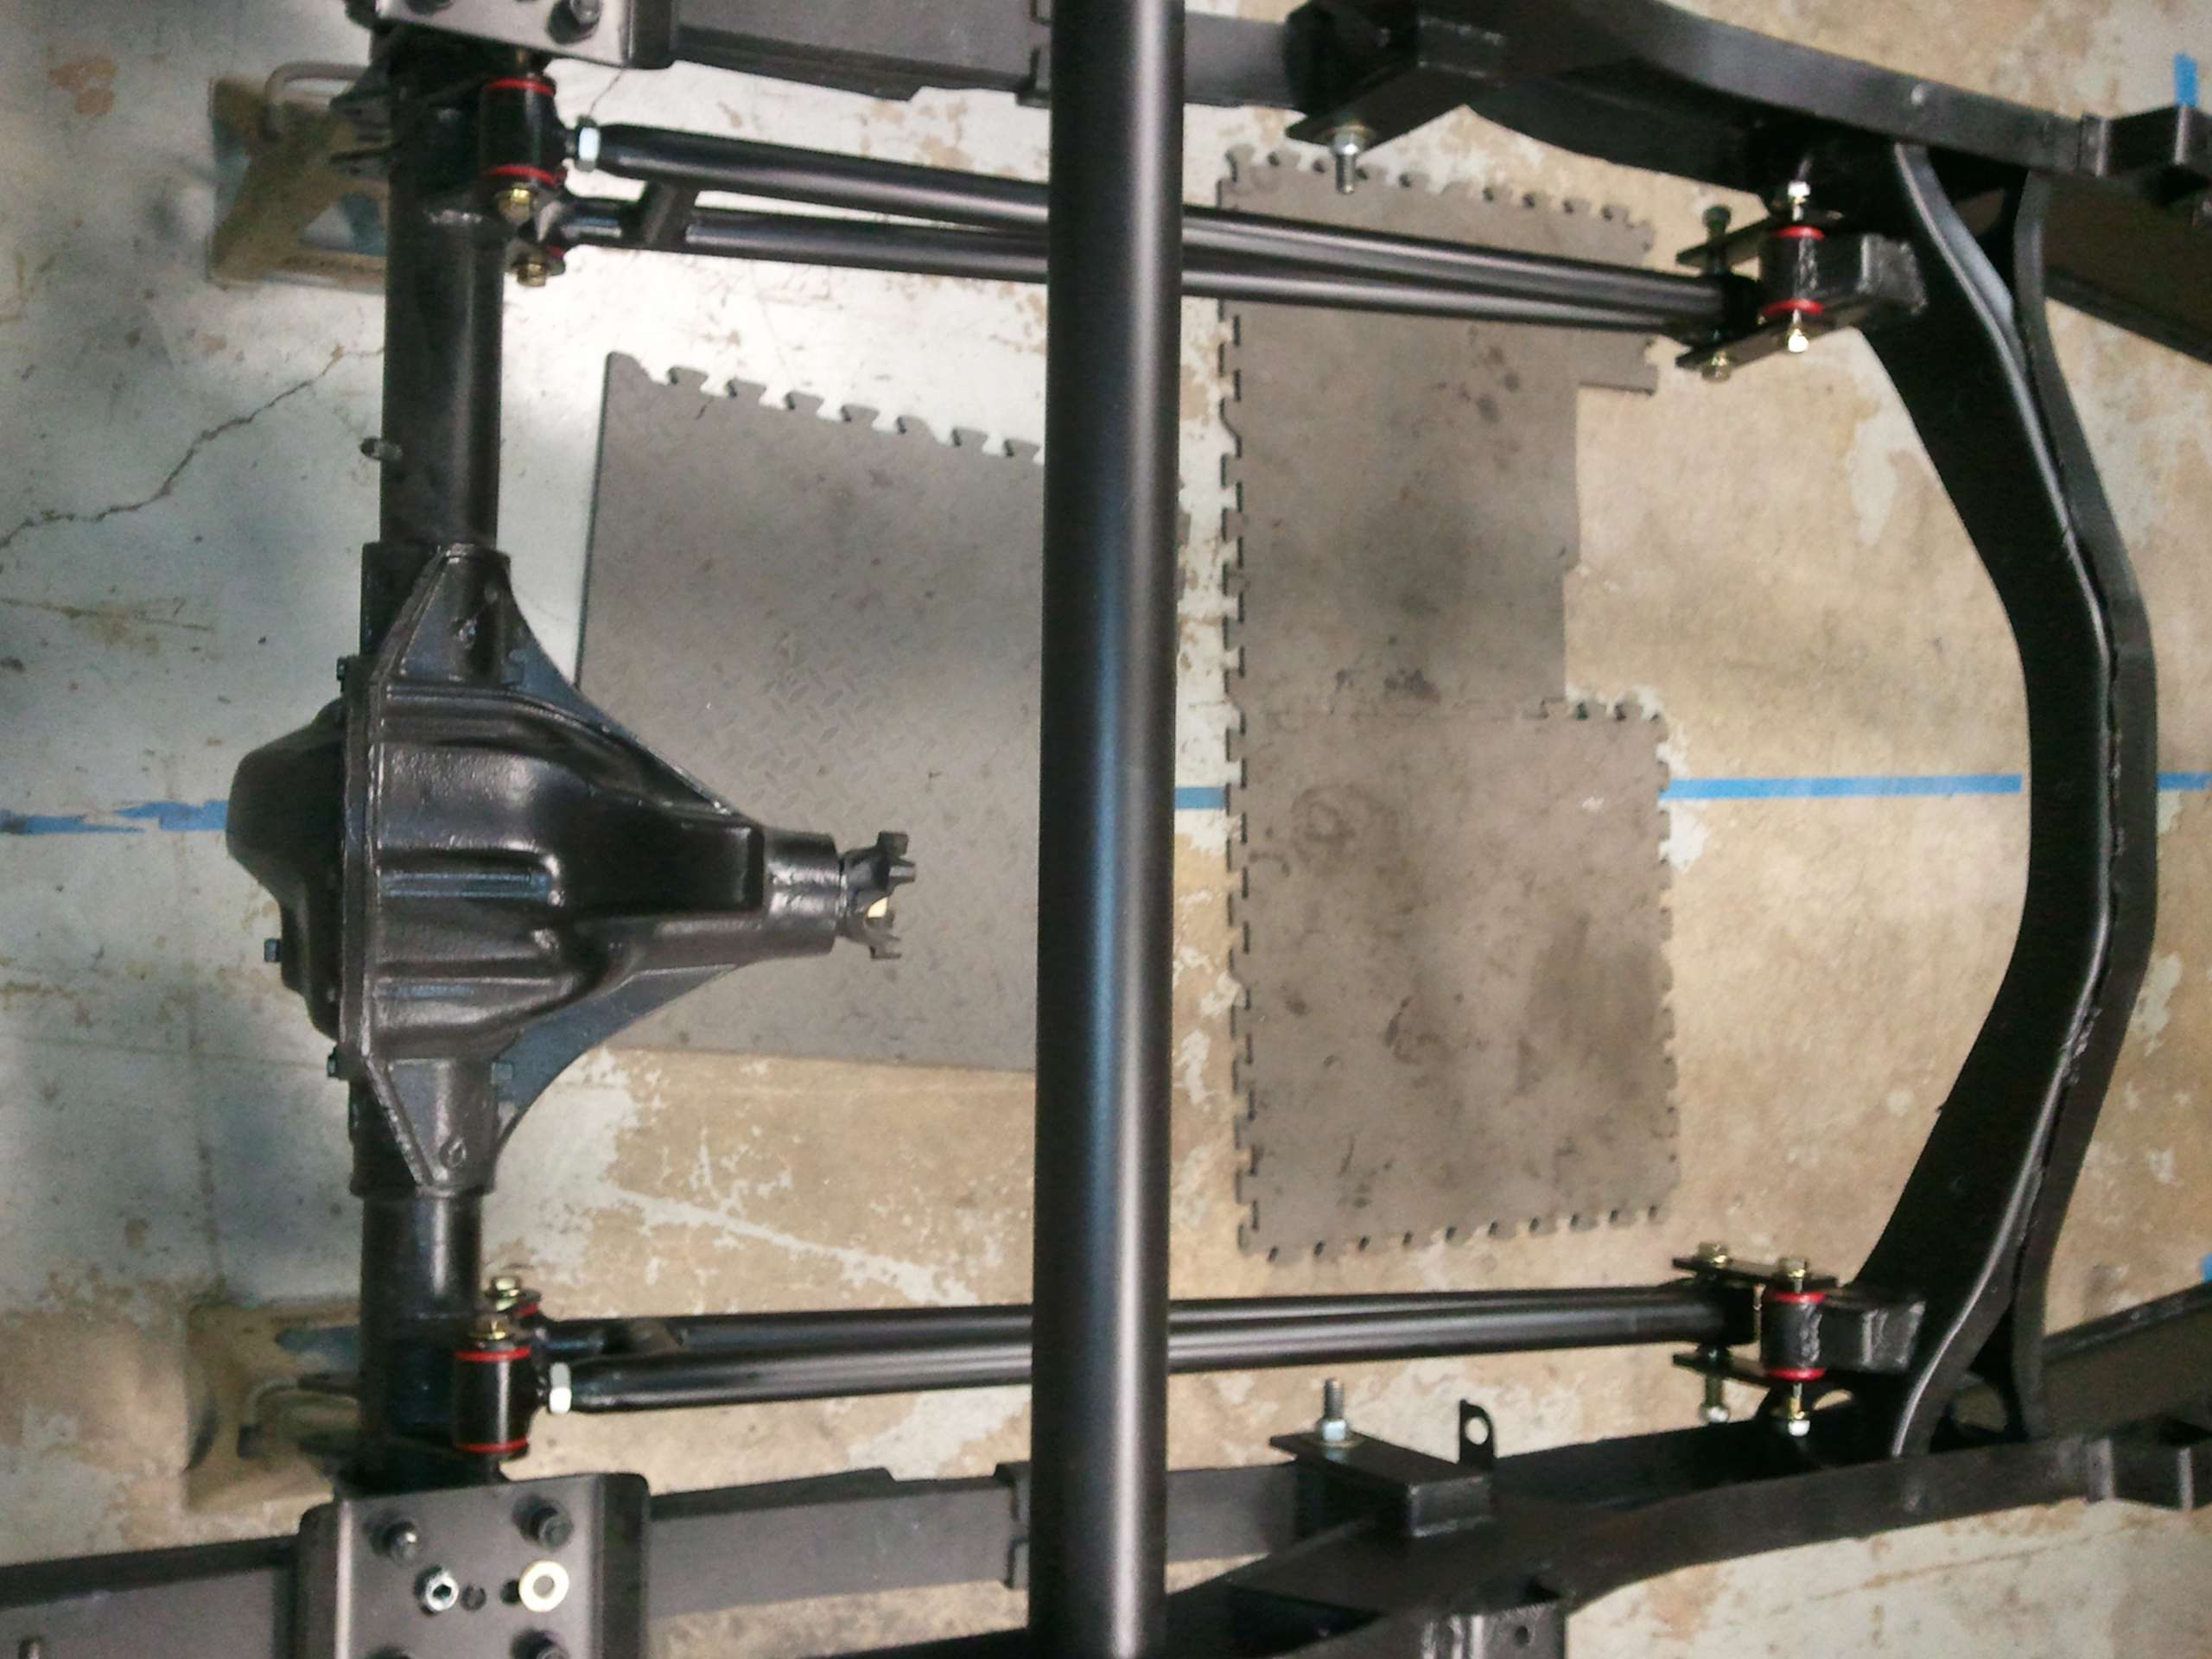
Time to put all the pieces together and install
Image

Image

Image

Image

This picture was taken with my phone resting on the bottom of the transmission crossmember. It's the middle low point between the two axles. The track bars look like they aren't going to have much of any obstacle clearance issues.
Image

I'm pleased with how the track bars turned out, but it was a mess load more work than I expected.

Resbum
Originally Posted by Resbum
"What year is my truck?... Which part?" Build thread- http://www.fsjnetwork.com/forum/viewtop ... 290#p18290
User avatar

Topic author
Resbum
Posts: 466
Joined: Fri Jun 08, 2012 9:45 am
Location: North East Oregon

Re: 1970 Gladiator 1 Ton 6BT 12V Cummins Build

Post by Resbum »

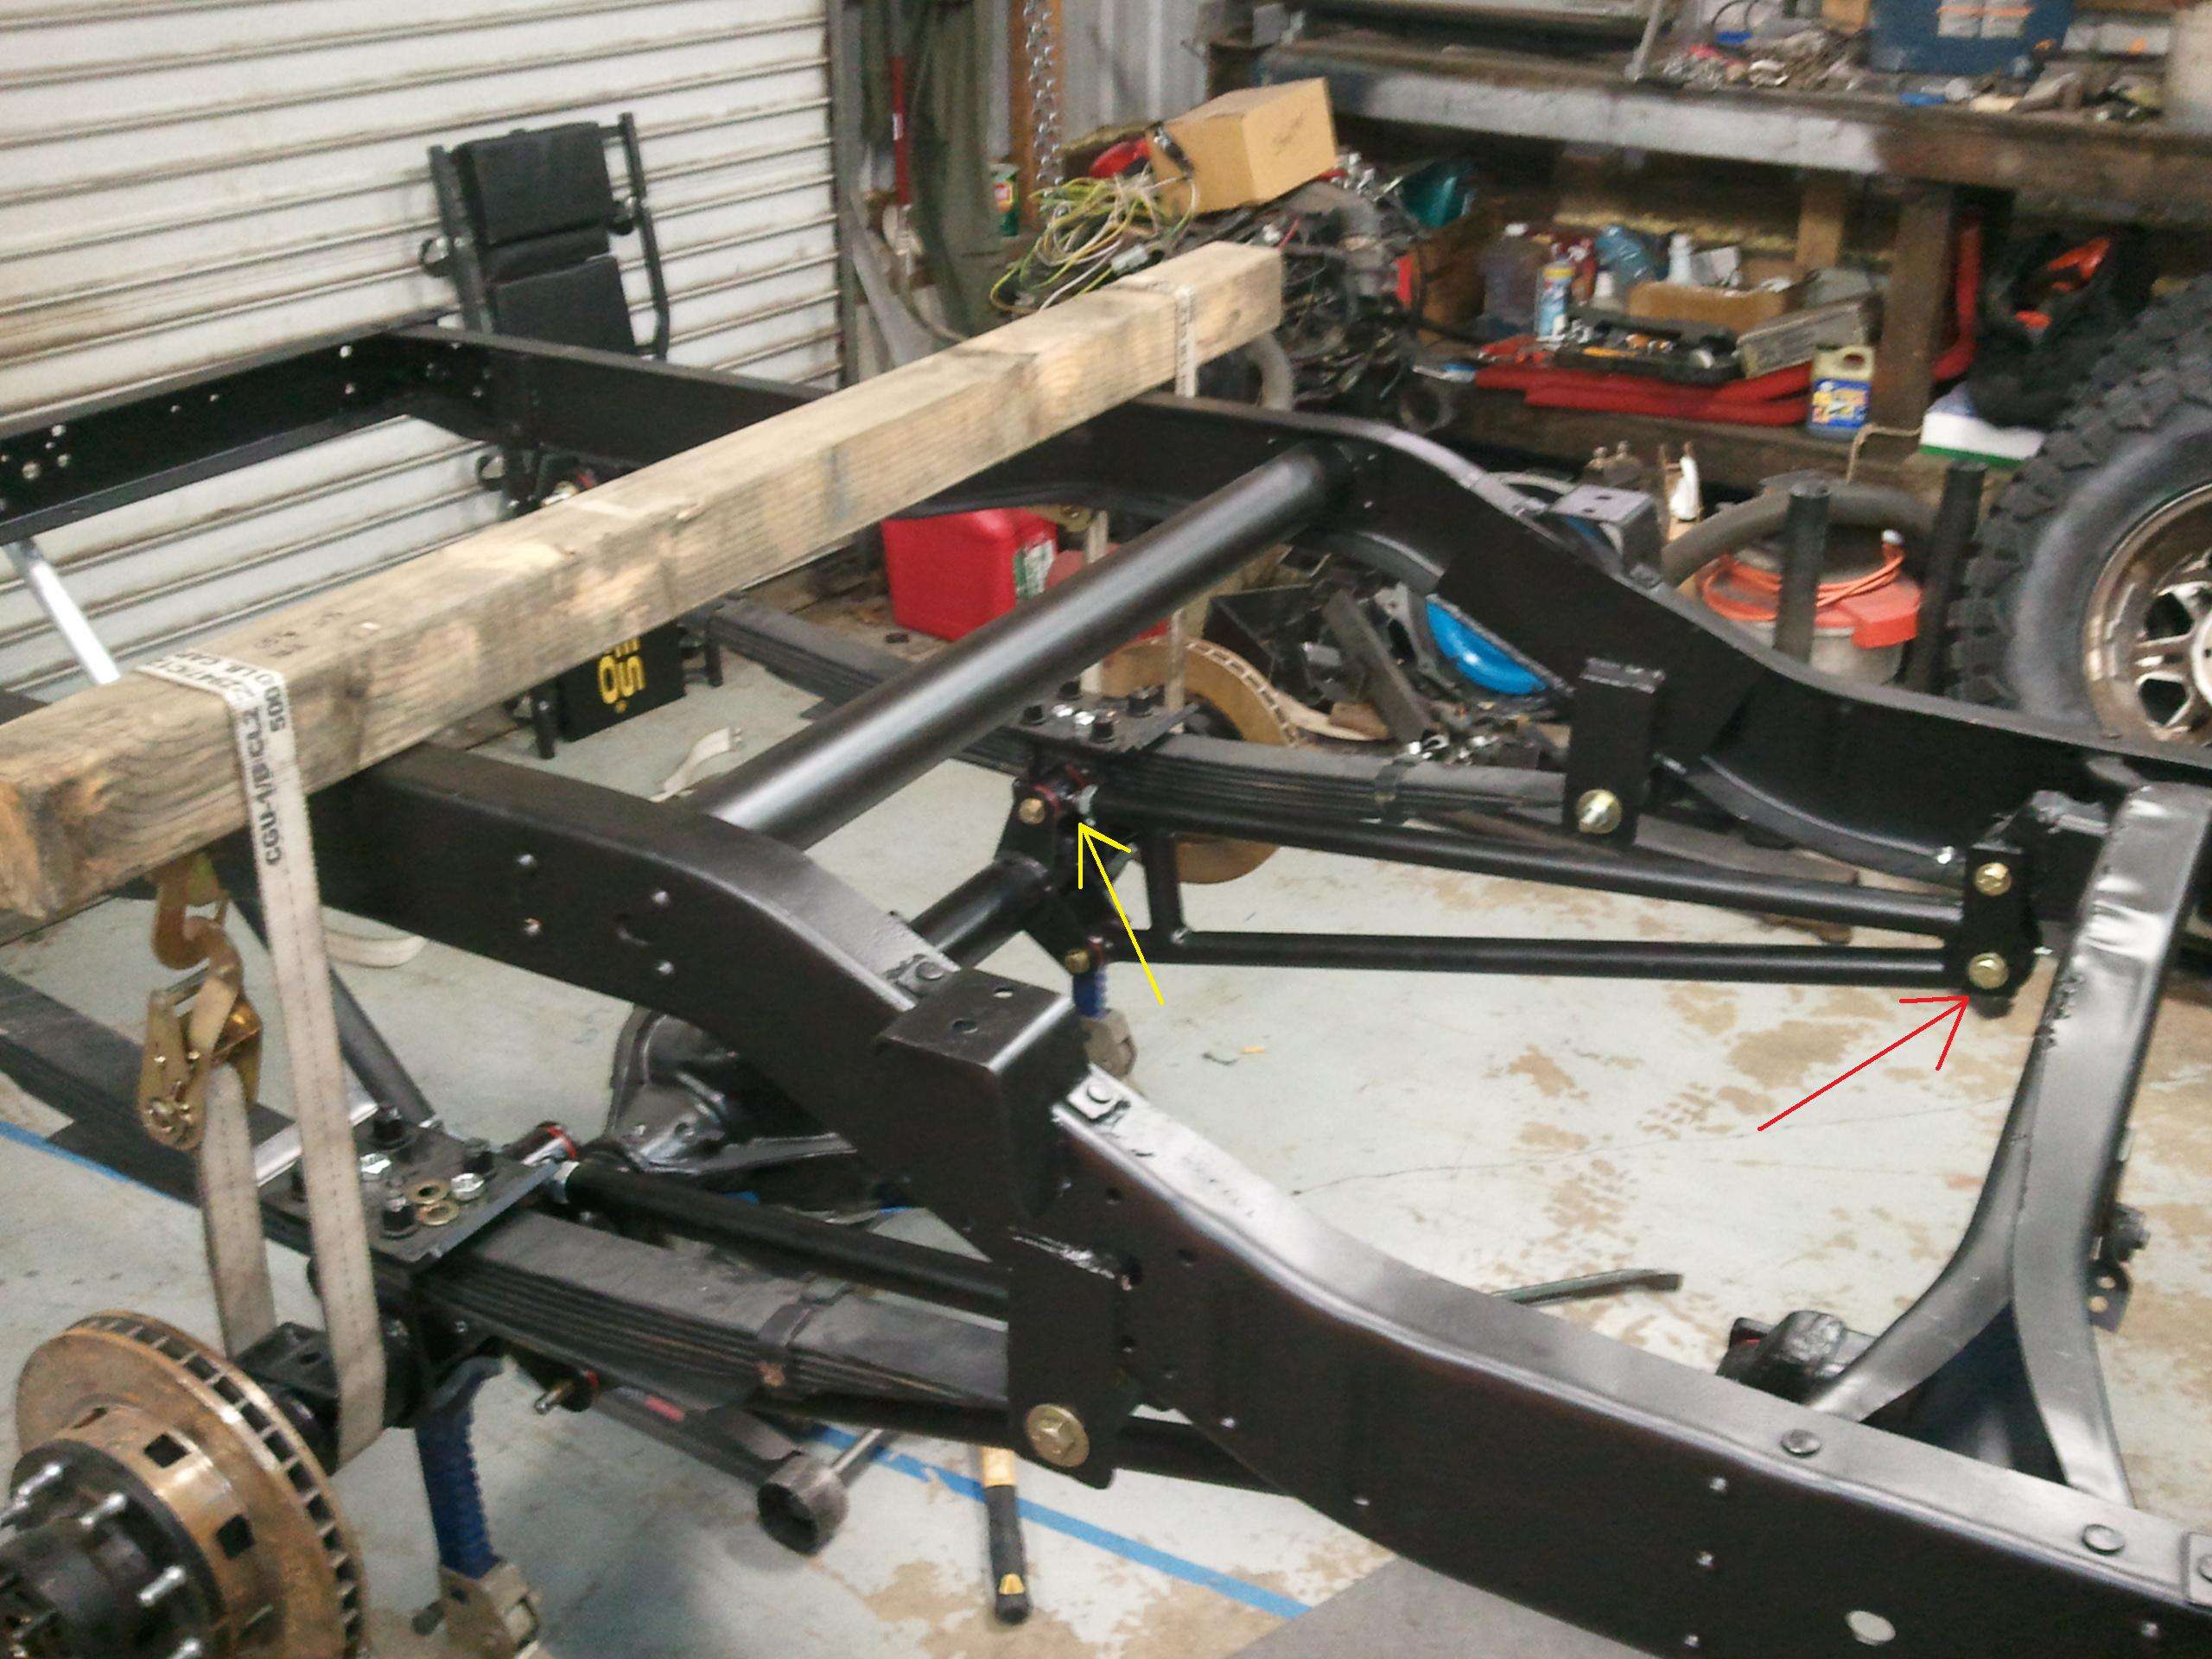
Today I wrapped up the major work on the frame.

I adjusted the track bars by compressing the springs with rachet straps wrapped around the axle and a 4X4 until the suspension was at its midpoint of travel. Then I turned the adjustable axle mounts(yellow arrow) in and out until the shackle joints(red arrow) lined up with the shackle holes. Then cranked everything down.
Image

Then I did a lap around the truck checking and retightening all the spring and shackle bolts, and axle u-bolts. After towing the frame down for its initial alignment everything had taken a good seat and the u-bolts had relaxed. They actually took more retightening than I expected and I'll definitely be checking them several more times.

Next on the list is to mount the shocks, install the calipers and new brake lines, mount the steering box and fabricate the drag link.

Resbum
Originally Posted by Resbum
"What year is my truck?... Which part?" Build thread- http://www.fsjnetwork.com/forum/viewtop ... 290#p18290
User avatar

Topic author
Resbum
Posts: 466
Joined: Fri Jun 08, 2012 9:45 am
Location: North East Oregon

Re: 1970 Gladiator 1 Ton 6BT 12V Cummins Build

Post by Resbum »

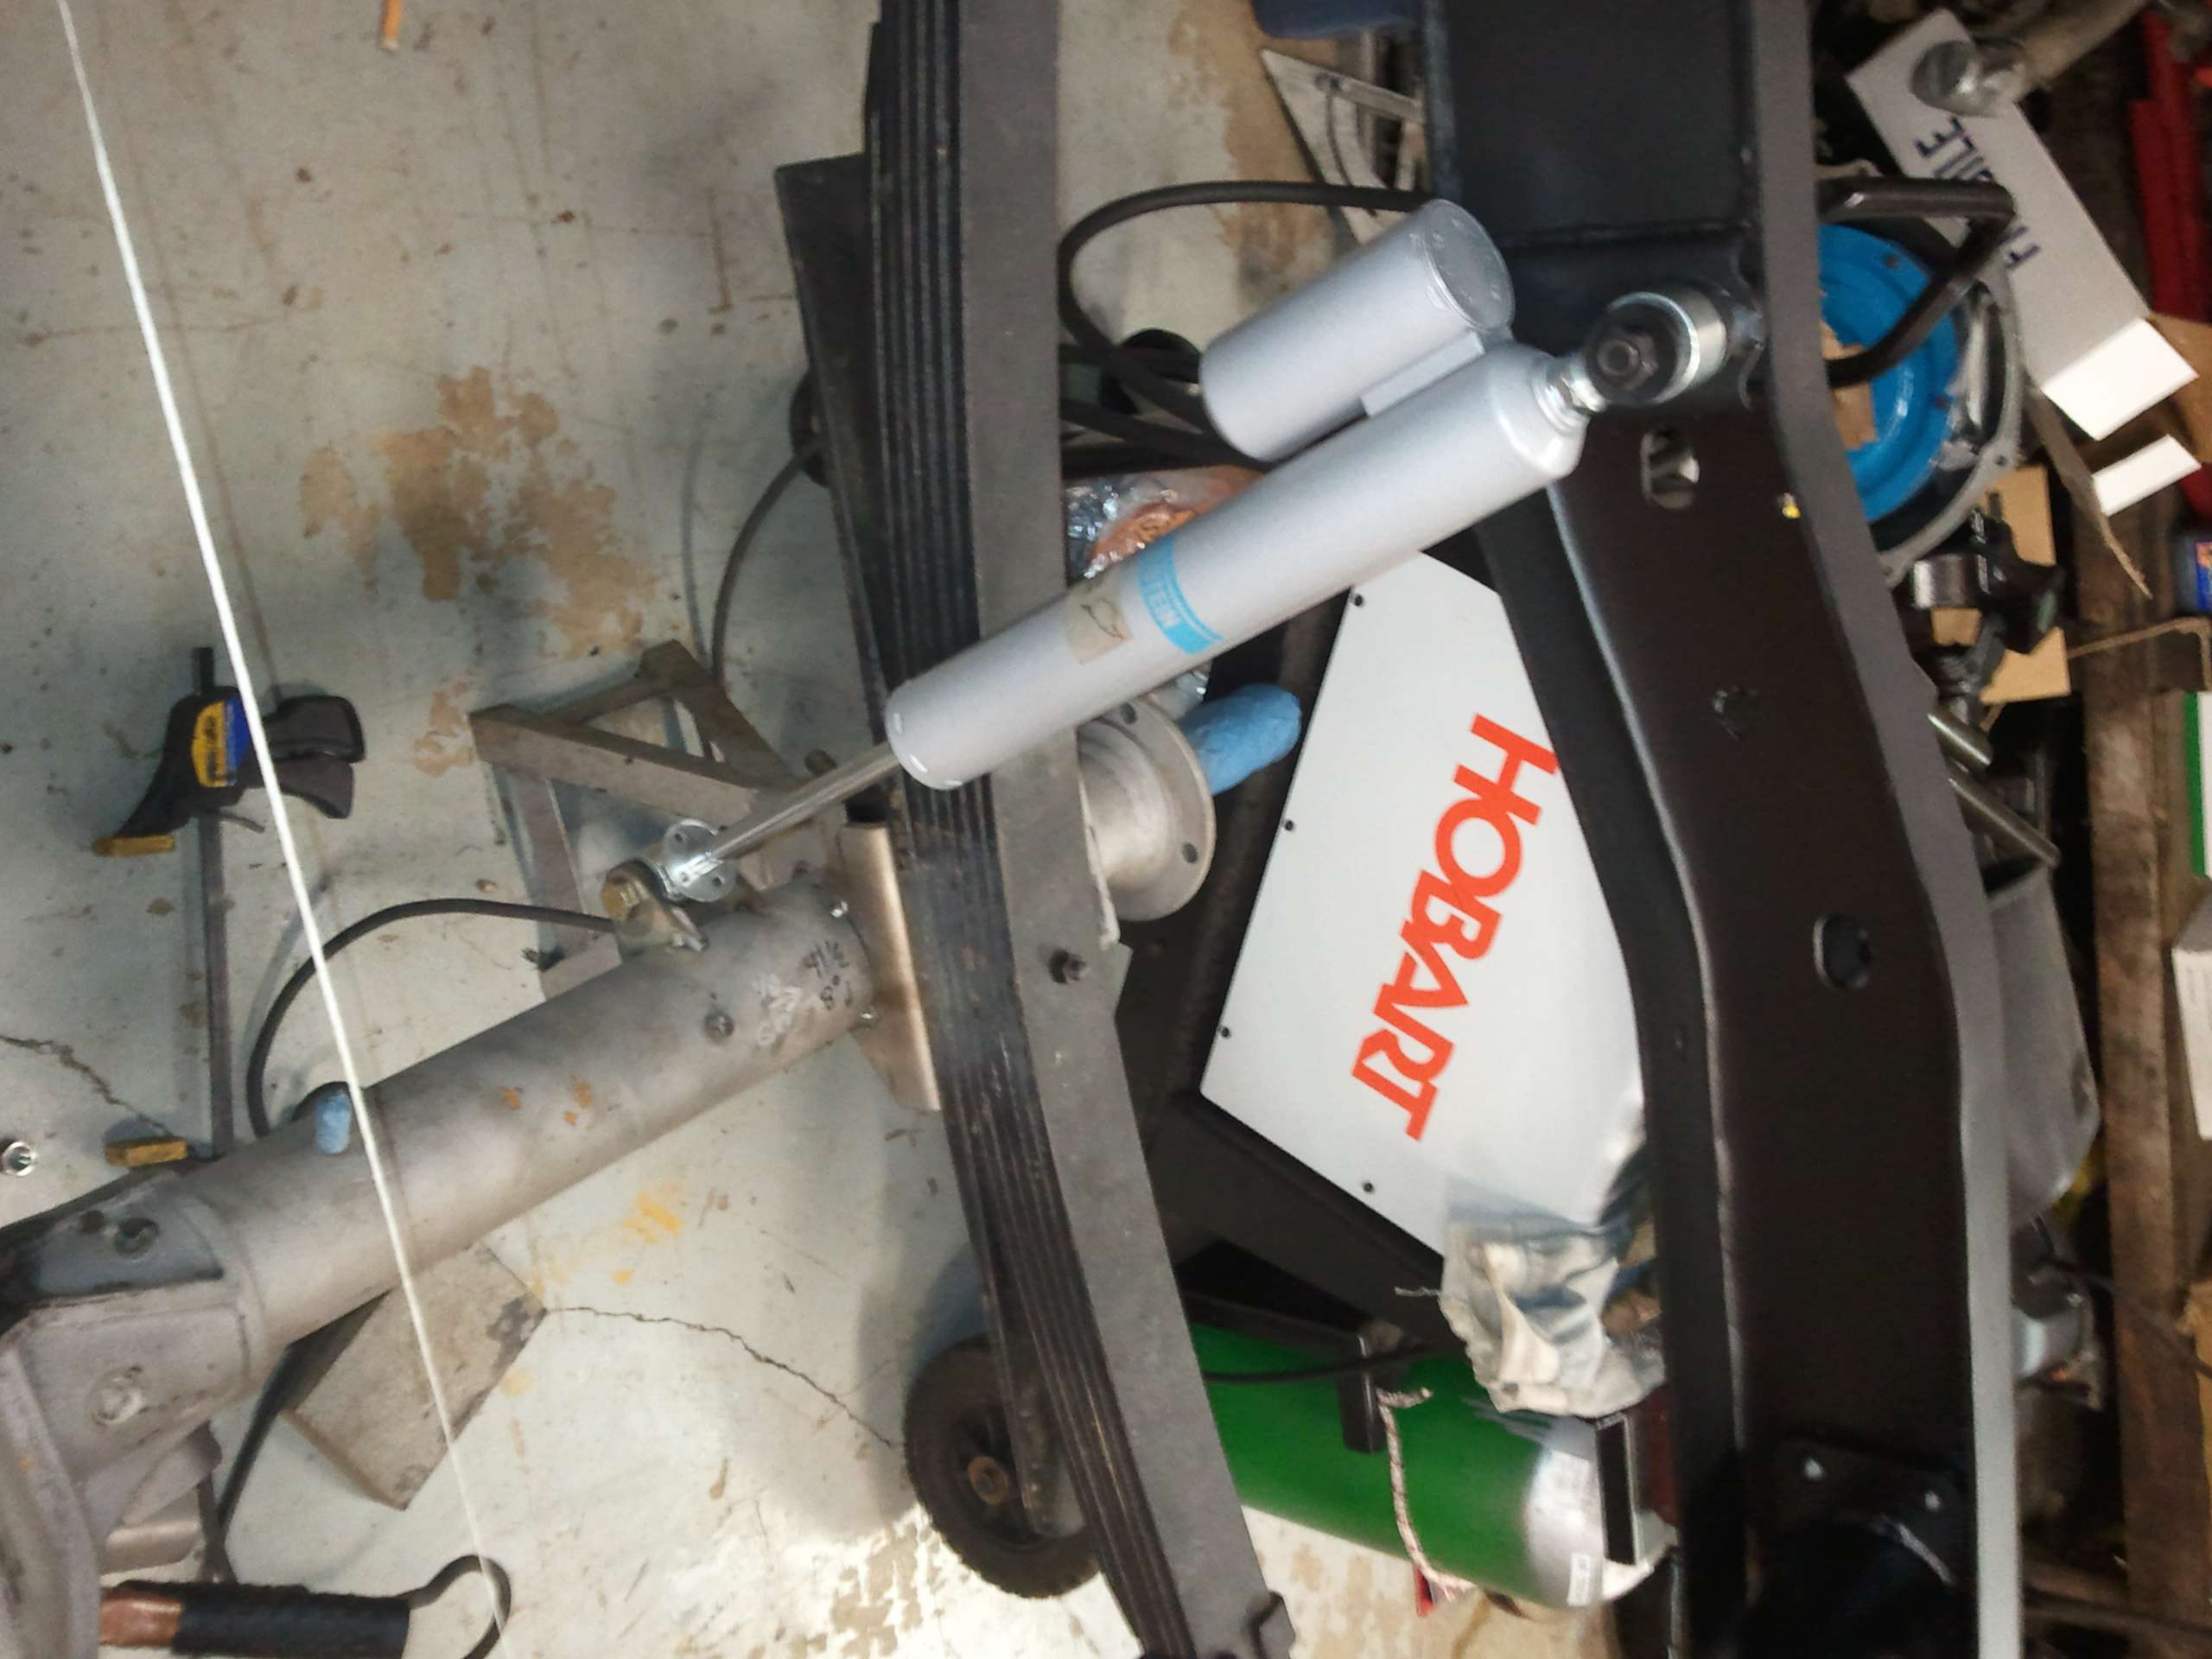
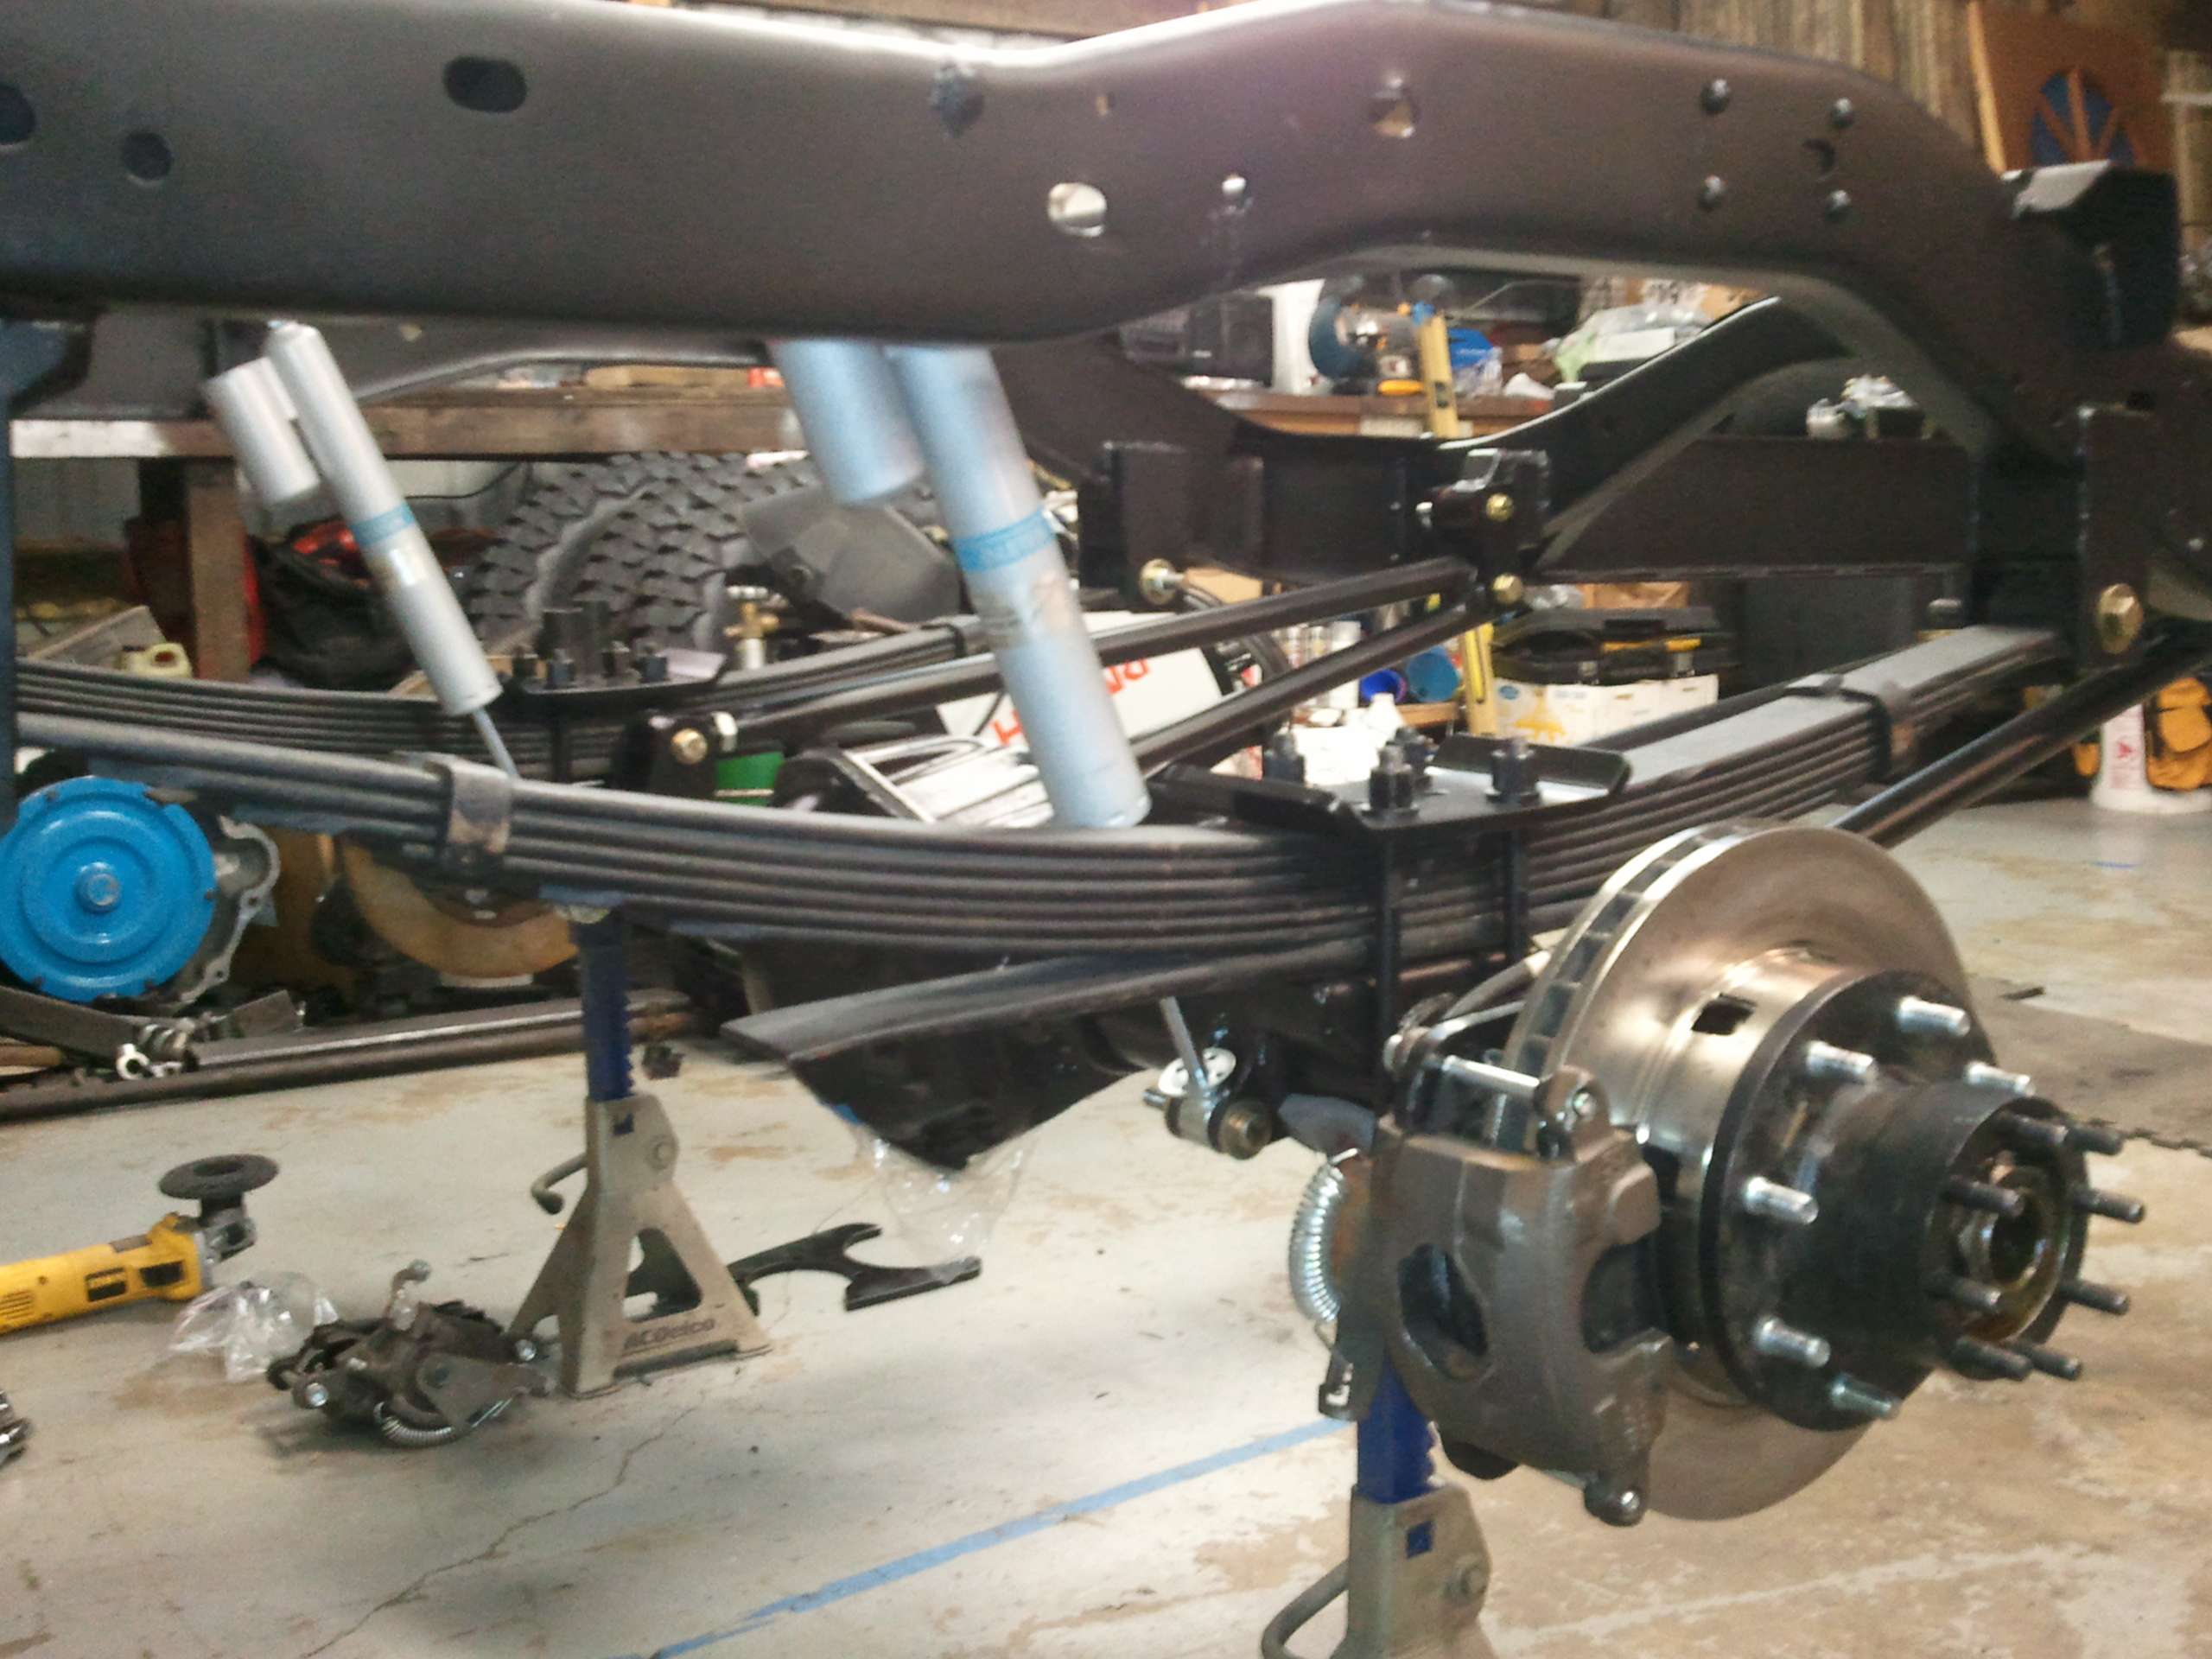
Got the rear brakes and shocks on today.

Image
Originally Posted by Resbum
"What year is my truck?... Which part?" Build thread- http://www.fsjnetwork.com/forum/viewtop ... 290#p18290
User avatar

Topic author
Resbum
Posts: 466
Joined: Fri Jun 08, 2012 9:45 am
Location: North East Oregon

Re: 1970 Gladiator 1 Ton 6BT 12V Cummins Build

Post by Resbum »

Quote:
________________________________________
Originally Posted by tgreening
I think you'll be good to go with most all of your intended uses, with only one concern (for me). Dual track bars like that tend to be fairly limiting on articulation. I'm not sure if the johnnie joints at your shackle ends will do the trick. If mild wheeling is all you're after you will probably be ok, but just so you know, you could have gotten away with just one track bar, more centrally located on your axle, with little to no effect of the articulation of the rear end.
________________________________________

Thanks tgreening for the honest input. Yeah, this was one of the tougher calls I made when designing the truck. Here's the reasoning I used.

I confirmed with Ballistic Fab that the 2.63" joints have 24 degrees of articulation with the 5/8th" bolt bore hole(30 degrees for 9/16th's). The shocks I'm running in the rear only have 10" of travel and are approximately 42" apart. I plugged those numbers into an online triangle calculator and with the two shocks at opposite extremes, fully compressed/fully extended, the most my rear axle can mechanically articulate is 13.3 degrees. Because the shocks are tilted aft the axle actually gets a touch more articulation. Let's say 12" and that comes out to 16 degrees of mechanical articulation. When I got the first track bar made I hooked it up to a shackle and swung the axle end through what I believe will be the most it could experience and it freely moved through that range.

When I positioned the lower shock tabs on the axle I set it so that the axle hung at 8 3/8th" of extension with the wheels and rims mounted. That leaves about 1 5/8th" hyperextension. I'm going to mount the bump stops so that they stop the axle 3/4" before max compression.

My thoughts are that with the 1 ton rear springs I'd have to be extremely heavy in a really twisted up position before the springs would ever flex to max opposite extremes.

Now the other thing that came into play when deciding to run two bars. The engine torque. I'm not an engineer and honestly don't know how much rotational torque one bar can handle. My plans for the engine are to stop the mods around 800ft/lbs of torque. Because I don't have a clue, two bars are just a safety net. Now that I think about it, rock crawlers running doublers have crazy gear ratios, +100:1, so they must experience some pretty big rotational torques running just one bar.

Now some confirmed validation for your argument. I have an idea of what's going on, but it would take math I'd struggle with and I'm too lazy to confirm it.

Here's what really happened when I put the track bars on. As I said, I originally set the rear axle to droop 8 3/8" of shock extension with all the operating weight hanging from it(tires/rims). After I mounted the track bars the axle only droops 7 3/4" with all its weight hanging on it. It takes my fat rear laying over the wheel to get it to extent to its original resting place. So something is going on to limit articulation.

Resbum
Last edited by Resbum on Fri Apr 05, 2013 2:30 pm, edited 1 time in total.
Originally Posted by Resbum
"What year is my truck?... Which part?" Build thread- http://www.fsjnetwork.com/forum/viewtop ... 290#p18290
User avatar

Topic author
Resbum
Posts: 466
Joined: Fri Jun 08, 2012 9:45 am
Location: North East Oregon

Re: 1970 Gladiator 1 Ton 6BT 12V Cummins Build

Post by Resbum »

.
.
Originally posted by budojeepr 02-18-2012 08:58 AM
________________________________________
Quote:
________________________________________
Originally Posted by Resbum
Here's what really happened when I put the track bars on. As I said, I originally set the rear axle to droop 8 3/8" of shock extension with all the operating weight hanging from it(tires/rims). After I mounted the track bars the axle only droops 7 3/4" with all its weight hanging on it. It takes my fat rear laying over the wheel to get it to extent to its original resting place. So something is going on to limit articulation.
________________________________________

First off, I have HUGE respect for your fab skills and the way you're going about building and sharing your thoughts and details on the build. Second, your retirement plans nearly drive me crazy with envy. :D

I had the same concerns as tgreening about the articulation when I saw the pic in this post.


You're trying to limit axle wrap as a result of all that torque, right? It's a good design for that. However...

Ignoring the effects of the shackle at the back end, the front shackle -> axle -> frame mount of track bar make a triangle with fixed leg lengths. Any movement of the axle up or down, whether it's both wheels or just one, means something has to bend. Luckily, it's the spring, for most of the available travel. Once the spring rate exceeds whatever is the weakest link in the track bar or its mounting on the axle or frame, you'll break the track bar somewhere. If the spring rate is always lower than the weakest link, sooner or later you'll fatigue the spring somewhere and it'll break.

This is why most track bars have extensible arms - so the geometry can change as the axle moves up or down.

Here's a suggestion: You can mount the front end of each torque bar on its own shackle. The movement of the shackle should be enough to keep things from breaking, and it won't hurt the anti-wrap effects of the track bar.

My experience (as opposed to theory) with this is limited to a single Rubicon Trail run where my buddy's torque bar (that's what he called it) did not have any extension built in, and it busted its frame mount off. That left him with severe axle wrap and the mount on the axle would bang on his fuel tank with every bump or touch of the accelerator.

We ended up running his winch cable down under the front bumper, all the way back to the axle mount, then cinching it down. It really compressed his front springs, but controlled the rear axle. That's when I got the idea of making an axle wrap control system using a spring-tensioned cable. Of course that would only work under forward torque...

Thanks for listening (talk about long-winded!! :eek: )

budojeepr
Last edited by Resbum on Sat Apr 06, 2013 6:51 am, edited 1 time in total.
Originally Posted by Resbum
"What year is my truck?... Which part?" Build thread- http://www.fsjnetwork.com/forum/viewtop ... 290#p18290
Post Reply