Meet Road Trip
-
2326davis@gmail.com
- Posts: 28
- Joined: Wed Sep 07, 2016 8:10 pm
Re: Meet Road Trip
WOW, that looks great. I realize now that I've bit off a little more that i can chew picking a 79 Chief wide track for the first restoration. I'll have a lot of questions for you.
-
GaJeep94YJ
- Posts: 313
- Joined: Fri Dec 18, 2015 12:00 pm
Re: Meet Road Trip
What tail gate wiring? Will it roll the rear window up/down with a remote? Link ?
Sent from my Nexus 5 using Tapatalk
Sent from my Nexus 5 using Tapatalk
-
Road Trip
Topic author - Posts: 313
- Joined: Mon Jun 11, 2012 8:46 am
- Location: Bryan, Texas
Re: Meet Road Trip
I responded to GaJeep off line. I got the tailgate harness from Serehill. It will roll the rear window up and down with a remote. If anyone is interested, here is the link.
http://www.ifsja.org/forums/vb/showthread.php?t=163645
http://www.ifsja.org/forums/vb/showthread.php?t=163645
Robert
-
Road Trip
Topic author - Posts: 313
- Joined: Mon Jun 11, 2012 8:46 am
- Location: Bryan, Texas
Re: Meet Road Trip
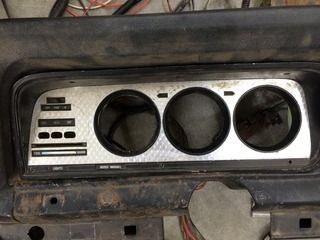
Good weekend on RT. First the story of the dash. I started with something like this,
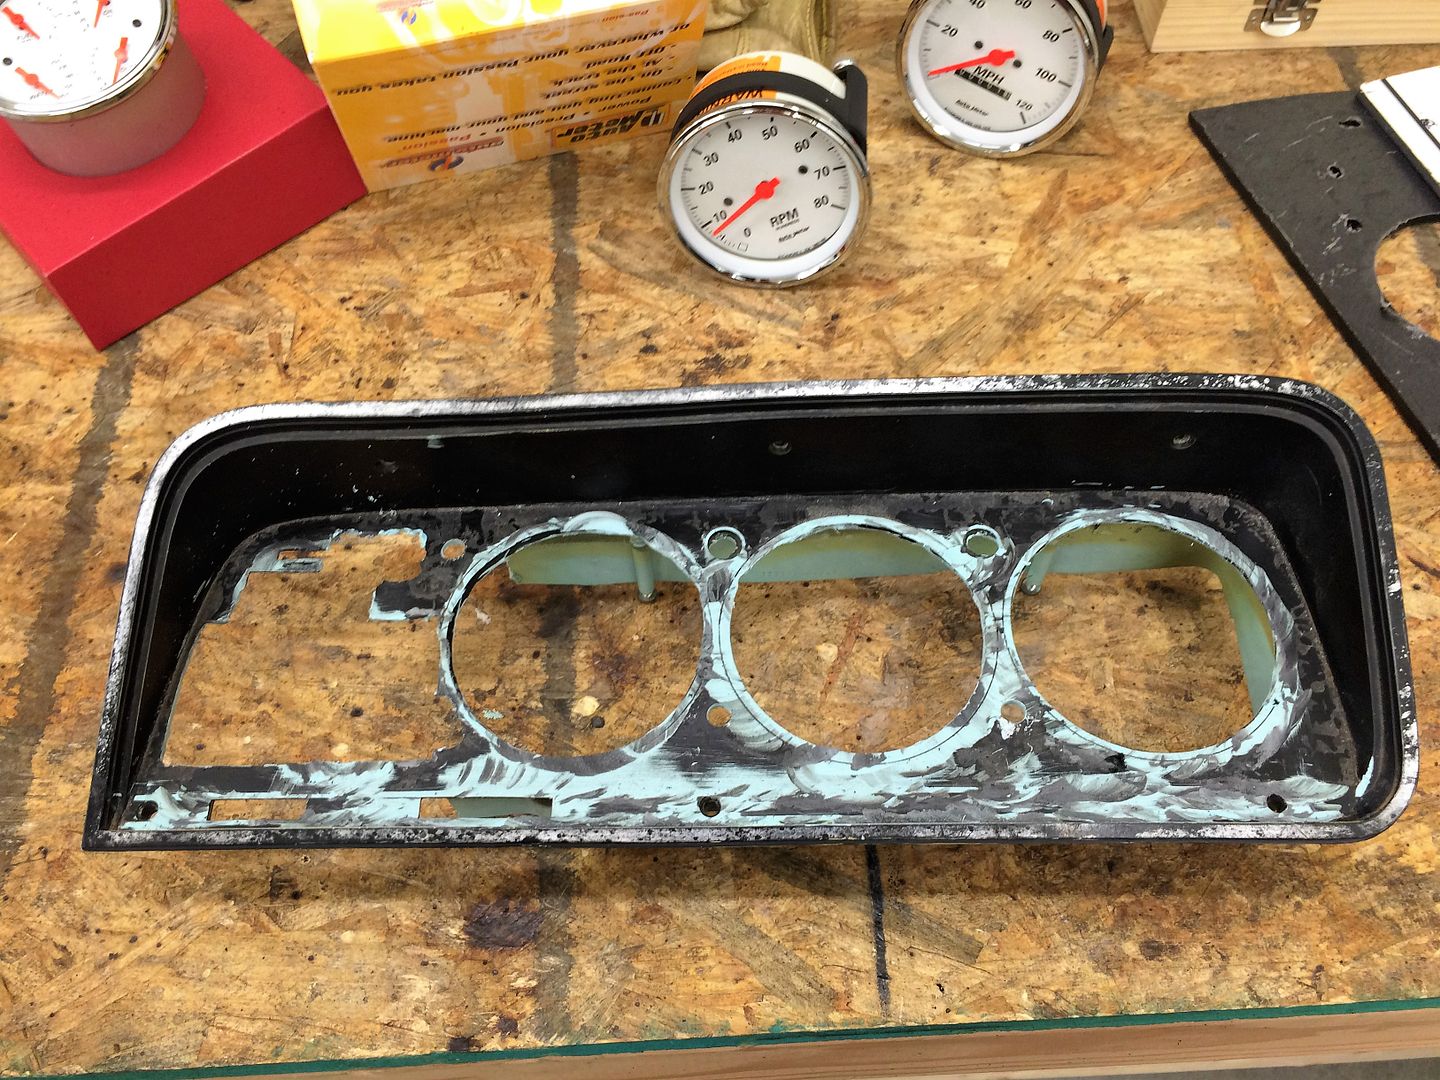
After about an hour, me and Mr. Dremmel had it looking like this
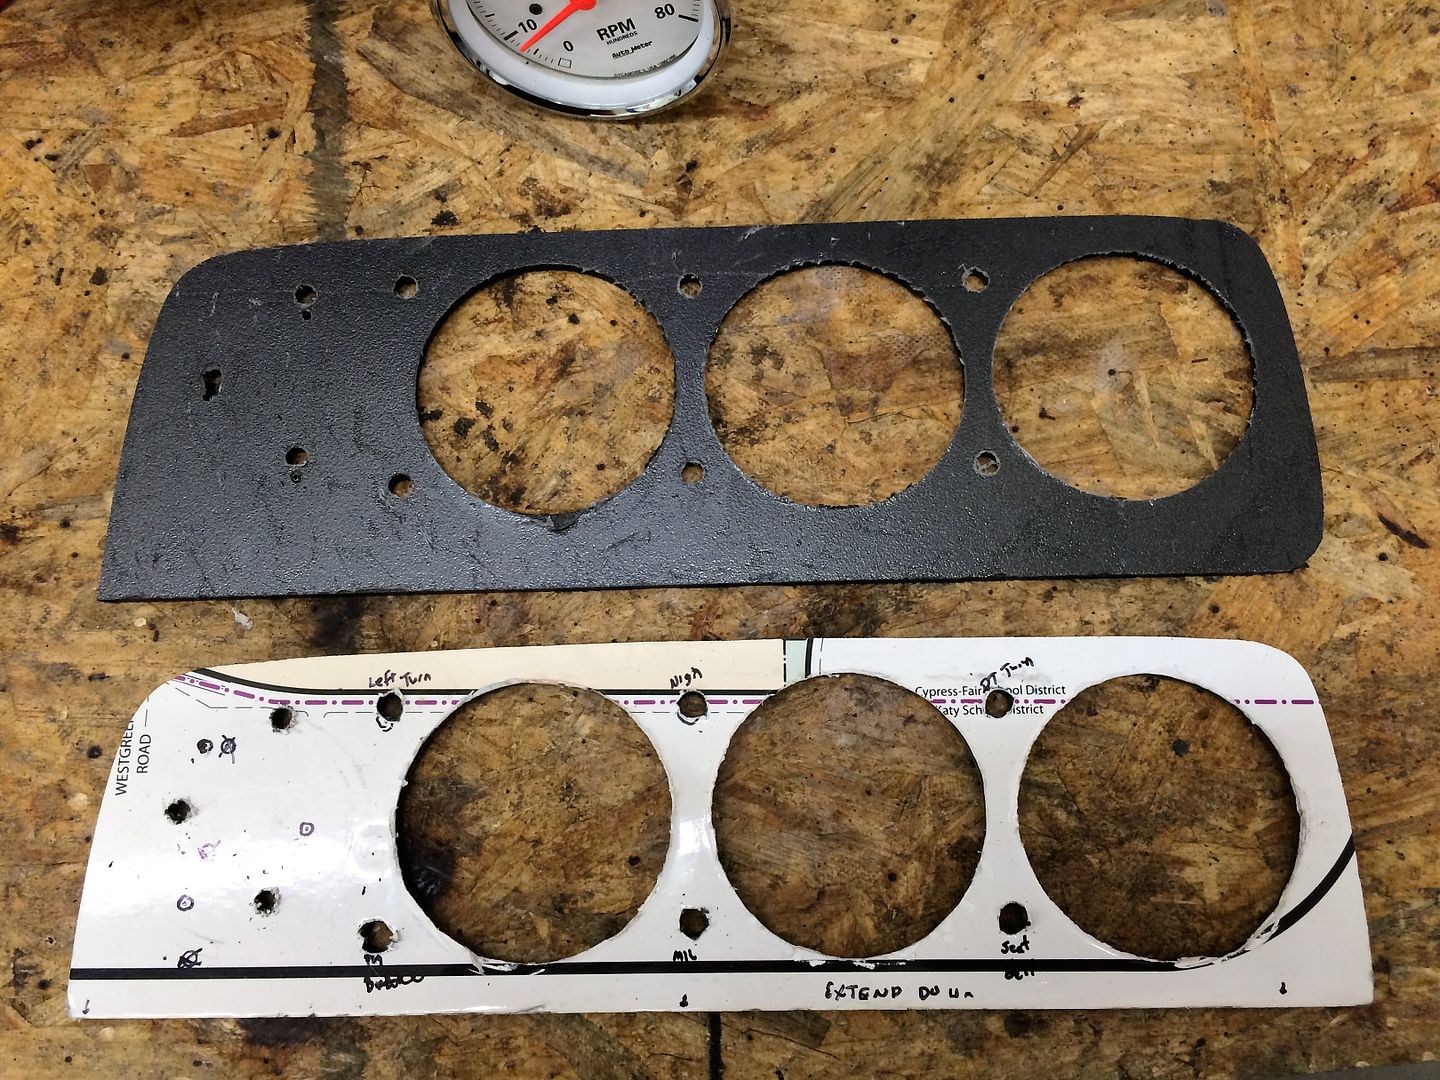
Then I took the template I had worked on, a sheet of black plastic I got online, and made an insert with all the holes for gauges, lights and AC controls. You can not imagine how much black dust/chips I had after all that!
A LOT more time with the solder gun, plugs and electrical stuff, and I had this.
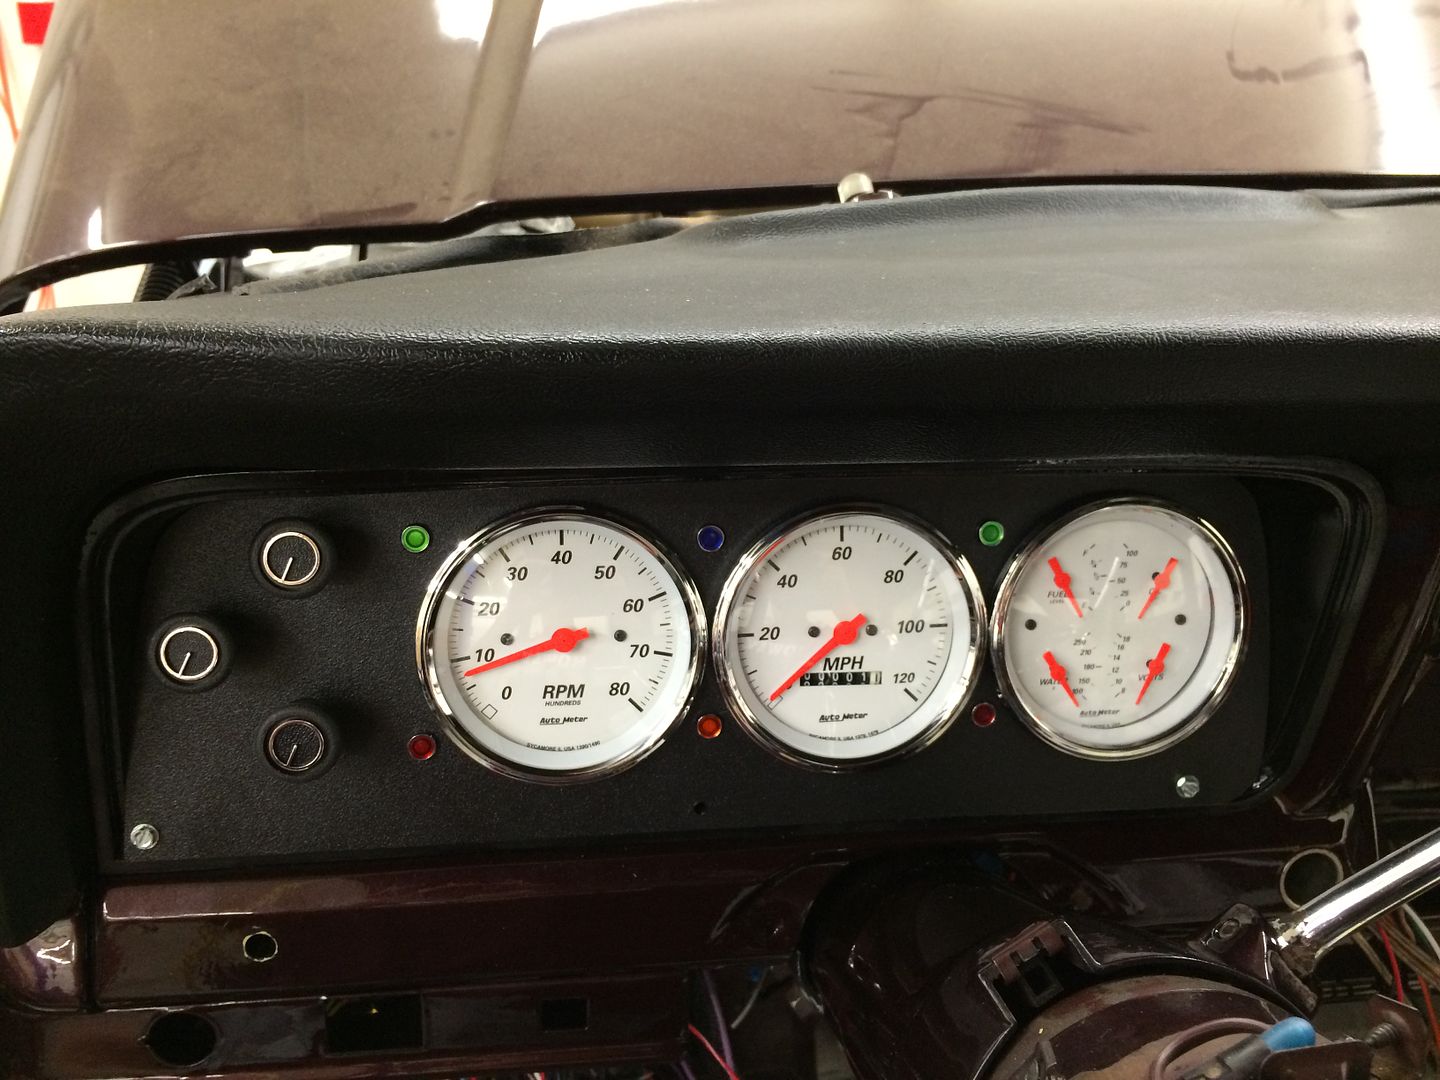
The AC controls are the 3 knobs on the right in the same place as the original heater control. I have lights for left, right, high, parking brake, MIL (for the 5.3) and seatbelt warning. I'm going to replace the little silver screws on the bottom two corners with something else, but it hold the dash in place for now.
So then I did something for show. I started with this,

And wound up with this

I did another coat to smooth it out some after I looked at this picture. It is a product called Mother's Back to Black. It works pretty good. You can see the color is back from gray, especially in the next picture.
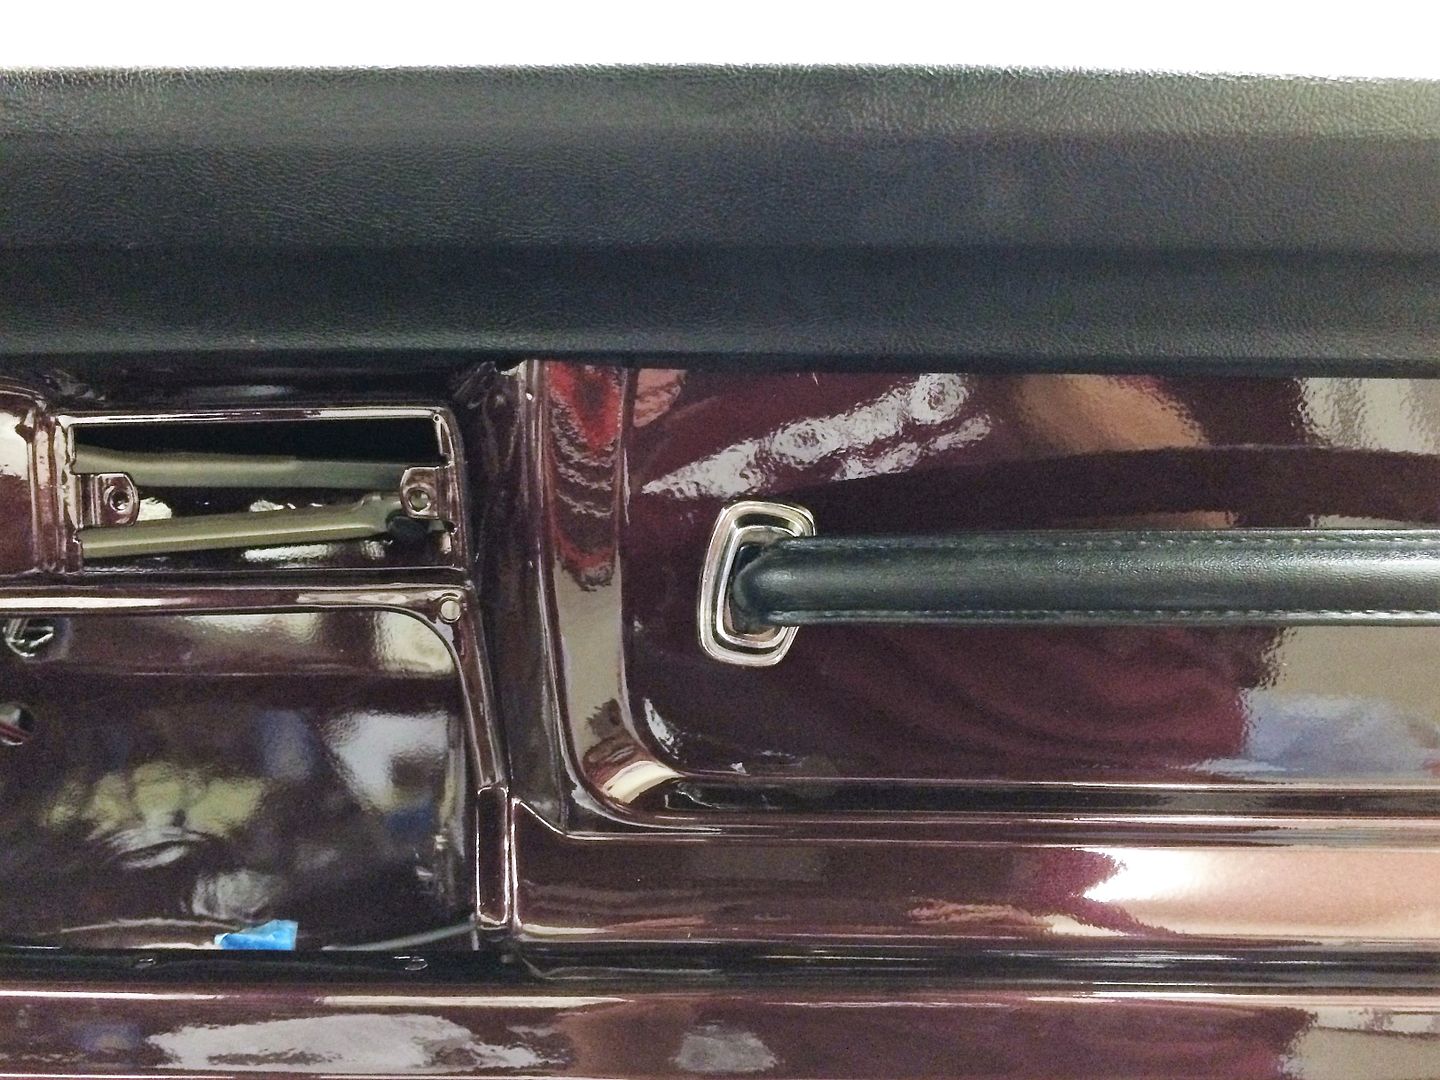
The little plastic trim piece is crooked. Did I install it wrong or is this just craftsmanship from the late 70's Detroit?
The next picture has a mystery in it.
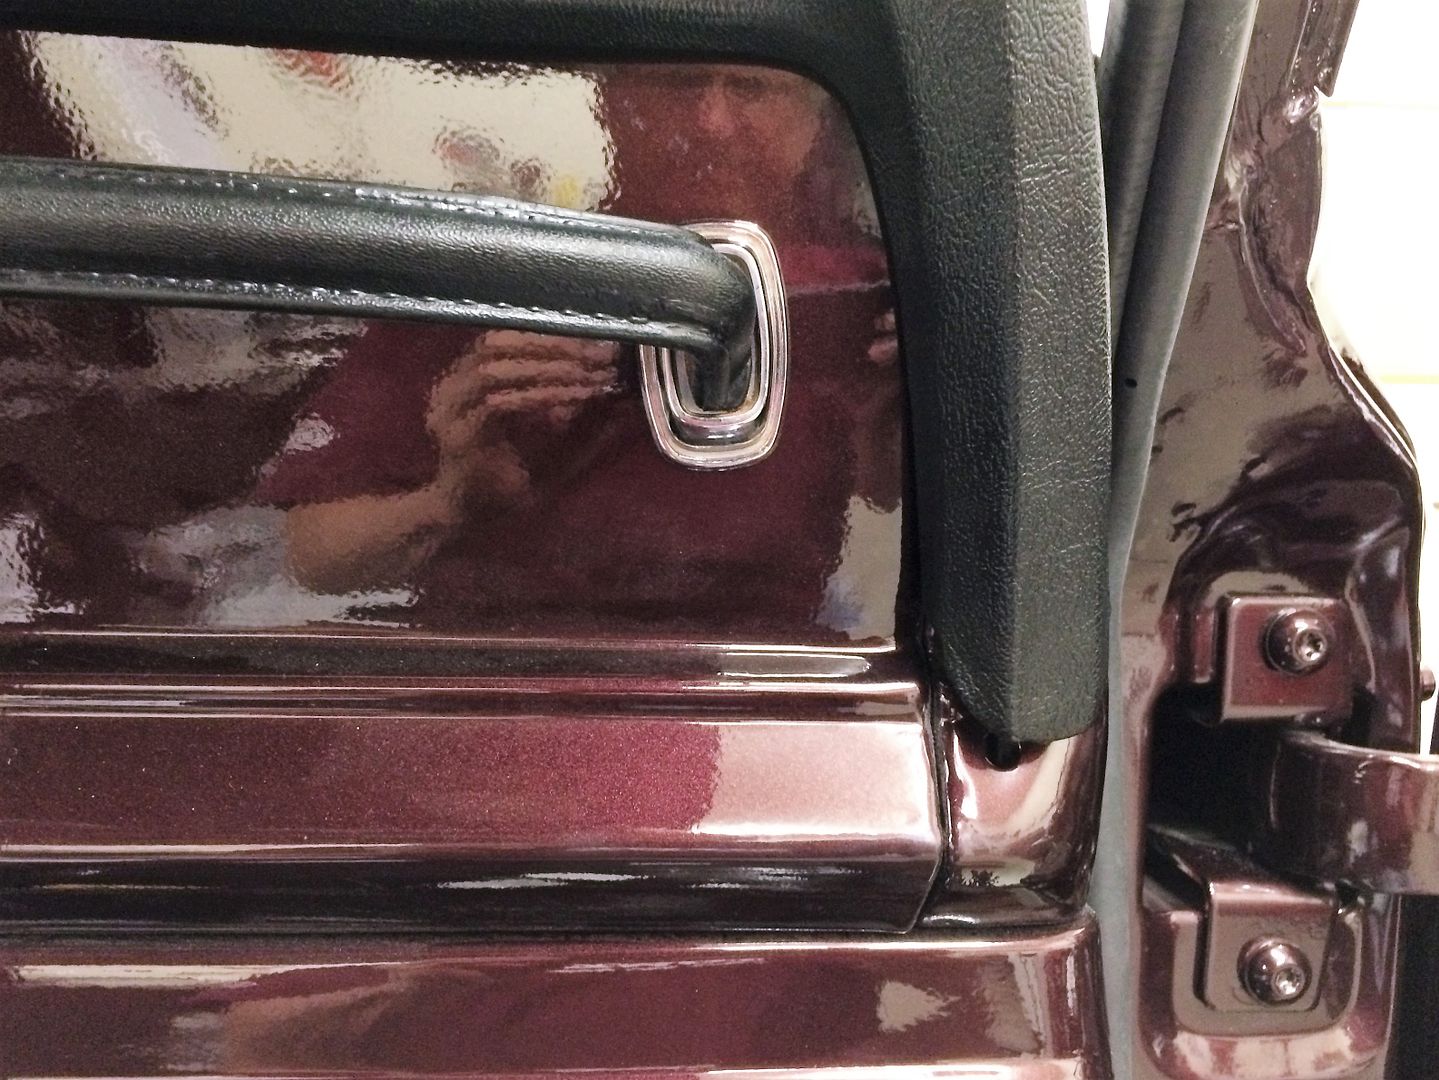
The mystery in this picture is "what in the world is the hole under the dash pad for?" Where the dash pad stops at the very bottom there is a hole in the dash. I have the dash from a 79 and an 82, and the dash pads from both. The hole is in both the dashes and neither pad has a bolt at that location.
SO, anyone know what was originally bolted there?

After about an hour, me and Mr. Dremmel had it looking like this

Then I took the template I had worked on, a sheet of black plastic I got online, and made an insert with all the holes for gauges, lights and AC controls. You can not imagine how much black dust/chips I had after all that!

A LOT more time with the solder gun, plugs and electrical stuff, and I had this.

The AC controls are the 3 knobs on the right in the same place as the original heater control. I have lights for left, right, high, parking brake, MIL (for the 5.3) and seatbelt warning. I'm going to replace the little silver screws on the bottom two corners with something else, but it hold the dash in place for now.
So then I did something for show. I started with this,

And wound up with this

I did another coat to smooth it out some after I looked at this picture. It is a product called Mother's Back to Black. It works pretty good. You can see the color is back from gray, especially in the next picture.

The little plastic trim piece is crooked. Did I install it wrong or is this just craftsmanship from the late 70's Detroit?
The next picture has a mystery in it.

The mystery in this picture is "what in the world is the hole under the dash pad for?" Where the dash pad stops at the very bottom there is a hole in the dash. I have the dash from a 79 and an 82, and the dash pads from both. The hole is in both the dashes and neither pad has a bolt at that location.
SO, anyone know what was originally bolted there?
Robert
-
SJTD
- Posts: 1933
- Joined: Tue May 21, 2013 12:02 pm
- Location: Lompoc, Sunland or somewhere between
Re: Meet Road Trip
Maybe for the Wagoneer pad?
Sic friatur crustulum
'84 GW with Nissan SD33T, early Chev NV4500, 300, narrowed Ford reverse 44, narrowed Ford 60, SOA/reversed shackle in fornt, lowered mount/flipped shackle in rear.
'84 GW with Nissan SD33T, early Chev NV4500, 300, narrowed Ford reverse 44, narrowed Ford 60, SOA/reversed shackle in fornt, lowered mount/flipped shackle in rear.
-
Road Trip
Topic author - Posts: 313
- Joined: Mon Jun 11, 2012 8:46 am
- Location: Bryan, Texas
Re: Meet Road Trip
SJTD, saw the post and thank you for clearing it up.
I'll probably just put a plastic plug in the hole to help hide it, per another suggestion. Thanks Todd.
I'll probably just put a plastic plug in the hole to help hide it, per another suggestion. Thanks Todd.
Robert
-
Road Trip
Topic author - Posts: 313
- Joined: Mon Jun 11, 2012 8:46 am
- Location: Bryan, Texas
Re: Meet Road Trip
Another weekend of 1 step forward and 2 steps back. I have been working on the side vents in the 79.

Yes, I treated them with rust killer and then painted the outside with MasterCoat to stop them from rusting. I put them in the kick panel and then hooked up the rider side cable. I happen to have a NOS rider side cable, so I thought I was golden.
But NO! The cable and the Vintage Air unit conflict. In other words, the cable won't go. Now I have a NOS cable that I'm not using and these two very nice vents with grills.
This what I have until I get the kick panels installed, sometime down the road.

Yes, that is a very nice PATCH PANEL on my nice paint!
Enough venting. Next week I hope to try the Viper Alarm and the Nite Lite sentimental (turns the lights on when it is dark and off when it is light enough).
Robert
-
 243
243
- Posts: 740
- Joined: Sat Mar 16, 2013 7:32 am
- Location: Texas
Re: Meet Road Trip
That's too bad Robert, but will you keep the drivers side vent operational for fresh air?
1978 Cherokee NT, 5.3/4L60/NP241 in Progress
-
Road Trip
Topic author - Posts: 313
- Joined: Mon Jun 11, 2012 8:46 am
- Location: Bryan, Texas
Re: Meet Road Trip
I'm still trying to decide on that. It would make life easier if I just left it out. I'm looking at the holes everywhere, thinking there will be plenty of fresh air coming through them. I have to finish the electrical and then I'll decide.
Robert
-
Road Trip
Topic author - Posts: 313
- Joined: Mon Jun 11, 2012 8:46 am
- Location: Bryan, Texas
Re: Meet Road Trip
Well it's been a while, but I am still working on RT. Electrical was not my strong suit, but I am beginning to understand a little of it.
The rear window switch I worked on in a previous post works like a champ with Serehill's harness in the back. So I started on the rear defrost.
I like the stock switch look, but I'm having a devil of a time finding a relay to make it work. Then after hours on internet searches, I found a company in Great Britain that makes a relay that is supposed to power on with a momentary switch, and stay on for 10 minutes and it is designed to "provide power to the rear defroster". So I ordered one. I have the wiring set up so that when it arrives I can plug it in and test it. If it works, I'll post the details.
I also looked into Strode's fix. He did a very good write up on that and so I found one of the 91 Explorer rear defrost switches just in case the foreign relay doesn't work.
As I also posted, I have been trying to figure out the Viper alarm wiring and the NiteLite auto headlight controls. Well, after some starts and stops, I got the Viper to lock and unlock the doors. HUGE accomplishment for me. I got the NiteLite to turn on the headlights, but so far I have not gotten it to turn off. Of course, I have not rolled RT out into the daylight to see if it works.
Here is the "fancy electrical bar".
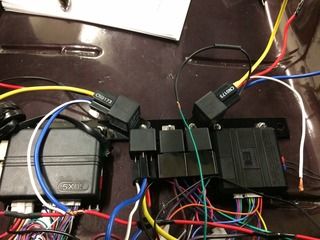
The two relays on top, they were necessary to convert the negative pulse Viper to power the positive pulse door locks. The left side is the Viper, the right side the NiteLite. The 3 relays in the middle, the one on the left is where the "defroster" relay goes and the two on the right work with the NiteLite.
The bar bolts to the back side of the grab handle on the dash. Leaving enough room for the Vintage Air mock up unit between it and the dash.
Well, every once in a while I get fed up with wiring and have to do something fun. So I thought I'd do the bumpers.


Fun isn't necessarily what I'd call mounting a 3 piece bumper by yourself. That was a major PITA! All loose and floppy until you get it bolted up to the frame so you can then start aligning everything. But at the end of the day, I think they look pretty good.
For today, it's back on the differential. The front one seems to have almost stopped leaking oil, but not the back one. I finally got the last of the torx bolts out of it using a hammer and a cold chisel. About 3 hits with a 2lb hammer and it was loose enough to take out with pliers. Now to get the cover off and reinstalled. Maybe this time it won't leak.
Robert
-
Road Trip
Topic author - Posts: 313
- Joined: Mon Jun 11, 2012 8:46 am
- Location: Bryan, Texas
Re: Meet Road Trip
Good day on RT. First I got the shocks on. You all have seen that, so no pics.
Then because I'm running the stock radiator with the 5.3, I had to find a way to make the hoses to connect the two. There is a major size difference in the orifice between the Jeep radiator and the Chevy 5.3.
So I ordered two 90 kits and 2 hose kits from Jegs.
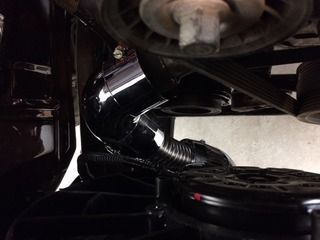
This is looking down from the top at the bottom hose. You can see the 90 from the 5.3 turning the hose down to the radiator. You can barely make out the 90 on the radiator.
Then the top hose.
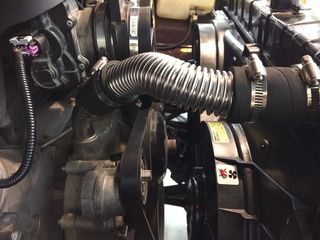
Had to cut a about 8" off the metal hose with a hack saw, but it fit and tightened down.
I have been messing with the rear defroster. I wanted to use the Jeep switches, but I was having trouble with the rear old Jeep relay and the other relays I got from DelCity just didn't work.
So I got in touch with Strode who has a great fix, and I found an Explorer switch, but before I bought it I tried Al Gore's internet one more time and found this,
http://www.12voltplanet.co.uk/12v-un...min-delay.html
It is a Bosch style time delay relay (TDR) that turns on for 10 minutes and turns off, made specifically for a rear defroster. My biggest concern was it was made in England, but I took a risk and spent about $25 American (the site is in Pounds Sterling so you have to do the conversion), I got the relay and it works.
I wired the defroster switch to the 1 pin, switched power to the 3 pin (this was hard to understand, power to the normally closed?), ground to the 2 pin, constant power to the 4 pin (like our 30) and the 5 pin was output to the defroster. I spliced off of the 5 pin to run the little blue light that comes on when the rear defroster is on, and it does. I ran one 10 g wire from the TDR to the rear and soldered it onto the wire that goes to the grid. I have a rear defroster!
Ok, I know you are all thinking 1 pin, 2 pin, etc. Yes, the Brits apparently number this thing differently than we number relays. Bottom line, it works so I'm not complaining.
Good day.
Robert
-
GaJeep94YJ
- Posts: 313
- Joined: Fri Dec 18, 2015 12:00 pm
Re: Meet Road Trip
Do you have your radiator hoses complete now then? I used a stock radiator with my 5.3 and have the part numbers of stock hoses if you need them
Sent from my Nexus 5 using Tapatalk
Sent from my Nexus 5 using Tapatalk
-
Road Trip
Topic author - Posts: 313
- Joined: Mon Jun 11, 2012 8:46 am
- Location: Bryan, Texas
-
GaJeep94YJ
- Posts: 313
- Joined: Fri Dec 18, 2015 12:00 pm
Re: Meet Road Trip
Remind me, are you using a cross flow or factory
Radiator hoses with ls conversion radiator: Lower hose is a 71904 from advanced and top is a 71659, all were Dayco brand from Advanced auto i believe
(these are the hoses to use Dayco #'s
E71990 & B71904)
Sent from my Nexus 5 using Tapatalk
Radiator hoses with ls conversion radiator: Lower hose is a 71904 from advanced and top is a 71659, all were Dayco brand from Advanced auto i believe
(these are the hoses to use Dayco #'s
E71990 & B71904)
Sent from my Nexus 5 using Tapatalk
-
GaJeep94YJ
- Posts: 313
- Joined: Fri Dec 18, 2015 12:00 pm
Re: Meet Road Trip
If you are using the factory radiator then use an upper hose from a 2000 Yukon xl for the lower radiator hose on the jeep radiator
Sent from my Nexus 5 using Tapatalk
Sent from my Nexus 5 using Tapatalk
-
 tedlovesjeeps71
- Posts: 2905
- Joined: Fri Jul 22, 2016 4:39 pm
Re: Meet Road Trip
A self timed relay? That's awesome to know about! Wonder if it would work for heated seats? I have a pair from a grand Cherokee I'd love to wire up to work.Road Trip wrote: http://www.12voltplanet.co.uk/12v-un...min-delay.html
It is a Bosch style time delay relay (TDR) that turns on for 10 minutes and turns off, made specifically for a rear defroster. My biggest concern was it was made in England, but I took a risk and spent about $25 American (the site is in Pounds Sterling so you have to do the conversion), I got the relay and it works.
-
Road Trip
Topic author - Posts: 313
- Joined: Mon Jun 11, 2012 8:46 am
- Location: Bryan, Texas
Re: Meet Road Trip
Ted, I timed the relay and it stays on for about 13 minutes and turned off as advertised. It will handle a 30 amp load. Check the seat, and if those two criterion work for the seat, it should work.
Robert
-
Road Trip
Topic author - Posts: 313
- Joined: Mon Jun 11, 2012 8:46 am
- Location: Bryan, Texas
Re: Meet Road Trip
I know that no one cares but me, but I got the seat belt buzzer and light to work. The plug on the seat belt was dirty and not making the connection. Now I get to listen to that buzzer until I buckle up...once I get it finished.
Robert
-
GaJeep94YJ
- Posts: 313
- Joined: Fri Dec 18, 2015 12:00 pm
Re: Meet Road Trip
Where is the buzzer for that?
Sent from my Nexus 5 using Tapatalk
Sent from my Nexus 5 using Tapatalk
-
Road Trip
Topic author - Posts: 313
- Joined: Mon Jun 11, 2012 8:46 am
- Location: Bryan, Texas
Re: Meet Road Trip
I found it under the dash when I tore it down and just put it back under the dash. It ties in to the drivers buckle. It buzzes until you insert the tab into the buckle. Just a challenge that I wanted to conquer.
Robert